11 301 0 Date: 03/01/2016
The ceiling plays a significant role in the design of a room. A unified style in the room is achieved through clear thought out every detail of the interior. The easiest option is to use whitewash or interior paint to decorate the ceiling. Gluing wallpaper to the ceiling is somewhat difficult and this type of ceiling design does not always justify itself. The most acceptable in all respects is the use of tiles as a material for decorating the ceiling. But how can you glue ceiling tiles correctly and which one is better to choose?
Ceiling tiles are square in shape. Sold in the form of blocks per square meter of surface. In manufacturing, two types of external surface treatment are used. The first type - the outer side is embossed and is intended for painting. The second one has a laminated front side, already painted during manufacture.
When choosing blocks, in addition to color and functionality, you must also take into account the size of the tiles. Before purchasing, make calculations so that you need to buy the same number of tiles of the same color or pattern at a time, with a small margin just in case. If in the middle of the work it turns out that some of the tiles are defective or you are missing several pieces, it will be difficult to choose the same color or find an identical pattern.
Choice
Today there is a very large selection of such material, which is used not only as a ceiling covering, but also for walls, but different types are used. Before covering the ceiling with wallpaper, you need to select it.
Suggestions for the ceiling:
- On a fabric basis.
- On synthetic.
- On paper.
There are certain rules for gluing ceilings, but initially you need to understand the properties of each type.
Characteristics:
- All ceiling wallpaper on any basis is impregnated with a moisture-resistant agent, which makes the material more durable. There are different sizes. Their width can be 60 cm or reach 100-120 cm.
Advice. To have much fewer joints on the ceiling, it is best to use wide wallpaper.
But here it is worth paying attention to the fact that those that have a smaller width are much easier to glue.
Paper based
Vinyl on paper
Paper-based wallpaper for the ceiling can be vinyl or paintable.
What are vinyl wallpapers?
They consist of a layer of thick paper, on top of which there is a layer of foamed vinyl. They are found both in white and multi-colored. This type is considered the most durable, since it does not tear or deform during the pasting process.
Vinyls are divided into:
- Foamed vinyl surface.
- Thick vinyl.
- Silkscreen printing.
Let's take a closer look at the types:
- The best type at the moment is considered to be wallpaper using a thick vinyl coating. They are very resistant to cleaning. Their surface can be washed with a soap solution. Painting them is also very easy.
- With the use of foamed vinyl they are also good and their technical characteristics are similar to the previous ones. But they have one drawback - they are not able to let air through.
Advice. This type of vinyl wallpaper is best used in the kitchen area, bathroom, and so on. It is not recommended to use them in children's rooms or bedrooms.
- Another type is silk-screen printing. They consist of two layers. The top layer imitates the surface of silk, which can be smooth or embossed.
Several advantages:
- Durable.
- Durable.
- Wear-resistant.
- They have a presentable appearance.
- Do not fade when exposed to direct sunlight.
Such wallpaper is made on a special type of thick paper, which, after impregnation with an adhesive solution, does not change its size.
Advice. When choosing the option with silk-screen printing, you need to apply glue not to the wallpaper, but to the surface of the ceiling.
Fabric based
Fabric base
It cannot be said that this type of wallpaper consists of a fabric base and nothing more.
In the production process of such finishing material, textiles are applied to a non-woven base, and the front side is the fabric:
- Linen.
- Viscose.
- Silk and other materials.
Distinctive characteristics:
- They can give a noble and sophisticated appearance to the room.
- But they require quite careful and careful care.
- They should not be subjected to wet cleaning.
- They have special instructions according to which they are cleaned.
- It is also worth noting that the price of such finishing material is high.
Advice. It is best to clean such wallpaper with a regular vacuum cleaner.
Synthetic based
Example
This type is based on a layer of foam fabric. A layer of fabric is already glued to it.
This type of ceiling covering helps maintain a constant temperature because it can retain heat very well in the room. That is, in addition to finishing the ceiling, it is also insulated.
How to glue synthetic-based materials:
- Be very careful, as they are soft and one wrong movement can lead to their deformation.
- They have a large width and are quite difficult to glue on your own.
Advice. To prevent this type of wallpaper from absorbing dust and various contaminants, its surface must be treated with special means. It is also worth noting that wallpaper can absorb odors very well and is best not used in the kitchen area.
They are cleaned just as easily as the previous ones - using a regular vacuum cleaner.
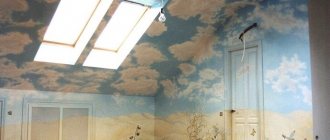
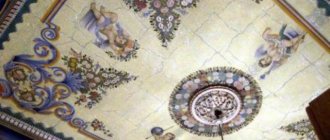
Types of photo wallpapers
Among all the diversity, there are several main types of photo wallpaper for ceilings. Let's take a closer look at each type of this ceiling covering:
Photo wallpaper based on fabric or paper with a decorative textile layer.
...or a blooming garden
Textile photo wallpapers are made by applying various fibers to the base using unique technologies. As a rule, these are threads of flax, polypropylene fiber with imitation of natural fabric, as well as silk.
A subtype of textile is velor photo wallpaper. Accordingly, in them a special pile is applied to a fabric or paper base, which looks very much like the soft surface of velor. And often - real velor fibers. This type of coating is well known for its wide variety of colors. Textile ceiling photo wallpaper is ideal for the interior of a bedroom, living room or kitchen.
Wallpaper Starry sky
Paper photo wallpapers are very common. You can glue them in various rooms, from the nursery to the living room, kitchen or bedroom. They have either a matte or glossy decorative layer. In addition, this layer is also protective, since it is laminated using a special film. The use of this technology increases the moisture resistance of photo wallpaper.
Related article: Beautiful arch in a private wooden house
Volumetric 3D photo wallpaper can be used for the ceiling. The volume effect is achieved using special technologies. This new product is becoming increasingly popular, not only in entertainment venues, but also in the interior of ordinary apartments, as well as country cottages. However, in addition to the recognized advantages, 3D photo wallpapers have one significant drawback: the high price.
The use of such photo wallpaper for the ceiling, which has a 3D effect, among other things, allows you to visually enlarge the space, which is especially important for small rooms. That is why designers often strive to create a special atmosphere by offering scenes with starry skies, beautiful clouds or natural landscapes. As for decorating bathrooms, in such cases marine themes are most often used.
Worth knowing! Recently, self-leveling 3D photo wallpapers have begun to gain particular popularity. The difference with more traditional solutions is that they use a special polymer layer that covers the decorative surface, thus increasing the protective properties against moisture and mechanical damage.
Vinyl photo wallpaper
Vinyl photo wallpaper (based on PVC, on top of which a decorative drawing or photograph is made). They are characterized by improved resistance to moisture. That is why it is advisable to use this type of ceiling photo wallpaper in appropriate rooms. For example, in the bathroom or kitchen. Among other things, the surface of these photo wallpapers can be an imitation of various decorative surfaces. For example, natural stone or tiles.
Tools
The instructions we offer will tell you how to glue wallpaper on the ceiling correctly. All the work can be done with your own hands, but having an assistant will be welcome.
To do this, you should prepare the following tools:
Stationery knife
- A sharp knife - take a stationery knife and a pack of replacement blades, since you will have to cut a lot, and steel dulls on paper very effectively;
Yardstick
- A tape measure for marking – a long ruler for precise cutting of the canvas won’t hurt either;
Applying glue with a roller is quick and convenient
- Roller with tray or brush for applying primer and glue;
Cutting fabrics is very convenient with good scissors
- Scissors;
- Cotton rags and a large sponge;
Without a wide spatula, it is difficult to cut wallpaper around the ceiling skirting boards
- A narrow spatula is for removing old paint, and a wide one is for trimming the edges of the canvas;
Deep penetration soil
- A primer, preferably acrylic , is needed to reduce the absorption of the surface;
Adhesive for paper wallpaper
- Wallpaper glue - an option for your type of wallpaper;
Wallpaper spatula
- Plastic spatula or rubber roller - to smooth the canvas on the surface;
For comfortable work at heights
- Stepladder or table;
- Chop cord.
Before starting work, if possible, remove all furniture from the room. Close all windows and vents, turn off the air conditioner and fan to avoid drafts. If the air is too dry, place buckets of water in the corners. You also need to turn off the power and remove the chandelier.
We prepare tools and materials
Wallpapering tools
Whatever wallpaper you choose, without a doubt, you will need the following set of materials and tools:
- Roulette.
- Stepladder, table or chair.
- Brush or roller.
- Sharp knife.
- Glue.
- A rag or an ordinary rag.
- Roller.
Wallpaper glue
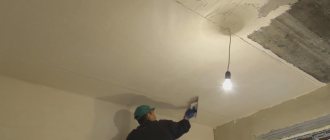
Depending on the general condition of your ceiling, you may also need additional means to properly treat the base for gluing. It may be necessary to level, plaster or putty the surface. In view of this, you should carefully inspect and prepare the surface before finishing.
Ceiling preparation
How to properly glue ceiling wallpaper?
The first step is to prepare the surface. Leveling the surface at the moment is not particularly difficult.
There are two options for this:
- Application of plaster.
- Using drywall.
Plaster
This material has been used for many years to level surfaces. The use of plaster is characterized by some knowledge in this area.
There are two types of this tool:
- Starting plaster.
- Finish plaster.
To plaster the surface you will need:
- Starting plaster.
- Finish.
- Two spatulas (large and small).
- Level.
- Construction mesh (if necessary).
- Sandpaper.
Stages of work:
- Initially, excess layers of old plaster are removed from the surface or paint is removed. After this, a layer of starting plaster is applied to it.
- As soon as it has dried, it is treated with sandpaper and then a second one is applied, then a third, and so on. The number of layers will depend on the unevenness of the surface.
- As soon as the starting layers of plaster are applied, the finishing layers are applied. The whole process is carried out in the same way. The video shows all the actions that are carried out using plaster.
- The work process is quite dusty and before wallpapering the ceiling you should first clean the room with a vacuum cleaner and wet cleaning.
Drywall
Leveling the ceiling with plasterboard
Drywall is currently a universal material, without which no repair work can be completed. With its help, ceiling surfaces are leveled very quickly and efficiently (see Leveling ceilings with plasterboard - how to do it yourself) and the most unusual structures (multi-level ceilings) are built on them.
For installation you will need:
- Metal profiles.
- Self-tapping screws.
- Dowels.
- Screwdriver.
- Hammer.
- Sheets of plasterboard (it is better to take moisture-resistant ceiling).
- Level.
- Stationery knife.
- Putty.
- Sandpaper.
Installation:
- Installing drywall is quite simple. A special metal profile frame is pre-fabricated on the surface.
- Sheets of material will be mounted on it. After this, the joints of the sheets must be covered with special tape and puttied and sanded.
- In some cases, the surface is plastered, but such actions may not be carried out before gluing.
- There should be no problems - since such material is able to quite easily perceive all the actions that are carried out on its surface.
Advice. Before gluing a plasterboard ceiling, it is necessary to treat the surface of the material with a primer solution.
Marking
How to glue wallpaper to the ceiling - the principle of operation of the chop cord
At the next stage, we make markings along which the wallpaper will be glued:
- carefully mark and draw the boundaries of the stripes - you can only make the first one, and glue the subsequent ones, focusing on it;
- we make the marking along a convenient wall - it is better that the joint is parallel to the light falling from the window;
- Apply glue and immediately apply the strip, strictly adhering to the marking lines.
How to properly glue wallpaper to the ceiling - vinyl and paper need to be soaked with glue in advance
This must be done without delay, as the glue dries quickly. If you choose non-woven wallpaper, then the glue should only be applied to the ceiling, and if it is paper or vinyl, then you should pre-impregnate them with glue as well.
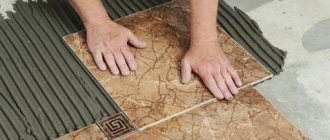
How to beautifully glue tiles to the ceiling: finishing options ↑
Decide exactly how you want to place the tiles on the ceiling. There are many options for covering the ceiling with tiles. It all depends on the features of the room and your imagination. In any case, a small amount of adhesive is applied pointwise to the tile, the element is pressed to the ceiling surface, and held for several minutes. During this time, the glue sets to the surface and the tiles are securely held on the ceiling.
Diagonally, if the chandelier hangs in the center of the ceiling ↑
This happens quite rarely. But if this is your case, marking is easy to do. Pull two threads diagonally, mark the point of their intersection. This will be the center, which should coincide with the exit point of the wire for the chandelier. Draw two lines through the center perpendicular to each other. Thus, the ceiling surface is divided into 4 equal parts. The first square is glued so that one of its corners is located exactly in the designated center of the room. Next we move along the drawing. The tiles should be glued to the ceiling closely, without leaving gaps or seams; wipe off any remaining adhesive with a dry cloth.
Tiling the ceiling starts from the center of the room - this makes it easier to avoid overlaps and mismatches
And if the chandelier is not in the center of the room ↑
The tiles are glued similarly to the first case, but the markings are done slightly differently. Two perpendicular straight lines are drawn through the point where the chandelier hangs. These straight lines should be parallel to the walls of the room. In the resulting right angles we draw lines at an angle of 45 degrees. Next, we glue the ceiling tiles in the same way as in the first option.
How to glue ceiling tiles with a snake ↑
To do this, you will need ceiling tiles of two colors. It is important to choose two colors that go well together. Mark the ceiling surface as in the first or second option. The tiles are glued from the center according to the drawing.
“Snake” is one of the common methods of laying ceiling tiles
How to glue tiles to the ceiling in a checkerboard pattern ↑
You should also start from the center of the room, which we find by drawing diagonals. It is very important to arrange the elements so that they are strictly parallel to the walls, otherwise the overall appearance of the ceiling will be spoiled. There are times when it is not practical to glue ceiling tiles from the center of the room. For example, if the room is small, when tiling the ceiling from the center there will be a significant overuse of tiles. Or in cases where the room is narrow and long (a corridor, for example), it can be difficult to correctly mark the ceiling and glue the tiles in the center parallel to the walls. In this case, it is better to glue the ceiling tiles, moving from the edges to the center.
Tiles laid in a checkerboard pattern always produce the desired decorative effect
The process itself
Now let's be more clear.
Gluing non-woven materials
How to hang wallpaper on the ceiling - ready-to-apply adhesive composition
So:
- Cut the roll into strips of the required length;
Advice! Take with a small margin so that the edges can be conveniently trimmed later.
- Roll the cut strips into rolls;
- Apply glue to the width of the strip, guided by the previously applied markings;
- We press the edge of the roll to the surface and gradually unwind it, while smoothing the strip with a roller or brush from the middle to the edges so that no air bubbles remain;
How to properly glue wallpaper on the ceiling - combining the joints
- Next, from the edges adjacent to the walls, you need to cut off the excess part. To do this, we apply a long spatula, and, as if following a guide, we cut the wallpaper along it with a stationery knife.
- Keep the blade sharp, as a dull blade can tear the wallpaper.
After gluing, do not allow direct sunlight to hit the wallpaper, and there should be no drafts in the room. This is done to ensure that the glue dries evenly. “How to glue wallpaper on the ceiling” is a video that will show the whole process in action.
Advantages of non-woven fabric
How to glue ceiling wallpaper - non-woven fabrics
Non-woven wallpaper has a number of advantages over paper wallpaper:
- they are made from natural cellulose and textile fibers with the addition of binding polymers;
- allow air to pass freely, that is, “breathe”;
- made from materials that are absolutely harmless to humans;
- they are durable and easy to glue;
- can withstand up to 15 painting cycles.
Non-woven wallpapers have a wide selection of colors and textures
Selecting a paper version
Such materials have their advantages:
- because they are cheap, they are available to everyone;
- the work is easy and with some skill this work can be done with your own hands;
- they can be glued in any room where the air humidity is within 40 - 60%;
- an abundance of colors and different patterns will satisfy every taste;
Negative characteristics include:
The bright colors of paper wallpaper will not last long if sunlight falls on them
- Short-lived.
- They burn out quickly.
- They are fragile and therefore cannot be painted.
- It is necessary to carefully prepare the surface so that not a single hole or bump remains, otherwise after the glue dries they will all appear.
- Wallpapering the ceiling with paper wallpaper should best be done by two or three people. This is due to the fact that glue must be applied to both the ceiling and the wallpaper.
- The paper is very fragile and breaks easily, especially after impregnation.
How to hang ceiling wallpaper - this is how any pattern can be combined
After gluing, the same precautions are necessary as with non-woven wallpaper - drafts and direct sunlight are not allowed.
How to choose wallpaper?
For pasting ceilings, you can use the same types of wallpaper as for finishing the surface of walls. There is no fundamental difference between them. Here you can apply the same division into types as for wall coverings:
- Waterproof
- Paper
- Washable
- Fiberglass
The first three types are, one way or another, materials with a paper base. Different kinds of individual characteristics are achieved through different outer layers. Paper wallpapers do not have any external coating at all, but they will be the cheapest option.
The most durable are fiberglass coatings. They contain specially manufactured polymer threads that give the fabric strength. As a rule, such coatings have a deep relief pattern. The photo shows the ceilings being covered with just such wallpaper.
They have a lot of advantages - they are inexpensive, easy to clean, can be painted any color and are durable enough to last for many years. It is precisely because of its high resistance to external influences and low cost that many choose this type of finishing for country and country houses where they do not live in winter.
Non-woven ones are durable, beautiful in appearance and a bit expensive. However, these are one of the most beautiful coatings when glued; you only need to apply the adhesive composition to the surface on which they need to be glued.
Vinyl sheets are similar in characteristics to the previous type, differing only in increased moisture resistance and difficulty in painting - the paint does not always adhere well and it is necessary to paint the coating in several passes.
How to apply liquid wallpaper to the ceiling
Liquid wallpaper on the walls and ceiling
Relatively recently, such a concept as liquid wallpaper has entered our lives. But they can often be seen not only on the walls, but also on the ceiling. They are called liquid because before use they are diluted with water and applied with a spatula or a stiff brush.
Such coatings have a number of advantages:
- durable;
- hide all minor irregularities and do not require careful preparation of the base;
- after application, a smooth, seamless surface is obtained;
- easy to apply;
- wide range of colors;
- do not fade from sunlight (unless we are talking about cellulose);
- do not fall off in high humidity;
- made from environmentally friendly material.
Tools required for application:
- A wide and narrow spatula or a grater;
- Primer;
- Rollers of different sizes;
- Hard brush;
- Drill with mixer attachment.
We also need raw materials that we will apply to the ceiling. Today there are three types offered:
- ready for use, in plastic buckets;
- dry mixtures containing dye;
- dry mixtures without dye, you add it at your discretion.
Advice! By the way, you can make such wallpaper yourself from old newspapers and other waste paper.
Making liquid wallpaper from paper waste
We prepare the ceiling in the same way as for gluing other types of wallpaper. In this case, you don’t have to worry too much about evenness, since this material is applied like plaster, and therefore effectively hides various defects.
Liquid wallpaper is diluted with water strictly according to the instructions on the package and left to swell for 12 hours. After this time has elapsed, another 0.5 - 1 liter of water is added and the mixture is mixed again.
How to wallpaper a ceiling - applying liquid wallpaper to the surface
Afterwards you can start applying. This is done with a spatula, after which the surface is carefully smoothed with a grater, as in the photo above.
Finally, you need to properly dry the ceiling. This will take 48 hours. During this time, it is necessary to exclude drafts and changes in humidity. The price of such a solution is not so low, especially when it comes to silk wallpaper. However, if you try to make the mixture yourself, you can save a lot.
Now you know how to wallpaper a ceiling. As you can see, there is nothing complicated about this, but working with your hands constantly raised up is not very convenient or pleasant. The video in the article will show you how to effectively warm up a stiff neck and shoulders.
How to stick ceiling tiles
When carrying out renovations, many people wonder how to beautifully and at the same time cheaply finish the ceiling. One of the most suitable options is to decorate the ceiling with polystyrene foam ceiling tiles. Working with such tiles does not require special skills and it can be done even by one person.
Ceiling tiles have been popular for many years. And the variety of patterns and colors will satisfy the taste of even the most demanding customer.
Tools and materials for work
As always, before repairing, you should prepare the necessary tools so as not to look for them during work and waste time on it.
To work with ceiling tiles, you need very few tools; you probably already have many of them in your arsenal:
- Tape measure and pencil;
- Stationery knife;
- An even strip or rule of at least 50 cm for cutting tiles;
- Miter box and fine-toothed hacksaw (for sawing ceiling plinths at corners);
- Long thread (required when gluing diagonally);
- Roller or wide brush (if you need to prime the ceiling);
- Spatula with a width of 5-7 cm (when attaching tiles to mastic);
- A few clean rags for polishing tiles.
Calculate the required number of tiles; to do this, measure the area of the room, add 10-15% for reserve. Typically, tiles are sold in packs of 8 pieces, the size of one tile is 50x50 cm. Packaging is 2 sq.m. therefore, divide the area of the room by 2 and get the number of packages required for purchase.
Any large hardware store will be happy to provide you with at least a dozen options for ceiling tiles to choose from. In recent years, multi-colored and designer options have become increasingly popular, consider these if you suddenly want to try something new.
Tip: Transfer the dimensions of the room onto a piece of notebook paper and draw the ceiling tiles on the resulting rectangle on a scale, so you can accurately find out the number of tiles required. This is especially useful when gluing tiles diagonally.
Trying to save money, many people start gluing tiles from the corner; yes, it is economical, but it will look much worse than with other options.
Having determined how many and what kind of tiles you need, you need to choose what you will glue them to.
Read also: Two-level gypsum board ceiling
There is no shortage of adhesive materials to choose from; many people use “moment”, “glue master” or other liquid adhesives, but there are also special mastics and pastes created specifically for tiles.
The packaging of any type of fastening material will indicate consumption rates per square meter for a certain type of application; read the instructions and calculate the required amount for your room.
There is no optimal advice on which adhesive base to choose; for some, simple adhesive lasts for decades, while for others, the tiles fall off after a year. Here the main role is played by the base on which we attach it and the operating conditions of the room. So it might even be worth experimenting with different types of glue on your ceiling.
Don't forget to choose a suitable ceiling plinth (fillet). They are sold individually, 2 meters each and in various widths.
Preparatory work
Before you start gluing the tiles, it’s worth doing some preparatory work that will extend the life of your new ceiling. The ideal option would be, of course, if you completely clean the ceiling of the old coating. but often this seems impossible and labor-intensive.
The tiles adhere perfectly to such substrates as: concrete, fiberboard, plasterboard, chipboard, OSB, but they should also be pre-primed.
Let's look at the most common types of ceiling bases.
- Concrete base - tap the entire ceiling and remove any loose areas. Fill large cracks and potholes with putty. After this, be sure to prime the entire ceiling. The primer will increase the adhesive properties of concrete.
- Painted ceiling - use a spatula to remove any peeling paint and prime the ceiling as well. It is better to remove old emulsion paints completely, since in the future the paint itself may come away from the ceiling at the adhesive joints.
- Whitewashed ceiling - also remove problem areas with a spatula. In general, a lime base is the most unsuitable for tiles; it is recommended to remove the whitewash at least in the area where the glue is applied. If this is not possible, pay special attention to priming; it would be better to apply the primer several times at intervals of several hours and allow the final coat to dry for at least 12 hours.
Gluing tiles parallel to the walls
When all the preparatory work has been completed, the primer has dried for the allotted time, you can begin gluing the tiles.
Let's consider the process of gluing tiles parallel to the walls:
- Marking the ceiling - we decide on the option for placing ceiling tiles. Determine the expected center using a tape measure and pencil. Better yet, pull 2 ropes from corner to corner, their crosshairs will be the center of the room. Then, using a tape measure and focusing on the resulting center, pull the threads at right angles to each other.
- Prepare the tiles for applying the adhesive. If it is a liquid glue that requires curing, then you can apply it to 3-5 tiles at once and by the time you reach the last one, the first one can already be glued. If you use adhesive mastics, they dry quite quickly, so apply only to 1-2 tiles. On containers with glue there are recommendations on the number and location of glue dots. But still apply glue at your discretion, but at least 9 dots on the tile. There should be at least 10-15 mm from the glue to the edge of the tile, otherwise the glue may come out and stain the tile.
- We start gluing from the middle of the ceiling. If the chandelier is located there, cut the corners of the tiles under the wire coming out of the ceiling; these cuts will be covered with a decorative trim of the chandelier. In the store you can also purchase a decorative element for a chandelier that will harmoniously combine with the tiles. Important! The chandelier bulb should be at least 20-25 cm away from the tile, otherwise the tile will heat up and may warp over time.
There are many sequences for gluing tiles, here are some of them:1. Glue the first 4 tiles strictly according to the markings (or rope), namely, one corner of the tile should lie on the marked center, and the edges should be aligned with the markings. Then glue two rows in each direction and fill the corners of the room as the last step.
2. gluing the ceiling in quarters, filling sequentially with tiles from the center to the corners.
Tip: try not to press on the tile with your fingers, as dents may remain on it; smooth it with a clean cloth.
- If you don’t have a whole tile at the edges, then use a tape measure to take the required dimensions and transfer them to the tile. Using a guide, cut the required piece with a stationery knife and only after preliminary fitting, apply glue. Do not try to fit the tiles directly against the wall; even the smallest ceiling plinth will perfectly close the centimeter gaps at the edges.
- After you have glued all the tiles, secure the ceiling plinth with the same glue as the tiles, or with liquid nails. Joining them in corners at 45′ using a miter box and a hacksaw.
Some craftsmen recommend sealing the joints of the tiles with sealant so that they are less noticeable, so don’t do this, over time the sealant will definitely turn yellow and ruin the entire appearance of the ceiling.
If you still want to make the seams less noticeable, then paint the tiles in color.
Sticking tiles diagonally
Gluing tiles diagonally is not much more difficult than parallel.
- Marking - pull 2 ropes from corner to corner, their crosshairs will be the center of the room, pull 2 ropes parallel to each other using a tape measure and focusing on the resulting center.
- Glue the first 4 tiles from the resulting center, aligning the corners of the tile strictly with the ropes. If you want the first tile to be the center one, then place it so that the threads intersect all 4 of its corners:
- The next step will be gluing all the tiles without trimming, in any sequence convenient for you.
- Having carefully measured all the cutting distances with a tape measure, we cut the tiles to size using a utility knife.
- The final stage will be securing the ceiling plinth.
Conclusion
In fact, the process of gluing ceiling tiles is much easier than it seems at first glance, so don’t be afraid to take on this task yourself.
Here are some tips for caring for tiles:
- If during work you accidentally stain the tiles with adhesive, simply remove it with a damp cloth;
- Do not put pressure on the tile during installation, marks may remain on it, wash your hands periodically when working, this way you will definitely not stain the tile;
- The easiest way to remove damaged tiles is with a spatula;
- When performing general cleaning, wipe the tiles with soapy water or non-aggressive detergents;
- Avoid getting water under the tiles, as this may cause them to collapse;
- Some greasy stains can be removed from the tiles with alcohol.
If you have any questions, please leave comments.
Good luck with the renovation!
Similar articles:
How to paint a ceiling with your own hands?
Repair of suspended ceilings
How to glue ceiling plinth
We paint ceilings without streaks. Simple but effective tips
Ceiling wallpaper for all occasions
Eco wallpaper
Taking our advice into account, you can create an exclusive interior with your own hands, and its price will be affordable, considering that wallpaper is the most inexpensive way to redecorate.
Pasting the ceiling in the kitchen
The easiest and fastest way to get a unique ceiling in the kitchen is to cover it with decorative elements. The result obtained is not much inferior to the effect of expensive and complex suspended ceiling designs made from plasterboard slabs or tension threads.
Another undoubted advantage is that the surface does not need to be perfectly leveled like for painting; it is enough to eliminate large irregularities and cracks.
Materials for gluing the kitchen ceiling
The kitchen is a specific room in a residential building where changes in humidity and temperature are observed. This factor determines the list of building materials when choosing what to glue on the ceiling in the kitchen.
Recommended materials for gluing kitchen ceilings:
- Non-woven wallpaper
- Vinyl wallpaper on non-woven backing
- Expanded polystyrene boards
Non-woven wallpaper and polystyrene foam boards can be painted many times, up to 10 times, with acrylic water-dispersion or latex paints and have a very long service life.
In addition to non-woven wallpaper, non-woven vinyl wallpaper can also be used on the kitchen ceiling. Such wallpapers are quite heavy and have a high price. The vinyl layer suggests the possibility of only 1-3 times future painting with water-dispersion paints, which indicates the short service life of such a ceiling.
Vinyl wallpaper on non-woven backing for painting on the ceiling
It is strongly not recommended to use light paper wallpaper on the kitchen ceiling, as they very quickly lose their original appearance, which cannot be restored.
Wallpapering the kitchen ceiling
Non-woven wallpaper can be flat or embossed, but made in one layer. Vinyl wallpaper on a non-woven base consists of two layers. The first, flat, is used for gluing to the ceiling, and the second performs a decorative function in the form of a various relief pattern.
Wallpapering tools
The entire gluing process can be divided into stages:
- Accurate measurement of the required material
- Preparing the ceiling surface
- Cutting wallpaper into required lengths
- Installing wallpaper using glue on the ceiling
Measuring operations
It is necessary to begin the process of wallpapering the ceiling by correctly measuring the required length of wallpaper and the number of rolls.
The main rule for the direction of gluing is the coincidence of the lines of wallpaper joints with the direction of sunlight in the kitchen coming from the windows. Here we decide how we will glue the wallpaper. Either along the length of the room, or along its width. By measuring the original width or length dimensions, we can calculate the desired continuous length of wallpaper in one roll. Correct calculation will allow you to minimize financial costs.
Important! When measuring the length of a strip of wallpaper, it is necessary to take into account an additional 3–5 centimeters on each side for the permissible error that may arise from uneven surfaces of the ceiling and walls.
Manufacturers produce wallpaper in rolls from 10 meters to 25 meters and a width of 0.75 meters. For ease of gluing the ceiling, it is recommended to take wallpaper 0.75 - 0.9 meters wide.
The measurement procedure will be more complicated if you have to combine the relief pattern of the wallpaper with lighting elements. In this case, the calculation begins with the main strip, in which the lighting devices will be located and the amount of wallpaper required for the ceiling design may increase.
Preparing the ceiling surface
For wallpapering, a perfectly flat ceiling surface is preferable, but minor unevenness will not affect the quality of the wallpaper and will be perfectly camouflaged.
Preparing the ceiling surface for wallpapering
Any loose plaster or paint must be removed from the ceiling. To level the surface it is possible to carry out plastering work.
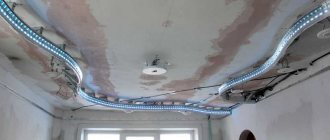
A very fashionable trend is wallpapering suspended ceilings made from moisture-resistant plasterboard boards. Combinations of different patterns look especially impressive on multi-level versions of plasterboard ceilings.
The overwhelming majority of wallpaper adhesive manufacturers recommend applying one or more layers to the ceiling surface as a preliminary primer. According to technology, such layers must dry completely.
Wallpaper cutting
Cutting wallpaper into strips
It is recommended to prepare in advance all the strips of wallpaper that will be glued to the ceiling. In this case, it is necessary to take into account the tolerance for each strip, the location of the lighting elements and the individual design features of the kitchen ceiling.
Installation of wallpaper on the kitchen ceiling
Before the actual process of gluing the ceiling, it is necessary to turn off the electricity in the room and completely close the doors and windows.
There are a huge number of manufacturers of wallpaper glue made from non-woven fabric or based on it. Adhesives can be either in a ready-to-use form or in the form of semi-finished products, from which, strictly following the manufacturer’s instructions, the required composition is obtained.
Wallpaper glue
Non-woven and non-woven vinyl wallpapers do not absorb glue and do not change their geometry when glue gets on them. This feature allows you not to apply glue to their surface, but exclusively to the plane of the ceiling. The strips are not burdened with glue, and the gluing process is greatly simplified.
Applying a strip of wallpaper to the ceiling must be done in tandem with an assistant. The process is simplified by the fact that when the wallpaper is attached to the ceiling with glue applied to it, there is no immediate fixation. There is time for precise alignment of joints and patterns, straightening the surface of the wallpaper to prevent the formation of air bubbles.
Excess glue can be easily removed with a clean rag. The tolerances of each strip are cut off with a knife.
The mounting points of the lighting fixtures are thoroughly cleaned of any glue residue, and only after this the light is connected.
Polystyrene foam boards on the kitchen ceiling
The building materials market offers a huge selection of polystyrene foam boards, which vary in color, texture and size. The wealth of options will help you decide as accurately as possible what to cover the ceiling in the kitchen with.
Gluing slabs to the ceiling is a very simple task. You can even do it yourself, without involving specialists. The slabs are very light. The most common size is 50 cm * 50 cm.
Choosing polystyrene foam boards for the kitchen ceiling must be based on the overall design of the room.
Polystyrene foam boards on the kitchen ceiling
Calculation of the required number of slabs for the ceiling depends on the design decision of the location of the slabs on the ceiling.
There are three main options for placing a decorative element on the ceiling:
- The main guideline is lighting elements
- Pasting starts from the geometric center of the kitchen parallel to the walls
- Diagonal option for gluing slabs from the center of the ceiling
Option No. 2 is considered the most economical, and the third option is the most expensive, since it involves a lot of unused scraps.
Preparing the surface of the kitchen ceiling almost completely coincides with preparation for wallpapering. Only the primer layer of glue is not applied.
The special adhesives used to fix polystyrene foam boards to the ceiling have very high bonding characteristics.
The glue is applied to the slab from the back side along its perimeter, with indentations from the edge of 2 - 3 cm, plus two intersecting lines in the center of the slab.
The slab with glue applied to it is pressed against the ceiling and immediately pulled back, so that part of the glue remains on the ceiling. Next, you need to wait 5 - 6 minutes and, with a little effort, install the stove on the ceiling. This procedure is done with each slab.
A kitchen ceiling with wallpaper or polystyrene foam boards helps create a stunning and unique design.
potolokexpert.com