Polyethylene material welding machine
It is very convenient to use a special welding machine to join film sheets, and welding can be completed in the shortest possible time. The device that welds greenhouse film is characterized by a fairly simple operating principle. A standard engine drives two wheels through a gearbox. Using a special tripod, a wedge heated to certain temperatures is inserted between the film sheets.
The result of welding using such a device is the formation of a double seam with a strength of at least eighty percent. Welding occurs automatically, and manual actions are necessary solely to change the temperature regime of the wedge and the speed of movement of the film web.
Most often, such a device is used in the industrial sector, but it is possible to use it for personal purposes. The manual type of such a device is a type of industrial hair dryer, but has less weight.
Oilcloth care
- When our repair has come to an end, it is recommended to wash the resulting surface with soap and water and dry it. In the same way, the oilcloth should be cleaned of dirt during use.
- Under no circumstances should we use our usual detergents containing acidic or alkaline components, otherwise the film will not last long.
- Oilcloth tends to fade, and therefore, to maintain it in its original form, we recommend wiping the material with a solution of milk and vinegar from time to time - then it will please the eye for a long time.
Among the large number of modern adhesive materials, bustilate is quite popular. Many types of this adhesive composition are effective in various areas of finishing work, which makes it truly universal. We want to talk more about the technical characteristics, advantages and disadvantages, as well as the nuances of use today.
This synthetic glue is the brainchild of domestic scientists. Appearing within the walls of NIIMosstroy in the 1960s, the glue quickly began to gain popularity due to its ability to be used in a variety of areas of activity.
The material contains the following components:
- Latex;
- Water;
- Thickener carboxymethylcellulose (CMC);
- Preservatives and other additives.
Welding
This method is used most often because it is considered the least expensive, but at the same time very high quality and durable.
Important: you must carry out the work with extreme caution, because there is a risk of not only spoiling the material itself, but also getting burned
The most commonly used method is bonding with plates. To do this, place the two edges of the polyethylene sheet that need to be glued on top of each other between the metal plates. The edges should protrude slightly. Gently press the plates and run the soldering iron along the very edge of the polyethylene. In this case, plates are necessary to ensure that the film simply does not curl under the influence of high temperature.
If you don't have a soldering iron, you will need an iron. Place the pieces of fabric to be glued slightly overlapping (1 cm). Lay strips of cotton fabric under the reverse side of the polyethylene and on it. After this, run the iron, heated to maximum temperature, over the fabric from above.
There are a large number of different glues for plastic available in stores. However, keep in mind that the vast majority of compounds are not suitable for polyethylene. But do not discard this method - to glue polyethylene, you can use standard glue for plastic after careful preparation of the material.
In order to make the surface of polyethylene more active for adhesion, you will need chromic anhydride or chromium. Such products are sold in specialized chemical stores. If you have chemist friends, you can ask them for the composition. Chrome gently acts on the surface of polyethylene, making it receptive to glue.
Anhydride or chromium should be applied to the film, and only then the usual BF-2 glue, which is sold in every store. Such a simple method of gluing polyethylene would become very popular if the necessary chromium-based substances were easier to obtain.
Cons of PVA
• The glue is very thick, it is impossible to apply it in an even layer on the surface of the wallpaper. Consequently, you should not use PVA glue for pasting large panels of wallpaper. And special substances have been added to the wallpaper glue to promote sliding and uniform application. • Due to its dense consistency, PVA dries very unevenly. In addition, when drying, a film is formed, under which, in the case of excess glue, a so-called bag of glue and air is formed. Wallpaper glue dries evenly, and the wallpaper lies flat.• The resulting film is not soluble in water. Later, after the wallpaper has served its purpose and the time comes to remove it from the walls, it turns out that this is not so primitive, because the film has tightly “soldered” it to the wall. The listed disadvantages of PVA glue make it not the best choice for gluing wallpaper.
The most famous manufacturer of table film in the world is the Japanese company Meiwa. They provide clear, colored, matte overlays to the market. , both in large rolls and in standard tabletop sizes.
In terms of their positive qualities, glass table films from domestic manufacturers do not lag behind Japanese ones. Decosave and Modern companies produce both transparent overlays and tablecloths in various shades and patterns, which allows you to match them to any interior.
“Ofiston” is considered the best company in Belarus that produces thick transparent film for the table. Their transparent tablecloths have gained popularity among customers, which indicates the high quality of the product.
Everyone has probably heard about the Swiss company Ikea. The quality of this company's products is evidenced by many positive reviews. The models of table films that are most quickly leaving the shelves of the Ikea store are the transparent “Preuss” and “Skrutt”.
The following companies are also successful in selling silicone tablecloths:
- Durable;
- Esselte;
- Leitz.
Oilcloth for walls
The most popular solution for using oilcloth is covering a dining table.
Previously, oilcloths were sold on a cardboard base, on which a layer of polyvinyl chloride (PVC) was applied to give strength. It is worth noting that such oilcloths were of rather poor quality: flimsy, had a strong, nasty smell, and over time the designs on them wore off.
With the introduction of modern new technologies, oilcloths have emerged using synthetic and polyester varnish compositions, giving the material brightness, density, lightness, and wear resistance. Modern oilcloth is more of a fabric, which is why it looks quite interesting and beautiful.
How to glue it correctly
First of all, you need to calculate how much material you will need. To do this, you need to take measurements of the area of the kitchen where the oilcloth will be glued. To do this, you need to know the length, width and height of the room. Further:
- The surface on which the oilcloth will be glued should be thoroughly cleaned of the old coating. This could be paint or wallpaper. You also need to thoroughly wash the area to remove dust and dirt. If you used water, then dry the walls well after that.
- When gluing this material, you should use PVA glue or Bustilat. They dilute well with water and do not leave stains or streaks. Remains of this glue can be easily wiped off with a damp sponge.
- The oilcloth needs to be cut into strips that are convenient for you; if there is a pattern, “fit it.”
- The glue should be applied to the strips carefully, and the oilcloth should be completely covered with glue without gaps, because bubbles may subsequently form. For a better effect, you can apply the adhesive composition to the wall. This is done in this way: coat the wall with a brush or roller, let it dry, then apply another layer of glue.
- We glue the strip to the wall, smooth the canvas from the center to the edges, so air does not accumulate under the oilcloth.
- We glue every second strip of oilcloth with a slight overlap on the first one.
- It is best to start gluing from the corner, so the joints will stick well.
- If the oilcloth is slightly swollen during pasting, you should lightly cut the oilcloth, or pierce it with a needle, release the air and gently smooth it with a cloth.
- After the glue has dried, the oilcloth must be washed with soapy water. If any glue residue remains or there are streaks, rinse again.
- In order to maintain the shine for a long time, experts recommend occasionally wiping the surface of the oilcloth with a mixture of vinegar and milk, which are diluted in equal quantities.
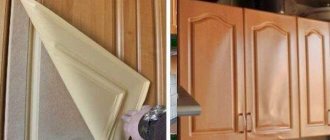
If you want to completely update your kitchen interior, then oilcloth can also be used to cover furniture surfaces. It can be used to cover a closet, table, cabinets and even a refrigerator. This will give your kitchen a new and fresh look. This method is the cheapest for updating the interior. There are no particular difficulties when covering furniture with film, because it lays flat on any type of surface.
Good luck and enjoy your interior renovation!
Information about oilcloth
Various materials are used to make oilcloth, giving it strength and good resistance to mechanical damage. The components that make up the oilcloth ensure excellent environmental friendliness of the coating.
Positive aspects of coating
Oilcloth does not absorb moisture. Therefore, it can be safely used to decorate walls in the bathroom, kitchen and many other utility rooms.
Possessing heat resistance, oilcloth can be used to cover the kitchen work area, as a so-called kitchen apron.
The material does not absorb fats and various dirt. It is easy to remove dirt using a soap solution.
The low price of oilcloth allows you to replace wall cladding with a new material.
A huge range of coatings allows you to match it to any interior style and become a real decoration of the room design.
The disadvantage of oilcloth is the risk of harmful microorganisms: mold, mildew.
Oilcloth for walls
The most popular use of the material is as a dining table cover.
More recently, oilcloths have been on sale with a paper or fabric backing, on which a layer of polyvinyl chloride (PVC) was applied to ensure strength. These types of oilcloth were not very durable, had a strong chemical smell, and over time the paint rubbed off from the design.
With the use of modern new technologies, materials using synthetic and polyester varnishes have appeared, giving oilcloth brightness, thinness, lightness, and wear resistance. Modern oilcloth has become similar to fabric, and this property allows it to be used for unusual wall decoration.
Application area
- Oilcloth with its fancy ornament or pattern and beautiful design can compete with wallpaper, especially in rooms with high humidity: bathroom, kitchen.
- The coating can be used to decorate furniture: finishing shelves, table surfaces and using unusual zippers in furniture instead of doors.
Oilcloth gluing technology
You need to know about the features of pasting with this coating even before you decide to use oilcloth for wall decoration.
oilcloth for walls
Work order
- The amount of material should be calculated. To do this, take measurements of the room or kitchen apron. Knowing the length, width, height of the room, you can easily calculate the surface area without taking into account window and door openings and can determine the length of the oilcloth. Remember that if the coating has a pattern, then you need to buy it with a reserve to adjust the pattern.
- Now you should prepare the surface of the walls well. Completely remove the old coating (paint, wallpaper, etc.), clean from dirt and dust, if necessary, wash with the prepared solution: 3 tbsp per liter of water. l. baking soda. After the procedure, the walls need to be thoroughly dried.
- Purchase the estimated amount of oilcloth and glue in the store. To glue the coating, PVA glue and Bustilat are used. They are diluted with water, so they do not leave stains after drying. Excess glue can be easily removed with a damp cloth. Be sure to check the release date - the glue must be fresh.
- Prepare glue according to instructions.
- The material is cut into the required strips, adjusted according to the ornament and design. The strips are carefully coated with glue as evenly as possible, without missing a single area, using a brush or roller, otherwise there will be bubbles. The glue is also applied to the wall, allowed to dry a little and then smeared again with the next layer. The strip is glued to the surface, proceeding in the same way as with wallpaper: press the canvas from the center to the edges, smoothing the oilcloth over the surface, expelling the air.
- The next canvas is glued with a slight overlap on the first, matching the pattern. The joints are carefully rolled so that they are not visible.
- If pasting is done on chalk whitewash, then you should first treat the wall with glue so that when the whitewash dries, it does not come away from the plaster.
- You should start gluing from the corner. To ensure that the joints stick well, paper strips coated with wallpaper glue are glued on top of them. After the oilcloth has completely dried, the strips are moistened and removed. The top of the covering is secured with a suitable border.
- If bubbles form during gluing, carefully cut them with a sharp knife, release the air and smooth them out.
Operation and care
- After drying, the surface with the oilcloth should be washed with soapy water at room temperature and wiped dry. Repeat the procedure as it becomes dirty.
- Do not use aggressive detergents containing acids and alkalis to extend the life of the material.
- To maintain the brightness and color of the coating, it is recommended to periodically wipe them with a mixture of milk and vinegar, diluted in equal proportions.
Now you can imagine how to glue oilcloth to the wall. With its help you can get an extraordinary interior for your bathroom or kitchen.
To avoid mistakes, you can read the tips on how to properly glue wallpaper.
https://remontuzel.ru
Installation of floor, wall or finishing coverings indoors is not always possible with the help of fasteners. Despite the wide selection of screws, nails, bolts, studs, self-tapping screws, their presence can significantly spoil the appearance of the coating and complicate its further operation. The use of adhesives helps solve the problem. Especially appreciated are universal adhesives, suitable for gluing wallpaper and floor coverings, and placing decorative elements made of various materials. Thus, the use of Bustilat glue in the process of laying linoleum provides a high-quality coating due to a number of technical characteristics of the adhesive composition.
The domestic manufacturer offers many options for bustylate glue
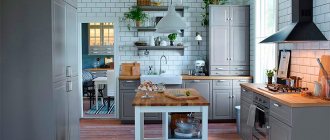
Oilcloth on the wall for the kitchen
When renovating the kitchen, everyone thinks that everything should be simple and practical, because this room has always been the most popular place in every apartment and the pride of the owner.
Modern building materials can satisfy the needs of any person, even the most fastidious. But, unfortunately, not everyone has the means to cover their kitchen with expensive materials. Therefore, oilcloth on the wall in this case is the best option, because it has a beautiful appearance and is quite cheap. The kitchen, most of all, differs from other rooms in its practicality, since the risk of contamination is highest here. Therefore, oilcloth would be most appropriate here, since after each cleaning it looks like new.
Of course, there is now a large selection of these products on the market, but how to choose high-quality, not expensive material, but at the same time, it looks beautiful and stylish? Let's try to find out, because like every finishing material, oilcloth has its own advantages and disadvantages.
Features of application
Instructions for use are quite simple and clear. prints it on each package for the convenience of its customers:
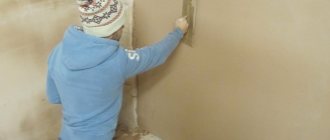
- 1. The surface to be treated is cleaned of traces of old material, leveled, puttied and cleaned until completely smooth.
- 2. This is followed by treatment with a special primer that improves adhesion and also prevents the spread of mold and pathogenic fungi.
- 3. Wallpaper/linoleum is measured and cut into pieces of appropriate sizes.
- 4. The glue is thoroughly mixed until a homogeneous mass is formed.
- 5. The substance is applied to both surfaces using a brush or roller.
- 6. You need to wait 10 minutes until the glue dries, after which you can combine the material with the surface. It is important to expel all air bubbles from under it using a dry towel or a special plastic spatula.
- 7. Upon completion of the work, you need to fence off the room from drafts for a day.
The price of Bustilat glue is approximately 130-150 rubles per kilogram. There are large-volume packages, the purchase of which can save a couple of tens of rubles.
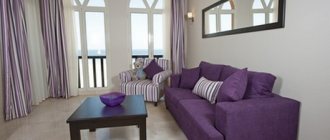
When renovating an apartment and decorating premises, you can add zest to the design using a variety of finishing materials, including oilcloth or fabric (chintz, satin, velvet). Oilcloth can be used to cover all the walls of a room or only part of the surface. Such material can be glued with mastic, special glue, or simply pinned with nails, although it is now so rare to attach the coating to the walls. How to glue oilcloth to a wall
so that it is practical and beautiful?
What can we give? I invite you to the group on Subscribe.ru:
APARTMENT RENOVATION, USEFUL TIPS, HOME AND FAMILY
How to glue oilcloth to a wall
Procedure for installing oilcloth
First of all, it is advisable to calculate the required amount of material. To do this, it would be correct to take measurements of the room or kitchen area, depending on your goals. Measure the length, width and height and subtract the area of the room using the formula. You can also give the dimensions to the seller and he will calculate the area of your premises. And there is no need to even say that the coating with a pattern must be purchased with a reserve, because you will be gluing the oilcloth with a selection. Next you need to prepare your walls. You need to remove the old coating (paint, wallpaper, etc.), clean it from dirt and dust, wash off the dirt, and so on. It goes without saying that at the end of the procedure the walls must be thoroughly dried. Purchase oilcloth of the required size and quantity from a hardware store, and don’t forget about glue. Of course, we all know very well that PVA glue and Bustilat are used to glue the coating. Please note that they are diluted with water, so they do not leave stains when they dry. Everyone knows that excess glue can simply be removed with an ordinary rag. Do not use expired glue, check the date of manufacture of the glue with the date of gluing. According to the description on the package, you need to prepare glue. The material is cut into the required strips, adjusted according to the ornament and design. And it doesn’t even need to be said that the strips are carefully coated with glue - with a brush or roller, so that bubbles do not appear later. Undoubtedly, it is worth mentioning that the glue is first applied to the wall, allowed to dry slightly and again smeared with a second layer. The strip is glued to the surface, proceeding in the same way as with wallpaper: press the canvas from the center to the edges, smoothing the oilcloth over the surface, thereby expelling the air. The next sheet of oilcloth must be glued with a slight overlap. The joints are painstakingly rolled with a special wallpaper barrel so that they are not visible. If the pasting is done on chalk whitewash, then you should first treat the wall with glue so that when the whitewash dries, it does not move away from the plaster. Better yet, before gluing the oilcloth, wash off the whitewash and prime the walls. It is advisable to start gluing the oilcloth from the corner of the room, moving clockwise. After you have glued the sheets, you can glue the paper strips at the joints of the sheets with regular glue, and after they dry, wet them and peel them off
This is to seal your joining seams. If after you have finished the work, air bubbles suddenly form, then you need to carefully pierce them with a syringe, let a little glue in there and smooth them out.
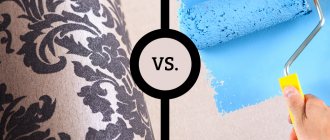
Adding PVA to wallpaper glue
Perhaps it makes sense to simply enhance the effect of regular wallpaper glue by adding PVA? Today, experts are confident that with the modern variety of professional adhesives for different types of wallpaper, there is no need to complicate your life by mixing wallpaper glue with PVA. But PVA glue is perfect for gluing small areas, lagging fragments and joints.
Modern developments in the construction industry make it possible to solve almost all problems. Adhesives, which are presented in a wide variety, already contain everything necessary to carry out gluing conveniently and efficiently.
It is only important to choose the right glue in accordance with the type of wallpaper, read the instructions and follow the simple process of diluting the glue. In some cases, you will first need to prime the surface of the walls.
If you have doubts about the correctness of your choice, it makes sense to contact specialists and get the necessary advice, protecting yourself from the occurrence of unwanted nuances.
Sources:
- PVA glue for wallpaper. Is it worth it to complicate things?
When it comes to renovating a kitchen, the practicality of the materials with which it is planned to decorate the room comes to the fore. Today, the building materials market is ready to offer a lot of options that meet both the visual and utilitarian wishes of the buyer. True, many of these solutions come at a considerable price, which not everyone is willing to pay, so today’s article we will devote to oilcloth - an inexpensive, practical and very aesthetic material. How to glue oilcloth to the wall, what tools you will need for this and how to ultimately glue it to the wall - read below.
Tool preparation
If you have already finally decided that oilcloth will be used as a finishing material for the walls in the kitchen, then for DIY repairs you will need the following set of tools:
- Cutter - it is necessary for the formation of separate panels of film, which will subsequently be glued;
- A pencil, pen or other writing object - everything is clear here, you will first need to apply markings, according to which the walls in the kitchen will be covered;
- A measuring tool, for example, a tape measure or a ruler - the purpose is just as obvious;
- A hairdryer, preferably an industrial one - with its help you will treat the surface of the film with warm air or warm up the puncture sites of bubbles that inevitably arise during fastening;
- Use a spatula or squeegee to smooth out the film so that it is evenly pressed against the wall.
Surface and material preparation
- The first step, as when using any other finishing material, is to calculate the required amount of oilcloth. Having measurements of the length, width and height of the room or specific area where repairs are planned, it is easy to calculate the area and understand the required quantity of the product. Do not forget that if the oilcloth has a pattern, then it is necessary to take a certain supply of material, about ten percent, in order to subsequently be able to adjust the pattern.
- The success of repair work directly depends on the quality of the preparatory work done, so take your time and carefully free the walls from the previous coating, as well as various deposits of dirt and dust. We advise you to wash the bare walls with a solution of water and soda, and then dry them thoroughly.
- Now is the time to go to the store and buy the oilcloth you like, as well as glue - it is recommended to use PVA, Bustilat. These types of glue are diluted with water, and therefore there are no stains left when the oilcloth dries. Remember that the glue must be fresh, try not to come across a fake.
Pasting technology
- It's time to prepare the material for work. First you need to prepare the glue following the instructions. The material, in turn, is cut into strips that match the ornament. The glue must be applied evenly to the oilcloth; a brush and roller are used for this; inattention to this procedure can lead to the formation of bubbles. Now the resulting strip of oilcloth can be glued to the wall; this is done in the same way as in the case of wallpaper - pressing from the center to the edges and smoothing the material, thereby expelling the air.
- Each subsequent canvas must be glued with a slight overlap on the previous one in order to maintain an even pattern.
- In the case when oilcloth on kitchen walls is done for whitewashing, the wall must first be treated with glue, otherwise the whitewash may come off the plaster and the repair will be ruined.
- The pasting process begins from the corner of the room. There is a problem with gluing the joints, so it is recommended to put paper strips soaked in wallpaper glue on top of them; when the work dries, they can be moistened and removed. The top of the covering must be secured with a pre-selected border.
- If during the process it was not possible to avoid bubbles, then they should be cut and carefully smoothed after the air has escaped from them. There is no need to worry if defects due to air ingress do not occur when using oilcloth for walls - this material is easy to work with and any defect can be eliminated in a matter of minutes.
Manufacturers and prices
Let's find out which of the manufacturers today offers us the best selection of transparent kitchen tablecloths at reasonable prices.
NIKLEN
The Canadian manufacturer offers the most elegant models made of PVC. The work is so delicate that from a distance a confident impression of natural lace is created. Ornaments are traditional: floral, plant. A product 110x140 cm rectangular in shape will cost 352 rubles.
Agness
This Chinese trading and manufacturing brand offers high-quality polyester products. The models are real works of art - beautiful, but at the same time practical. The cost of a transparent lace product 85x85 cm is 1,776 rubles.
Gray Textile
The Chinese brand offers elegant models of PVC lace weaving. The cost of a product with a floral pattern 85x85 cm is 780 rubles.
If you want to purchase a strict, practical model without lace or other decor, suitable for everyday use and fitting into modern, laconic interiors, opt for Russian products with a strict rectangular shape. These tablecloths are a smooth, dense PVC film that protects the tabletop with an ideal transparent layer. Or opt for a set: tablecloth and chair covers in the same color scheme.
Such products are very inexpensive. For example, a tablecloth measuring 180x120 cm will cost only 57 rubles. Photos of various tablecloths for the table can be seen here.
Variety of assortment
The market today offers a huge variety of coverings for the dining table - these include napkins, oilcloths, and tablecloths. They come in completely different shapes - round, rectangular, different sizes, and a variety of colors. Therefore, it will not be difficult to find a model to suit your taste, suitable for almost any interior. China is the leader among manufacturers, but products from Russia and Western countries are sufficiently represented.
It’s quite easy to choose the color and design style of the tablecloth you’re interested in. It is much more difficult to find environmentally friendly and high-quality material. Therefore, it is recommended to focus on this when choosing. It should be taken into account that very cheap oilcloth from China will not be of high quality and environmentally friendly. For those who do not like tablecloths, there are napkins that can be used during meals for each person. They are also easy to clean and protect the countertop from temperature changes and dirt.
Related links: Which ceramic tiles are suitable for shabby chic style
Advantages and disadvantages of the material
This type of finishing has many advantages. One of them is easy installation. This type of lining can be changed quite quickly if the old oilcloth in the bathroom has become dilapidated.
This material is available in a wide range. Today you can buy films of any color, with different ornaments and patterns. This allows you to select finishes for any design and style of the bathroom.
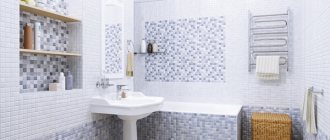
Covering bathroom walls with oilcloth significantly saves the family budget. This is an inexpensive material that is not afraid of moisture. Consequently, dampness and mold will not appear in the bathroom.
This type of finishing can be used for other interior elements. For example, you can decorate the facades of an old cabinet or a section of the wall above the sink in the kitchen with self-adhesive film. In addition to its water-repellent properties, this material can withstand significant temperature changes.
They produce film without a backing, on a fabric or paper base, foamed or embossed.
Oilcloth with backing
At the same time, oilcloth for the bathroom, the design photos of which in our gallery will help you make the right choice, also has some disadvantages. Before covering the walls with polyvinyl chloride film, the facing surface must be perfectly smooth. Only in this case will the oilcloth lie flat and last a long time. It is necessary to remove all irregularities and defects in the coating and carefully plaster the wall.
Plastering bathroom walls
In general, oilcloth finish is suitable for almost any substrate. It can be applied to glass, wood, plywood, metal, mirror, plaster surfaces and even tiles.
If you have chosen oilcloth for the bathroom walls as a finishing material, you should stock up on the necessary tools before carrying out the repair. You will need:
- special cutter for preparing film panels;
- pencil or ballpoint pen for marking;
- measuring tape or ruler;
- hair dryer (household or industrial); scissors;
- a felt spatula or squeegee that allows you to smooth out the facing material.
When applying self-adhesive film, a hairdryer is needed to treat surfaces, corners and joints with warm air. They also need to warm up the puncture sites of air bubbles that may appear during the installation of the oilcloth.
Useful shopping: what kind of oilcloth should be used for a kitchen table?
The kitchen often becomes the heart of a modern home. Of course, there is a living room for relaxation and communication, but much more often family members gather in the kitchen, at the common table. Interior designers unanimously agree that this room plays a key role within the space of an apartment or house, and therefore requires special attention. The kitchen should energize you in the morning, set you in a positive mood, and help you relax after a long day with a cup of hot tea. At the same time, it is impossible to get a modern, stylish and well-kept kitchen without a good dining table, and one of the most effective and simple solutions for caring for it is to buy oilcloth .
Good old fabric tablecloths, embroidered or starched, are good for formal receptions. As a rule, they are used only on special occasions, because this decorative item is very capricious and demanding to care for: food stains are not always easily removed from the fabric - be it linen, cotton, silk or modern synthetic materials. Wine and juices, cake cream or greasy stains from barbecue can ruin the beautiful appearance of the tablecloth once and for all. At the same time, putting oilcloth on a fabric-based table is a completely different matter. These are durable products with high resistance to mechanical damage and ultraviolet radiation, dense enough to provide reliable protection for the countertop from hot dishes, an accidentally slipped knife or spilled compote.
Oilcloth coverings today are produced in a wide range of colors and a huge variety of patterns, including dozens of models of such products are presented in the assortment of our Arsenal of Goods base in Voronezh . We offer to buy oilcloths for the table at affordable prices and from proven, reliable manufacturers. Our customers are presented with both classic transparent oilcloths for the kitchen table made of PVC, and non-standard openwork models, on fabric and non-woven base.
When choosing among the endless variety of options for such products, you must first decide not on what color scheme or print will decorate your kitchen, but on what the table covering will be made of. After all, at first glance the photos of oilcloths on the table are the same, but in fact they are made from different materials, which determines both the unique characteristics and operating features of such products, not to mention the price. For example, cheap polypropylene tablecloths are affordable for everyone, but they are not suitable for long-term use: they are very thin, they tear from any, even the smallest, scratch, and are also afraid of the hot surfaces of pots, pans and kettles.
made from PVC for the kitchen table are much more durable, they are not much more expensive than polypropylene ones, but they look much more solid. These days, such coverings are used not only in everyday life, but also in the catering industry, and in the restaurant business they are often combined with classic tablecloths made of natural fabrics - linen or silk. Polyvinyl chloride is elastic and durable; it does not fade in the sun for a long time (due to the introduction of light-absorbing dyes into the raw material). For many years, such table material will retain its original rich colors and delight the eye with the beauty of the design.
In addition, polyvinyl chloride lends itself well to embossing, due to which the finished product acquires an interesting texture, and the use of such decor as a result brings a touch of elegance to the interior. This material is very undemanding in care: most of all kinds of dirt can be easily removed from it using a regular soap solution and a soft sponge. Inexpensive PVC oilcloths do not allow water to pass through (as well as other liquids), and are not afraid of exposure to aggressive environments commonly found in the kitchen (detergents, marinades, salt and sugar solutions, vinegars, acids, and so on). Finally, the production of products in a wide range of configurations (square, rectangular, round, oval tablecloths of various sizes and proportions) makes it easy to choose exactly the option that will look perfect in your kitchen.
It should be noted that, in addition to PVC, the base material also plays a big role in the service life of finished coatings and their resistance to various damages. Today, the most widely used substrates for polyvinyl chloride in such products are fabric - linen or cotton - and non-woven fabric. Products based on linen and cotton acquire high strength and resistance to abrasion and tearing, do not wear out on corners and bends for a long time, and can withstand repeated folding and unfolding without consequences, including long-term storage when folded. Currently, on the Russian market you can buy fabric-based oilcloth from not only domestic, but also foreign manufacturers - in particular, this option is ubiquitous from companies from Italy, Turkey, and Japan. In addition to table coverings, PVC on fabric is widely used for the production of other kitchen products: napkins, hot pads, aprons.
Non-woven tablecloths are an excellent example of the achievements of the modern chemical industry. Polymer fibers in such products are combined with polyvinyl chloride to form a monolithic coating that is very strong and durable. It is believed that, for example, for polished tabletops it is better to buy oilcloths on a non-woven basis , since their backing slips much less on a smooth surface. Like models using fabrics, these options are resistant to a wide range of acids, alkalis and solvents, do not absorb liquids and odors, and are easily washed from any contaminants. Manufacturers often ship these types of products in rolls 25 m long and with a standard width (from 1.2-1.3 m to 1.32-1.35 m, 1.4 or 1.5 m). buy a PVC tablecloth at retail cut to fit the size of a specific tabletop, which, in particular, makes these products very convenient for tables with non-standard proportions.
Sometimes on sale you can also find oilcloth coverings made of PVC applied to a paper backing, but the demand for them is small - the difference in price with the more popular fabric and non-woven options is insignificant, but the latter last many times longer. Their production is a complex technological process: PVC is mixed with plasticizers, stabilizers, pigments and fillers to form a paste, which is then evenly applied to the canvas, after which such a semi-finished product is calendered (passed between rollers) at a temperature of +200°C, followed by cooling. As a result, the output from the unit produces a material of a strictly specified width and thickness, with an infinite length; If necessary, drawings and ornaments are applied to cooled and, in fact, ready-made PVC tablecloths.
It is interesting that these days the use of oilcloth coverings is not limited only to the kitchen or dining room. Thus, such products have found wide application in medicine, they are purchased for kindergartens and nurseries, and are used in arranging workplaces in various applied circles (for example, modeling). PVC oilcloths are also used in interior decoration, the manufacture of advertising structures, and protective awnings.
Colored oilcloth for the bathroom
In Soviet times, the choice of building materials and the shortage of furniture often led to the fact that many housewives did not allow many housewives to realize their creative ideas in their apartments. Despite this, the owners created a beautiful design and competently equipped their home.
In modern times, everything has changed for the better; manufacturers offer a wide variety of materials to suit every taste, color and budget. On the market you can find a huge assortment of self-adhesive oilcloth; of course, this material is inferior in quality to ceramic tiles. But if you waterproof it correctly and glue the film to the wall, then such a coating will reliably protect the bathroom from moisture.
Wall care after renovation
Oilcloth does not require special care, because unlike other materials it is not capricious. As soon as small dirt appears on the wall, you just need to remove it using any detergent. There are stains that are not at all easy to clean. If they appear on oilcloth, you can use an alcohol-containing composition to clean it. Even regular vodka will do here.
It is not recommended to use harsh abrasives to clean self-adhesive oilcloth. Their composition can harm the canvas and even erase a beautiful pattern.
Oilcloth is very popular today not only because of its wide variety and ease of installation, but also because of its beautiful design and low price. It will not only protect the bathroom from moisture, but also decorate it with its beautiful appearance.
In addition, the oilcloth is easy to replace if you suddenly don’t like it. It also doesn't require much care. Tired of design? With film, changing the pattern will not be as long as with tiles.
In addition, the wide variety of this material will help you easily decide on the desired bathroom design, and nothing will limit you in your experiments.
Instructions
In order to determine how much oilcloth you will need, take measurements of the room, that is, the number of pieces for pasting should be equal to the number of meters of wall length (you can ignore window and door openings).
If the room has been wallpapered previously, completely remove all previous coatings. If there is paint on the walls, moisten them with water and remove the plaster, plaster, paint, and then dry thoroughly.
Now take the oilcloth panels themselves and spread them with glue evenly over the entire area, without missing a single area, otherwise bubbles may form.
If you glue oilcloth
on chalk whitewash, then first apply glue to the walls using a brush, otherwise, when drying, the layer may begin to lag behind the plaster. Apply glue to both the wall and the canvas, and then smooth it out with gauze.
Start from the corner. If you are gluing with an overlap, always point the edge of the fabric towards the window. Apply the cloth coated with glue from top to bottom, from the ceiling to the floor. To smooth the edges, use a roller or rag, being careful to ensure that the pattern on adjacent panels aligns correctly.
Glue the oilcloth strips with a slight overlap, coat the edges well. Using a damp cloth, smooth and wipe off any excess glue. Take strips of paper, coat them with wallpaper glue and place them over the seams. Once dry, lightly moisten with water and remove. Secure the top of the oilcloth in the ceiling area with strips of paper that will match the color or, conversely, create contrast.
Related article
After you have mastered the technique of gluing wallpaper on a flat wall, it's time to learn how to glue the corners. At first glance, there is nothing complicated in this process. However, upon closer examination of the case, this process becomes a real curse for some. Therefore, it will be useful to read this article to the end. Below are some recommendations for wallpapering corners.
Instructions
I would like to say right away that gluing a whole canvas into a corner is extremely undesirable. In practice, there are very few absolutely straight nodes in apartments. That is why, with almost one hundred percent probability, the corners of your wallpaper will wrinkle, the strip will skew, and the next strip will also lie unevenly. What can I say? The process stalled, your mood deteriorated and you had to run to the store for a new roll of wallpaper. A depressing prospect. Therefore, to prevent such incidents from happening, glue the corners correctly.
So, what is the basic principle of wallpapering corners? The canvas should be glued in such a way that there is a slight overlap on the adjacent wall (literally 1-2 cm). The next strip will lie end-to-end on the other wall towards the corner and you will have an even corner. If you are gluing heavy wallpaper (vinyl, non-woven and other similar ones), then it is necessary, using a plumb line and making a centimeter overlap on the adjacent wall, to paste the strip of wallpaper strictly vertically.
These were the basic requirements regarding the process of gluing wallpaper in the corners. These requirements apply to both paper and other wallpapers. The exception, perhaps, is glass wallpaper. They will have to be cut exactly along a plumb line that runs right along the corner. The whole “trick” here is that glass wallpaper is glued exclusively for painting, so the junction of two canvases in the corner after the process of painting the wallpaper will become almost invisible.
Video on the topic
Sources:
- how to glue glass wallpaper in corners in 2019
In the process of gluing wallpaper, novice repairmen often have doubts about the strength of the glue used. At this moment, first of all, they remember about PVA glue. But how justified is its use?
Vinyl and silicone tablecloths
Vinyl is a practical, easy to use and care for modern material that has an attractive appearance. Any dirt can be removed in a matter of seconds with a damp cloth or sponge. Today they produce models that imitate fabric and look very elegant.
Vinyl practically does not wrinkle, but if severe dents, creases and folds form, you can use an iron. Iron a vinyl tablecloth using a warm iron through a damp cloth. Do not put pressure on the material or stay in one area for too long.
Silicone is used to protect the table from scratches and dirt. Silicone products are a film that is laid directly on furniture or on kitchen napkins, lace or fabric tablecloth. Silicone is characterized by easy use and care, practicality and resistance to various factors, durability and elasticity.
The silicone tablecloth does not slip or slide, does not rustle or slide. It does not wrinkle and lies flat on the table. You just need to carefully place the film on top of the table and smooth it out with your hands. If you want to stick the tablecloth on a glossy, glass, lacquered or other table as a protective film, mix water with two drops of dishwashing detergent.
Add the resulting product to a spray bottle and spray on the tablecloth and table. Place the film on the surface and level it, smooth the material with a cloth to remove water. After three to four weeks, trim the material according to the parameters of the table.
Tablecloth made of polyester and PVC
Polyester is the most common and affordable material for kitchen tablecloths. It is easy and quick to wash, does not fade and has a low price, but does not wrinkle much. They make completely polyester products and polyester tablecloths based on cotton.
Both options cannot be boiled and it is not recommended to iron even with minimal heat from an iron or hair dryer. Such materials melt under the influence of high temperatures, so it is better to use smoothing methods without the use of these devices. Use weights or heavy objects.
Polyvinyl chloride is the second most popular material due to its practicality and durability. If creases or unevenness occur on a PVC tablecloth, carefully iron it with minimal heat using light and smooth movements. Iron only through a damp cloth! For thin material it is convenient to use a hair dryer.
Products made of polyester and PVC do not like washing and are considered disposable. The material should be periodically wiped with a damp sponge or cloth, and then wiped dry. Then the tablecloth will last a long time. But when it loses its attractive appearance, it is better to replace the product with a new one rather than resort to washing.
In exceptional cases, you can wash oilcloth, but only by hand and at a temperature not exceeding 40 degrees. These tablecloths are ideal for garden furniture on the terrace, in the bathhouse or in the country house.
DIY apron for the kitchen.
Good day, dear visitors of the site rems-info.ru.
I want to tell you about a solution to a problem that almost everyone who moved into a new apartment with finishing from the developer has encountered. As a rule, in a modern new building, a protective wall apron in the working kitchen area (which protects walls and wallpaper from splashes of water, grease, etc.) is simply not provided. And if you are not going to make a new renovation in the near future and have already spent a lot on purchasing kitchen furniture, then I will tell you a simple, and most importantly inexpensive option for decorating a kitchen apron with your own hands, which will allow you to forget about this problem for a year or two. To do this you will need:
- Kitchen oilcloth. The one that is usually used to cover the table. We choose medium thickness, any color and shade or colorless - it’s just a matter of your taste. The standard width is 140 cm. The length depends on the size of the kitchen and the width of the desired apron. Prices for this product are reasonable and vary widely.
- Furniture stapler with staples. I already had a stapler, but it is better to purchase staples with a greater depth, for example 12-14 mm. The price for boxes of 1000 pieces is around 100-200 rubles.
- Scissors, stationery knife, measuring tape and other available tools.
- A little imagination.
So, let’s move on to decorating an apron in the kitchen from oilcloth with our own hands.
These were the usual nondescript walls in our kitchen.
We went to the store to get the necessary materials. The choice of oilcloths is huge.
Prices are approximately in this range.
I opted for a bright, kitchen-themed oilcloth.
It all depends on the color of the wallpaper and kitchen furniture. You can lay the same oilcloth on the table, then you will have two bright, well-combined accents.
In the same store we buy furniture staplers and staples.
We bring all this home and move on to the main lesson. You need to carefully measure the length and width of the piece of oilcloth you need. Keep in mind that you need to run along the wall behind the worktop in order to protect our wallpaper there too. Since oilcloth is a very easy-to-work material, you can easily measure the length, cut out sockets, switches and other elements. If the work area is corner, then simply wrap the oilcloth on another wall.
After we have measured and cut out the necessary sections, we begin to attach them to the wall with a furniture stapler.
This is quite difficult, since the walls are not made of wood, but of brick or concrete. It is better to use brute male power. We apply the oilcloth evenly, if you have cabinets hanging, then directly under them, but if the wall is not loaded with anything, then simply along an even line (you can even mark it with a pencil).
We continue in the same spirit with an interval of 10 - 15 centimeters.
When you have secured the oilcloth along the entire length of the working area, secure the joints and edges of the sections in the same way. Cut holes for sockets, switches and other elements that cannot be secured from above.
If you plan to have any shelves, holders, dryers, etc. in your work area, then we attach it all to our finished apron. Again, due to the fact that this is oilcloth, there will be no problems with drilling and screwing in screws.
In this photo you can clearly see how the socket is cut out, and the holders for all sorts of kitchen little things are already attached to the apron.
I advise you to make the protective apron higher above the kitchen stove, since in this area the walls get dirty the most - droplets of fat fly from a heated frying pan, steam from a boiling kettle settles.
This is how we quickly and cheaply made a kitchen apron with our own hands, giving it a bright accent in our kitchen in soothing colors.
As you can see, nothing complicated! A little time, a little expense, a little imagination and such a small but important problem has been solved. I hope your apron will serve you until major renovations! Good luck!
Scope of application of Bustilat glue
It is easier to clarify where Bustilat cannot be used, since the characteristics of the composition are suitable for performing a large number of installation works.
Gluing heavy wallpaper, floor coverings, carpets.
For installation of borders, baseboards, tiles, linoleum that does not have a base.
Working with tiles, slopes, decorative panels.
In order to connect different types of materials: polymers, PVC, film, leather, leatherette, suede.
This is just a small list of possible uses of the product. Due to its high adhesion, glue is often used for finishing floors, walls and other surfaces.
Instructions for using glue
Before carrying out work, it is necessary to ensure good ventilation of the room by opening the doors and windows.
To prepare the surface for gluing, it must be cleaned of dust and dirt. If the base is porous, it is recommended to pre-prime it with a special solution.
Works with linoleum
- To glue linoleum or carpet, a thin layer of adhesive is applied to the floor with a spatula, and the prepared coating is laid on top of it.
- Next, you need to carefully press it to the base and leave it for 72 hours to dry completely.
- The glue consumption in this case will be about 500-700 grams per square meter.
To speed up the drying of the glue when gluing linoleum or tiles, you can add cement mortar in a ratio of 1 to 1. Prepare the solution from 1 part cement and 3 parts sand.
Working with tiles
- When using adhesive to decorate walls with tiles, you need to apply a layer of 1-3 mm of the composition on the back side of the tile.
- Next, press it firmly against the wall. Drying occurs within 72 hours, and glue consumption varies between 400-1000 grams per square.
Wallpaper
- For gluing wallpaper, Bustilat does not need to be diluted if it has not thickened. Otherwise, add 1/7 part water, but don't overdo it.
- The glue consumption will be 300-400 grams per square meter.
Bustilate and PVA - what is the difference?
Construction PVA and Bustilat are two common adhesives that differ in chemical composition and some performance characteristics.
Both compositions glue the same materials and surfaces, and their advantages include low cost, but there is a slight difference between them:
- Bustilat glue is stored longer than PVA (12 and 6 months, respectively);
- PVA is more environmentally friendly, so it is not prohibited to use it when renovating children's institutions;
- In terms of adhesion, Bustilat is slightly superior to PVA.
As you can see, the differences between the two adhesive compositions are insignificant, so you can choose any of them for repair work.
Are there any analogues?
Bustilat glue has almost no analogues, considering the price-quality ratio, but there are improved varieties of adhesive composition.
Different types differ in such parameters as:
- thermal resistance;
- frost resistance;
- immunity to moisture.
Let's look at the main varieties:
Bustilat-M
An adhesive with frost-resistant characteristics, suitable for gluing finishing tiles, carpets made of synthetic materials, heavy wallpaper and linoleum, and it is also often used for priming internal and external walls of buildings.
Bustilat-N
This adhesive composition is used for gluing tiles, heavy wallpaper, borders and linoleum without a base. The material has high waterproofing properties. To obtain the desired viscosity, Bustilat-N must be distributed with water according to the instructions before use.
Bustilat-D-Super
This type of glue is characterized by improved adhesion, minimal toxicity and non-flammability. It is considered the best option for gluing linoleum or wallpaper.
Bustilat-Lux
It is designed for gluing finishing and building materials based on polymers, PVC film, various types of wallpaper and linoleum. Bustilat-Lux is often used in construction areas, but it is also used by carpenters and joiners.
How to remove old Bustilat from walls?
When it is necessary to remove wallpaper glued to Bustilat and remove residual glue, you need to prepare. Let us immediately note that trying to soak frozen Bustilat is pointless - even hot water cannot soak it.
The only possible and effective method is mechanical removal of wallpaper and glue.
You can use a metal scraper or a sharp spatula.
The glue is removed well with a grinder with a metal brush attachment, but this work is very dusty, so you need a respirator.
There is another trick you can use to remove Bustilate: wet a rag and apply it to the surface, then iron or heat it with a hairdryer. The glue will soften and you can peel it off with a spatula. The work is not fast, but not dusty.
May 3, 2020 Specialization: philological education. 20 years of experience as a builder. Of these, for the last 15 years he led a team as a foreman. I know everything about construction - from design and zero cycle to interior design. Hobbies: Vocals, psychology, quail breeding.
Greetings, my dear readers.
When renovating a kitchen with your own hands, you can greatly simplify the task for yourself if you choose oilcloth for finishing the work area. This practical coating is an inexpensive material, the price is 150–200 rubles per linear meter. Manufacturers produce oilcloth with a wide variety of designs and patterns, so you can choose a coating to suit any style of kitchen.
Other gluing methods
You can glue greenhouse polyethylene in other ways.
- The use of xylene and trichlorethylene heated to a temperature of seventy degrees, as well as through acetic acid heated to thirty degrees with a concentration of 80%.
- The use of certain types of glue. The best option is to use BF-two or BF-4 glue. The bonded surfaces must be pre-treated with a solution of chromic anhydride with a concentration of 25%.
- It is advisable to glue the polyamide film using PK-5 glue, and the resulting joint should be ironed with an iron heated to fifty degrees.
- Using a special super glue designed for gluing polyethylene materials. Such adhesives appeared on the Russian market relatively recently, but many gardeners and gardeners have already appreciated the ease of use. The glue is completely odorless, and the strength of the resulting connection is quite sufficient for using such material as a covering for greenhouse structures.
Russian manufacturers produce several special devices that allow you to weld polyethylene at home. The most inexpensive and high-quality device for such work is the PP-40 series device. In terms of external indicators, such equipment resembles a traditional soldering iron with a slightly modernized tip.
Features of use
The packaging must be removed very carefully. The use of any sharp objects, especially scissors and knives, is prohibited.
In order to get the product you need:
Carefully grasp the edge of the tape. Pull it towards you. Remove the remaining film. Clean the tablecloth from dust.
Laying the material
Flexible glass is installed on a stone, metal or wooden surface as follows:
- Place the film on the table.
- Moving towards the edges from the center, press down. This will help avoid air bubbles.
- Wipe the table covered with liquid glass with a damp cloth.
The film is laid on a tabletop made of glass as follows:
- Clean the surface from dirt.
- Place a tablecloth on the table.
- In places where bubbles collect, spray with water from a spray bottle. Against the background of additional moisture, the tablecloth quickly sticks to the tabletop.