How to level the ceiling in an apartment or house with putty?
If you need to level the ceiling, first you need to determine the difference in height, that is, its curvature. To do this, use a hydraulic level and measure the height at all four corners. The minimum height is the final point at which the ceiling will need to be leveled. The best option is if the difference is insignificant, that is, small, up to 1 cm. In this case, you will be able to level it using starting and finishing putty.
Instructions:
- First, the old coating is removed and the whitewash is completely washed off. All dents and depressions are sealed with plaster. Next, a primer is applied, which, after complete drying, is covered with a thick layer of starting putty.
- Next, you need to let it dry for 2 days. After this, a new layer of primer and the finishing layer are applied again. Do not try to remove the material very carefully, because it is useless. This can be done in the next stages of leveling.
- After the finishing putty has dried, it must be covered with the thinnest layer of finely dispersed putty, which is applied in a layer of up to half a millimeter.
- After this, the ceiling is polished using special polymer mesh and sandpaper, and the ceiling is leveled. Sanding is carried out, after which any remaining dust is removed. The surface is primed and you can begin further finishing manipulations - painting, whitewashing.
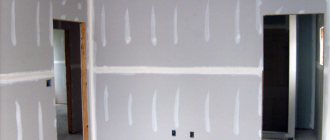
Leveling with putty
How to install beacons?
In order to correctly install the beacons on the ceiling surface, you need to follow all the steps provided in the instructions:
- To begin with, the room is completely leveled. The corresponding marks are fixed on the side walls. Using a painting cord, determine the lowest point of the ceiling.
- The first beacon should be fixed at this point.
- Then, markings are carried out along the entire perimeter using plaster. The marking pitch should be three hundred millimeters.
- Beacons must be fixed so that their height is no more than five centimeters.
- In order to arrange everything evenly, a building level is used.
How to level a crooked ceiling in an apartment or house with a grid?
The task becomes more complicated if the difference between the corners is 2 cm. In this case, you will have to purchase a special mesh, which is made of nylon fibers.
Instructions:
- At the initial stage, it is also necessary to remove the old coating, seal cracks with plaster, and apply a layer of primer.
- After this, bustilate or PVA glue is applied to the mesh and it is glued over the entire surface of the ceiling, its entire area. Next, a layer of putty is applied directly to this mesh, as in the previous case with leveling with putty.
- If the mesh is not secured and a very thick layer of putty is applied, then after drying it will simply fall off. This mesh is a kind of fastening material that glues the ceiling to the putty.
Ceiling leveling
Preparing the ceiling - let's make it absolutely clean!
If the ceiling surface in your home has been painted, puttyed, or pasted many times, it should be restored to its original form. Without this, the alignment procedure is impossible. You have to wash off all the old layers of paint, remove the remnants of materials that were previously used to decorate the ceiling.
Plastered surfaces are treated with a sharp spatula, having previously soaked the old finishing coating with water. Impregnation can be easily done using a spray bottle or a regular sponge. Be prepared to have to sharpen the spatula several times when cleaning old plaster. Experts advise choosing a tool with a long handle. It will be much more convenient for you to work with it.
Water-based paint can be removed from the ceiling much easier if you dilute a bottle of iodine in 7–9 liters of water and generously moisten the surface to be cleaned with this mixture. But it is recommended to apply special removers to old water-dispersion paints (they are easy to buy at any store that sells construction products). They are applied to the ceiling using a roller, left for 20–30 minutes, and then the softened coating is removed with a spatula using a minimum of effort.
Removing water-based paint from the ceiling
Be sure to remove old plaster in areas where the ceiling slabs touch.
There is no need to completely knock out the seams; it is enough to get rid of those remnants of material that can be chipped off without serious difficulty with a hammer, a small construction pick and a spatula.
In addition to removing old coatings, preparing the ceiling in an apartment (in a private house) for leveling requires taking measures aimed at ridding the surface of various fungi and mold. They usually appear in rooms with high humidity. Unremoved fungus will very soon “decorate” your new ceiling covering if you do not get rid of it.
After thoroughly cleaning the ceiling, it is advisable to apply a primer to it. It will significantly increase the level of adhesion between putty and concrete floors. Hard-to-reach surface areas are usually treated with a paint brush, and flat areas with a roller.
How to level a ceiling with a rotating band?
If the level at the corners of the walls differs by 3 cm, then the option with a mesh will not work.
Instructions:
- It is necessary to use a special reinforcing structure, which is screwed to the ceiling using self-tapping screws. The mesh can be metal with small cells, or nylon. It is attached in the same way at the very first stage.
- After this, rotband plaster from the Knauf company is applied. This is a special gypsum mixture that allows you to eliminate even decent unevenness.
- It is applied in a thick layer of 2 cm, and then leveled using starting and finishing putty. Please note that each layer must be treated with a primer for good adhesion and adhesion of one layer to another. How to apply putty, see the first example.
Rotband
How to level a plasterboard ceiling with your own hands?
If the difference in the corners of the walls is significantly more than 5 cm, the only option here is to install a suspended ceiling. It may not be suspended; plasterboard ceilings are often installed.
Instructions:
- To do this, the surface is treated, dirt is removed and irregularities and dents are repaired.
- They are coated with a primer, after which the sheathing is installed, which consists of metal profiles.
- In this way, a kind of frame is made, sheets of plasterboard are attached directly to this frame, which is then covered with a thin layer of finishing putty, and after that further processing can be carried out.
- This option is suitable if you are not a fan of suspended ceilings, but want to glue tiles or wallpaper to the ceiling.
- In this case, drywall will help you level the ceiling without buying a huge amount of putty, without making the structure heavier, and also save time and money.
- In addition, the plasterboard construction allows you to create multi-level ceilings using interesting, unusual decor.
- Very often, backlighting is installed; tension surfaces can be made with photo printing.
- Nowadays the combination of plasterboard and suspended ceilings is very popular.
Lathing for drywall
Flat stretch ceiling: advantages
Please note that there is a huge selection of both glossy and matte films. You can choose a design that interests you on the Internet and bring it to life on the ceiling. This is an excellent opportunity for parents of small children who want to make the nursery quite interesting and unusual. At the same time, installation of suspended ceilings takes a minimum of time. This is especially true if there are already special grooves that are installed around the perimeter of the entire room. The craftsmen can do the work itself in just a few hours. That is, without dust, without dirt and endless cleaning of floors, you will get a completely flat ceiling.
Using stretch films, you can create the illusion of a perfectly flat, white whitewashed ceiling. At the same time using a white matte film. The advantages of such ceilings are that they do not deteriorate when water flows onto them; it will be enough to drain the water through the hole for the chandelier and re-stretch the film using a gas burner. In this case, the surface is completely restored and does not deteriorate. In fact, stretch ceilings are not as expensive as it seems at first glance. If you compare it with the amount of putty spent on leveling a crooked ceiling, then the use of suspended ceilings allows you to save significantly.
Stretch ceiling
As you can see, it makes sense to level the ceiling on your own if the curvature is small, up to one centimeter. You can use a small amount of putty and level the ceiling on your own. Otherwise, if there are significant differences in height, we advise you to contact specialists and get a stretch or suspended ceiling.
Methods for leveling the ceiling
There are several ways to make the ceiling perfectly flat, which can be combined into two groups - “wet” and “dry” finishing. The photos presented in the article will help you understand more specifically how to level the ceiling.
The first finishing option involves the use of dry building mixtures, which are diluted with water before use. A dry ceiling can be leveled using plasterboard, plastic panels or so-called stretch ceilings. The choice of how to level the ceiling with your own hands directly depends on the presence of communications under the ceiling and the degree of difference in ceiling height.
So, if communications are laid under the ceiling, then a “dry” finishing method is used using a system of suspended ceilings. The best way to dry level a ceiling depends on the preferences and financial capabilities of the owner.
In the absence of communications, the choice of technology is determined based on the degree of ceiling drop. So, if the height difference exceeds 5 cm, then the “dry” finishing method is more rational. If the difference is less than 5 cm, then you can level the crooked ceiling using both “dry” and “wet” methods using plaster and putty.
If the difference is less than 2 cm, the ceiling is simply covered with two types of putty, and if the difference is from 2 to 5 cm, then the “raw” method in this case involves additional strengthening of the ceiling surface with a reinforcing mesh.

