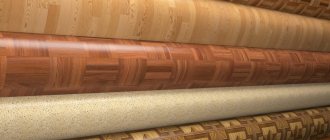
Currently, when renovating an apartment, much attention is paid to the unheated part of it, and more specifically to the loggia and balcony. Designers come up with a lot of things: they heat floors and walls with a “warm floor” system, cover them with panels, tiles, etc.
Before laying the stone, it is necessary to prepare the room: we glaze and insulate the loggia (balcony), completely finish the ceiling and floor.
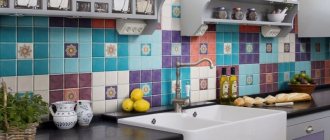
Recently, the use of artificial stone as an element of wall decoration on a balcony or loggia has become especially important.
Modern methods of painting brick walls
Today, the finishing of a brick balcony is divided into two categories:
- decoration using natural bricks;
- leveling with plaster mixture followed by painting.
The first category of finishing is used only when there are no multiple defects and splinters on the surface. The second method is most relevant for excessive damage that spoils the entire appearance of the wall.
How to paint a brick balcony as a decoration element? Before you begin the work process, it is recommended to follow several steps that will help the paint not crumble from the wall surface:
- stripping;
- alignment of seams between stones;
- priming the wall surface.
First of all, professionals recommend removing the remaining old paint and dust from the wall. If you neglect this requirement, then soon the new paint will begin to crumble, since there will be no tight adhesion to the wall surface.
Finishing a brick balcony requires special efforts that guarantee the desired result. The seams between the brick elements are cleaned with a stiff brush.
After which, the void between the stones is filled with a mixture of mortar using a special spatula. During the filling process, it is important not to stain the brick.
Once the seams have dried, you can proceed to the priming process. Every centimeter of a brick balcony must be carefully primed. After the primer has completely dried, you can proceed to painting the wall.
Advantages of interior finishing of a balcony with decorative stone
One of the most popular types of decorative stone is brick-style tiles.
In most cases, it is lighter than natural stone and adheres well to ordinary tile adhesive. Most artificial tiles are made of gypsum. As you know, this material is famous for its environmental friendliness, ease of processing, and warmth. Gypsum stone is malleable, but at the same time quite durable. It is an excellent sound and heat insulator due to its porous structure. Artificial stone is one of the options for modified gypsum. Accordingly, it has all the qualities of gypsum (light, breathable, warm). The advantages of internal cladding of balconies and loggias with decorative tiles include high impact resistance, excellent wear resistance, fire safety and moisture resistance.
Before laying the stone, it is necessary to prepare the room: we glaze and insulate the loggia (balcony), completely finish the ceiling and floor. Then just start working on the walls: level and coat with primer. After this, you can decorate the walls of the balcony with artificial stone.
What types of invoices are there?
The material imitates different types of natural materials. The big advantage of this is that by combining different textures, you can get an original finishing design.
READ MORE: We cover the balcony with plastic panels
Main types of surfaces:
- brickwork;
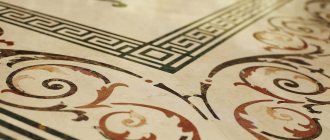
- granite, marble;
- rubble stone, such as pebbles or boulders;
- sandstone, limestone;
- polished and sawn stone.
The list can go on for a long time - artificial stone is made by man, so the surface design is limited only by imagination.
The process of internal cladding with artificial stone
If you plan to lay heavy natural stone, then it is best to reinforce the wall with a metal mesh, while for “lightweight” imitations of brick and stone this measure can be neglected. Source: vopros-remont.ru
- Initially, we need to make sure that the inner surface where we will glue the decorative stone has a solid base and is suitable for additional load.
- Before you start work, lay out a pattern of artificial stone on the floor. This way you can distribute it by size and color, adjust it if necessary and avoid mistakes.
- Be sure to remember that laying artificial tiles always starts from the corner of the loggia/balcony.
- Apply adhesive (liquid nails) with a spatula evenly to the inside of the stone tiles. Also apply a small amount of glue to the wall of the balcony/loggia. Glue the stone to the wall by pressing lightly on it. Thus, we glue the entire tile without violating the technology. We wait until the glue is completely dry.
- To ensure that the joints between the stones are airtight, we rub them with a special grout.
If your balcony is not glazed, then be sure to treat the decorated surface with a hydrophobic (water-repellent) solution.
Typical mistakes when laying artificial tiles:
- Very wide seam.
- Poorly executed surface priming: after some time the stone will fall off. After priming the wall with a regular primer, it is advisable to prime the surface with concrete contact. This will create a rough film on absolutely any surface. As a result, the glued artificial stone will not fall off.
- Chips of artificial stone when adjusting it.
- Chaotic laying: to prevent this mistake, it was recommended to lay out the pattern on the floor.
By decorating your balcony with artificial stone, you can independently transform the “junk room” into a beautiful and cozy place. Just follow these guidelines.
Necessary tools and material for laying artificial stone
So, you will need:
You will need: A hacksaw, a miter box with fairly high sides, Spatulas, Putty, Paint, Varnish, Kitchen sponges, Brushes, Chisel, sandpaper, file, Tile adhesive, Level, Simple pencil, Drill with attachment or construction mixer
- Wood saw (when working with artificial tiles there is no need to use a grinder).
- A miter box with fairly high sides (a device for cutting decorative gypsum polymer tiles at an angle of 90 and 45 degrees).
- Spatulas (necessary for applying glue). For convenience, you can have spatulas of different sizes in your arsenal (small, medium, large).
- Putty (needed to cover the seams after laying the stone).
- Paint (the manufacturer should provide paint that matches the tone of the gypsum stone, which you can use to cover the stone in case of chipping or to cover the seams between the stones).
- Varnish (preferably water-based). After you have finished cladding the balcony with artificial stone, covered up the flaws with paint from the manufacturer and let it dry, apply varnish in the area of the chips and seams.
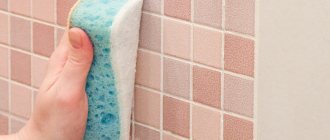
- Kitchen sponges (ideal for putting putty on joints).
- Tassels. It is better to purchase 2 pieces: one will be used for applying paint, and the other for varnish.
- Chisel, sandpaper, file. With these tools you can adjust the tiles to size. This will make the work much easier.
- Tile adhesive (specify that the consumption is 3-7 m). You can also use liquid nails.
- Level (be sure to check that the masonry does not deviate from the level).
- A simple pencil.
- Drill with attachment or construction mixer. (for putty).
How to lay tiles on a balcony with your own hands
There are two main ways to install tile flooring:
- Directly onto the concrete floor;
- On a sub-base or refinished plank floor.
The first option is considered the fastest, most durable and least labor-intensive to work with. The only inconvenience is that you have to put up with the uneven surface of the concrete slab.
For your information! On all open balcony floors without exception, the concrete slab always has a slope of several degrees to ensure the drainage of rain and melt water. Sometimes the slope occurs in several directions at once, it all depends on the quality and condition of the console.
The second option is simpler, but more labor-intensive. Tiling a balcony will require laying a plywood or plasterboard base, which leads to an increase in the height of the floor level and additional financial costs.
How to lay tiles on a wooden floor on a balcony
If you decide to lay the cladding without dismantling the old plank base, then the wooden floor must be properly cleaned, freed from old paint, and sanded to “white” wood. In addition, at the stage of trimming and stripping the floorboards, it is necessary to check the horizontal position of the wooden base, otherwise the tiles on the balcony will lie at a slope.
The wooden floor is sealed with plywood or plasterboard
The wooden floor will need to be treated with a protective impregnation that protects the wood from rotting, painted and a waterproofing film applied. There must be vents under the floor to ensure normal pressure of water vapor and condensate, otherwise the wood will rot.
The next step is laying plasterboard sheets; moisture-resistant plasterboard with a thickness of at least 18 mm is used for lining. The joints between the sheets are sealed with silicone, and the seams around the perimeter are sealed with polyurethane foam. The material itself is laid on a wooden base without screws.
Ceramic tiles on the balcony floor must be laid using acrylic glue. But it is best to use silicone-based elastic compounds. The same material, but of the appropriate color, matched to the tone of the floor covering, is used to grout the joints.
Laying tiles on a concrete floor
First of all, the stove on the balcony must be thoroughly cleaned of debris, dust, washed and dried. Next, we apply an acrylic primer to the surface of the concrete floor, which improves the adhesion of the tile adhesive and tiles.
Marking for sticker
The process of gluing tile material to concrete begins with measuring the floor surface. You can use a laser level or string several paint cords aligned with the horizon. It is necessary to find the highest point on the surface of the concrete floor. It is from this point, or almost from it, that you will need to start laying tiles or porcelain tiles.
The highest point of the surface is usually located under the wall near the balcony door
After the highest point has been found, we move the laser beam or cords from it 17-20 mm higher. To reliably glue ceramic tiles at the highest point of a concrete floor, you will need at least 5-8 mm of tile adhesive plus 10-12 mm of the thickness of the ceramic itself, so you get the desired value of 17-20 mm.
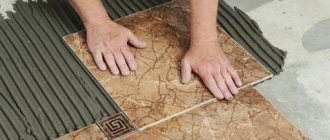
We glue the tile material to the floor on the balcony
We begin laying the tiles from the far row, right under the fence. The top point, as a rule, is located under the wall of the house, so we place the first tile on the floor in the corner opposite, photo.
Since the floor was not leveled, the layer of glue turns out to be quite large
For installation, you will need to apply a fairly large amount of glue, the layer thickness is approximately 15 mm. We leave a small gap, 4-5 mm, and lay the tiles in place, after which we level them using a building level or a laser in two mutually perpendicular directions along the horizon.
Next, you will need to lay the entire row under the balcony railing to the end. When laying tiles, do not forget to install seam crosses. At this point, work was stopped for at least two to three days until the glue completely sets. We lay out the second and third rows in a similar way on the concrete floor of the balcony using a snake or parallel strips.
Grouting joints
After the masonry mortar has completely hardened, remove the plastic inserts, clean the seams from any glue residue, blow through and prime the surface. To grout joints, you can use the same adhesive composition, but with a small addition of plasticizer to improve the elasticity of the material. The grout is applied with a regular sponge for glazed tiles; for porcelain stoneware or clinker, the joints can be rubbed with a rubber spatula. After the composition has dried, wipe the floor dry and wash with clean water.
Preparing the base
Before finishing, you need to level the walls of the balcony. There can be three options:
- The walls of the balcony are smooth with minor defects. You can leave it as is or carry out spot repairs - this will not affect the quality of installation.
- There are medium-sized defects - differences within 1-2 cm, cracks. In this case, it is advisable to level the walls of the loggia with plaster. It is applied to the reinforcing mesh.
- Strong changes, the walls on the balcony are littered. Moisture-resistant drywall will help here. Moreover, you can put insulation under it. But finishing the loggia with artificial stone requires strengthening the wall. Therefore, the distance between the axes of CD profiles is made not 600 mm, but 400 mm. After installation, the slabs must be coated with antifungal impregnation and primer.
READ MORE: Installation of a block house on the balcony
The wall needs to be plastered along the lines; the finished surface is treated with impregnation and primer.