To lay the final flooring, a floor screed is carried out, which can be wet or dry.
Dry screed consists of gypsum fiber boards (GVL) with a waterproofing layer, waterproof plywood or chipboard, which are laid on a dry backfill (expanded clay) or insulation (polystyrene). Using a dry screed, any unevenness in the subfloor is leveled and a perfectly flat surface is prepared for laying the flooring.
Floors constructed using this technology provide maximum comfort and convenience. Thanks to their characteristics, they provide a feeling of coolness in summer and warmth in winter.
Dry floor screed is used for:
- short deadlines for repairs;
- reconstruction of old buildings or structures with wooden floors;
- low temperatures;
- arrangement of floors in multi-storey and office buildings, cottage-type houses;
- installation of electric heated floors in buildings with wooden floors.
Advantages and disadvantages of dry floor screed
Dry screed has undoubted advantages that have ensured its widespread use:
- excellent heat and sound insulation;
- low fire hazard;
- hypoallergenic;
- very short installation time;
- absence of “wet” stages of work;
- ability to withstand high operating loads (distributed - up to 1000 kg/m2, point - up to 500 kg/m2);
- the ability to install any plasterboard partitions;
- ease of installation;
- a light weight;
- convenience of laying any communications.
For all its advantages, dry screed has the following disadvantages:
- the most important is hydrophobia , when moisture gets in, the backfill gets wet and an unpleasant smell of mold appears, gypsum fiber board, chipboard or plywood begin to deteriorate, which leads to deformation of the floors; to eliminate the consequences of moisture ingress, the floors have to be opened to dry or completely replace the dry screed;
- relatively high cost compared to other types of screed;
- dusty, when laying the backfill you have to work with gas masks.
Application area
Dry floor screed is good in cases where you need to quickly and inexpensively level the floor. But the technology is not very good in the sense that the foundation still sags. Even if you carefully follow all the recommendations. If the base does not have large differences and the backfill is laid without voids, the deflections will be invisible.
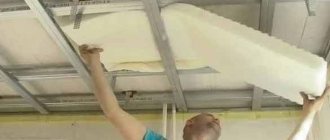
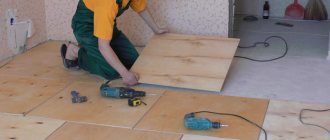
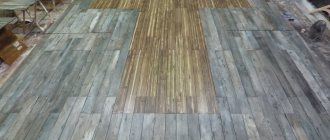
Do-it-yourself dry screed: in the process of work
In addition, there are restrictions:
- The minimum backfill thickness is 4 cm. A smaller layer is unacceptable.
- The permissible difference in the base is 5 cm. Anything larger must be sealed/cramped/filled before starting work.
There is one more point: if the thickness of the backfill is more than 6-7 cm, it is recommended to lay another layer of gypsum fiber board 10 mm thick on top of the superfloor sheets (20 mm thick). The resulting thickness of the sheet material is 30 mm.
The technology of dry floor screed has its own characteristics that determine its successful use in certain cases; its main areas of use are:
- If a screed layer thickness of more than 50 mm is required, theoretically the dry floor can be raised to a height of up to 200 mm. In this case, multilayer installation is used, laying intermediate sheets every 50 mm of backfill.
- Due to the low thermal conductivity of expanded clay, which is a backfill material, dry technology is advantageous to use for leveling floors in unheated attics of private houses. Expanded clay is often poured under the roofs of a brick, block or wooden house for insulation during construction, but if you add a fine fraction and put sheets on top of it that fit tightly to the walls, you get additional room in the house, which can be used as a workshop or for other economic purposes .
- Dry screed can be effectively carried out if wooden logs with expanded clay insulation, located in violation of the horizontal level, are used as support for laying the floor on the lower floors of houses. When carrying out leveling work, fine expanded clay is added on top, which is an additional insulation material, and then subfloor slabs are laid on it.
We suggest you familiarize yourself with How to install beacons on a wall for plaster without a laser level
Floors on which it is better to make a dry screed
- The installation of dry screed is rational in private houses or apartments with combined water heating of premises containing radiators and heated floors. When distributing the water circuits of heated floors and radiators, a manifold is installed on the floor, from which the underfloor heating pipeline flows along the floor slab into the heated room and is subsequently filled with cement-sand screed. If radiators are used, then the pipes are often run along the floor, leading to the radiators from below - such a connection is invisible, looks much more aesthetically pleasing than wiring along the walls, and is currently a newfangled trend. Even if the owners decided to save on screed and ran a pipeline to the radiators along the walls along their surface or in grooves, on the floor they would have to look for a way out of the situation with the difference in levels of rooms with heated floors and radiators. As a result, we have to solve the problem of which method is best to raise the level of all floors on the floor in rooms with radiator heating and corridors. Even an amateur understands that using cement mortar for these purposes due to high labor costs, high consumption of materials and increased load on the floors is the wrong solution, and dry screed is an excellent alternative option.
- Sometimes loose floors are made in apartments and private houses in situations where utility lines are laid along the floors, which most often are electrical power cables and heating pipes. With this option, this solution kills several “birds with one stone” - it saves significant money, time and labor costs on chiselling walls, levels the floors and makes them warmer, which is especially important on the first floors.
To summarize the above, it should be noted that the use of dry screed is effective in cases where it is necessary to level floors with communications located on them (water pipes, large-section electrical network cables) throughout the entire apartment or on the floor of an individual house, as well as in situations where It is necessary to ensure high thermal insulation of the floor.
Expanded clay
Materials and tools for work
The process of arranging a dry screed is not very difficult and can be performed by anyone with minimal construction training. To perform a dry floor screed, the following materials and tools are required:
- dry backfill (expanded clay, fine-grained blast furnace slag, expanded vermiculite or expanded perlite sand) or slabs of extruded polystyrene foam (for a perfectly flat surface of the floor base);
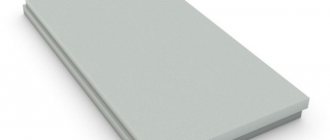
- tile covering (gypsum fiber board, chipboard or plywood);
- vapor barrier film;
- edge tape;
- self-tapping screws;
- PVA glue;
- metal U-profiles;
- jigsaw;
- screwdriver;
- laser or water level;
- roulette;
- ruler;
- pencil.
What is a dry screed, its features
What dry floor screed is has been known since ancient times, perhaps before the advent of cement; the method is not a technological leap in the construction industry, which constantly occurs with the advent of new materials and methods of carrying out work. It is based on a simple physical law - a fine-grained granular mixture in a confined space, having no way out, will always maintain its original shape.
- Bulk fine-grained materials with a granule diameter of about 5 mm always use expanded clay, which has no worthy competitors.
- Rigid sheet coverings are often used in types that contain gypsum binder - its surface has good adhesion to cement adhesive mortars on which ceramic floor tiles are laid.
- A vapor barrier, the main task of which is to protect the granular mixture from being saturated with moisture contained in the concrete subfloor; for these purposes, it is enough to use cheap polyethylene film.
- The edge tape, which is laid along the perimeter of the dry screed, is often used as a damper strip, the main purpose of which is to avoid the negative consequences of floor deformation due to thermal expansion. When heated, only screeds with cement increase in size by an insignificant amount (0.5 mm per linear meter), there is no destructive expansion of expanded clay and gypsum sheets, and the purpose of the damper is to seal gaps between the floor and the wall, prevent contact between them, and protect against dust ,
Dry screed diagram
Do-it-yourself dry screed installation technology
The quality of future floors and their service life largely depend on how the dry screed was carried out. It must be remembered that before starting work on arranging a dry screed, the installation of all communications must be completed.
The process of installing a dry screed with your own hands includes the mandatory sequential implementation of the following work:
- preparation of the floor base;
- floor waterproofing;
- laying edge tape;
- installation of beacons;
- arrangement of the substrate;
- laying sheet material.
Preparing the subfloor. It consists of removing the old floor covering (during reconstruction or restoration) and sealing with cement mortar all existing cracks, cracks and potholes, especially in areas adjacent to load-bearing walls and joints between floor slabs. All debris must be carefully removed from the floors
In order to avoid the appearance of floor squeaks in the future in houses with wooden flooring made of solid boards or parquet, the latter are strengthened with the help of self-tapping screws or nails.
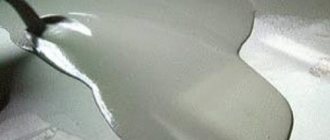
Waterproofing. It is carried out to prevent the penetration of moisture from the lower floors or basement. To do this, a polyethylene film with a thickness of at least 200 microns is spread on the concrete base. Instead of film, you can use bitumen-impregnated paper or any other moisture-proofing materials.
The film is laid in strips overlapping each other by 15 -20 cm and overlapping the walls by 7 - 10 cm or slightly higher, so that the edges of the film are slightly above the level of the dry backfill. To increase the effectiveness of the waterproofing layer, the joints between the film strips are taped together in the same way as the edges of the film are taped to the wall. Instead of adhesive tape, bitumen mastic can be used.
In old houses, wooden floors or wooden floors are covered with bitumen-impregnated paper to prevent spillage of fine-grained backfill materials.
Laying edge tape. This is done to improve sound insulation characteristics and protect the finished floor from deformation due to thermal expansion. To do this, a 10 mm gap is left between the walls and the screed around the perimeter of the room, which is sealed with an edge tape made of foamed PVC. You can also use strips of polypropylene foam, mineral wool or other elastic materials.
Installation of beacons and dry backfill
- Beacons are needed to obtain a smooth surface of the dry screed.
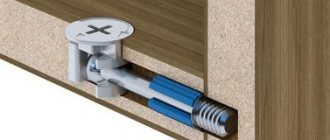
- Most often, metal U-profiles or plasterboard profiles measuring 27x60 mm are used as beacons for dry screed, which are laid on self-tapping screws screwed into the base of the floor with sharp edges upward.
- The profile is attached to the base using concrete mortar.
Arrangement of the substrate. Bulk materials with a fraction size of 1 to 5 mm are used as a substrate for dry screed They must have a density of no more than 500 kg/m2 and a humidity of no more than 1%, have high porosity and minimal hygroscopicity.
Before backfilling, a laser level is used to mark the level of the future finished floor. Level marks are applied to the walls and then connected in one line along the entire perimeter of the room.
When backfilling bulk materials, it is necessary to take into account the fact that corrugations or pipes with communications must be covered with it to a thickness of at least 2 cm, and the thickness of the backfill itself must be in the range of 3 - 12 cm (on average 5 - 8 cm). It is also necessary to take into account the height of the lower edge of the doorway so that the total thickness of the backfill, sheet covering and finished floor does not exceed it.
Dry materials are poured into the space between the guides and leveled using the rule according to beacons set taking into account the level of the future finished floor. The backfill starts from the wall opposite the doorway. After leveling the backfill, the beacons must be removed, since the shrinkage of the backfill can be up to 5%. This will cause the sheets of the finishing coating to rest on the rigid edges of the guides, rather than on the flat surface of the substrate, which will lead to deformation of the coating. If the thickness of the backfill is large, then it must be compacted using a hand tamper.
Pros and cons of dry screed
Dry floor screed is increasingly being used for leveling. This technology is a good solution for those who like to do their own repairs. In this process, it is important to divide the installation into stages. The first thing you need is waterproofing, which is polyethylene film. This is followed by backfilling with a thick layer of expanded clay for thermal insulation and leveling. Then you can lay sheets of durable material. This is what dry floor screed is all about. It is performed both on a concrete base and on joists.
To evaluate this leveling technology, it is necessary to consider the pros and cons of this process.
- No dirt. Dry screed eliminates wet processes.
- Using the surface immediately after installation. This makes dry screed very convenient. Plus it saves valuable time.
- Dry flooring can be done at any time of the year.
- Light weight structure. This is especially important for older buildings that cannot withstand additional loads.
- The presence of hydro-, sound- and thermal insulation.
- It requires little effort; one person can easily do it on his own. It is possible to dry-screed the floor with your own hands.
- Possibility of correcting the result.
- Laying all kinds of communications is carried out without any problems. These can be cables or film electric heaters.
Despite a number of advantages, dry screed also has one significant disadvantage - vulnerability due to high humidity. That is why, at the stage of creating a flat floor, you should pay attention to waterproofing; it must be of high quality. Good waterproofing eliminates this disadvantage of dry screed. Otherwise, the floor may swell.
Polyethylene film is used to waterproof dry screeds.
When choosing a dry screed, you should consider some features and nuances:
- Season;
- Timing;
- Financial opportunities;
- Features of the subfloor.
A short video on the durability and reliability of this method of floor leveling: