No renovation these days can be completed without leveling the floors. Floor screed is a repair stage that cannot be avoided if you ultimately need a high-quality result that can serve and delight you for many years.
You cannot do without a floor screed device when laying laminate, tiles, carpet, parquet boards, linoleum, etc. That is why you need to know how the methods of constructing screeds differ, which screed is best to choose, what materials are best used to make a screed in a residential area, which is what will be discussed in this article.
The most famous types of screeds
- Self-leveling floor (self-leveling screed);
- Cement-sand;
- Concrete;
- Dry;
According to professionals, using any of these screeds you can get a perfectly flat floor without any differences in height, suitable for subsequent installation of finishing floor coverings.
Self-leveling floor
Do-it-yourself leveling with mixtures
The required amount of mixture for dry screed is calculated as follows:
- calculate the planned volume by multiplying the area of the room in square meters by the required layer thickness in meters;
- the desired value is divided by 0.1 and multiplied by the mixture consumption per square meter with the screed thickness parameters of one centimeter. The value obtained as a result of calculations in kilograms is correlated with the weight of the mixture in bags.
The technological process for constructing a screed based on ready-made dry mixtures is similar to working with concrete mortar. At the initial stage, the zero level is determined and a system of beacons is placed, along which filling and leveling are carried out.
The main difference lies in the preparation of the working solution from a ready-made optimized composition. After adding the required amount of water to the mixture, according to the instructions, mix with a construction mixer or a drill attachment, followed by infusing the solution for five minutes. The finished solution must be thoroughly mixed again.
When should a floor screed be installed?
Floor leveling work should not begin until the old ceiling and wall coverings have been removed. When carrying out redevelopment in an apartment, you need to dismantle the old partitions in advance and install new ones, for example, from plasterboard. In addition, all electrical installation work must be completed. And after the electrics have been installed, the partitions have been installed, and rough finishing has been done on the ceilings and walls, you can begin installing the floor screed.
If you use a dry screed, it is worth remembering that it will take about a month to dry completely. As a rule, the degree of moisture in the screed can be determined in different ways, but usually experts recommend not starting to walk on the screed earlier than after 2 days; it is not recommended to lay the flooring earlier than after a month.
A self-leveling floor, which is poured in a thin layer to hide small differences in height, dries faster. It takes about 2 weeks for this screed to dry completely. Please note that installing a self-leveling floor requires installation of waterproofing. Self-leveling flooring, due to its small layer thickness, is perfect for leveling floors even in rooms with low ceilings.
If you plan to lay parquet in your apartment, you should additionally lay moisture-resistant plywood on the screed. In the case of other floor coverings, you can use a polyethylene foam underlay.
Concrete screed
Filling and leveling the screed
The work must be carried out at a temperature of 15 to 25 ° C. It is advisable to complete the pouring of the ceiling at one time, otherwise cracks may appear in it later. In addition, the quality of the screed is affected by the uniformity of the solution composition. It is necessary to ensure that each batch is performed in exactly the same proportions as the first. To work you will need the following tools:
Floor leveling tools.
- shovel;
- rule;
- Master OK;
- grater;
- putty knife;
- pliers.
Pour the solution into the space between the wall and the first 2 profiles. Run the rule through the beacons. Pull the device towards you. The rule removes excess solution and forms a smooth surface. After leveling (after 20-30 minutes), the area can be rubbed with a trowel. Fill the next square to the right or left of the first. Continue moving towards the entrance, not forgetting to wipe down the leveled areas.
The screed is not ready yet.
After 2-3 days, the beacons should be removed from it, as there is a possibility of rust forming on them, which will come out over time.
To make the profile easier to remove, marks should be made on the walls when laying it. The beacons are pulled out using a scraper, which exposes the edge of the profile. Next, pliers or pliers come into play. The remaining cracks are sealed with a primer, after which it dries, they are filled with a solution. The mixture is leveled with the rest of the surface with a spatula. You should not remove the profile immediately after pouring the screed; this will have a more detrimental effect on its integrity.
After a month, the coating will be ready for laying tiles or wooden floors. The floor screed should be moistened with water for 3-5 days. In the first ten days, the solution should harden under a plastic film.
Using a combination screed
Some experts combine several methods of floor leveling to achieve the most effective and high-quality result. However, it is worth clarifying that the use of a combined screed is advisable only in cases where differences in height on an uneven base cannot be leveled with self-leveling flooring alone.
The combined screed is done as follows. First, a rough (primary) screed is installed, which usually consists of cement or concrete with a large amount of quartz sand. The thickness of the primary screed is always made large in order to hide any large unevenness in the floor.
After the rough screed has dried, it is impregnated with waterproofing compounds, for example, bitumen or rubber mastics. After which a self-leveling mixture (self-leveling floor) of small thickness is directly poured. Before you begin laying the floor covering, you must allow the concrete screed to dry completely, because in the future it is the undried screed that can cause deformation and damage to the laid decorative covering.
When laying a heated floor in an apartment, you need to remember that the heating electric cables are laid precisely on the rough screed, then covered with a layer of waterproofing, and filled with self-leveling floor on top. After the self-leveling mixture has dried, the floor is ready for laying porcelain stoneware or ceramic tiles. If carpet or parquet is chosen as the floor covering, then the screed is additionally covered with plywood sheets. Please note that you should not forget to leave small gaps when laying plywood so that the floor does not start to creak later.
Preparatory stage
A strong and durable floor screed will only work if you properly prepare the surface for laying it. No matter how much you would like to skip this stage and simply stretch the solution over the old coating, you still have to remove it to the base. After this, all screed residues, debris and dust are removed. Possible cracks in the ceiling are sealed with a solution, and the surface itself is thoroughly dried. After this, waterproofing is placed on the slab.
So, to remove the old coating and prepare the base for the new one, you will need:
Floor leveling scheme with concrete screed.
- perforator;
- shovel;
- trowel or spatula;
- broom;
- cement-sand mortar.
Before laying the waterproofing material, the surface must be treated with antifungal compounds. They are applied to the ceiling with a brush or roller. After the impregnation has dried, the floor is primed.
The floor screed is installed after it is waterproofed. Thick polyethylene film and bitumen-based roll materials can be used as a moisture-repellent membrane. Today there are also liquid mastics that can be applied to the floor in one or several layers. Polyethylene is placed on the base with an overlap on the walls. The height of the overlaps should slightly exceed the thickness of the future coating. Roofing felt is laid in the same way. The edges of adjacent sheets and film and bituminous material must overlap each other. Polyethylene joints are covered with tape, and roofing felt joints are covered with bitumen. The waterproofing material is fixed to the wall so as not to interfere with further work. Now the floor screed will be protected from moisture, which without a membrane could destroy it from below.
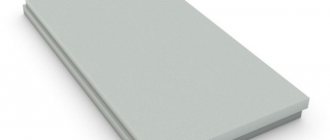
Dry screed
Dry screed is a fairly “young” method of installing a floor screed. To make such a screed, you do not need to dilute the dry mixture with water, since the dry screed is a ready-made building board, similar in composition to plasterboard, but much more durable.
Dry screed
The slabs are sold already treated with waterproofing compounds; they are laid on a bedding made of expanded polystyrene, with which the floor is leveled. Laying the slabs on the bedding is done quite rigidly; there should be no gaps between the slabs.
The big advantage of dry screed is that it can be used immediately after installation; you do not need to wait several weeks for it to dry. Other advantages include the low weight of such a screed and the ability to begin laying the coating the very next day after installing the slabs.
The disadvantages of cement and concrete screed include a rather large load on the floors, since for each sq.m. the floor presses 100-120 kg of screed. Some floors, for example wooden ones, are not always designed for such a load; in this case, a dry screed can be used.
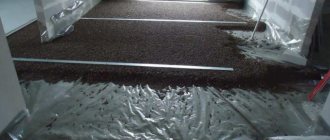
Soundproofing floor
The technology of a soundproofing floor is as follows: a soundproofing mat made of basalt wool is laid on the base and covered with plastic film on top. The film is laid in strips with an overlap of the strips of at least 10 cm, and is also placed on the walls to a height exceeding the thickness of the leveling layer. A reinforcing fiberglass mesh for the floor is laid on the polyethylene film (with an overlap of strips of at least 10 cm). In this case, the mesh is attached to the base so that it is in the middle or lower third of the thickness of the leveling layer. Next, the self-leveling mass is laid.
1 - reinforced concrete floor slab; 2 - sound-absorbing basalt slabs; 3 — separation membrane (polyethylene film); 4 — border tape; 5 - fiberglass reinforcing mesh; 6 — self-leveling floor; 7 - backing for laminate; 8 - laminate;
The thickness of the pour depends on the type of mixture: for a thin screed - 5-10 mm or 5-20 cm for a thick one. There is no need to prime the surface of the base, since soundproofing floors do not have adhesion to the base. An important point when installing floating floors is the insulation of the junctions of the screed to the walls or columns of the room, which is achieved by placing polyethylene film on the walls before installing the mesh and starting to pour the mixture. We also note that the glass fiber-reinforced self-leveling mass cannot be rolled with a needle roller, since the glass fiber with which the mixture is reinforced is wound onto the roller, unlike mixtures without reinforcement, where the use of a roller is strongly recommended.
In conclusion, I would like to show a very useful table that will allow you to quickly select the necessary mixture for organizing a floor screed, using weber.vetonit materials as an example. Every reputable manufacturer of dry mixes has similar comparative tables; do not forget to use them to avoid incidents and quickly determine the material you need for floor screed.
* The minimum thickness of the screed layer is at least 40 mm, with mandatory reinforcement with steel mesh with a cell of 40×40 mm. ** The thickness of the screed layer for weber.vetonit 5700 and 5000 is at least 30 mm, for weber.vetonit 4100 and 4150 - at least 20 mm. *** With mandatory control of substrate moisture and surface sanding before installation. **** If desired, the surface can be additionally leveled with weber.vetonit 3000 self-leveling floor.
These articles may also be of interest to you:
- How to make a floor screed correctly
- TOP 7 mistakes when leveling the floor
- Installing a water heated floor
- How to make a subfloor
How to make a leveling floor screed
First, using a laser level, marks are made on the walls indicating the “zero” level of the screed. The height of the level depends on how level the floor is in the room, usually 1.5 cm from the base is recommended.
The base is thoroughly cleaned of dirt and dust, and old floor coverings are removed from it. If there are cracks and various defects in the base, then they need to be eliminated using a special cement repair composition. Then the cleaned base is primed (for this purpose it is recommended to use primer with quartz sand, as this will increase the adhesion of the screed to the base). At the junction of the walls and the floor, it is worth sticking edge tape to protect the walls.
Next, beacons made of aluminum profiles are installed, attached to the base. The beacons should be placed exactly at the level, since they determine how level your floor will be.
After this, the self-leveling mixture is prepared in accordance with the instructions attached to it. To thoroughly mix the solution, you can use a drill with a mixer attachment. The mixture must be poured immediately after mixing, as it quickly begins to thicken and eventually loses its properties.
The solution is poured onto a previously prepared base and leveled using a toothed roller, which is necessary to remove small air bubbles from the mixture. Air remaining in the screed can further degrade the strength of the screed.
According to the site:
Material composition
Let's move on to the most interesting part - how and with what can you make a screed in an apartment? Let's consider all the solutions, describing along the way the properties of the materials and the technology for their installation.
One of the modern solutions is the use of self-leveling mixtures. They are sold in bags of 20-30 kg. They can have a cement or gypsum base - each option has its own characteristics, advantages and disadvantages.
Self-leveling floor mixture
This type of screed is used mainly in small rooms or when you need to quickly make a small layer.
The main advantage of such a floor is the speed of its construction. Depending on the type of material and layer thickness, the floor can be walked on after 2-10 hours. The coating is very durable, does not generate dust, and has high adhesion to various adhesives. The layer thickness varies from 5 mm to 5 cm.
Self-leveling solutions create a smooth plane under the influence of gravitational forces
Such a floor spreads when poured on its own, under the influence of gravity. Ideally, he takes the horizontal level himself, and the floor turns out perfectly flat, but this does not always happen, and it depends on a number of factors:
- Firstly, the base must be well-primed so that the water from the mixture does not drain away too quickly.
- Secondly, when the layer is not thick enough to provide the desired spreadability, and gravity resists the viscosity of the mixture.
- The third reason is the most common - there is simply not enough mixture for the area to be treated. To the eye, it seems that it has already filled everything, but in fact you just poured over the old floor.
To prevent this from happening, installation must be done according to beacons.
It is also worth noting the high material consumption and higher material costs when compared by coating thickness. However, the advantages listed above cover this fact.
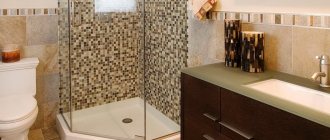
The bathroom floor is filled with self-leveling mixture
Now let's look at how such a screed is made. To work we will need the following set of tools and materials:
- The mixture itself.
- Electric kneading tool and attachment (perforator, mixer, drill).
- Several containers, the volume of each of which will be enough to dilute a whole bag.
- Tripod beacons.
- Fiberglass for reinforcement (not used by all craftsmen).
- Needle roller and spatula.
- Damper tape.
- Soil is a better concrete contact and a tool for applying it.
- Shoes with spikes for walking on already poured floors.
Table 1. Filling instructions
| Steps, photo | Description |
| Step 1 – cleaning the floor | We start with cleaning the room. First of all, use a hammer and spatula to knock off pieces of frozen putty and other debris from the surface of the concrete. We clean everything with a broom. Next, we take a construction vacuum cleaner and do some general cleaning. Advice! The better you clean the base, the stronger the self-leveling floor will be. |
| Step 2 – priming the floor | We need to reduce the absorbency of the base as much as possible so that the bulk mixture does not quickly lose moisture and dry out. It is better to make two layers of soil. |
| Step 3 - installation of damper tape | A damper tape around the perimeter of the room is needed in order to create a technological gap for the screed to accommodate thermal expansion. If the walls and you are plastered, then the easiest way to nail this element is with a stapler. |
| Step 4 – Fiberglass Flooring | If you decide to make your floor strong, spread this fiberglass over its entire surface - it will reinforce the screed. |
| Step 5 – installation of beacons | Next we install beacons. Their number is not regulated, but there are recommendations. First, we place them at the lowest points of the floor, and one at the highest. To do this, you should first measure the perimeter of the room with a laser or bubble level. Secondly, we arrange intermediate tripods so that the desired level can be transferred from a high point to a low one. Then the beacons are adjusted - the central rod is leveled so that its lower end shows us where we will pour the floor. Advice! If you haven’t found a tripod, then use regular dowel screws instead - screw them in according to the same principle, immediately determining the height, that is, the top point of the dowel should correspond to the floor level. |
| Step 6 – diluting and pouring the mixture | At the next stage, we begin to stir the mixture and pour it onto the floor. This must be done continuously so that the already poured concrete does not have time to set. |
| Step 7 - Rolling | The poured floor must be stretched using a needle roller and a spatula. This also helps to get rid of air bubbles that form in the mixture during kneading. We pour the floor and roll it out in this manner until it reaches the level of each beacon. |
READ MORE: Soundproofing floors in an apartment, choosing modern material
Pouring should begin from the lowest point, gradually moving to the highest. This way the floor is guaranteed not to set until the work is completed. At the same time, do not try to fill more than 20-30 square meters at once. If the room is larger, then divide it into sections using a metal profile PN 50*40 for drywall.
Wet screed
The classic version of the screed is wet. Among other competitors, it is the most inexpensive, therefore it is widespread in mass construction. For an apartment, it is not the best option, since it requires a minimum of 2 cm of thickness, which is not feasible in some situations.
Wet floor screed
The main advantage of this solution is the leveling of significant floor differences at minimal cost. The main disadvantages are the length of time, high labor intensity, and difficulties with mixing.
1. Concrete - a common classic. Made from cement, water and fillers. The latter are usually sand, crushed stone, and gravel. Such a screed is best suited for creating a floor base, since, despite all the advantages that were mentioned earlier and its strength, it is unlikely to make the coating even. Plus, the surface of such a floor is usually very dusty. Due to the presence of coarse filler, an appropriate layer thickness is required.
Floor screed with concrete
2. Cement-sand mortar. It reminds many of the first option, but there is no large filler in it. It turns out that this floor is cheaper, it is less durable, but it is better leveled and can be made in a thinner layer.
Screed made of cement and sand
3. Lightweight concrete screed. The filler changes again - instead of crushed stone and gravel, it can be expanded clay, polystyrene, etc. Such a screed will also not be very strong, but it will be very warm.
Lightweight concrete
4. Polymer-cement screed - it is done on top of the subfloor in order to level it (the finishing layer is no more than 15 mm thick). It consists of Portland cement, quartz sand and polymer additives. This composition gives the screed high strength and low shrinkage.
Polymer cement screed
Table 2. Installation of wet screed
| Steps, photo | Description |
| Step 1 – waterproofing layer | The first step is to prepare the floor surface - cleaning, priming, etc. We have already described these steps in detail earlier, so we will not repeat them again. If you plan to make a fairly thick layer of screed, then instead of all this, the floor can be covered with thick plastic film. You will receive excellent protection from water, plus during pouring the concrete will not lose cement laitance, which will have a positive effect on its strength. A damper tape is also attached around the perimeter of the room. Advice! You can dispense with this element for thin layers, but it’s still better not to do this - the material costs mere pennies, and it’s not difficult to attach. |
| Step 2 - reinforcement | If the screed is thick, then be sure to lay a steel mesh on the floor. This stage can be swapped with the next one if you want to raise the fittings above the floor. |
| Step 3 – Installation of beacons | Next we install metal or plastic beacons. You can purchase a profile like the one in the photo above, or use rectangular pipes for this - they are easier to align and do not bend when pulling the mixture. More attention needs to be devoted to this stage, since the beacons should form a single, flat plane. They are the ones who determine the evenness of the entire floor. Beacons are displayed in different ways. The most common method is to lay them on gypsum or mortar bosses and then wall them. |
| Step 4 – mixing the concrete | We determine the brand of concrete (usually M200) and mix it strictly according to the recipe. If your volumes are large, then use a concrete mixer, as doing this manually is very difficult. |
| Step 5 – alignment and trimming | At the next stage, the concrete mixture is dumped onto the floor and distributed evenly. For this they use a rule that moves along the beacons as if on rails. In this case, the movements are made of a vibration type, that is, from side to side, while simultaneously pulling forward. The rule does not tilt so that there is no deflection. |
After completing the work, the floor is left to dry. You can start finishing it no earlier than 20 days from now. Walking is allowed the next day.
We have described only the general procedure. In some situations, the screed can be laid on a heat insulator or combined with a finishing self-leveling coating.
Wet screed: diagram
Semi-dry screed
Also a fairly common type of screed. The technology of its construction involves the use of the same cement with sand, but in a different ratio. The material contains a small amount of moisture, so the floor dries much faster.
The operating speed is also very high. There is only one drawback - the coating is not very durable.
The master makes a semi-dry screed