Many people are faced with the need to refresh their interior quickly and as cheaply as possible. This need may arise among people who have rented an inexpensive apartment for a long period. Or those who have spent all available funds on purchasing their own home, postponing repairs and changing furniture until better times. Those who live in temporary territory are also in no hurry to invest in the situation. In general, the situation is ordinary. Even if it’s temporary, I want to live in cleanliness and comfort now, and not someday later.
Is it possible to transform the interior for literally pennies without making a complete renovation or changing the furniture? Yes, and there are plenty of opportunities for this. Today we're going to talk about improving the appearance of your kitchen. We bring to your attention 16 ideas for a low-budget, easy metamorphosis. Of course, a patched-up kitchen will not look completely new, and an old kitchen will remain old, but if you approach the issue creatively, with imagination and sparkle, you can achieve an excellent result.
Paint the fronts of kitchen furniture
This will not only refresh the doors, hiding the signs of time, but also change the color to a more current/light/cheerful one.
To paint old MDF film facades, it is recommended to first remove the film. To do this, you will need to warm it up thoroughly. Then the MDF needs to be sanded, wiped with a dry cloth and degreased with a special product. The next stage is priming. Acrylic primer is suitable for wood and MDF. It is necessary to prime several times (allowing the previous layer to dry) until the MDF surface becomes completely smooth to the touch. The primer can be lightly sanded before painting. Acrylic paints are suitable for painting, including those recommended for woodworking.
Plastic-coated facades are painted in the same way, but the plastic (laminate) does not need to be removed. It is washed, thoroughly sanded, washed again and degreased. Then a primer with a high level of adhesion is used, intended for problematic surfaces (for example, glass and plastic). From paints, it is better to choose one that is recommended specifically for furniture.
Veneered doors should be washed with a degreaser and wiped dry, then sanded. Primer is basically optional. Acrylic paint on wood and metal is suitable for painting.
Any facades need to dry well after painting. It is better to leave them alone for several days and only then install them back, so as not to damage the painted surface (it should be borne in mind that the paint gains strength gradually).
Film - quick design of the facade of a kitchen unit
Renewing the tabletop with film
This option for updating the headset turned out to be the cheapest and most accessible, because each of us can use self-adhesive film. Modern film can imitate natural materials such as leather, wood or stone. The only thing when choosing a material is not to give preference to the most inexpensive options, because the film must be of high quality and practical. For myself, I selected vinyl film, which is resistant to moisture, sudden changes in temperature, and also retains its color and appearance for a long time.
Before updating your old kitchen set, stock up on the following tools:
- Film
- Knife
- Ruler and pencil
- Centimeter
- Scraper
First you need to take measurements of all kitchen surfaces that are to be updated. Usually, for such processes, all cabinets are disassembled, since it is very difficult to carry out any repair work with an assembled and installed set. High-quality preparation requires not only cleaning the headset from dirt and dust, but also sealing cracks and chips. This will require putty, which we are all so used to.
Important! Self-adhesive film has one property that should not be forgotten - it highlights all surface imperfections. Therefore, the preparation process must be serious, and the foundation after it must be smooth.
After the dimensions are made, we will make marks on the reverse side of the film. The fabric is cut along them into the required pieces. When using a film with a pattern, make sure it matches. Use a utility knife and a ruler to cut the pieces as evenly as possible. When gluing, a rubber scraper allows you to smooth out places where bubbles form. You may not be able to paste the parts the first time, but after completing the renovation process, your kitchen will sparkle with new colors. Do not forget that fittings also play an important role and therefore it is worth purchasing them too. Unlike purchasing the entire kitchen set, purchasing individual parts will be very beneficial in terms of inexpensive repairs.
Remove the fronts from the upper cabinets, leaving them open
If the doors are really bad, and the frames are still nothing, only “boxes” can be left from the cabinets. This is a very current option - even new kitchens are sometimes ordered in a similar design.
The interior surfaces of the cabinets can also be painted or wallpapered.
Remove the fronts of the lower cabinets by covering them with curtains
The use of “skirts” instead of doors is typical not only for country and rustic, but also for modern design (including loft).
Photo wallpaper is a new product for decorating not only children's rooms, but also kitchen utensils
Finishing the countertop in the kitchen
A more interesting option than the previous one seemed to me to be a way to not only update the kitchen, but also radically change its appearance. Photo wallpapers today are in great demand for decoration in children's rooms and bedrooms. However, not only these rooms can be decorated in this way. The only caveat is the gluing of photo wallpaper onto the paint, which indicates the requirement to paint the kitchen unit. Among the tools you will need are: wallpaper glue, roller and paint, brush, scissors. To do the work yourself, you also need to take measurements, but for the renovation itself, you can use self-adhesive laminated options. They are more resistant to mechanical damage and are easy to wash.
Replace some or all of the upper cabinets with open shelves
Another common solution even for new interiors. Such storage spaces will cost mere pennies, but the work area will become lighter and visually lighter. By the way, shelves can be built from elements of old furniture.
Methods for restoring countertops
painting
One of the cheapest and easiest ways. For decoration you will need acrylic paint (can be in different colors), a foam sponge and a brush. The drawing can be arbitrary or use a ready-made template. Before starting work, the surface must be degreased. Apply the base color and then apply the selected design. To add depth to the ornament, tempered glass can be placed on top. The tabletop will sparkle with new colors and take on a designer look.
Decoupage
Designing the surface does not require much effort or professional knowledge. All you need is your own imagination and a little diligence. The material for decoration will be not only ready-made pictures, but also pictures cut out with your own hands from napkins, pictures from magazines or printed on a computer. After cleaning and degreasing the tabletop, secure the pictures on the table with PVA glue diluted with water 1:1. There should be no voids under the decoupage elements.
Note. Decoupage is not suitable for updating the work area of the countertop. The surface will quickly become unusable due to frequent use and treatment with detergents.
After the surface has completely dried, coat with varnish. Let the varnish dry again and repeat the procedure 3-4 times.
Self-adhesive film
One of the simplest and most accessible ways. A wide range of self-adhesive films will allow you to choose a pattern to suit every taste.
Advice. Don't buy film that is too cheap. The quality will be low and it will quickly lose its aesthetic appearance.
Having previously measured the surface, carefully peel off the bottom layer of the film and stick the film on using a rubber spatula. Take your time and smooth out all the bubbles (the final result depends on this). With a minimum of time, you can breathe new life into old kitchen furniture.
Tile
If there are ceramic tiles left after renovation, they will serve as an excellent finish for the countertop. From pieces of tiles you can create a mosaic or an entire composition. Thoroughly clean and dry the surface. Apply special glue and lay out the tiles according to a pre-designed sketch. Wait for the glue to dry completely and treat the joints with a special grout. This method is suitable for the work area, since the tiles are not afraid of intense impact and frequent use. Easy to care for and not susceptible to detergents.
Updating a kitchen countertop with available materials is much cheaper than replacing it with a new one. At the same time, create an original interior element. Use your imagination to realize your wildest ideas.
Decorate facades
The doors of the set can be subjected not only to painting, but also to other finishing. For example, cover it with thick vinyl wallpaper. This method is suitable only for those cabinets that are located away from the sink and stove. Also, facades can be covered with PVC film or fabric (the fabric is varnished on top), faced with mosaics, sheathed with planks, etc.
Change handles
The fittings seem like a small thing, but very important. New modern handles will give the old set a much more modern look.
In the interior of one kitchen, you can apply several renovation options at once. For example: remove half of the upper cabinets by hanging shelves; remove half of the lower facades, replacing them with curtains; Paint the remaining doors, bottom and top.
Cover an old countertop with tiles or mosaics
Usually, even with a budget kitchen renovation, the countertop is replaced with a new one. After all, the cost of laminated chipboard countertops is quite low. But if you don’t want to remove and remove the old surface, and then bring in and install a new one, there is a way out. A countertop that has lost its appearance can be covered with tiles or mosaics. Yes, it's not exactly cheap, but it's pretty fast. And you can buy the simplest tiles to solve this problem, on sale (leftovers).
If the leftovers are different, it’s okay. Combined cladding is quite acceptable.
We repair the countertop
Restoring a kitchen table is not a difficult task. The main thing is to take this process seriously. For example, what to do if the countertop in the kitchen is swollen? Indeed, water has a destructive effect on the wood from which the table is made. In this case, we cover the tabletop with film (special) and let it dry. We leave it in a vice for several hours (making sure that the film does not burst), then we treat the surface with silicone.
Also, if moisture gets in, the tabletop may delaminate. There is an exit. We remove sawdust and shavings that appeared as a result of exposure to moisture. We take a separate bowl, pour in sawdust and add PVA glue. Mix them and apply to damaged areas. We tighten the tabletop with a vice and leave it to dry. After a day, remove the vice and clean the “top” of the tabletop with sandpaper.
If the surface of the kitchen set has been exposed to high temperatures (for example, it was burned with a cigarette), then we restore it as follows:
- carefully remove the top layer from the damaged area;
- fill the recess with a special putty (for wood);
- level and dry;
- we tint this area with acrylic paint;
- leave until completely dry;
- then we apply silicone and dry (do not forget to cover the tabletop with a tablecloth for complete protection from external influences).
Self-adhesive film
Self-adhesive film will “give” new life to the kitchen table. When choosing it, pay attention to the following recommendations:
- stylish colors of the film (imitation of natural materials, for example, wood or leather) will add originality to the design of your kitchen;
- do not give preference to cheap products, the film must be durable and of high quality;
- An excellent material for updating a kitchen table is vinyl - it does not react to moisture, high temperatures and maintains a presentable appearance for a long time.
At the initial stage, the tabletop must be cleaned of stains, grease and chips repaired, since this type of film emphasizes surface imperfections. After cleaning, we proceed directly to the gluing process:
- measuring the kitchen table;
- make marks on the “inner” part of the film;
- carefully cut the material into pieces;
- When gluing, smooth out uneven areas using a rubber scraper.
If you follow all the rules presented, you will be able to cover your kitchen table the first time. Do not forget about careful care of the tabletop, which was sealed with film. It is easy to cut with a knife.
Dye
You can restore the excellent appearance of your kitchen table with paint (or varnish). For these purposes, various types of paints are used. For example, alkyd enamels are excellent for restoring countertops. They are non-toxic, cover the surface well and dry quickly. Acrylic paints (water-based) are also suitable. They are distinguished by their bright color and reliability. These paints are non-toxic and are ideal for the kitchen table (since it comes into contact with food).
If your countertop is made of wood, then it can be tinted with stain (a special liquid that is applied to wood to give it a rich color) or use oil to renew it.
Painting your kitchen table yourself isn't too difficult. So let's get started:
- we prepare the surface of the headset using a special grinding machine or sandpaper (the table can be bleached first);
- You can repair chips and cracks using a putty mixture;
- after drying, level the surface of the tabletop using fine-grained sandpaper;
- for painting we take alkyd paint (the primary layer will act as a primer);
- We apply subsequent layers as the previous ones dry.
Once the paint has dried, the kitchen table can be coated with colorless varnish. In addition, you can attach a sheet of tempered glass to the surface of the painted table. This tabletop has a number of advantages:
- does not absorb odors and is not exposed to high temperatures;
- not “afraid” of water;
- has a refined appearance;
- has high strength.
At the same time, this type of kitchen table requires special care; it should not be placed near the hob.
painting
Another creative idea for restoring a tabletop involves painting using a stencil. This method unleashes your creativity and adds unique flair to your kitchen design. The stencil itself is made of cardboard or thin plastic. In addition to the pattern, we will need acrylic paints (water-based), a brush (medium size) and a foam sponge. Before painting the headset:
- thoroughly clean and degrease;
- cover the table with the main color (it is advisable to choose pastel colors);
- take the template and use a brush to carefully apply the selected pattern;
- in order for the work to proceed dynamically, experts advise applying paint with a sponge in a thin layer;
- remove the stencil and remove all irregularities;
- let it dry.
Decoupage
In addition to the original painting, decoupage (a technique for decorating objects of various sizes) is used to restore the tabletop. This method will help protect the table from the effects of chemical detergents. The main thing is not to overdo it with the number of patterns, otherwise the kitchen table will look too bright.
Ready-made decoupage pictures can be purchased in specialized stores, or you can make them yourself using napkins or unnecessary magazines. The process is divided into several stages, we will need:
- wood varnish;
- acrylic putty;
- scissors;
- sandpaper;
- brush;
- pictures (purchased);
- PVA glue).
Paint the tiles
The tiles on the walls and floor can be painted - this will refresh the surface and change the color. We wrote about this in detail in the article “How to paint tiles.”
Cover the apron with new material
If the wall in the work area has a more than deplorable appearance, you can hide it behind laminated chipboard, MDF panels, plywood sheets, a mirror, clapboard, etc. In this case, it is not necessary to remove the old apron finish.
Main types of PVC films
Decorative vinyl film coatings are divided into several types, depending on the technology of their application.
Film for membrane-vacuum pressing
It is intended for textured surfaces of furniture facades made of MDF - these are doors, shelves, countertops and other elements. The process is carried out using a special vacuum press. The film has a thickness of 0.25 to 0.5 mm. They use both plain types and with various patterns or imitation of the textures of natural materials.
Film for laminating smooth surfaces
This type is well suited for cladding smooth surfaces made of fiberboard or MDF, for example, furniture panels, doors, window sills. Not all types of films are suitable for laminating chipboard due to the structural features of the boards themselves. In this case, the thinnest coatings are required, with a thickness of only 0.2 - 0.3 mm.
For lamination of profile moldings
When working with profile molded products, a machine is used to wrap long parts with film. A special laminate material with a thickness of 0.3-0.5 mm is used.
A similar technology is used to coat products made of metal, wood, plastic and MDF. In some cases, two-layer PVC films are used for lamination, which have additional protection from ultraviolet radiation.
Clear Protective Film for Furniture
For temporary protection of surfaces, a transparent soft PVC film with a thickness of about 50 - 120 microns is used - it stretches well and is convenient to work with.
It is indispensable when transporting furniture or other products, both disassembled and assembled. It is clear that the thicker the material, the higher the degree of protection of the parts. A special glue applied to one of the sides reliably fixes the film on the surface, but does not leave any marks on it when removed.
Often, inscriptions, logos or drawings are applied to such a coating for advertising or warning purposes.
For finishing the edges of chipboard and MDF panels
To reliably protect the ends of furniture parts, which are often subject to significant impact loads, as well as to give them an aesthetic appearance, a special PVC edge film is used. It combines the qualities of elasticity and hardness, but gluing it yourself is quite difficult, since this cladding should ideally be attached using a special machine. At home, a hair dryer and good thermal glue are used for this. The edge fits equally well on both chipboard and MDF.
Cover the floor with PVC tiles
There are vinyl coverings in the form of tiles, the size of which corresponds to the dimensions of the floor tiles. However, there are also variations for parquet. You can glue them directly onto tiles or onto boards. This will allow you to quickly and very inexpensively update and transform the floor. Of course, such a finish will not last too long, but as a temporary option it will certainly pay off.
Luxurious tile decor
To quickly and efficiently update your countertop with your own hands, you don’t have to use expensive materials: you can get by with ordinary ceramic tiles (the ones left over after finishing the kitchen apron are quite suitable).
In addition to ordinary ceramic elements, you can also use mosaics, composite tiles, etc. A countertop updated with stacked mosaic tiles will look quite original.
So, for work you will need:
- Tile;
- Tile adhesive;
- Grout for seams.
The surface must be thoroughly washed and dried. Then, applying glue to small areas, lay out the tiles. The grout for the joints is applied after all work has been completed. It is better to use tiles to update the countertop in cases where the kitchen work area is being restored. The updated product can easily withstand high mechanical and temperature loads, as well as exposure to cleaning agents.
Decorate the wall near the dining table
A stylish and comfortable dining area can become the main decoration of the kitchen interior. It will attract attention, making the shortcomings of the old kitchen much less noticeable. Fortunately, it is much easier to transform a dining area than a work area.
Particular attention should be paid to the wall near which the table is located. If the decoration in the kitchen is very old and there is no way to change it, you definitely need to refresh at least this wall. It is not at all necessary to remove the old coating and thoroughly prepare the surface. Even on top of old wallpaper, tiles or paint, you can install, for example, lining, panels, laminate, mirror or glass panels, etc.
Kitchen surfaces made of natural wood
When choosing a kitchen set, each of us dreams that the work surface in the kitchen will not only be durable, high-quality and beautiful, but also not harmful to health. Countertops made of natural wood, most often made of oak or bamboo, have these qualities. Kitchen sets made from these materials are not only incredibly beautiful, they are also durable and will last for quite a long time.
If you choose from cheaper countertops, you should note such materials for their manufacture as walnut, birch, pine and others. Products made from this wood are cheaper, lighter, and affordable for people with average income.
When humidity is high and water gets on the wood, it swells and loses its shape, so it is thoroughly impregnated with oil solutions and covered with a layer of varnish, which provides additional protection.
Also, kitchen countertops can be made not from a solid wooden board, but by gluing several wooden parts together. Thanks to gluing, the strength of the surface increases and the chance of deformation under the influence of certain factors decreases.
No matter how high-quality a wooden tabletop is, it still needs care and respect. This surface should be protected from scratches, cuts and splits, which most often occur from cutting products without a special cutting board. To care for wooden furniture, you must use appropriate detergents.
Pros:
- Great looks.
- There is no harm to health when using such countertops.
- Moisture resistance subject to basic care rules.
- Quite a long period of use.
- They are in the middle price category and remain affordable for most families with an average income.
- Wood has disinfecting properties, so bacteria and other harmful living organisms will not multiply on the surface.
Minuses:
- A small selection with beautiful wood textures, a limited color palette.
- Relatively low resistance to high temperatures, high risk of ignition.
- Instability to strong mechanical influences, which may result in defects in the form of dents and cracks remaining on the slab.
- They require regular care (use of special products, surface polishing, varnishing).
- Unresistant to various chemicals and dyes.
Introduce bright accents
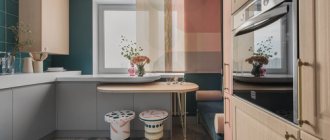
Colored elements will make even the most gloomy kitchen more lively, modern and cheerful. However, it is important to avoid chaos and excessive diversity. Accents should be one or two colors. The number of bright details should also be limited. Everything is good in moderation.
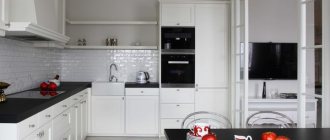
In the photo: the tiles on the walls and floor were painted, the facades were painted, the fittings were replaced, and accents were added. The kitchen looks completely new.
Decorate the interior
Decorative little things turn the kitchen into a cute, cozy nest. Minimalism is good in an expensive interpretation, but the old interior needs to be properly decorated - new design elements will draw a significant part of the attention from old surfaces and shabby objects.
There will be wall decorations that hide old decoration (paintings, posters, mirrors), baskets and storage boxes, and living plants (visually refreshing the decor). However, don't overdo it! Don't let the decor clutter your kitchen.
Advantages and disadvantages of different types of materials
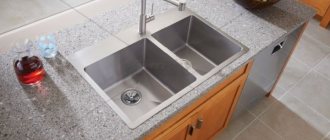
Inexpensive countertops are mainly made of wood (MDF, chipboard, etc.). Less affordable products are made from metal, glass, stone and other materials that are more durable.
Stone
Stone countertops are a classic option for the kitchen. However, this material is quite expensive and requires the installation of a solid base that can withstand increased loads.
Artificial
In its “pure” form, artificial stone is not used for making countertops. This material is used in combination with quartz chips and other fillers. Also in kitchens, inexpensive artificial stone made from a concrete mixture is often used.
Granite
Granite has the following positive features:
- attractive appearance;
- increased resistance to moisture, temperature changes and aggressive environments;
- does not lose color;
- washes well;
- does not “collect” pathogenic bacteria;
- long service life (several decades).
Granite is overpriced, cannot be repaired, and weighs a lot. The material absorbs dyes.
Marble
Marble can give off cold at any time of the year. This material is distinguished by its aesthetic appeal and long service life.
Metal
Metal surfaces meet the basic requirements for such products. The disadvantages of such countertops include the fact that the material is expensive and fades over time.
Glass
Glass, like metal, also meets the described requirements. However, this material does not tolerate mechanical stress that occurs upon contact with abrasive substances. Chips appear on the glass early. And the material itself is expensive.
Tree
Wood is considered a good option for making countertops. But this material is not without a number of distinct disadvantages.
Array
The array stands out due to the following features:
- robust design;
- attractive appearance;
- increased maintainability and moisture resistance;
- reasonable price (provided that countertops are purchased from common types of wood).
The main disadvantage of solid wood is that wood requires regular maintenance. In addition, if the material is not impregnated in production, then over time, due to natural drying, cracks will appear on the countertop. It is also possible for mold to form due to high humidity. To extend the service life of the array, it is not recommended to place hot objects on the wooden surface.
MDF
The popularity of MDF countertops is due to the following characteristics that distinguish such surfaces:
- environmental friendliness;
- wide variety of colors;
- low price;
- resistance to the formation of colonies of bacteria and mold.
MDF does not withstand high temperatures and strong shocks. With prolonged contact with water, wood material swells, which leads to surface deformation. The latter is leveled by laminating the product.
laminated chipboard
The most affordable countertop option, which has the same features as MDF. The main difference between these materials is that laminated chipboard is less resistant to moisture, dyes and aggressive substances.
Ceramic tile
Ceramics are able to retain their original appearance for a long time and withstand temperature and mechanical stress, and high humidity. At the same time, crumbs constantly accumulate at the joints between the tiles, and therefore the material requires regular cleaning.
Laminated surface
Laminated surfaces are made from MDF boards. Therefore, such products have the same advantages and disadvantages as the specified material.
Acrylic
Acrylic is used to make products of complex shapes. These countertops have the following features:
- pleasant to the touch;
- characterized by a monolithic design;
- environmental friendliness;
- hygiene;
- increased maintainability.
Acrylic is expensive and does not tolerate mechanical stress and contact with aggressive substances.
The properties of agglomerate and natural stone are identical. Moreover, the former costs more than the latter. Agglomerate is heavier than natural stone and lasts longer.
