For a long time I collected and prepared this material and now I present to you the best fashionable crocheted embossed napkins. My task was not only to find diagrams for them, but also to introduce them to the beautiful works of Patricia Kristofferson and other modern designers.
Many people already know about Patricia and the Internet is full of descriptions in Russian, and on Yotube there are also video master classes on knitting some patterns.
But I wanted to collect in one place a large collection of the napkins that I like best, maybe I’ll slowly knit them myself, as well as new items that are becoming more and more popular.
Napkin flower
A beautiful lotus made from napkins with your own hands will be a wonderful decoration for the festive table. This flower can be not only a decoration, but also a napkin holder.
To make this decoration you will need the following:
- Red napkins - 40 pieces.
- Red napkins - 4 pieces.
- Thin wire - 10 cm.
Manufacturing sequence:
- First, make some preparations. Take a green napkin and open it so that only one fold remains. Fold the resulting rectangle lengthwise and open it again.
- You should end up with a rectangle with a fold in the middle. Fold the corners of all four sides towards the center.
- Fold the sides also towards the center and in half again. This way you should end up with a narrow rectangle with corners on the sides.
- Do the same with the remaining green napkins.
- Take a red napkin and, without opening it, fold it in half to form a triangle.
- Place it with the top facing away from you, fold the side corners to the center with the sides. And bend the corners protruding at the bottom on the reverse side. Follow the same steps with all other red napkins.
- Start forming the base of the lotus. Take the green napkins and fold them together. Now, to mark the middle, fold their total mass in half, but without putting too much pressure on the fold - we only need it as a guide.
- Now secure the napkins with wire in the center and place them on the table with the long side of the corners facing up - these will be the leaves of the flower. Spread them out so that they lie evenly in a circle.
- Start collecting petals. Take a red napkin and fold it in half with the curved corners facing inward. Insert the resulting triangle into the green leaves of the water lily, and straighten the upper part so that you get a voluminous petal - it will be easier to insert subsequent ones from above.
Important! Insert the corners of the petal so that one is in one sheet and the other is in the other. This way the composition will hold better and there will be no gaps. So do the first row.
- Complete the next four rows in the same way. You should get a beautiful and lush lotus.
DIY crafts from napkins “Dandelion ball”
This craft surprises with its magnificence and simplicity of execution. She will take a prize in any children's homemade competition.
Materials and tools: yellow napkins (2 packs), light green corrugated paper, stapler (a device for fastening paper with staples), half pearls, toilet paper for the ball, plastic flower pot, instant glue, balloon, plate of water.
Stage 1
Take a device for fastening paper with staples and a napkin. The paper napkin is folded several times until you get a square, as in the photo.
A metal bracket is placed in the center of the square.
Stage 2
The edges of the resulting square are trimmed with scissors. You need to get a circle. All the leaves folded inside are cut off to create solid flower petals stacked on top of each other.
Stage 3
The magic begins at this stage: each petal rises from above in turn, stretches a little and presses back, then folds into an assembly.
Stage 4
New buds are made from the remaining napkins.
Stage 5
The resulting flowers need to be glued onto a paper ball. A similar ball is made from toilet paper and water. Take an inflated balloon. Small pieces of toilet paper soaked in water are placed on it. It's better to do several layers. Be sure to leave a hole for deflating and removing the balloon. After the toilet paper dries, the ball deflates. The hole is carefully sealed.
Stage 6
Flowers are glued onto a paper ball using instant glue. The work starts from the top of the head.
Stage 7
The spaces between the flowers are decorated with round corrugated paper rolls. All you have to do is grab the center of the round piece of paper, roll it up a little and stick it to the ball.
Stage 8
This DIY napkin craft is decorated with half pearls. They are glued to the center of each dandelion.
“Glitter hairspray” will help enhance the effectiveness of the composition. It is recommended to apply it pointwise, not to the entire flower ball at once.
Sweet heart
You can make a DIY paper napkin craft in the shape of a heart together with your child. This will provide an opportunity to develop patience, perseverance, imagination and accuracy in the baby.
To work you will need:
- White and pink napkins.
- Red cardboard.
- Scissors.
- A simple pencil.
- PVA glue.
- Pre-cut paper palm.
Sequencing:
- To carefully cut out a heart from cardboard, use a template, or draw it yourself. On the back side, trace a palm out of paper.
- Take some napkins and cut them into 4 strips, and then each strip into 3 more pieces. As a result, you should end up with small pink and white squares - make lumps out of them.
- Now start forming the composition itself. Make a palm from white lumps, filling its inner area with them - use PVA for these purposes. Using the same principle, fill all the remaining space on the heart with pink lumps.
Important! The lumps should fit tightly to each other so that there are no gaps.
- If you want to hang the craft on the wall, then attach a loop of silk or satin ribbon on the back side.
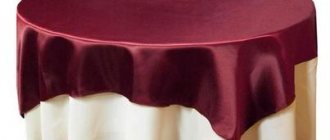
Table setting
The variety of colors and textures of napkins allows you to maintain the tradition of spectacular festive table setting, instead of fabric ones. A wide selection of creative ways to fold napkins allows you to make any everyday day festive and create a great mood during meals. You can make anything from paper napkins, from simple accordions tied in stripes, simple triangles for wrapping cutlery, to complex origami figures, bouquets of flowers in vases. Some examples are shown in the photo:
Bouquet of carnations
Real hostesses strive to please their guests with delicious dishes, but they also don’t forget to set the table. We suggest making a simple bouquet of flowers using napkins. A quick solution for table decor will impress guests and create a friendly environment for conversations. This bouquet can be placed on the table on weekdays.
Larger crafts, topiaries or trees of happiness, are made for large festive events - weddings and anniversaries, as decoration or even a gift to newlyweds, as a symbol of love and warmth.
Such products require a small amount of multi-colored napkins, a base for the crown on which the flowers from the napkins will be glued, a stick for the trunk, a pot, decorative elements and some kind of filler that will secure the entire structure.
Charming roses
Various flowers can be made from napkins. In this master class we will tell you how to make a beautiful rose. This craft can serve as a nice gift or an interesting decoration for any room.
To work you will need the following:
- Red napkins.
- Green corrugated paper.
- Scotch.
- Pencil.
- Scissors.
- Skewers.
Manufacturing sequence:
- Take a napkin and cut its sides so that you get separate squares.
- Place the square on the table, roll it into a tube using a pencil, but not all the way, but so that there is a free part of 2 cm left.
- Collect the resulting bead on the pencil from the edges to the center and remove it from the pencil. This way you will get a fixed petal with a corrugated roller. So make about 7 petals.
- Now begin to form a bud by rolling the petals into a spiral and placing several layers on top of each other.
- Insert a skewer into the bottom of the flower and secure with tape.
- Cut the top piece of approximately 1 cm wide from a roll of corrugated paper - you will get a ribbon. Wrap this ribbon around the skewer, including closing and tape.
- Secure the tip with tape too. So you should get a beautiful and original rose.
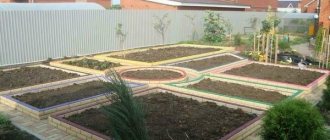
Crafts for the exhibition
Such a topiary can also be taken to a school exhibition for crafts in order to regularly take honorable prizes. And your child will certainly enjoy this activity; at the same time, it develops his creative potential and gives him the opportunity to discover new talents. If you don’t have the desire or materials for such a product, you can make it simpler - paintings from paper napkins using the cutting or mosaic method.
Related article: DIY crafts made from rubber bands for weaving: diagrams with photos and videos
Trimming is the process of gluing pieces of napkins rolled onto a thin stick onto PVA or any other glue, as well as onto plasticine. You can glue it arbitrarily onto some shapes or onto a finished drawing.
You don’t have to be able to draw for this; you can print out the drawing or cut it out from a coloring book and glue it onto thick cardboard. And even if it’s an ordinary flower, three-dimensional designs from such trimmings turn out very beautiful.
Mosaic is almost the same as gluing, only the napkins are cut into squares and twisted into beads. These balls can even be used to create beads for decorating a New Year tree or birthday party.
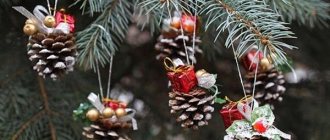
You can create various figures from plasticine and napkins in your free time with your children. Relax and engage in creative work with your child; using napkins is not so difficult. You can make toys for the Christmas tree, snowmen, the Christmas trees themselves, balls, fruits, animals.
First you need to mold a base from plasticine - a ball or bars, then cut a lot of squares from napkins with sides of 1-2 cm, and wrap pieces of paper onto a thin stick, for example, the back side of a pen shaft, then press these ends into the plasticine one after another.
Topiary
To decorate the interior of a room, a topiary made from napkins would be a very interesting option.
To make a va you will need the following:
- Multi-colored napkins.
- Stapler.
- Newspaper.
- Scissors.
- Glue.
- Flowerpot.
Manufacturing sequence:
- Take a napkin and fold it 4 times, and then staple it in the middle. Now cut a circle out of a napkin and start forming a flower.
Important! Please note that you should fold each layer of the napkin separately, otherwise you won’t get a beautiful flower.
- Make a lot of these flowers. They can be made from different colors or from one - as you like.
- After the decorative elements are ready, proceed to forming the base. To do this, take a newspaper, crumple it as tightly as possible so that the result is a ball, tie it with thread. Try it on the flowerpot.
Important! It is necessary that it is not too small or too large, otherwise your composition will look ugly.
- Cover the resulting ball with napkins - this is necessary so that the flowers stick to it better.
- When the glue is completely dry, you can begin to cover the ball with pre-prepared flowers.
Important! You can paste over the ball in a certain order, creating a pattern, or chaotically - everything will depend on your imagination.
- Decorate the flowerpot in which the composition will stand with ribbons or bows - this will make the topiary look even better.
Children's party decorations
Mothers always want to give their child a big holiday; large letters and numbers will help to decorate the holiday room in a special way. Don’t rush to look for them on sale, because you can make such a miracle yourself.
Cut out the necessary letters and numbers from cardboard; you can glue them together into a three-dimensional hollow number. Take a lot of napkins and cover them with colorful tubes of different colors of napkins. You can also glue flower buds from napkins. It will take more time to create the craft, but it will look gorgeous. Children and adults will not ignore your work.
Related article: Kanzashi braided ribbon with flowers: master class with photos and videos
Learning to make roses from napkins
Roses are the favorite flowers of many representatives of the fairer sex, and if made with your own hands, they will doubly delight you with their beauty and handmade warmth. There are a huge number of varieties of these beautiful flowers in nature and we will look at how to make some of them.
Red Chinese rose
All you need for the job is one napkin each in two colors (green and red) and scissors. First of all, let's form a bud. Take a red napkin, fold it in three and cut it, getting rectangular strips. We form the bud from one strip: fold it in half lengthwise and wrap it around the index finger.
Next, we straighten the “petals” and form a small extension at the bottom to which the stem will be attached. We attach a green napkin with a corner to the base of the bud and, pressing tightly with our fingers, twist it into a stem. Our rose is ready! This flower will be an excellent addition to the table setting for any romantic dinner.
Lush yellow rose
To make this royal rose you will need yellow and blue napkins, a pencil and a beautiful ribbon or streamer. First, we make blanks of petals, of which you will need 6 pieces for one flower.
You need to wrap the yellow napkin halfway around the pencil, as shown in the photo, squeeze it tightly on both sides and remove the rod - this will be one petal. We do the same with five more. We form a bud from the blanks: we roll the first one with a roller, and wrap each subsequent one around the previous one. When the bud is completely assembled, secure it with a ribbon at the bottom and decorate it with a blue napkin.
Delicate pink flower
This manufacturing method is perhaps the most painstaking, but the flowers turn out to be very realistic. The pink double napkin must be separated and the existing folds on both sheets must be cut - you will get 8 squares. We fold each of them, but not in half, but with an indentation, as shown in the photo - these are blanks for rose petals.
We take one piece and twist it from the middle to the edges to make the petal more natural. We do this with six more squares. We twist the last piece clearly horizontally, without bends, and form a core out of it, bending one edge down.
Next, we begin to fold the bud, wrapping the prepared petals around the core. When all the petals are collected, fasten the flower with thread or string. If desired, you can make 7-9 similar buds, plant them on wire stems, pre-wrapped with green napkins. The result is a wonderful bouquet that can be placed in a small vase or basket.