The history of furniture has developed interestingly: modern cabinets are distant descendants of ancient chests, i.e. durable boxes (boxes) with handles for easy transportation. Thanks to technological progress, storage systems are becoming more complicated to the limit, and many people consider the good old boxes to be something completely frivolous and impractical.
In this gallery we will show you many creative ways to store things in boxes, especially since their range in stores is very wide, and there are designs and sizes to suit every taste and budget.
This gallery starts with the original appearance of the boxes themselves: vintage and glamorous, French and oriental, romantic and strict, so that you can see how diverse their “kingdom” is. It’s quite possible to buy some things in stores, while others can be made with your own hands from scrap materials.
Below you will see 9 sections dedicated to ways to store various things in boxes in different rooms of the house. Pay attention to WHERE they are located and WHAT can be placed in them. Despite the obviousness of some options, we are sure that a couple of methods will be an interesting find for you.
Most of the boxes in this collection are made from thick cardboard, but plastic, wood and metal are also used for some spaces and situations. The principle of selecting box material is simple: heavy objects and changes in humidity (temperature) require a more durable material.
See how boxes can fit into your home in an unusual way, complementing the usual storage systems or becoming a separate element - practical or decorative. Depending on your needs (design, size), they can be solo or arranged in “colonies”.
__________________________
original box design:
Some boxes from this section were found at European flea markets, others are produced by modern companies, and others are a flight of fancy for decorators and lovers of original things. Fabrics and paper for gift wrapping, leftover wallpaper and napkins for decoupage, paints and stencils - all this will help decorate the simplest box you can find in your home.
In the following sections, you will see practical ways to store things in boxes depending on the room where they may be located.
__________________________
Decoration
Almost any interior can accommodate boxes. They are used for zoning spacious wardrobes. For convenience, each item is signed or decorated accordingly, so that you can understand what is inside and do not have to search for a long time.
To do this, they are covered with ribbons, colored paper, fabric, lace, or certain designs are drawn that are characteristic of the style of the room. The decoupage technique is popular.
For reliability, the box is finally opened with varnish to extend its service life, especially if it will be used frequently, in particular in a children's room.
The stucco molding looks original and unusual, but you will have to tinker with it and spend quite a lot of time. But the result will be excellent. Such a box can be placed in the living room and various small items can be stored in it.
Boxes decorated with your own hands will become the highlight of the interior and will help you rationally use the free space and not clutter it with scattered things.
Related article: Window in the bathroom: all the pros and cons
#DIY DIY storage box, DIY organizer (1 video)
The use of boxes in the interior (14 photos)
boxes in the hallway:
__________________________
Necessary materials
I will say right away that I have never watched DIY (“do it yourself”) style lessons, but relied only on my inner instinct. It turned out very well.
So, I needed:
- Cardboard box with lid.
- Patterned fabric.
- Pen.
- Scissors.
- Glue (you can use a glue gun).
- Awl.
- Eyelets and clamp (you can use regular pliers).
- Thick rope.
- Thick colored paper.
- Ruler.
Helpful advice: to avoid overpaying, buy cardboard boxes at the post office. They are simple, without patterns. Some even have handles that can also be used for decoration.
Why didn't I frame the box with craft paper? Because it's impractical. It gets wet from the slightest moisture, attracts dust and cannot be cleaned. Another thing is the fabric. Yes, the dust settles no less, but the surface can always be vacuumed, wiped with a slightly damp cloth, or simply shake off the layer using a pipedaster.
A gourmet delight: ice cream cake with a salty peanut layer
India: bike manufacturer releases first women's collection of motorcycle equipment
It was not possible to wash the double glass in the oven. My husband took it off with one click
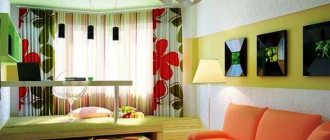
boxes in the living room:
__________________________
Decorating the finished box (MK)
In order for a handmade gift box for the New Year to have a finished appearance, it must be decorated.
This can be done in different ways. It all depends on your creativity and the materials available. We invite you to get acquainted with the most popular options. Decorating will turn the most boring gift into a fabulous one
Handwritten tags
Handwritten tags are often used to decorate New Year's gifts. They can have different shapes and sizes. If you are afraid that your handwriting will be recognized, instead of letters, depict New Year's symbols.
New Year elements
If dark paper was chosen to make the box, you can make a snowman applique. In this case, to make the body of the New Year's hero, you should use white paper. The hat should be contrasting. If you have some fleece or felt on hand, you should use them when making a headdress.
New Year's wreath is one of the symbols of the New Year and Christmas
A spruce branch attached directly to the packaging looks quite impressive.
Ribbons and bows
If you decide to make New Year's boxes with your own hands, you should first choose the appropriate material. Most often, cardboard of various densities and paper are used as a base. Their color is selected taking into account the shape and size of the package. Traditional is white material, which is then decorated in one way or another. However, it is possible to use other colors.
Cardboard is the most popular material
To make a box you also need to have:
- thin pencil;
- ruler at least 30 cm;
- stationery knife;
- scissors.
If you plan to create decorative holes, you may additionally need a compass or hole punch. If you don't have them, you can always use improvised means.
Manufacturing techniques can change the list of materials used
A box made of baguette looks chic and elegant. Baguette is a special material used to create picture frames. On sale you can find material made of wood or plastic.
To create boxes, it is recommended to use a plastic baguette. It is softer than wood, easier to cut and looks no worse than natural material.
Before purchasing a baguette in art stores, you need to decide on the amount of material that will be needed for the box. You can make a miniature square box or make an elegant craft with sides up to 15 cm. Having decided on the parameters, cut two strips of equal length from the main block. Process the ends of the workpieces with a knife to create an angle of 45 degrees.
Before final gluing the baguette blanks, try them on to each other, make sure there are no gaps. If you find any mismatches, sand the edges with sandpaper. Glue the joints of the side panels with construction or wood glue.
Thick cardboard, cut to a size slightly larger than the box, is used as the bottom and lid of the box. The bottom is glued to the box with Moment glue. You will have to tinker with the lid. To secure it, pieces of a piano hinge and pieces of thick fabric are used to connect the lid and the box. Regardless of how the cover is glued, the joints must be hidden or carefully processed.
A baguette box requires virtually no decoration, but this does not prevent you from decorating it using the decoupage technique, varnishing it, covering the lid and bottom with velvet fabric or leather.
The process of creating such a box is so simple that any girl can handle it.
We will need:
- tape reel
- thick cardboard
- pencil
- scissors
- PVA glue
First of all, you need to prepare a cardboard base for the bottom and lid of the box. To do this, attach the reel to a sheet of cardboard and trace it with a pencil. The resulting circle must be circled with another circle with a diameter 3 cm larger than the base.
Using a sharp object or metal ruler, bend the edges of the round bases. Glue one base to the bobbin using PVA glue. This will be the bottom of the box. To hide uneven edges, cover the gluing areas with a thin strip of tape.
For the lid, you need to prepare a strip of thick cardboard and connect the reel and lid with it. The width of the strip should be equal to half the height of the reel. This will make the mount stronger. Glue the parts of the lid with PVA glue and let it dry completely.
To increase the rigidity of the lid and bottom, you can glue to them another layer of cardboard with a diameter equal to the diameter of the reel.
The box is ready, all that remains is to decorate it. To do this, use the decoupage technique or simple decoration with acrylic paints, self-adhesive film with wood or stone prints.
Shoe boxes can be decorated in several ways - painted with acrylic paints, covered with cotton fabric or paper using PVA glue, self-adhesive film, paper wallpaper, old magazines or geographical maps. After processing, the boxes become very durable.
You can use small paper fans, buttons, beads or rivets as decoration. You can create different styles of boxes during the pasting process. And such items will not need to be hidden from prying eyes; on the contrary, they will serve as additional decor for the interior of your home.
An excellent material for creating such boxes and decorating them will be the pieces and sections of wallpaper left over from the renovation; in addition, you will need double-sided tape or PVA glue.
Fabric is also suitable - for example, a piece from a damaged dress, old jeans, a skirt that has become too small. Using natural material you can turn any item into an exclusive piece.
You can also decorate the box using a regular rope or braid; just apply glue and stick it on. It can be either straight stripes or various zigzags and convolutions.
If the idea is to make a shoebox a simple and useful item in the house, then the idea is to wrap and cover the entire box with fabric or colored paper and give it a new look.
A shoebox can become a unique decorative object, such as a briefcase, and no one will suspect what it is made of.
Simplicity and conciseness are good, but, nevertheless, without intricate decor, the products do not look as impressive as we would like. The boxes are decorated with all kinds of materials: ribbons, lace, half beads, buttons, acrylic painting, decoupage, embossing, stamps, ready-made bows and wooden carved miniatures.
As soon as you walk into a craft store once, a thousand ideas for decorating a product immediately come to mind. You can get by with a minimal set of materials and still surprise the recipient with the beauty of the gift.
Snowflake decoupage will look good on the lid of a round box
The application is applicable not only to panels
You can always tie the box with a beautiful ribbon or twine, glue a small bell to it, or put a congratulatory New Year's stamp on it. Approach the creation process thoughtfully and with inspiration, this will help you make a masterpiece with your own hands, even from a simple box template.
There is no need to buy special cardboard for these purposes. Used juice or milk cartons and old notebook covers will do. Below you will find a step-by-step process for making a jewelry box with sections.
To work you will need:
- PVA glue
- Sheet of thick cardboard
- 2 square bags of milk, juice
- Scissors
- Decorations (buttons, ribbons, beads, etc.)
We invite you to familiarize yourself with Bite two points side by side
Step-by-step production:
- Cut the square bags into six pieces of equal height - these will be the sections of your box.
- Place them next to each other, as in the photo, measure the length and width.
- Using these dimensions, draw a base and a lid from a sheet of thick cardboard. Add 2 mm on each side.
- Also make sides for the box from cardboard. They should not exceed the height of the sections.
- First glue the base of the box: the bottom base and sides.
- Then glue the sections inside the base. Secure them with clothespins to dry.
- Glue 2 fabric strips on the inside of the lid. They will hold the lid.
- Glue the other end of the fabric strips to one side of the box.
- Leave the box until completely dry, then you can decorate it.
To begin with, all the outer sides of the box should be covered with fabric, colored paper, beautiful wallpaper or other material. The inside of the lid should also be decorated with beautiful paper or fabric. Then you can decorate the box at your discretion: stick on a bow, beads, buttons, lace ribbon.
How to make a box from a milk carton: step 1
How to make a box from a milk carton: step 2
How to make a box from a milk carton: step 3
DIY jewelry box made from a milk carton
The box from the book is an original idea. A book box can be a good hiding place if you want to hide some little things that are not intended for public viewing. In this case, there is no need to decorate the book cover.
If you decorate the cover of the book, you will get a very unusual box. It's easy to do and the process will take a little time. To make such a box, an old book that you don’t mind cutting is suitable.
What to do:
- Open the book to the first page, draw a square or a circle, depending on your desire. Make indents a few centimeters from the edges of the page.
- Using a utility knife, cut out the shape you drew. You can throw away the part that was cut out; it will no longer be useful.
- Then glue all the pages together. There is no need to glue each page, otherwise they will simply become soggy.
- It is enough to glue the pages together in places. The main thing is that in the end they cannot be flipped through.
- Decorate the cover of the book with fabric, paper, beads, newspaper clippings, and other elements.
- The inside of the box can be left as is. You can also cover it with plain paper to hide the yellowness of the book and give the box a more elegant look.
- The inside and outside of the box can be varnished.
- If desired, you can attach a miniature lock to the box, which is sold in hardware stores and handicrafts.
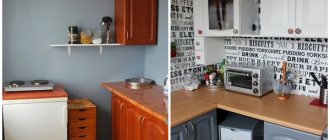
boxes in the kitchen:
__________________________
Decorating a box with your own hands for the New Year: ideas worth using
Ribbons and bows
Today there is a variety of styles, choosing from which can be quite difficult. You need to understand each of them in more detail in order to make the right choice.
- Contemporary combines clear lines and simple design. To expand the space, designers advise using colors for the floor and walls in approximately the same palette.
- Scandinavian style is in greatest demand today. It is precisely because of the lightness, airiness and combination of neutral natural colors that this style will be in the lead for a long time.
- Loft is great at expressing imaginative and imaginative ideas. Modernity, freedom and originality can be seen in every detail present in this style.
- Minimalism is especially appropriate in small apartments. Its advantage is that it is able to visually increase the living space.
- High-tech combines technology and functionality.
We suggest you read How Long Can Jelly Be Stored in the Refrigerator - Read Answer
Below are design options for a box made from an old book.
Handmade box from a book
How to make a box from a book
Cute box from a book
The following materials are suitable for decorating such a box: colored paper (plain or for decoupage), colored cardboard, ribbons, sparkles and beads, seashells, coins, etc. In such a situation, it is best to use any imagination, but with the condition that the box fits harmoniously into interior of the room. Most often, the box is sheathed or covered with fabric; you can use a piece of foam rubber for softness.
Any cardboard box will do.
Those who are interested in a certain type of needlework have the opportunity to demonstrate their talents in decorating a shoe box with their own hands.
The most popular techniques remain the following:
- Volumetric origami (figures made from paper blocks assembled into figures) and planar applique.
- Quilling (reminiscent of elements of unwound serpentine, folded into objects).
- Decoupage (use special napkins with a pattern).
A beautiful box decorated with napkins using the decoupage technique.
Of course, you can master any technique from scratch, but it is better to work with the appropriate skills. Although nothing is impossible when there is a desire - any technique can be learned in a couple of hours by watching a master class on video and decorating a shoe box with your own hands.
boxes in home office:
__________________________
What you need to create it yourself
- An ordinary cardboard box (ideally with high sides);
- Fabric for decoration;
- Paper;
- Scissors or clerical knife;
- Braid;
- Scotch.
How to do it yourself step by step
- First, we cut off all the sashes from the top of the box. Next, we cut small holes for the handles on both sides. It is better to make them at the top of the box.
- Cover the box with paper. This must be done so that the drawings on the box do not show through the fabric. We take album sheets and fix them with tape on the box.
- The upper edges of the album sheets must be folded towards the inside of the box.
- The paper must also be glued to the bottom of the box.
- The inside of the box is ready. It should look like in picture 5.
- Next, we decorate the box with fabric. We cut out two rectangles of fabric so that they are slightly larger than the sides of the box.
- We apply the fabric to the box and secure it around the edges with tape.
- We wrap the edges of the fabric towards the inside of the box.
- We glue the remaining sides of the box in the same way.
- It is important to wrap the material on the corners and sides of the box, otherwise the fabric will begin to “slip” and the box will serve you much less.
- We bend the corners of the fabric in 2 steps so that there is no excess fabric left (the diagram is shown in the picture).
- Before attaching this section, its edges must be processed. To do this, secure it with pins from the inside.
- Next, we sew the workpiece on the sides so that the threads at the edge of the fabric do not fray.
- In the place where we previously made holes, we also cut a hole in the fabric.
- We pull back and tuck the upper part of the fabric with the hole inward.
- Press the cut edges against the holes in the box.
- Next, we fix the fabric with tape from the inside.
- Now we decorate the upper edges of the box with braid.
- We wrap the sides of the box and secure with double-sided tape.
- The side should look as shown in photo 20.
- We pay special attention to the inner corners of the braid. We fold the material and sew it with several stitches.
- The tape should be located around the entire circumference of the sides on the box.
- We work with the braid extremely carefully, because it will serve as a decorative element.
- The top edge of the box is ready.
- Next, decorate the bottom of the box with braid.
- Using double-sided tape, glue the tape to the bottom of the box.
- We also decorate the holes for the handles with braid. We secure it with tape.
boxes in the bedroom:
__________________________
Cardboard with handle and two sections
This box has a convenient partition with a handle and 2 compartments
Necessary materials
- Cardboard 3 mm thick;
- Whatman;
- Cotton fabric in several colors;
- Ruler;
- Pen or pencil;
- Self-healing cutting mat;
- Scissors (or stationery knife);
- Glue (you can use PVA or transparent polymer).
- A brush 1-2 centimeters wide.
- In addition to all of the above, we recommend preparing paper tape and several cotton napkins. We will need them to remove excess glue and smooth the fabric.
We suggest you familiarize yourself with How to prepare a 2 percent soda solution - ENT diseases
Here's what we need for work
Step-by-step instruction
- We collect the box. We cut out the box parts from thick cardboard (see illustration 1).
- To create cardboard boxes, it is better to use thick, even cardboard. In our example, cardboard with a thickness of 0.3 centimeters was used.
- We take a blank for the bottom and mark the middle. Glue the partition in the center. This way we will have two compartments for things. We cut paper tape into strips 2 centimeters thick and glue the joints with it. Next we attach the side walls. We also glue their joints with tape or craft paper.
- We glue the front side of the box. We cut out a blank from whatman paper. We lay it on the fabric.
- We cut the fabric and leave a small allowance of 1-2 centimeters.
- Glue the fabric on top of the Whatman paper. Smooth out wrinkles and irregularities with a napkin.
- We bend the side allowances of the fabric and glue them to the box.
- Cut the top corners diagonally.
- We fold the fabric and glue it to the inside of the box.
- Trim the seam allowance by 2 millimeters perpendicular to the side.
- We fold the fabric again and glue it to the inside of the box.
- Now you need to glue the allowances on the bottom. To do this, we cut the corners diagonally, fold the fabric and glue it to the bottom of the box.
- At this stage, the workpiece should look like in illustration 13 (see gallery).
- Glue the opposite side in the same way. To complete the top finishing, we cut out a rectangle of 20x14 centimeters from whatman paper, and 22x16 centimeters from fabric.
- Cut off the excess corner of the fabric.
- Fold and glue the fabric to the smaller sides of the rectangle.
- Glue the blank to the box.
- Then we attach the fabric allowances (top and bottom) to the cardboard.
- We design the opposite side in the same way.
- We glue the partition. First, we'll outline the top edge of the part. Let's cut a fabric strip 32 centimeters long and 2 centimeters wide, bend it in the middle, then iron it in this position and cut off the corners. Glue it to the cardboard, cutting off the corners on the folds.
- To make the holes, cut out a rectangle 25 centimeters long and 2.5 centimeters wide. We retreat 1.5 centimeters from the edge and make cuts on the next 4 centimeters. We retreat 13.5 centimeters from the beginning of the fabric and repeat the cuts on the next 4 centimeters. We cover the hole in the partition with fabric. This must be done so that the area with the cuts is above the semicircles.
- From whatman paper we cut out two parts of the partition of a size corresponding to the cardboard part. Near the window we remove another 3 millimeters.
- Glue the piece to the fabric and cut it with a small allowance. Cut the corners and cut out the window.
- Glue the top allowances and the fabric itself around the window.
- Glue the part to the partition, leaving allowances on the inside of the box.
- We design the second side of the partition in the same way.
- The next step will be gluing the internal sectors of the box. Since the partition is already pasted over, you first need to decorate the opposite side. To do this, cut out a rectangle from whatman paper. It should be 2 millimeters smaller than the inside. We cover it with fabric, leaving a small allowance for the hem. We cut off the corners and glue the seam allowance on top to the Whatman paper.
- We glue the workpiece to the box, and attach the allowances to the bottom and adjacent sides.
- We glue the sides. Now the allowances need to be glued to the Whatman paper on the top and sides. We let the allowance that remains go to the bottom.
- We glue a rectangle to the bottom with allowances bent inward.
- We design the other sector of the box in the same way.
- All that remains is to decorate the bottom of the box from the outside. Cut out a rectangle measuring 23x20.3 centimeters from whatman paper. We cover it with fabric, cut it diagonally and glue the allowances inside. We attach the workpiece to the box. That's all!
We suggest you read: Is it possible to wash suede shoes in a machine? Care, tips, cleaning - video
boxes in the wardrobe:
__________________________
boxes in the nursery and teenager's room:
__________________________
boxes in the bathroom:
__________________________