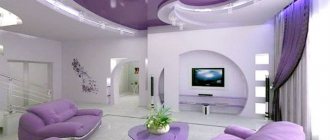
The lining ceiling looks good in the interior
The appearance of the ceiling is an important component of the interior of any room. It not only has a decorative function, but also has practical significance. First of all, the ceiling retains heat, isolates extraneous sounds and makes communications and lighting details invisible. The modern market for construction products offers a variety of finishing materials that can make the ceiling modern, beautiful and well-groomed. One of the representatives of such finishing materials is lining. Let's consider its types and how to cover the ceiling with clapboard.
Types of construction lining
Wooden lining is a popular finishing material. It is made from deciduous and coniferous trees. Main advantages: resistant to the formation of fungus and mold, easy to process, there is a small number of knots. To cover the ceiling with clapboard with your own hands, many consumers choose it due to its strength, durability and environmental friendliness. In rooms where the air temperature is much higher than usual, and the ceiling is intended to be finished with clapboard, linden cladding boards are used, since it does not contain resin. The lining can be painted with enamel of various colors, varnished, or simply have its own natural appearance and color.
Plastic lining is distinguished by ease of installation and practicality, the absence of rotting and corrosion processes. It can be either with a seam or seamless, imitating the structure of natural stone, various types of trees, and also have a uniform color. After assembling the ceilings, no priming or painting is required.
Fibreboard or MDF panels are made from wood fiber using the pressing method; they are also used for finishing the ceiling with lining with your own hands, but are not recommended for use in rooms with high humidity. Features: due to the rich color range, they have a beautiful appearance and are durable.
The lining can be painted or left natural color
Peculiarities
The origin of the name of the building material is interesting. Previously, transport cars were lined with wooden slats, which were then used in interior decoration. This is how the generalized name for the wooden material came about.
Its main feature is naturalness. A room in which the ceiling is decorated with wooden paneling breathes. A natural microclimate is formed in it due to the property of wood that absorbs moisture when there is an excess of it and releases when there is a shortage.
Design of ceilings made of lining
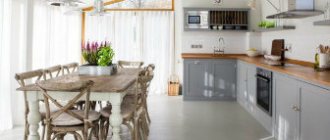
Almost all materials used in interior decoration can be perfectly combined with clapboard boards used to construct the ceiling with your own hands. For baths and saunas, country houses, loggias and balconies, this material has no equal. The kitchen requires no less attention.
The design of the lining ceiling should be combined with the overall interior of the room and look stylish and harmonious. To prevent the surface from being monotonous, the slats are installed in different directions, thereby forming a certain pattern. For this purpose, decorative beams or slats of different colors are used. The kitchen will look elegant if natural wood is present in the ceiling decoration.
Design
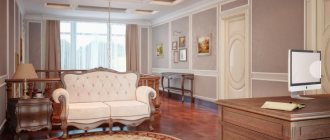
There are many models of lining on the modern market, thanks to which you can turn any design idea into reality. A white timber ceiling is considered a wonderful decoration for a room, as it will not only visually expand the boundaries of the space, but also make the room bright and fill it with a special atmosphere of comfort. If desired, the suspended structure can be supplemented with colored areas or inserts made from dark boards.
Glossy lining also looks chic in rooms - unlike matte panels, it is practical to use, does not get dirty, and after cleaning there are no streaks left on its surface.
What tools will you need?
To ensure that lining the ceiling with a clapboard with a wooden frame does not cause any inconvenience, it is necessary to have your own specific set of tools on hand:
- Screwdriver, hammer drill or impact drill.
- Hammer.
- Level (water or laser).
- Construction corner.
- Roulette.
- Hacksaw. For metal profiles - metal scissors.
When constructing a wooden frame, it is recommended to use timber measuring 20X40 mm, 40X40 mm, 50X50 mm. To attach it to the ceiling and walls, use nails, screws or anchors along with plastic dowels and wood screws. If you need to make a ceiling from a lining with your own hands, but using a metal frame, you will additionally need:
- CD profile – serves as the basis of the frame;
- UD profile for creating a perimeter;
- crab-type cross fastenings and U-shaped fastenings;
- flea screws and metal screws.
In order to sheathe the ceiling in a wooden house, certain calculations of the amount of materials needed are required. The lining is fastened to the frame using staplers, special nails, clips and self-tapping screws with a press washer.
Sheathing can be done in one direction or in different directions to create a pattern.
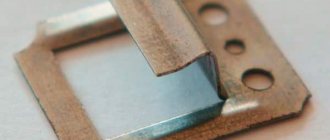
Construction of a wooden frame for lining
Scheme of the arrangement of a wooden frame for lining the ceiling.
To make a lining ceiling smooth and beautiful, you first need to equip a high-quality frame. It can be your choice of either wood or metal.
Experts recommend making a metal frame under plastic panels in rooms with high humidity, for example, in the bathroom. In living rooms, wooden beams are best suited for lathing. You can consider installation technologies for wooden and metal frames.
For a wooden frame, timber with a cross section of 50x50 cm, 20x40 cm, 40x40 cm is suitable.
Work should begin by obtaining a straight line located approximately 10 cm from the ceiling along the wall downwards, along the entire perimeter of the room. The line is drawn using a building level, measuring instruments and a pencil. It will serve as a guide for the frame being created.
It should be noted that in advance all wooden elements of the future sheathing are treated with an antiseptic and dried well. This is done to protect the tree from various pests, rot, and fire.
Scheme for attaching wooden beams to the ceiling.
The beams are fixed to the ceiling on opposite sides of the room using dowels or impact screws. Their evenness must be constantly monitored using a building level.
Then the remaining beams are fastened to the ceiling at a distance of approximately 60-80 cm from each other. If in some places the beam is distant from the ceiling, then the free space is filled with special wooden elements.
After this, the structure is strengthened as follows: jumpers are installed between the main beams, using the same beam. The places where the lamps will be installed are especially secured with jumpers. It should be noted that the wooden beams on the ceiling are installed in the direction perpendicular to the clapboard covering.
Preparatory work
Cladding with clapboard requires mandatory preparatory work. When purchasing this material, you need to understand that the lining must have the same temperature and humidity as the room, in order to subsequently avoid perspiration and distortions. For this purpose, it must be freed from packaging and laid out on the floor for at least a day.
If there is old cladding or other finishing materials on the ceiling, they are dismantled without regret and the peeling plaster is removed. The surface is cleaned of dust and various contaminants. Small cracks are sealed with putty, and deep ones are expanded using a grinder and concreted with cement mortar.
To avoid fungal infection, the base is treated with a special solution. If necessary, insulation is done with heat-insulating material.
Surface marking
This stage of work is the most critical, on the quality of which the entire finishing process of the ceiling depends. The problem of how to sheathe a ceiling with clapboard will be correctly solved if the markings are made correctly. Its goal is to determine the horizontal, which indicates the plane of the future location of the wooden finish, as well as to draw lines parallel to each other on all walls of the room.
Using any level, find the lowest point of the base, from which the remaining marks are made on other walls around the perimeter. The ceiling is lowered within 7-10 cm. A closed contour is applied using a dyeing molar cord or marker. It must be remembered that the laid line must converge at one point, and displacements indicate an error in the marking.
Frame installation
The frame for the lining should be correctly assembled
Finishing the ceiling with your own hands is a simple process, but it requires some attention. Ceiling cladding is carried out in two stages: the installation of a load-bearing base and its covering.
Option 1: frame made of wooden beams
At the very beginning of work, two beams are attached to opposite sides of the room at a distance of 10-15 cm from the wall. The timber is fixed to the ceiling using nails, screws, dowels or anchors in increments of 60 cm, and perpendicular to the selected direction of the panels. The distance between the beams should be 60-100 cm for wood and 40-60 cm for plastic panels. The bottom edge of the beam must be exactly parallel to the floor and be at the same level as the other beams. A fishing line or rope is stretched along the lower edge of the installed wooden crossbars, following which the remaining beams are attached.
We are strengthening the structure. Between the laid beams, jumpers made of the same timber are installed. They are especially necessary where lighting fixtures are planned to be installed.
Option 2: metal profile frame
Installation begins with fastening the UD profile along the entire perimeter of the walls along the marked contour. Attach it with dowels. Then CD profiles are attached to opposite sides of the ceiling 10-15 cm from the walls. Their location should be strictly perpendicular to the future cladding. The connection of the profiles to the ceiling is made using U-shaped fasteners in increments of 40-60 cm. The remaining profiles are installed along a stretched cord, and then the remaining profiles are secured along the surface of the ceiling. The distance between CD profiles should be no more than 60 cm.
The metal structure is reinforced with jumpers using a crab-type cross fastening.
After complete installation of all types of frames, electrical wiring is installed; the ends of the wire are left at the necessary points where lighting fixtures will be installed.
How to choose material?
There are many manufacturers of this material, but the quality of the products sometimes leaves the best. To avoid making a mistake in your purchase, you should carefully inspect it during purchase. You should pay attention to every little detail.
Packaging – you should be wary if the lining is sold packed in film. This fact indicates the low quality of the product, since the seller is not allowed to tear the film and pull out the panel for inspection. Also, panels covered with film are exposed to humidity resulting from lack of ventilation . This packaging negatively affects the quality of even first-class materials.
If possible, carefully check the plate itself. Slight bending jeopardizes the result of the work performed. It is better to refuse such a product . Firstly, there will be difficulties during installation. Secondly, even after installing it, there is no guarantee that it will last long.
If visual inspection is clear, inspect the surface. Transverse waves may appear on the board. The most thorough inspection is necessary for connecting structures (grooves and ridges). Under no circumstances should they contain chips or cracks.
For inspection, it is advisable to have a clip that can detect waves. If any are found, the clamper will not be able to be installed as needed. Make sure that assembly is easy when trying to connect individual panels.
Be sure to use a device, if available in the store, to measure the moisture content of the lining . Take the time to examine your purchase - this will guarantee the final result.
When choosing a finishing material, you need to have an idea of its specifications. Wooden lining is divided into four quality categories. They have significant differences. It is impossible to choose quality materials without paying attention to them.
- Class A products are fully suitable for ceiling cladding. Errors are possible here, such as resin stains (no more than two), non-through cracks (one or two), one knot is allowed.
- Class "B" is relatively good material. Its use in residential premises is undesirable due to its aesthetic characteristics. This is an increased number of blind cracks, knots and resin stains.
- Class “C” products are of low quality. It is used for cladding only outbuildings. In this group, the criteria are completely different - falling knots, through cracks, resin pockets. However, this material is not a complete defect.
- “Extra” class products are characterized by the complete absence of any defects. This is an ideal option for finishing ceilings.
This classification is a guiding star when choosing wooden lining. The type of wood affects the performance characteristics of the manufactured product.
Installation of lining
Installation of lining to the ceiling
So, let's figure out how to line a ceiling with clapboard so that the result of the work evokes a feeling of deep satisfaction.
From the selected material, blanks are first made with a length equal to the distance between parallel walls minus 5 cm. Assembly begins by installing the first plank, which is attached to the frame beams on both sides using a stapler. The second and subsequent slats are inserted at a slight angle into the groove holes of the previous one. For reliability, each lining is tapped from the end side along its length with a rubber hammer. The second side is attached to the guides at the bottom of the lock rim. To do this, take nails or self-tapping screws with a press washer. Install strips to the opposite wall.
When using plastic cladding or PVC panels, the installation order and the size of the gaps for possible thermal expansion remain unchanged. Just before proceeding with the installation of the first strip, it is necessary to secure a U-shaped groove along the entire perimeter of the ceiling under construction, into which the extreme ends of all panels will be inserted.