© Author: Vladimir Sasin
Sooner or later, every master carpenter has a desire to organize and compactly place the tools accumulated over the years. The ideal solution for this is a tool cabinet. Unlike open shelves and racks, it has front doors that prevent dust from entering. It’s also very interesting to watch the reaction of guests when the master opens his closet. Behind its doors hides the carpenter’s “gold and bread”.
EVERYTHING YOU NEED FOR THIS ARTICLE IS HERE >>>
Undoubtedly, a tool cabinet can be made from sheet materials, but, in my opinion, this is unsporting and not carpentry-like. In the manufacture of this cabinet, I used classic carpentry techniques and joints, not without the use of hand tools.
The very first step in the manufacture of any carpentry is the embodiment of a drawing or sketch of ideas and desires. At this step, you need to think through everything to the smallest detail: decide all the nuances of finishing compositions, what fittings and what materials will be used, what operations and on what equipment will be performed.
Well, when you’ve already thought through everything and made a sketch, you can safely begin!
The design of the body of my cabinet is panel-board, assembled on the LH (dovetail), using frame-panel structures. All parts are made of solid beech. The wood should be at wood moisture content (5-9%), laid down and “accustomed” to the workshop.
I glued the panels for the body, shelves, drawers, and doors with a small allowance for further processing. Titebond HI wood glue was used. After removing the clamps, you need to let the boards “rest” for a day or two (preferably more) to distribute the moisture, and only then proceed with further processing.
Related link: DIY mobile tool cabinet (detailed drawings)
While the panels were resting, I was busy making the front frames and the back wall.
Only the manufacture of the facades is described below; the rear wall was made using the same technology.
The facade trim (DC and DD parts according to the specification) has a cross-section of 45 x 18 mm. A tongue and groove 10 mm deep and 6 mm wide was milled along the edge. In horizontal strapping elements, milling was also carried out on the end sides.
Then I chamfered a small amount around the perimeter. For gluing the façade frame, I prepared beech tenons with a grain length of 19 mm, a width of 35 mm, and a thickness of 6 mm. The glued panel for the panels was adjusted to size, but so that the panel was 3-5 mm smaller in width than the internal size of the frame. This is done to prevent the influence of seasonal wood deformations. The figurine field on the panels was milled on a machine.
Rear wall trim elements
Figure field on a panel, made on a milling table
Back wall gluing
After preparing all the parts, you can start gluing. Having coated the insert tenons with glue and installed the panel, you need to secure the frame with clamps. Do not glue the panel under any circumstances! This can only be done when using plywood.
The next operations are jointing and thicknessing. These are the basic operations for preparing for gluing panels. All table parts are made from glued sections (except for the legs). Re-glued workpieces are always more stable than non-glued ones.
The hull panels must be cut to size according to the drawings. And you can start cutting the dovetails. It is important to position them correctly. The drawing shows that the tenons themselves are located on the vertical parts of the body and on the side parts of the drawers.
I made the dovetail tenons and mating parts on a Leigh D4R Pro tenoning jig. I note that it has speeded up the production of studs several times, and the quality and tightness of the fit can be adjusted very precisely.
Milling tenons onto a drawer piece using the Liegh D4R Pro jig.
The milling cutter has been removed for a better view
Initially, the width of the shields of the horizontal and vertical elements of the hull was the same. But to install the rear wall, I made the sidewalls and internal elements 12 mm smaller.
The tenon was formed on the milling table after making the mating part in the sidewalls (this makes it easier to adjust the joint density).
All cabinet parts are ready for gluing. This process must be approached with full responsibility. The subsequent geometry and rectangularity of the entire structure will depend on this stage.
When I was gluing the body, drawers and door frames together, I attached plywood gussets with clamps in the corners for the correct geometry.
Gluing the cabinet body
Special strip for applying pressure on the tenons during gluing
Materials and tools
To assemble the cabinet you will need:
- Boards. The best option is pine. As for quantity, you should focus on the desired sizes. An important point is the thickness of the material. The fact is that a closet usually uses not only shelves, but also the walls themselves. Accordingly, if you plan to place heavy metal tools on the walls, then the board should be selected with maximum thickness.
- Plywood. This material is used to create partitions. You can also use it to make the back wall of a cabinet if you do not plan to store heavy tools or use the wall as a “shelf.” But such sheets are not suitable for the bottom, since they cannot withstand heavy loads. Again, the amount of plywood is determined by the dimensions of the box and the partitions.
- Beam. It is best if it is made from the same type of wood that was used in the boards. It will be needed to equip the cabinet with legs or runners. The optimal size is 50x50.
- Metal corners. Here you only need those elements that are used in the construction of furniture, as they are characterized by increased strength. If you want to make a closet with opening doors, then you should immediately take care of the hinges.
- Screwdriver. The tool will need appropriate drills and bits.
- Electric saw or hacksaw.
- Furniture screws. But when purchasing them, you immediately need to take care of special nuts for them. It is advisable to opt for brass products, since this material is highly resistant to moisture. This is especially important for those who plan to place their closet on the balcony.
- Self-tapping screws. These fasteners will be needed to secure the auxiliary fasteners. Here you can get by with galvanized elements. But in addition, it is worth keeping nails on hand, although some recommend discarding them, since wood tends to dry out, which means that the fastening will weaken over time.
Once all the materials and tools are on hand, you can start working.
Homemade drill and its scope
To make such a drill you will need a metal tube 100 mm long and 10 mm in diameter.
One end of the tube needs to be ground on a machine to get a sharp cutting edge
This drill will come in handy if you need to make perforations on thin material. Rubber, leather, thin plywood - all this can be easily processed with such a tool. Just remember that when working with wood, the drill needs to be cooled in a container of water.
By the way, drilled pieces of material can be useful to you as dampers for furniture. They can be glued in places where doors or drawers knock.
A drill can also be useful to you if a self-tapping screw breaks in the material. Simply drill out the material around it with this device and remove it along with a piece of the self-tapping screw.
Assembly steps
Tool cabinet yourself
To assemble a tool cabinet with your own hands, you need design drawings.
You can create them yourself, or you can simply find an interesting option on the Internet.
In the first case, a simple sketch will do.
The main thing is to determine for yourself the dimensions of the back and side walls, and also pay attention to the parameters of the lid and tray.
The main thing here is not to forget that when planning shelves, it is worth remembering the thickness of the boards, which will “eat up” a certain part of the space.
To create a tool box, you must perform the following steps:
- To make the legs, the timber is sawn into 4 identical cubes (50x50x50). It is recommended to fix them on runners made of the same material. The runners themselves are attached perpendicular to the sides of the cabinet, which indicate the length.
- Next, all wooden elements are processed. For such purposes, an antifungal solution is used. It will help protect the wood from rot and mold. As soon as the coating has dried, all parts are coated with wood primer, and when this layer is dry, Aquastop is used. BUT! Such work is carried out only with planed boards, and it is advisable that all materials are pre-cut into the required size parts.
- The first thing that is assembled in the closet is the frame. According to the drawing, the boards are adjusted according to the parameters, after which the side walls, bottom and lid are assembled. In the case of narrow elements, it is allowed to use two combined boards, but the main thing is to ensure that there are no gaps at the joints. Fixation is carried out using self-tapping screws. Thus, an external frame on temporary fasteners should be obtained.
- Now proceed to the main fixation. For these purposes, all connecting points are secured using furniture corners. Here, too, self-tapping screws or nails are used first. Next, furniture screws and nuts are screwed in, after drilling the corresponding holes in the right places. The most difficult part is drilling the holes at the end of the stroke in the shelves, lid and bottom. As a result, it turns out that their ends will have drilled holes. IMPORTANT! The length of the drill is selected to match the length of the screw.
- Now let's move on to the legs. A beam is attached to the bottom of the box, on the reverse side, like runners. There is no need for heavy-duty fasteners, so you can get by with simple self-tapping screws. Next, pre-prepared legs are mounted to them in the corners.
- As for the boxes, this work is carried out by knocking down a frame of the desired shape and size, where the bottom is nailed down. If shelves are needed, cuts are made on the inside where the partitions will be installed. They can be made from plywood.
If desired, doors can be attached to such a box, after which the entire product is varnished.
So, how to organize your tool cabinet?
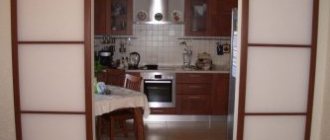
There is a good option for such furniture, which is a cabinet with two doors. The doors swing open, and in the middle part of the cabinet there is a folding table. You can install separate lighting in the closet. When closed, it takes up very little space, so it can be installed in a small city apartment. The easiest way to make such a cabinet is from wood.
To make a wooden tool cabinet , you will need:
- pine boards (thickness 20-25 mm);
- plywood (thickness 10-12 mm);
- wooden blocks (section 40X40 mm, or 50X50 mm);
- hacksaw, hammer, nails (30-60 mm), screws (30-60 mm).
- metal corners (100-150 mm and 80 mm);
- hinges (120 mm) and other fittings.
Before you start making a cabinet, you need to decide on its location in the house and its dimensions. For example, there is free space. Two meters along the wall. If the central part of the cabinet is 100 cm wide, then the doors should be 50 cm each. When opened, they will take up these 2 meters of free space. The height, for example, will also be 2 meters.
Now you need to take the prepared lumber and cut it to size. The back of the cabinet, as well as the back (and at the same time the front) of its swinging doors, can be made of thick plywood. The side walls are made of boards. The boards can be connected to each other with metal corners.
It looks like three identical rectangular boxes. Now the task is to attach the sashes on hinges or hinges to the central part so that they open and close with ease. But, before doing this, you need to fix the central part of the product on the wall. High-quality fasteners are important here, since, given that the table will recline in the cabinet, there will be a large load. You need to attach it directly to the wall using metal corners. The corners are attached to the boards. Holes are pre-drilled in the wall into which the choppers are driven.
After the central part of the product is secured, you can mount the table. It consists of a wooden board that hinges down into the bottom of the cabinet. From below, on the tabletop, 1 or 2 folding legs are fixed. Also on hinges. Door hinges can be used. But they must be quite massive and firmly fixed. The table should not be too large so as not to increase the load on the cabinet.
The next stage of work will be fastening the opening sashes. They need to be adjusted so that the movement is smooth and they fit perfectly. To fix the shutters in the open state on the wall, you can provide special clamps.
Arranging the tools
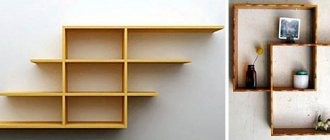
It was described above how to create a simple box, but in order to use it conveniently, its internal space must be ergonomic. For such purposes, shelves, drawers and hanging hooks are organized. This issue can be resolved this way:
- Upper compartment. To create shelves, you can use the same boards that are fixed inside the frame. It is permissible to fix them on ready-made hooks or by drilling holes in the ends (on the outside of the box) and place them on self-tapping screws. Such shelves can easily withstand the weight of small tools or boxes of nails and screws.
- Bottom part. For convenient use, it is best to make only one shelf in the lower compartment. More massive instruments can be placed on it. If you wish, you can install a folding table here.
There is also an option for mounting tools on the walls. It’s worth saying right away that all heavy elements should be located in the central part, but lighter tools are hung on the doors (if there are any).
Cabinet assembly diagram
Usually loops, nails or other elements are used for this, but boxes can also be placed. To ensure that they always remain in their places, they are placed on glue or screws.
The quantity and shape of the internal filling of the box directly depends on the needs. The more building material there is, the more shelves and compartments need to be created.
Lighting installation
Of course, you can also install a portable table lamp with a clothespin mount. But it is much better to provide separate lighting for such a cabinet. In addition to the lamp, you can also provide an outlet located so that you can conveniently plug in a power tool there. If desired, you can even run a separate line from the electrical distribution panel. The line must be connected through an emergency shutdown circuit breaker.
Well, the tool cabinet is ready. It remains only to pay attention to the external decoration, so that when closed it fits well into the interior of the room. Don't forget about door handles. If there are small children in the house, you can provide a latch or lock.
This closet is very convenient. Not only does it allow you to store a large number of tools and everything that can be useful for a home craftsman, but it also represents a mini-workshop with electricity and a small table.
After reading this material, the question of how to make a cabinet to place home tools in it disappears by itself. After all, the description is quite detailed.
Improving the tool box
Depending on where the tool cabinet will be located, on the balcony or in the storage room, you can make its lighting with your own hands. This will significantly improve ease of use. There are several options for resolving this issue.
For those who understand electricity, we can offer automatic backlighting. Future lighting fixtures are marked in the box and holes are cut for them so that it is possible to install a base.
It is advisable that the product is already in place, since the next step will be choosing the length of the electrical cable. It is fixed to the wall or ceiling using screws, after which it is placed in the lid and closed. Next comes the sequential connection of the backlight to the cable - first phase, then “zero”.
IMPORTANT! Any work with wires and other elements is carried out only with the electricity turned off. Now the lamps are screwed into the base and the work is checked.
Halogen lamps. This option is suitable for a large box to illuminate its shelves. Typically, such kits are sold as ready-made kits consisting of:
- switch
- transformer
- halogen lamps
- connector
- wires
Initially, lighting is marked, after which holes (0.5 cm) are made with an electric drill and cutter. After this, the cutter is turned over and the points are completed.
If this is not done, there is a risk that the tool may seriously damage the wood, which will require you to redo the shelf or door.
According to the diagram, all the elements on the floor are connected into a single chain, after which the lamps are connected to a transformer and the operation is checked. For parallel connection, blocks and terminals are used.
In order for such lighting to work fully, it is worth remembering the following important points:
- transformer power ratings should be 5% higher than the total power of the lamps themselves
- minimum power output from the transformer is 12 volts
- pay attention to the operating voltage indicators of the lamps themselves
- For the backlight to work well, the maximum cable length should not exceed 2-3 m
- the transformer is mounted in a place so that it does not heat up from other sources (battery, heater, etc.)
Mini workshop with lighting
LED Strip Light.
Perhaps the easiest way to outfit your toolbox with light.
But this does not mean that such light will be ineffective.
LED strips are sold in reels, and you can buy a specific meter or take one reel, in which 5 meters are measured at once.
Additionally, you will also need a plug and wire to connect the entire system to the mains, as well as a power supply and controller.
The work has the following stages:
- first connect the unit with the cable, and then connect the controller to the power supply
- 4 multi-colored controller wires are connected to similar colors on the tape using a soldering iron or terminal blocks
- to check, connect the plug to the socket and see if all the lights are on
- Each tape on the reverse side has an adhesive backing, which is covered with a protective film - gradually removing it, the tape is pasted in the necessary places for illuminating the box
If desired, you can purchase multi-colored ribbon. As for the intensity of lighting, it all depends on the density of light bulbs per 1 square meter. m. - the more there are, the brighter the light.
Making tool box lighting is actually not that difficult.
Various types of designs
There are a considerable number of models. They are designed to store certain things.
A huge variety can be found on the modern market: specialized, office, instrumental, archival.
Each of them has its own design, and they are calculated for different loads. When choosing a model, this must be taken into account and known.
What models are there:
- Stationary. These devices are a frame into which vertical posts are built and transverse shelves are located horizontally. Additionally, the rigidity of the cabinets is increased by the sheet steel used to cover the sides. Such products can withstand quite heavy objects.
- Mobile. These products are equipped with wheels, with which they can be moved without first unloading them to different places. Due to the weak strength of the casters, these cabinets have some loading weight restrictions.
- Mounted. They are used to rationally use the space in the garage. Such cabinets are secured under the garage ceiling with special fasteners. The carrying weight of such products is small.
- Collapsible. They differ from stationary ones by the presence of a number of holes in the vertical racks, which allows shelves to be fixed at any height.
- Rotating. Serve to store various small items: nails, wrenches and small hand tools. Access to different tools can be achieved by rotating the box around its axis.
Cabinets in which tools are stored can withstand heavy loads. They are made of reinforced metal