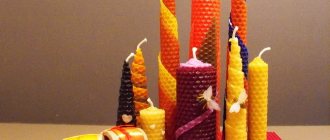
DIY crafts from satin ribbons - embroidery, weaving, decoration
Ribbons are a simple and inexpensive material. With its help, you can create beautiful things that will charmingly decorate your home interior or stylishly complement your outfit. Even a child can make an original craft from them. And for an adult craftswoman who uses various techniques for working with this material (kanzashi, artichoke and others), such an activity will not only bring an interesting result, but will also bring a lot of pleasure. These little things can also be used as cute gifts for friends.
Flower made from pieces of ribbon
The ribbon width of 2.5 cm is ideal for creating small, neat flowers. The technique is quite simple.
What you need for work:
- lighter;
- needle and thread;
- ribbon;
- scissors.
What do we have to do:
- Cut the ribbon into pieces 7 cm long. You need about ten pieces in total.
- Carefully melt the cuts, then bend the cut on each side so that the shape is trapezoidal. And melt it to fix it.
- The same process must be carried out with the remaining pieces.
- Each of the petals must be swept along the bottom, then carefully pulled off the thread and secured.
- Form a flower and sew at the base. A button can be used as a more secure base.
You can decorate the finished flower by gluing 1-3 beads to the center.
Ribbon accessories
Using various methods of working with satin ribbons, you can create not only the well-known hair clips, but also stylish earrings, an elegant necklace or a lovely brooch. Or show your imagination and create a complete set for a significant event.
This set is made using the kanzashi technique, which has become incredibly popular lately. For this implementation you will need:
- satin ribbons of two colors of the required width (from 2.5 cm to 5 cm);
- Scissors;
- Yardstick;
- Source of fire (candle or lighter);
- Glue gun;
- Beads for decoration and accessories for jewelry.
Set up your work area carefully. All prepared materials should be at hand.
First you need to prepare square blanks. Then roll them into the petals of the future flower. Next, form flowers and twigs from the prepared petals and fix them on the base tape. Glue a bead to the center of each inflorescence. Attach the clasp elements of a necklace or the loop of an earring to the ends of the decorative ribbon.
A stylish and extraordinary decoration is ready.
Master classes on making kanzashi flowers from satin ribbons
This selection of step-by-step master classes contains the most beautiful flowers made from satin ribbons, which are suitable for hairpins, elastic bands, headbands, headbands, and brooches. The lessons show how to assemble unusual floral decorations from one or two types of petals.
Lush flower from one type of original petals
We want to start the selection of MKs with a new item - this kanzashi flower made of satin ribbons consists of one type of new type of petals. The diameter of the flower is 10 cm, but it can be easily increased by adding another row in a circle.
Prepare:
- 45 strips of satin ribbon – 7*2.5;
- 7 double-sided stamens;
- white felt.
Turn the satin ribbon inside out and bend the top at a right angle towards you. Fold the top part in half. Fold it away from you and place it in the middle of the bottom one. Fold it on the right side and solder the ends with a lighter. Make 45 of these parts .
The flower is assembled by gluing the petals together. The photo shows how to connect. On O , apply to the lower right edge on both sides and glue into part X.
For the first row, connect 15 elements. Glue the first circle onto a felt base with a diameter of 4 cm. Glue 4 petals together. Fold 7 stamens in half and form a bundle, securing it with glue. Glue the stamens between the second and third petals.
Glue the first and last petals together to create the middle. Make a few more rows of 12, 8, 6 petals and a middle of 4 parts.
Glue the second row onto the first row with a glue gun. Behind him is the third. Connect the last two to each other by applying glue to the central part. Fasten both parts.
If you want to make a hairpin based on this flower from ribbons, then watch the full step-by-step master class.
Dahlia made of identical two-color petals in two sizes
This three-dimensional flower is made of satin ribbon in two colors of different widths. The master class shows the example of white and blue, but you can combine your favorites. The technique for making all the petals is the same, but they are different in size.
Cut the ribbons into pieces, you will need:
- 76 white – 2.5*4 cm;
- 76 blue – 2.5*3.5 cm;
- 6 white – 2.5*3 cm;
- 6 blue – 2.5*2.5 cm.
For assembly:
- felt circle with a diameter of 4.5 cm - 2 pieces;
- white felt rectangle 1*4.5 cm;
- white felt base 3*3 cm.
For decoration:
- blue half bead with a diameter of 14 mm;
- chain with rhinestones.
On one side, use scissors to trim the corners into an oval shape. Use a lighter to trim the edges and stretch them in different directions. Repeat with the entire top of the petal and the blue ribbon.
Place the blue one on top of the white petal, align it along the bottom edge, you can solder it with a lighter. Fold the corners towards the center. You need to make 72 large and 12 small similar parts.
The felt circle can be divided into 12 equal parts for greater accuracy. Glue four petals first, then two more between them. The second row also consists of 12 petals; glue them between the parts of the first.
Similarly, fill the third and fourth rows of 12 blanks each, each time retreating slightly towards the center. The fifth and sixth row of the dahlia flower are made up of eight large petals made of satin ribbons.
Place small petals between large ones, helping yourself with tweezers. Glue the remaining 12 large petals from the bottom, turning the flower over - this will make it more magnificent and voluminous.
Glue the blue center with a diameter of 14 mm to a 3*3 cm felt circle. Glue a rhinestone chain around it with transparent glue, having previously cut off the required length. There are 14 rhinestones in this master class. Glue the dried center into the center of the dahlia.
A voluminous and fairly large dahlia is well suited for decorating a hairpin. If your hairstyle doesn’t allow it, decorate it with a summer hat or handbag.
Multi-layer flower made from 2.5 cm and 5 cm ribbons
Experienced craftsmen recommend learning how to make flowers with your own hands from 2.5 cm satin ribbon - they make beautiful petals. In this master class, brocade ribbon .
Prepare 24 yellow squares – 2.5*2.5 cm and 8 red ones – 2.5*2.5 cm.
Cut 5*5 cm squares:
- 8 golden;
- 8 yellow;
- 8 gold brocade – 5*5 cm.
And you also need:
- 32 pieces of bias tape – 1.5*4 cm;
- red decorative lace “Rhombus”;
- 8 half beads with a diameter of 5 mm;
- center with imitation rhinestones with a diameter of 2 cm;
- yellow felt.
A bright flower made from 8 large kanzashi petals. One is made of 5 pieces, but for convenience it is better to make two petals and then glue them together. Prepare three 5*5 cm squares of gold, yellow brocade and yellow flowers.
Fold one more time and solder the ends with a flame. Fold three triangles so that the gold brocade is in the middle. Bring the ends together, trim and solder over a lighter. Trim the bottom and flame it. Make eight double petals from small red and yellow squares 2.5*2.5 cm.
Glue the small parts into the large ones to create kanzashi petal Dig out a circle with a diameter of 3 or 4 cm from felt. Glue it to the base.
Add sprigs from bias tape. Cut the bias tape into 4 cm pieces. Fold one in half and solder the edges. Connect the ends and solder with a lighter. You need 24 of these drops. Glue two together, add one in the middle. Collect 8 twigs. Glue the half beads. Glue the branches between the layered petals.
From the red diamond mesh ribbon, cut out the shapes shown in the photo. Glue them under the bottom of the satin ribbon flower.
The second tier consists of eight double round petals made from bias tape. Fold the two yellow pieces diagonally. Place the two triangles together, bring the top ends down and fold. Solder the sections. Cut the lower part at an angle and singe it. Glue on both sides of the petal. Glue the resulting parts onto a felt base with a diameter of 3 cm. Decorate the center with a middle, it will hide all the working moments.
This vibrant floral design works well as a clip-in and will look great on long, thick hair.
Embroidery ribbons
There are many materials about satin stitch or cross stitch. But few people know that you can create wonderful paintings using satin ribbons. Although as a result of this direction, extraordinary, voluminous canvases appear.
But in terms of minimal investment of time, effort and money, this handicraft is the best.
To make this craft you will need:
- Ribbons. It is best to use satin ones. This plastic material has a wide range of colors;
- Textile. Any material through which the ribbon will pass without deformation is suitable;
- Several needles with a wide eye. You can purchase a knitted needle (it differs in that it has a blunt tip);
- Scissors and hoop;
- Lighter.
Motives for embroidery
Most often, nature, bouquets or butterflies are chosen as the subject for a painting. These designs are first applied to the material. Then the contour is embroidered with various seams. The queen of flowers most loved by needlewomen is the rose. To embroider this flower, just take five steps. The photo below shows in detail how to do this.
You need to make five stitches using plain thread in the shape of a snowflake. Then we stretch the tape under the fibers, alternating passes from above and below. The size of the bud will depend on the number of turns. The thread should match the color and tone of the ribbon.
What and where to use
Fabric braid has several names and markings:
- Bias tape - used for edging items of any nature, as well as lengthening and hemming trousers.
- Double binding with an allowance (oblique) - necessary for framing rounded cutouts.
- Cotton braid is necessary for strengthening seams, as a decorative element on things and for creating loops.
- Galun made of woolen fabric - has ironed edges, necessary for edging the edges of thick clothes and for decorating national things.
- The voluminous edging with an internal cord is suitable for beautifully decorating lapels and any other edges of clothing.
- Double-sided satin ribbon is an original option for decorating light and complex dresses, children's outfits, suits, sundresses and evening dresses.
- Twill tape is a durable material that is suitable for sewing bags and decorating wall panels.
- Rapeseed tape is also highly durable and can be used for processing the bottoms of skirts and trousers, as well as as a hat tape and a decorative element when sewing corsets.
- Taffeta braid is a mandatory attribute when making decorative flowers and jewelry.
- Lace of any texture is a popular material in handicrafts, which can be used with the same effect in decorating outfits, hats, shoes, bags, dolls and any accessories.
Braid and its purpose
Fabric braid is a separate element for decorating clothing, which is widely in demand in manual and machine labor, in production and in private studios. These textiles are used to produce individual accessories, decorative jewelry, exquisite hairpins, etc. In the past, braid was used to decorate chairs, curtains and even shoes. In fact, the purpose of this tool is varied and modern handicraftsmen know how to “breathe” life and new colors into a thing using simple textiles in the form of braid.
In the interior
The decorative braid in the photo is presented in the interior as decor when decorating:
- curtains;
- tablecloths;
- pillows;
- shelves, etc.
This element fills the atmosphere with lightness, pleasant sophistication and home comfort.
Gift decoration
When choosing a gift, it is necessary not only to think about the present itself, but also to decorate and present it in an advantageous way. In this case, a beautiful textile ribbon will come in handy, from which you can make a rosette, a voluminous bow or light lace. Such a gift contains warmth and tenderness, which puts it a step higher than standard packaging from the store.
Embroidery techniques
In order to embroider a fabric with a ribbon, you need to know the different stitch options. Their main variations are:
- A stem stitch is short, small stitches located close to each other in a straight or slightly oblique line;
- The chain stitch looks like a series of loops coming out of each other;
- French knot.
Sometimes, to enhance the effect, decor from beads, sequins and seed beads is added to the ribbons.
Decorative ribbon decorations for home
One of the most striking examples of crafts for interior decoration made from this material are Christmas tree balls made from it. Which is especially important on the eve of the New Year. To create them, the “artichoke” technique is used.
In this method, pieces of satin ribbons are attached to the workpiece in a certain order, which completely depends on the desired pattern. A detailed photo report will help you understand the process.
We perform the second half of the ball in the same way. Then we glue the loop and decorate the joint with golden braid.
For the everyday beauty of your abode, you can make an original basket of flowers. For this embodiment you will need:
- Large bar of soap;
- Safety pins with pearl heads;
- Ribbons for baskets and flowers.
Poke pins into the upper edge of the soap so that the distance between them is approximately 7mm. Do the same on the other side of the piece. Next, having secured the end of the tape, wrap it around the soap as shown in the photo.
Next, we secure the handle of the basket, made of wire wrapped with tape. We place the made roses in the basket. To create them, make the required number of buds according to the photo. For the stem, wrap a piece of wire of a suitable size with a green ribbon.
We place flowers inside the basket, and the elegant interior decoration is ready.
I hope you are convinced that making crafts from ribbons is not a difficult task. Handicrafts will help you express yourself creatively, while away the evening with enthusiasm, and will significantly decorate you and your surroundings.
Kanzashi flower with sharp petals
The next master class will teach you how to make flowers from satin ribbons using the kanzashi technique with your own hands. It also contains an explanatory video that will help beginners understand the operating instructions. We will need the following materials:
- Satin ribbon of any bright color, twenty-five millimeters wide;
- Mother of pearl beads;
- Candle, thread and needle;
- Glue gun;
- Pencil and ruler;
- Scissors.
Read
We make beautiful crowns and hats using the kanzashi technique
Let's start making the third master class, and take a look at the video attached to it. We cut off pieces of ribbons, of which seven are ten and a half centimeters long, six are nine centimeters long, and five are six and a half centimeters long. Let's arrange them separately from each other, as shown in the video, first burning the ends over a candle. The pieces will serve as the basis for the craft. Then we will begin to form flowers using the kanzashi technique. To make a petal, fold one strip of ribbon twice in the center, resulting in a sharp kanzashi petal. We gather the smooth edges onto the thread using a “forward needle” seam. We will do this operation with each petal, gradually stringing identical kanzashi petals onto one thread, which we then tighten. As a result of such manipulations, we get kanzashi flowers.
To make green leaves for our craft with our own hands, cut twenty centimeters of green ribbon and fold the strip in half, face to face. Then we cut off a part diagonally, and, burning the cut, turn it right side out. As a result, we got three separate flowers with petals of different sizes, which we need to connect together using a glue gun. The largest flower should be at the bottom, in the middle we will place the middle one, and at the top the smallest flower and one large pearl. All that remains is to glue beautiful green leaves down the flower, and we consider that the master class is completed.
Crafts from ribbons: options for making original products (51 photos)
Crafts made from ribbons are a worthy object of creativity in the hand-made genre. Satin products are an ideal attribute of any holiday. Shimmering in the light and giving their shine to everything around them, soft and silky ribbons are pleasant to pick up and admire. It is convenient to make products with your own hands that are not repeated anywhere else. Even nylon tapes are quite suitable for beginning needlewomen.
Simple crafts from ribbons with step-by-step instructions
DIY ribbon crafts are quite suitable for beginners. This is a beautiful and elegant material that does not allow errors. With their help, you can create gift packaging and the gift itself, without unnecessary hassle, provide basic fastening and fixation, as well as original decor. This is a “grateful” material that cannot spoil the product.
You can make almost anything from satin ribbons: so many bright colors and ribbons of different widths open up incredible scope for creativity. Several ready-made ideas with photos are presented to the craftswomen.
Kanzashi
Japanese art that allows you to create decorative decorations from satin ribbons - flowers, bows, stars. In appearance, finished kanzashi products resemble the quilling technique, only not from paper, but from ribbons.
The manufacturing technology is simple. 2-4 cm pieces of satin ribbons are prepared in advance. They are bent with loops and/or half-bows and fixed. Then the petals are assembled and glued into one bud. The art of the craftswoman lies in selecting colors and shapes, as well as maintaining accuracy when working.
The unfading kanzashi flowers will delight you for a long time.
Bouquet for a wedding
Today's brides prefer everlasting and never-falling bouquets made from satin ribbons. Carefully selected colors will perfectly harmonize with the wedding dress. The bride's bouquet will not cause any worries: it is hypoallergenic and eliminates the need for watering. Satin flowers will not lose their shape even a few days before the wedding. Peonies, roses, hyacinths, asters - everything can be created from rectangular pieces of ribbons gathered around the core.
The base for the bouquet is made from polystyrene foam, old newspapers wrapped with twine, or you can buy it ready-made. To strengthen the flowers you will need a glue gun and needles with beads. Everything else depends on the imagination of the craftswoman and her needlework skills.
The step-by-step process of making a bouquet can be represented as follows:
- A sketch is drawn indicating the type of flowers, colors, and quantity.
- Materials are being purchased.
- Individual flowers are made from pieces of ribbons, beads, and threads.
- The leg is prepared and the buds are attached to it.
- The last stage is decorative finishing: wrapping the stem and bottom of the bouquet with satin fabric.
Even a child can make such a bouquet, using the advice of parents and master classes from the Internet.
Festive bottle decor
Bottles at a festive celebration can be decorated in different ways:
- simply tie a satin ribbon around the body of the bottle, giving it the appearance of a gift;
- tie not only the bottle, but also the glasses with ribbons of the same color;
- make a bow or flower and attach it to the surface;
- wrap the entire vessel in satin ribbons of different widths, make figured slits in the form of a pattern on their surface;
- attach ribbons to the bottle in several tiers and with folds, like a fluffy skirt;
- glue the material of different colors overlapping, starting from the neck.
Originally designed bottles will transform the holiday atmosphere and make it more sophisticated.
Christmas tree
The Christmas tree is an indispensable attribute of the New Year. It can be made from ribbons, cut into strips about 5 cm long. The strips are folded in half and secured with pins or beads. Then you need to find a base cone: you can take a cardboard sleeve or a foam piece. From bottom to top, you need to glue “petals” onto it, with or without a slope. It is preferable to place more elongated petals below, and short ones above. A bow or star is attached to the top. The “branches” themselves can be decorated with beads.
Such a simple Christmas tree will be an excellent option for decorating the New Year's table. It can be made for a holiday with the family or for an office corporate event.
Bracelets
A product such as a bracelet can be skillfully repeated using satin ribbons. The idea of making jewelry from silk braid is not new: back in the 19th century, needlewomen used satin materials for their crafts.
The following can be made from ribbons using the weaving technique:
- braids in 2 or 3 rows;
- round baubles;
- spiral baubles;
- square products from 4 ribbons.
Create a feed collection
Once you become fully involved in the art of making ribbon jewelry, your tastes will immediately become clear and you will have a clear idea of what types and colors of ribbon you prefer.
My suggestions are intended only to help us take the first step. Types : Most of the colors and products described in this book are made from French wire ribbons in various shades and widths. Since such ribbons are not suitable for some techniques, I also used silk ribbons cut on the bias. Within these two groups you will find a huge color palette of ribbons, both bright and faded, both multi-colored and hand-dyed. When using silk ribbons, the petals are very soft and delicate, while wire ribbon makes it possible to give them the desired shape when the flower is ready.
Dimensions : To determine the width of the wire tape, the French system known as lignes is used, where according to the size the tape is assigned a certain number, for example (15 mm), #5 (23 mm), #9 (39 mm), etc. This a system that manufacturers use when selling tapes to wholesale and retail customers. Consumers purchase tapes by width in inches (or metric equivalent). For the projects featured in this book, I used a range of ribbons in different sizes. To make the instructions easier, I have rounded some of the widths to 2cm for #3, 2.5cm for #5, 4cm for #9. Buy ribbons of different widths, still giving preference to 2.5 cm and 4 cm.
Ribbon quality : French wire ribbons can be made from polyester or rayon with acetate. Try both types. Perhaps after a while you will give preference to one of them. Personally, I prefer viscose with acetate. Don't buy hard tapes. For a successful result, a soft material is desirable.
Color and Texture : Remember to vary colors to create impactful pieces. Don't be afraid to use orange-yellow - it would be great for pansy petals, hollyhock hearts or a gorgeous rose. Buy half a meter of citrus green ribbon - it will be great for the center of a poppy, calyx or showy leaf.
If a flower is being used to decorate clothing or the home, texture is just as important as color, so don't ignore ribbons made from velvet, silk, organza and wire grosgrain. Consider whether a striped or textured ribbon would be suitable for a petal or leaf to draw attention. To create a soft pleated rose, use organza ribbon. Give yourself a meter of expensive jacquard ribbon for your necklace bag. Here is my motto when buying ribbons: “If you like it, buy it! If you're not sure what you like, still at least a little, but buy it! Someday you will find a use for it."
For flowers, I suggest you buy the following ribbons : three meters each of pale pink, lilac, dark purple and peach; one meter each of purple and lavender; two meters each of turquoise, olive, grass green (or three other shades of green); one meter each of pale yellow, yellow-orange, golden, rust color; three meters cream; two meters of ribbon in the color “white night” and another meter of ribbon of some other color, which must be present in your collection. Why, I bought the tape, although I had no ideas on how to use it, and it was very useful to me when, at midnight, it suddenly dawned on me how it could be used!
Note : Before you start working on any of the products described in this book, please note that I calculated the width and length of the ribbon only for an individual petal, so you will have to calculate on your own how much ribbon you will need. It should be enough to make one or two flowers for testing. If I mention how much tape you will need in total, it will be enough to complete the piece and maybe some of it will not be used up. Be sure to read all instructions before cutting the tape.
Storing the ribbons : Carefully wrap the ribbons around the cylinder or fingers to avoid damaging the wire. Once folded this way, place it in a cardboard box, plastic drawer or basket with compartments (remember that the storage area for the tapes should not contain any acid residue). If you buy tape in rolls, simply store them in large plastic boxes with lids. When not needed, the boxes can be removed under the desktop.
Cleaning the Tape : Most tapes, whether used flat, smocked, or firmly sewn to the dress, are usually designed to be washed gently in warm water. Some ribbon colors are not permanent, so if in doubt, test them. I am very particular about washing the ribbons after they have been shaped into the flower shape and sewn onto the dress. It’s much safer to make a product that can always be unfastened.” Use a pin or sew flowers onto the border, which in turn can be removed for cleaning. So, on the dress of the 1920s, shown on p. 8, the roses were sewn onto the trim, which was then attached to the dress with just a few stitches. Most of the products in this book do not require washing.
What can be made from satin ribbons
From ribbons, which are sold in almost every store specializing in needlework supplies, any beginning needlewoman can make beautiful jewelry or accessories.
Even children can be involved in making products from satin ribbons with their own hands, thanks to which they will not only learn to sew, but also work independently.
There are several areas of application for products made from ribbons : New Year's crafts, toys, souvenirs for any holiday, or to sew decorations for dolls. You can also use these crafts in everyday life - as a box for storing jewelry, or do:
- all kinds of flowers and bows - for decorating objects and clothes;
- bracelets, hairpins and headbands;
- figurines of various animals, garlands and brooches.
Designers often use ribbons to work in a variety of techniques: for example, kanzashi to decorate interiors, women's hairstyles and things. You can also use ribbons to embroider panels and paintings, decorate bottles of alcoholic drinks or cushions for rings. And make baskets with flowers from ribbons and soap.
Crafts from ribbons can be made in several ways:
- Weaving, for example, a bracelet or pendant. Ideal for beginner needlewomen.
- Sewing: it is used to create appliques or individual decorative elements - bows, flowers or vignettes that can be sewn onto clothes or a handbag.
- Making complex products using additional elements: baskets with folding handles, various boxes and caskets.
We decorate things and decorate the interior
If you want to make a lush flower from satin ribbons as a gift, then choose bright colors: scarlet, yellow, burgundy, orange. When the leaves and flowers are colorful, they look great in a basket. For a young girl, choose more delicate shades: lilac, pink. The wedding dress should have white or pale colors. You can use straw wicker or thin willow twigs in a flower pot.
We invite you to familiarize yourself with the name of a flower similar to a palm tree.
Container, things - everything should look harmonious. The filling material may be simple polystyrene foam. It is very convenient to stick flowers into it when making a composition. Whatever new ideas come to you, bring them to life.
A hard sponge is used in floristry as a special, special material. Most often it is used for the manufacture of professional products. Kanzashi colors in little girls' hairpins and elastic bands look unforgettable. To create hairstyles, you can use decorative elements: small flowers, beads, butterflies.
The hat can be decorated with bird figures made from ribbons. Large crafts look best in the decor of bags and hats. Ribbon flowers are also successfully used in the interior. They are used to create luxurious roses, regal gladioli, strict peonies and modest daisies. If the products are properly cared for, their attractiveness will remain for a long time.
Apple trees look wonderful in small wicker baskets with flowers. A flowerpot in the shape of a bicycle, which is decorated with bouquets, will look very original. Even in our time, topiaries - trees of happiness - are very popular. Floating cups are as famous as they come. All these products refresh the interior and give it a unique and stylish look. Such crafts will be an original gift for a loved one. These flowers will set you up for positivity in winter. The holiday atmosphere is guaranteed to you.
What to use to make a petal pattern:
- Large template;
- The smaller pattern is paper;
- Reduced template.
If you used more than one technique to create flowers, they will look more impressive. Show your imagination and come up with something original.
Artificial flowers and original baskets
The most popular crafts among beginners are flowers. In terms of ease of execution, they come second after embroidery, which consists of sewing pieces of ribbon of the desired color along the contour of a pattern previously applied to the material.
Flowers are made a little differently; here a needle and thread are used to secure one or another element of the product. So, a master class on how to make a simple flower:
- First of all, you need to take a ribbon 6 cm wide and about 90 cm long and fold it in half, with the wrong side inward. Then you need to sew the ribbon, basting it along the edge, starting from the fold line and moving towards the edges.
- After this, pull the basting thread at one end in order to carefully gather the ribbon along its entire length. Fold the edge of the ribbon to form a central bud. To do this, you need to use the edge from which you started basting the ribbon and secure it with a few stitches.
- Then you need to twist the ribbon around the central bud, and after each turn the ribbon should be secured along the edge. After it ends, hide the ends of the thread and straighten the made flower.
- If desired, you can make a stem for the flower by making it from a green plastic tube and placing a “bud” on it.
After mastering this technique, you can start creating a basket of ribbons:
- To create the base, you need to take a piece of aromatic soap and secure safety pins on it in a circle, at intervals of 8 mm. Their number should be the same.
- After the pins are placed, you need to take a 2 cm wide ribbon and secure its edge. Then form the walls of the future basket. To do this, the tape must be attached to the top pin and lowered. Next, hook it to the bottom pin and lift it again.
- Repeat similar steps until the wall of the basket is woven. In this case, the long end of the ribbon should be located at the bottom, and the short end at the top. Form the bottom edge of the basket with the edge of the ribbon, which will create a side. And from its remains weave the upper edge of the product.
- After completing the weaving of the basket, you need to make a beautiful bow from the ends of the ribbon, and cut off the unnecessary part with scissors. These remnants can be used to decorate the handles of the product, the base of which can be made of wire.
Crafts made from ribbons in the form of baskets can also be combined with artificial flowers to decorate a festive table or room.
Rose on a fork in a minute
Looking at photos of products made from ribbons, the question involuntarily arises: how to create such an option yourself.
Since materials for making crafts are easy to find and do not require large investments, they are popular among needlewomen. They are common and purchasing them is not difficult.
The products created from them are distinguished by originality and unusualness. Working with ribbons is not difficult, you just need to have basic sewing skills.
Another advantage of working with this material is the opportunity to involve children in this exciting process of creating products from satin ribbons with their own hands.
Handicraft activities promote the creative development of children. When making a product, problems may arise that the child needs to solve.
As a result, he strives to make decisions independently, develops motor skills, perseverance, and attention.
Crafts from satin ribbons can be made to coincide with any holiday; then we will consider an option for the New Year. Before the New Year, everyone strives to beautifully decorate their homes; products made from ribbons will be original decorations.
A Christmas tree made from satin ribbons is made using a narrow ribbon, a cone base, thermal glue, and a bow for the top. Rolled pieces of tape are glued to the base one after another, starting from the bottom edge.
Then all the rest are glued on, and the top is attached at the end. It can be ready-made, or you can make a suitable option from ribbons of a different color and width.
You can make a beautiful Christmas tree from satin ribbons using the kanzashi technique. This option is more difficult to implement, but the result is completely justified.
To make this craft, you need a cone base, any kanzashi petals, thermal glue, a Christmas tree topper, and decorative elements.
The petals are glued to the base one by one, row by row, forming the future Christmas tree.
The base is glued on top and, if desired, any decorative elements - beads, rhinestones, bases. You can make a craft using several colors, connecting them together.
This is a quick way to create small roses from satin ribbons.
What is needed for the product:
- fork;
- two tapes of different widths (1 cm and 3 mm);
- needle and thread.
What do we have to do:
- Thread the end of the ribbon between the outer tines of the fork.
- Make five turns around three cloves.
- Then make four turns around the four cloves.
- Without removing the tape, turn the fork with its end facing you and grab all the winding layers at once from one edge with one or two stitches.
- After removing the tape, make one or two stitches from the other edge.
- Take a thin ribbon and tightly tie all the layers of the future bud where the stitches are.
- Take the petals apart one at a time, starting from the top. For convenience, it is better to immediately give them shape.
- Having finally formed the bud, you can make leaves from a thin ribbon. But this is optional.
The size of the bud depends on the width of the material. The main thing is that it is not wider than the tines of the fork. Not everyone has probably tried working with a fork like this. But the method is very simple - everything will definitely work out!
Peony is a luxurious lush flower that always attracts attention, including its variety of colors.
We invite you to familiarize yourself with Autumn crafts for kindergarten from matches
What you will need:
- lighter;
- needle and thread;
- ribbons in two shades to match (red and pink are taken as an example);
- scissors;
- tweezers.
Description of work:
- Take ribbons of both shades of different widths - 5 and 2 cm.
- Cut out petals of the same shape. 15 pieces each from 5 cm ribbons and the same number from 2 cm ribbons. A total of 60 petals should be obtained.
- Carefully burn the edges of the fabric over a lighter until they curl slightly.
- Start forming a flower with small petals, alternating shades. The thread tension can be loosened little by little.
- If possible, do at least a couple of stitches so that the peony does not accidentally fall apart at the wrong moment.
The finished lush peony can be decorated by adding a bead to the center or gluing transparent rhinestone droplets onto individual petals.
Kanzashi are Japanese traditional hair ornaments. That’s why flowers made using the kanzashi technique are most often used for hoops, hairpins and hairpins. These flower ideas are always impressive.
What you will need for work:
- ribbon;
- ruler;
- pencil;
- cardboard;
- scissors;
- lighter or candle.
Description of work:
- The average width of the tape for the kanzashi technique is 5 cm. It needs to be cut into squares. Only seven pieces.
- Bend the square into a triangle. Bring the side corners to the top of the figure to get a rhombus. For convenience, you can use tweezers.
- Fold the corners of the diamond down. Thus, there should be three fold lines on the front side. Use tweezers to pinch the cut lines at the bottom.
- The irregularities must be carefully cut off with scissors and scorched over a candle. Thanks to this, it will retain its shape. Do the same for the remaining petals.
- Collect the finished petals on a string, form a flower and glue it to the base. A round piece of cardboard is suitable.
- The last step is to decorate the core with a bead.
The flower using the kanzashi technique is ready and can now be glued as a base to any hair accessory.
Here is another simple and relatively quick way to create rose buds from a single piece of ribbon. Having mastered this simple technique, you can make flowers even while sitting in front of the TV.
What is necessary:
- ribbon (the size of the bud depends on its width);
- thread and needle (can be replaced with hot glue);
- scissors.
How to make a bud:
- Smooth out the fabric and lay it in front of you. For example, a width of 2.5 cm is selected.
- Bend either end of the fabric perpendicularly downwards, as in the proposed diagram.
- Make two or three turns to form the core of the flower. It needs to be fixed. You can sew it with thread or simply glue it with hot glue.
- Now the shaping of the petals begins. The free edge of the ribbon needs to be bent as in the first case, closer to the rose. And carefully wrap the core, supporting the workpiece from below. If desired, the turns can be fixed with threads or glue.
- Continue further, repeating the steps already described in the previous paragraph: bend the ribbon and wrap it around the flower. And so on until the bud is quite lush.
- From time to time you can fix the tape with thread or hot glue. The main thing is not to let the ribbon unravel.
- When the bud reaches the desired size, you need to trim off the excess, if any, press the end of the tape to the base and secure it again.
It is worth noting that it is useful to practice twisting such roses from ribbons of different widths. You can change the bend angles, experiment with the number of bends and twist density. All this will allow you to achieve completely different effects and find the result that you like more than others.
If any details remain unclear, you can always study the visual video of this master class.
The scheme for creating these flowers is quite simple, but at the same time the flower turns out to be very realistic. And it only takes a few minutes to make. This option will work out right away, even for someone who has never folded flowers from satin ribbons.
We suggest you familiarize yourself with the benefits of walnuts with honey, how to take walnuts with honey
What you will need for the product:
- ribbon for bud;
- scissors;
- lighter;
- needle and thread.
How to do:
- Cut the ribbon into fragments 5-10 cm long. If you take the petals of different lengths, the finished flower will look more natural.
- Round off and melt the cut lines using a lighter. It is important to ensure that there is no darkening on the fabric.
- Now the petals need to be sewn at the bottom using an overlapping method. Starting with small petals and gradually moving to larger ones. It is best to use a thin or medium needle so as not to make large holes.
- Each of the segments needs to be pulled a little to give the petal its shape.
- All that remains is to roll the resulting petals into a rose and carefully straighten the petals.
- You can glue a bead into the center for decoration. And complement the decor with narrow ribbons of suitable colors.
Roses made in this way are often used in arrangements for celebrations. For example, if you needed to create a boutonniere for the groom or a wedding bouquet.
The excellent kanzashi technique consists in making flowers from a narrow satin ribbon-braid of large width. In Japan, they decided to decorate their stiletto heels with flowers. To do this, fold small pieces of fabric into something like flower petals. Unusual flowers bloom on stiletto heels, and this beauty adorns your hairstyle. Works using this technique are in fashion - they even decorate wedding dresses. If you work using the kanzashi technique, in addition to the necessary tools, you also need a ruler, a chalk pencil and a candle.
The kanzashi technique distinguishes three types and uses the following types of petals: round, long and sharp.
The kanzashi flower that you will make from a ribbon equal to a width of 5 cm will be medium in size. These interior decorations will decorate any home. Gifts in the form of a hairpin or headband will delight any child. If you want to make different petals, then the tape must be cut into equal squares, which are then folded diagonally.
Lower the side corners to the central place - a rhombus is formed. Bring its side corners back and pinch the cut from below with tweezers. Trim the uneven cut with scissors or scorch it with a candle. Gather all the petals onto a thread, then roll them into a flower and glue them to the base. Don't forget to make the middle out of beads.
Tools and materials for making the product:
- Multi-colored satin ribbons of different widths;
- Threads and needles of different thicknesses;
- Well sharpened scissors;
- Transparent adhesive and glue gun;
- Several tweezers.
This style combines a variety of flower and petal shapes. Ribbons made of satin material can be collected into large baskets of flowers, and you can also decorate your accessories.
Seasons change - and we do not have the opportunity to enjoy year-round flowering. You can learn how to make original, voluminous, airy compositions, paintings, and crafts from satin flowers step by step with your own hands. Atlas is very widely used in needlework, and crafts made from it are durable and attractive.
Application of the kanzashi technique
Having mastered the simple technique of making crafts from ribbons, you can proceed to more complex ones. Currently, making accessories from ribbons using the kanzashi technique .
The essence of this technique is to create artificial flowers from ribbons and then place them on headbands and other accessories necessary to fix the hairstyle. This technique uses not only braid, but also beads, beads, buttons and much more. To make the products, squares of the same size are used, cut from braid with a soldering iron. Sharp and round petals are made from them.
To form a flower, the finished petals need to be collected on a strong sewing thread and then glued to a base of felt or cardboard using PVC glue or regular stationery glue. Finally, you need to attach rhinestones, beads and sparkles to the workpiece, let it dry and straighten the petals.
Thus, having mastered various techniques for creating crafts from satin ribbons, you can make original accessories and home decorations with your own hands .
Learning to make a daisy from thin ribbons
The new master class will explain to those interested how it is easier to make a daisy flower from ribbons or fabric. To make your own artificial daisy from ribbons, stock up on the following materials and tools:
- White satin ribbon, six millimeters wide;
- Satin ribbon six millimeters, yellow, or a button for the center of the flower;
- Lighter;
- Needle and thread;
- Glue gun;
- Scissors, pencil and ruler.
Read
White daisy made from ribbons in kanzashi style
This MK contains a video that will help you understand the content of the scheme underlying the formation of a chamomile flower. In addition to the video, you will find text explanations in the MK that you can use as a guide. You need to start working in the kanzashi technique by cutting eight pieces of ribbon or fabric. The length of these strips depends only on the personal decision of the needlewoman. The fact is that the length of each chamomile petal depends on this length. We determine the desired length of one petal, and mentally multiply it by two. This figure will be the required length of the tape. In this MK, the segments will be eight centimeters long. If your strips are cut from fabric, then treat the cuts with fire from a candle or a lighter. In total, you may need forty units of white satin ribbon.
Let's continue making the MC and fold each piece in half, burning the edges and forming petals. Then we cut out a circle whose diameter is four centimeters. Let's step back eight millimeters from the edge of this circle and draw another circle inside it. After this, we begin to apply glue and glue the petals without going beyond the drawn line inside the circle. This process is very clearly visible in the video of this MK. After the first row, we will also glue the second row to make the kanzashi flower more magnificent. Next, let's move on to the center of our craft. To do this, we thread a yellow ribbon, six millimeters wide, into a needle with a wide eye, and make a knot at the end of this ribbon.
Bring the needle from the wrong side to the front side, and then fill the inner surface of the center of the daisy with French knots. We will make these knots very close to each other so that the middle of the flower is dense. We are finishing the second master class. We fix the yellow ribbon on the wrong side of the work, apply a little glue there, and glue a white felt circle to mask the defects on the wrong side. This chamomile is made using the kanzashi technique. In this lesson we will look at other kanzashi flowers that will be useful to you in decorating absolutely any idea.
DIY crafts made from satin ribbons
Satin ribbons are a universal material used for making crafts using various techniques. They are inexpensive and the consumption is quite small. A detailed description of satin ribbon crafts for beginners will allow you to start your creativity.
Satin ribbon panel
The tapes are suitable for making the following products:
- flowers, bows, snowflakes;
- voluminous animals;
- paintings and panels;
- Christmas trees and topiary.
Flower headband
They also decorate:
- clothes, shoes and hats;
- wedding paraphernalia (glasses, bottles of champagne, bridal bouquet);
- premises;
- Easter eggs and New Year's balls.
Reference! To decorate a gift box or bouquet, you do not need any additional tools. Enough satin ribbons and a little work.
Decorate hairbands with ribbon flowers
The next master class will teach novice needlewomen how to use crafts made from satin ribbons to decorate their hair. In order to make flowers from ribbons with your own hands and decorate headbands, hairpins or hair clips with them, we need to prepare the following materials:
- Green satin ribbon two and a half centimeters wide;
- Pink satin ribbon five centimeters wide;
- Red satin ribbon five centimeters wide;
- Hair band;
- A felt circle with a diameter of thirty-five millimeters for the base;
- Glue gun;
- Lighter and soldering iron;
- Scissors;
- Tweezers.
From the green tape we need to cut five strips of twelve centimeters each, and another five pieces of nine centimeters each. Cut out squares from pink and red ribbons. We will need twelve red squares, and fifteen pink ones. These are the details that we need according to the requirements of the diagram in order to make flowers from ribbons with our own hands. We start the MK by making green leaves. Fold each strip of green ribbon in the middle and cut off a corner, holding the ribbon with tweezers. We burn the cut ends, gluing them together. Now we will make inverted triangular petals from pink and red ribbon. To do this, fold each square three times, forming a triangle. We cut the edges of the triangle as shown in the video, burn them and turn them over to the other side. Follow the pink and red petals according to the requirements of the kanzashi diagram that this master class contains.
Read
Several options for creating dahlias from ribbons
When burning the cut ends, you need to keep the flame close to the tape until the melted edges stick together. Let's complete the preparations for our craft and continue with MK. This will be followed by assembling a flower from satin ribbons. We start by covering the felt circle with satin ribbon and gluing this circle to the hair band. Then we apply a little glue to the end of the base, and glue the five large green leaves first. Apply glue in the spaces between the large leaves and add smaller leaves.
The next stage of MK is to form a flower from pink and red petals with your own hands. We will start with a small bud, which needs to be glued together from three pink petals, having first smeared their side surfaces with glue. Between the first three petals of the bud we continue to glue the next pink petals. When the bud becomes large enough, you can proceed to gluing the red petals. Place the petals from the red ribbon not inward, as we did before, but with a curve outward, gradually gluing them. The remaining pink petals can be glued two together and added inside the green leaves. So, the hairband, on which dazzling flowers made from satin ribbons bloom, is completely ready. Handicraft lessons, supplemented with photo and video materials, will help all beginning needlewomen master the art of making beautiful fabric and ribbon flowers.
Different techniques for making crafts
Crafts are made using various methods. They are easy to understand even for a beginner, although the products often look luxurious, natural and complex.
Kanzashi
The Japanese technique of making decorations for hairpins, headbands and hair clips from ribbons is kanzashi. Modern craftswomen create not only hair decorations using this technology, but also many other crafts. They are assembled from individual petals, which are folded like origami. Kanzashi is based on two principles for creating petals: round and sharp. The rest is the imagination of the needlewomen (photo).
To work, you will additionally need glue and beads, rhinestones, and sequins. Satin ribbons are pre-cut into squares.
Making round petals:
- Fold the square into an equilateral triangle.
- Bring the corners from the fold to the bottom corner so that a rounded line is formed at the top.
- Fold the side corners at the back. Align the edges.
- Burn the cut and press to secure.
In the finished product:
Making sharp petals:
- Fold the square in the same way as in the first option.
- Connect two corners, folding at the top.
- Fold the petal in half again.
- Burn and fix the corner.
- Trim the bottom edge and melt the cut over the candle.
More often, this technique is used to make flowers and snowflakes for hairpins, hairpins, headbands and elastic bands.
Butterflies and kanzashi flowers will be a wonderful decoration for clothes in the form of brooches, and voluminous swans, peacocks and Christmas trees will become interior decor.
Melted petals
This technique is good for creating roses, peonies and poppies. The flowers look natural, but not as neat as kanzashi. Only synthetic tapes are suitable for work. You can only choose the right material by trying.
Additionally, prepare tweezers with long tips, cores or beads.
To create flowers from melted petals you need:
- Draw a petal on paper. If it is a circle or a flower shape, then each piece is 0.5 cm smaller than the previous one, at least 10. If it is a drop or a heart, then make 3-4 sizes of at least 6 pieces.
- Cut blanks from tape.
- Melt the petals over a candle; it is better to hold them with tweezers and at a short distance from the fire.
- The petals in the shape of a circle and a flower are connected in the center, and the drop and the heart are collected at the bottom. Then the core is attached.
Crafts with melted petals are suitable for creating large flower arrangements. And also for decorating brooches or hats, but you should carefully select the clothing style for such accessories.
Embroidery with satin ribbons
Any embroidery is popular at all times, and if you add ribbons to it, the picture seems to come to life. The creative process is complex and requires special perseverance and accuracy from the master. To work, you will need base fabric and a special needle with a large eye.
Before you start working, it’s worth learning the basic stitches of the technique:
Straight stitch. It is made as a thread seam. Used to create petals.
French knot. Suitable for depicting buds. The needle is brought out to the front side and wrapped with tape, then a puncture is made next to the previous one and the needle is returned inside out.
Twisted stitch. On the face, the tape is pulled and twisted so that even turns are obtained. The needle is inserted at the required distance and brought out to the wrong side, where the tape is secured with threads.
Japanese seam. The tape is laid out on the face and a needle is stuck into it, leading to the wrong side. This is how leaves are created.
Knowing these stitches, you can easily learn how to make derivative stitches.
Embroidery with satin ribbons
Three-dimensional rose embroidery
- The location and size of the flower are marked on the fabric. 5 rays are drawn from the center at equal distances. Thick threads are used to lay seams along these rays. And then the tape is pulled through them in a checkerboard pattern.
- A piece of tape is gathered at the bottom, twisted into a spiral to form a bud, and sewn on with thread.
- A rose embroidered with Japanese stitches looks most natural. Work begins from the core with small stitches, then they are enlarged and laid in the shape of the petals.
Ribbons are used to embroider paintings and panels, and are also used to decorate clothes, bags, and pillows.
Important! It is better to use a thick, blunt needle. This way the hole will be large enough for the tape and it won’t break the threads of the materials.
Other options
There are many more different types of “tape creativity”.
For example, a bridal bouquet can be made from twisted roses. To do this, you will need a tape 4-5 cm, 1.2 m long. Fold a corner on one side and twist it into a tube. Wrap the core with tape until the end of the length, twisting it at small intervals, from the face inside out and back again. The second edge is hidden under the last petal, and the structure is secured by stitching with thread.
Bridal bouquet of twisted roses with beads
The artichoke technique makes wonderful New Year's toys. To do this, you will need a foam base, satin ribbons of three colors, 5 cm wide. We cut them into squares and iron them in half. Attach one square to the base. Align the center of the rectangle with the center of the square, fold the corners and secure. Next, in the same spirit, pin the remaining parts. Decorate the top of the ball with a bow.
Advice! To fasten parts in this type of patchwork, it is customary to use pins with a flat head.
Artichoke technique: New Year's toys
The variety of colors and sizes of ribbons allows you to make each craft unique. And having gained experience, needlewomen begin to experiment, coming up with new ways of making petals. Therefore, every day more and more beautiful and interesting works appear in various techniques.
Variety of petals using kanzashi technique
A novice craftswoman should first master the technique of making various petals by first watching a master class on video. Then you can start making elements of such decor, which can be narrow and round. By changing the sizes of satin ribbon blanks, you can create complex compositions by nesting narrow and round petals of different colors into each other.
Before making a flower using the kanzashi technique, you must first select the colors of the satin ribbons so that they blend harmoniously. From narrow petals you can make both inflorescences and leaves, changing colors. The round petals are always used to make the inflorescence.
Having made the required number of blanks, the master begins to assemble them into a single flower arrangement. For this, glue and thread are used, which are usually used to collect flower petals. To master the basics of the kanzashi technique, you need to start by making a simple flower, in which round petals will create inflorescences, and narrow leaves will form twigs.
Master class on making a narrow petal
First you need to cut the satin ribbon blanks. For ease of work, you should take a tape 5-6 cm wide, green and red. Using scissors or a soldering iron, cut squares with a side equal to the width of the tape.
To create a flower you will need to make 7 wide red petals. 7 squares are cut for them. For green leaves you will need 5 blanks. When the material is cut, you can proceed to making narrow petals.
Now we take the green blank and begin to fold it with our hands, or with tweezers, so that we get a triangle, the fold of which should be at the top. Then the right end bends towards the left. To prevent the workpiece from unfolding, it must be held with tweezers.
Then once again the triangle is folded from right to left. The ends and folds must be trimmed.
The folded ends are trimmed a little and melted over a lighter. To prevent the material from burning, but from melting, it must be kept in the lower part of the flame, holding the workpiece with tweezers. The bottom edge is also trimmed and melted. The leaf is ready. The remaining 4 leaves are made in the same way.
Master class on making a round leaf using the kanzashi technique
The red square folds diagonally into a triangle. Then each of its corners is bent to the top, which is located below. You get two parallel folds exactly in the middle of the workpiece.
One folded edge is folded over the other. It turns out to be a triangle. Holding the workpiece with tweezers, you need to cut off the slightly free edges and melt them over a lighter. The free lower edge is also leveled and melted.
When processing with fire, the edges of the petal must be glued together. You can do this with your fingers, allowing the material to cool slightly so as not to get burned. Then, from the wrong side, drop a little glue into the resulting recess and glue the petal together so that it becomes round and does not puff up. Using the same pattern, make 6 more petals for the inflorescence.
Assembling a flower using the kanzashi technique
Red petals need to be strung along a sharp corner on a thread with a needle and made into an inflorescence. For work, you should use transparent threads, for example, monofilament, so that they are not visible later on the decoration.
Cut another red square from the satin ribbon. Also cut out a small, even circle for the base of the cardboard flower. Glue a cardboard circle to the middle of a piece of tape and bend all the edges inward, covering the cardboard base, having previously cut the material in a circle with an indent. The folded pieces of material are also glued to the cardboard.
Lubricate the inside of the resulting blank with glue and glue it to the back of the flower. You should use glue for gluing, not a glue gun, since you want the adhesive to not set quickly. This will ensure that all the petals are properly aligned.
Using gel glue, two green leaves are glued together at the lower ends. Another pair of leaves is glued together in the same way. The fifth leaf is glued to the double leaves. Afterwards the triple leaf is glued to the double one.
The resulting green branch is carefully glued between the petals of the inflorescence. A bead or rhinestone is glued into the middle of the flower. This floral arrangement can be glued to a clasp with a base to make a brooch, or to a hair clip.
Having mastered the technique of making narrow and round petals, you can begin to create original decor for various products. Before you begin, you should carefully consider the color scheme of the flower and the product that it will decorate.
DIY ribbon flowers - 6 master classes for beginners
In this material we presented 6 step-by-step master classes for beginners, following which you can make flowers from ribbons for making/decorating with your own hands:
- Artificial flowers (interior);
- Wall panels;
- Topiaryev;
- Decorative and wedding bouquets;
- Costume jewelry (rings, brooches, necklaces, bracelets);
- Hair accessories (headbands, headbands, barrettes, elastic bands);
- Boutonniere;
- Gift packaging;
- Decorative pillows;
- Boxes for jewelry and other small items;
- Albums and notebooks;
- Applications for clothes, bags and shoes;
- ...and much more! This selection of photos shows only a small part of the crafts that you can make after mastering various techniques for making flowers from ribbons:
Original flowers made from ribbons: mini-products as a design element
The most popular and widespread trend in needlework has become the creation of flowers from ribbons. These decorations are the main decor when decorating wedding dresses and men's suits in black and white. The bride's bouquet is also decorated using the kanzashi technique.
Crafts and decorations are made from leftover tape or fabric.
First you will need a stencil or patterns made of paper or cardboard. You need to calculate the size of the flower you intend to make. Let's start by pulling the ribbon through the hole in the center of the workpiece, and we need to braid each bend. The tape should not move in other directions. It must be held with your hands.
Next, you need to release the stencil from the product, cut off the thread and singe it. You cannot break the thread from the diagram. You can decorate flowers with various beads, buttons or pebbles. Then we straighten the petals of the craft. For bright colors, the color palette should be different. Such jewelry is suitable for hair, accessories, souvenirs and gifts for friends.
Materials for fixing a flower in a bouquet:
- Regular wire;
- Copper thin thread;
- Special wire - stem.
If you have learned how to make mini-flowers from ribbons, it means that you and your loved ones will have a lot of updated things in your wardrobe with bright, fashionable, designer elements.