Often, to create something new, we need advice from other people. Have you ever made furniture for your home yourself? Today we’ll talk about how to make a wooden garden table with your own hands. The variety of tables is so great that the manufacture of a desk or dining table has its own nuances. But there are also general tips that can be useful when creating this piece of furniture. There are several important aspects that should be taken into account first in this work.
- choose the right wood;
- choose the right configuration for your desk;
- create a drawing and mark the necessary details and features on it.
How to make a table from wood? We'll tell you in this article.
How to choose wood
The choice of wood will determine the appearance of the table, its strength and the level of complexity of manufacturing.
The tree classification can be structured as follows:
- Soft type: pine, spruce, fir, cedar and other woods.
- Hard type: oak, birch, beech, ash, maple, walnut, fruit tree wood.
- Very hard type: boxwood, yew, dogwood, birch wood
Once the choice of material has been made, we begin processing it.
According to the needs of different people, as well as in the case of individual distinctive situations, different characteristics of wood or its features are important:
- Rot resistant.
- Texture of the material.
- Price of raw materials.
To make a table, we need high-quality dried wood.
If your goal is to make furniture for a living space (and not just practice a skill), then you need to take into account the quality of materials without neglecting them. Dry lumber must be used. How it will be dried is up to you. Evaluate in advance whether you can properly dry the wood at home; if this is not possible, it will be more profitable and reasonable to order ready-made material. During drying, the wood will be deformed, this must be taken into account, but purchasing already dry wood is much more expensive. For high-quality drying at home you will need:
- constantly stable temperature conditions, otherwise the material will dry in waves;
- good ventilation in the room, no draft;
- It should be remembered that this process is very long; the material must be dried without being shifted from place to place for about six months.
Then think about the design of the product.
- Tabletop.
The shape of the tabletop can be round, square, rectangular, oval.
Here, strength plays an important role, as does the absence or low absorption of moisture by wood. Optimal material: pine, oak. For a pine tabletop, choose cheap but high-quality material - without rotten areas, cracks, protruding knots and other unnecessary defects.
- Table legs.
The legs can be made of a different material than the tabletop, and can be of the most bizarre shape.
Optimal material: birch, it is strong enough for constant load; boxwood and acacia are also suitable.
To make a table from wood, the material must first be treated with sandpaper. If you are just starting your carpentry career, you should use birch, pine, oak, acacia and boxwood in your work.
Unlike other materials, wood has a number of advantages.
There are several advantages when using wood in construction:
- easily subject to various processing;
- sufficiently resistant to changes in temperature and humidity;
- good shock absorption: practically no chips or scratches;
- simply undergoing restoration;
- environmentally friendly material;
- the cost varies depending on the type of wood and processing methods;
- the material is easy to saw, cut, and chip with special tools;
- does not require careful and constant care
- external aesthetics.
However, there are also a number of disadvantages.
That being said, there are some significant disadvantages to keep in mind:
- the cost is significantly higher compared to other materials;
- wood can become deformed under the influence of weight;
- without the use of special coatings it is not resistant to mold and mildew, corrosion;
- wood cannot be called a moisture-resistant material;
- Over time, the above aesthetic appearance may be significantly lost.
If you make a table and benches in the same style, you will get a very nice furniture composition for your home, cottage or garden.
Types of crafts for the garden
If you have a child, you can turn your local area into a real fairy-tale corner by cutting out figures of heroes from Russian fairy tales.
In addition to people and animals, you can make a peasant cart, a train, and mushrooms. The best wood to implement this idea is birch.
Garden furniture, for example, solid oak chairs or linden benches, is suitable for arranging a backyard. You can make several benches for flower pots.
It is appropriate to place small tree stumps with beautiful textile pillows throughout the area - you will get comfortable places to relax.
Another useful wooden craft for the garden and cottage is a bird feeder. There are many design options for it - from simple to complex.
You can make a wicker fence in the Provence style from branches and brushwood. It will become the highlight of your landscape. It can be used as a fence for a vegetable garden or front garden.
An old stump can easily be turned into a wonderful flower bed. As you can see in the photo of wooden crafts, such an element of landscape design looks very picturesque.
A mandatory attribute of a summer house - a swing - can also be cut out of wood. They also make decorative mills, wells, and bridges from it. Wooden carved gazebos and benches are considered decorations of the garden.
Wood is unique because it can be combined with other materials, be it stone, metal or glass. Such crafts look especially impressive.
Wooden tables: range of shapes and sizes
Elegant benches will ideally complement a homemade table.
It is important to decide in advance what shape and configuration the table requires. Professionals advise paying attention to several points:
- the table should fit well into the room where it is planned to be installed;
- think about how many people will constantly be at this table and what it will be used for; from this parameter, calculate the size of the product;
- choose a folding table option if from time to time you need it for more people;
- take into account the age and capabilities of people (for example, the table for children will be different).
By choosing different positions of the table legs and the distance between the boards, you create your own unique design.
The table can be of different shapes. In addition to different shapes, the table can also have different support under the tabletop itself, in other words, a different number of legs.
- table with one leg - this type of installation is suitable only for a small product; it can be used, for example, to make a children's table;
- table with two stable legs - this type of table is good for a rectangular or oval tabletop, but is quite inconvenient and unstable for constant use in everyday life;
- a table with four legs is the most common type, has the greatest stability (compared to the others), is suitable for both a dining table and a coffee table - it is the most versatile type of this type of furniture.
The table can be decorated with openwork wood carvings.
In order to guess the most suitable table size for any room, you should take into account and constantly keep in mind the area of the room itself and that part of it that is the maximum allowable for placing this piece of furniture; you should also, of course, take into account the wishes of the owners.
Material selection
Every owner has unnecessary scraps of boards and plywood sheets on his farm. If they are not available, then lumber can be purchased at a specialized store or at the construction market. In addition, the summer cottage is full of improvised tools for creating crafts from wood with your own hands - saw cuts, roots, branches, branches.
There may even be a dried tree or stump. From all this you can come up with many unusual items. For the most part, the ideas are simple to implement. Even a beginner can implement them.
The main tools are a saw and a jigsaw. You may also need a hammer, nails or screws.
Features of assembling wooden tables
If you follow the correct drawings, there is nothing difficult in assembling the table.
There are several types of hand-assembled wooden tables.
- o on dowels (attached with glue);
- o on the drawers (necessary on tables that are subject to periodic disassembly);
- o bolted (such connections are used mainly for garden furniture).
Woodworking workshop and tools
Be sure to make the table in a pre-prepared room; wood dust is very difficult to remove from an ordinary room.
- Room
There are several characteristics that are necessary when organizing your own workshop:
- the work should be carried out under some kind of canopy, ideally: a garage or barn (otherwise there will be too much dependence on the weather);
- You need to make a high-quality hood, otherwise dust will constantly settle on the finished product and you will not achieve straight lines or high-quality finishing of the material. In addition to dust, the hood allows you to eliminate the toxic smell of varnishes and wood paints.
And in the end we wanted to advise you something
Do not make solid wood furniture throughout your apartment. Why?
Because the material is expensive, but very capricious. Once again, the temperature and humidity should not fall or rise, otherwise it will swell from resentment. Naturally, you shouldn’t let it get wet, etc. And taking into account the fact that air conditioners and heated floors are increasingly used in apartments, it will be difficult to please the furniture.
But we must pay tribute to the fact that, for all its capriciousness, it will turn your apartment into a home similar to royal rooms. And to make it less capricious, as we said above, treat it with special compounds before you start using it.
Tools
Even a moderately complex table will not require many tools.
The set of tools and their price category depend on the intentions of the master. The higher the level required, the more extensive the shopping list becomes.
- an electric jigsaw gives greater accuracy in cutting wood than a saw;
- rotating miter box facilitates corner cutting;
- The sanding machine is universal in use and will obviously be required for the manufacture of wooden furniture;
- a manual router is required when processing holes;
- impregnating and other compositions.
Where to start making solid wood furniture?
If you have decided to make an oak table with your own hands, then you should carefully understand this issue so that the final result does not disappoint you. First you need to prepare all the drawings, study training workshops, watch video instructions to determine how many blanks and which ones you will need.
Important! It is better to take blanks with a reserve; in addition, they must be smooth and dry.
Of course, it is easier to make furniture from boards, but such products are only suitable for a home decorated in an old rural design. In addition, boards are also short-lived, so it is better to make a tabletop, for example, from glued bars so that it can withstand enormous loads and constant exposure to moisture.
Important! You can also use solid pine as the main material, because it is inexpensive and excellent for beginners to practice. In addition, pine is easier to work with, it is softer, and it is much easier to process than oak. Its only drawback is the presence of resin in the wood, which contaminates the surfaces of the cutting elements and the sanding machine blade.
Consumables for working with wood: varnishes, paints, impregnation, glue
After making the product, the table should be varnished.
How to impregnate wood to prevent it from rotting?
- used motor oil is an excellent option for impregnation, but, unfortunately, is not suitable for the dinner table;
- it would be optimal to impregnate with a water-polymer emulsion twice, with a break of three to five days;
- water-based acrylic varnishes are superior to old furniture nitrocellulose varnishes;
- PVA has been proven to be superior to bone wood glue.
Options for wooden tables
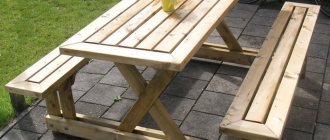
A table with homemade benches is the best option for a summer house.
- Wooden table with benches.
- You need to assemble the table top: the boards are attached to the crossbars with self-tapping screws (it is important to use self-tapping screws as opposed to nails, since the latter contribute to the destruction of the surface of the wood).
- After this, the legs are attached to the crossbars, which must be strong and durable in order to withstand the weight of the table itself and the people sitting at it, thus the minimum thickness will be 4 centimeters).
- Then you need to attach the side crossbars to the legs, on the basis of which benches should be built, fastening them with bolts rather than screws for greater strength.
- Next, we secure the benches and proceed to the subsequent processing of the furniture.
There are several disadvantages to this invention that must be kept in mind:
- If a person on one side suddenly stands up, then all the food will literally fly towards the other.
- It is also not very comfortable to sit at this type of table.
You can improve this design so that its quality becomes unsurpassed, but we invite you to evaluate the idea and project!
Table boards do not have to be the same size and color.
- Table made from pallet boards.
If you have boards of different sizes, colors and, perhaps, even tree species, you can make an interesting structure out of them by organizing the elements in a special way: alternating, grading, creating your own logic for constructing the boards. Among other things, also use discarded dry boards. The side parts of the pallet can act as a good frame, and the rest can be used as a tabletop. We recommend carrying out this work in the yard or garage with an exhaust hood due to the large amount of dust settling everywhere.
- For the legs, use timber more than five centimeters thick. Pre-prepare all the tools and parts needed for the work: you need to sand the wood along the grain with sandpaper, starting with coarse, and then moving to finer grains, carefully removing dust. Next, you need to paint the boards with acrylic or oil paint, apply the desired stencils, symbols or paintings. After this, carefully coat with varnish, repeating this procedure several times and dry.
- An attractive table in a rustic style should be assembled from pallets (also called wooden pallets). In the event that a non-aqueous varnish is used, applying two or three layers is enough, in other cases it is necessary to apply more times, approximately up to ten. After completing the varnishing of the elements, it is worth moving on to installation, which consists of several steps.
- We secure the tabletop with planks, firmly connect the boards together and secure them with self-tapping screws. It is mandatory to use a drill to ensure that the wood is not damaged when using self-tapping screws. Then we coat the joints with glue, and treat the entire tabletop with special products that protect the wood from rotting.
- Last of all, we install the legs: we need to screw them with self-tapping screws in order to learn the structure, we install jumpers at the bottom.
The original design of this model consists of special “rough” wood processing.
- Wooden table with glued top.
For a glued tabletop, you need to take boards of the same width. For this experiment you will need grooves (and therefore a milling machine). Old floorboards already have grooves; if the appearance of the table is unimportant and its purpose is not for a home, it is worth using them.
- The boards need to be laid out on a completely flat surface; this is important for further assembly of the tabletop.
- Carefully coat the sides with glue, join, avoiding gaps between the boards, then pull the resulting invention together with special tools. Leave the product to dry for one to three days. If the gluing operation of the new tabletop was carried out correctly, then gaps will not appear. If cracks appear, then the tabletop will spread even more.
- The ends need to be processed - first trim them with a jigsaw and then sand them. If there is no belt sanding machine, replace it with manual sanding - first use coarse, then medium-grit sandpaper. Then carefully varnish the resulting furniture in several layers (about ten layers of varnish, after every third layer you need to treat the surface with sandpaper and remove dust with a damp cloth), in no case rush at this final stage, then installation of the product is required.
- It is required to make massive L-shaped legs. Take boards at least two and a half centimeters thick so that their thickness matches. Connect them at a ninety-degree angle.
- Make a sample on the boards to be joined, coat the joint with wood glue, and then install self-tapping screws. After the glue has dried, coat the parts with varnish and bring them together into the final composition.
Get creative and create a functional, practical and great-looking table in your own home! Such a standard piece of furniture can create a certain mood in the premises and ennoble your home with special comfort! Choose your material and begin a new adventure - inventing your own table, which may become an ambassador for generations to come! If you still doubt that you can create your own table, you can imagine the new furniture in your head, and then give it to professionals for execution, and then, of course, also enjoy the resulting work of art!
Some tips for beginners
There is one humorous but true saying: “You can immediately recognize a good carpenter by all the fingers on his hands.” The fact is that working with carpentry tools does not tolerate violations of safety regulations, otherwise you can easily get hurt. With hand tools, of course, the risk is less, but you need to work carefully with any tool.
If you wish, you can even build your own business in furniture manufacturing, but to do this, you need to have tools and practice, only in this case you will be able to establish a full-fledged production that will be profitable. The first thing you can do is a few beautiful things for your home, for example, an oak table made by you personally.
Making an oak cabinet
Choose your workpieces carefully, as oak has one special feature. Only the core can be used to make furniture; it is easy to distinguish by its dark color. The light part or linen, as carpenters call it, deteriorates very quickly, so it should not be on the furniture. Of course, you can also make furniture from blanks with linen, but in this case, it will quickly lose its beautiful appearance, even despite protective impregnations and varnish.
No one was born a master right away; everyone learned at some point. Therefore, if you are just starting out in carpentry, you have quite a long learning curve ahead of you. But as a result, you will be able to make beautiful, unique and, most importantly, unique furniture that can make your interior unique. If you wish, you can make furniture production your permanent source of income; this is quite a profitable business.
