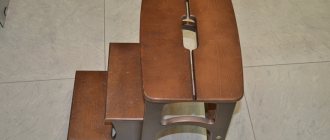
DIY chair restoration step by step ↑
Before deciding how to restore an old chair with your own hands, you need to take care of its stability. With prolonged use, the furniture becomes loose: the wood dries out, and the glued tenon joints cease to perform their function.
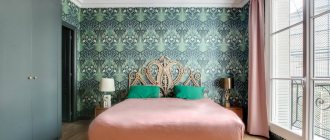
A stunning effect can be achieved by simply painting the chairs in different colors.
Carpentry work ↑
- First, the node connection is disassembled. Be careful not to damage it. The spike is swung and at the same time the knot is tapped with a hammer.
- The groove area is cleaned of old glue and dust. It is convenient to do this with a chisel or knife.
- Then the spike and socket are evenly and thinly coated with glue with a viscosity of 200.
- Afterwards the assembly is assembled and clamped in clamps. The product must be in the clamping device for at least three hours. The remaining dispersion is removed with a damp cloth.
Important! If a bolted connection needs repair, place metal or plastic washers under the nuts and tighten the nuts.
- If the wooden elements are not adjacent to the eyes, you can increase the missing volume with a thin piece of wood. Use casein or flesh glue. The adhesive is left pressed for 8-10 hours in a warm room. Professional craftsmen use a belt tie, which allows them to achieve the required force when gluing.
- If a tenon breaks, it is better to replace the defective part with a new one. The leg is processed with a hacksaw and the nest is cut out with a chisel to a depth of 50 mm. Afterwards, cut out the insert of the required size and hammer it in with a hammer.
Advice. Use PVA dispersion, it is non-toxic and not prone to destruction. Epoxy adhesive “Master” or “EDP” will also work.
The legs can be securely fixed using wooden scarves. You will also need studs with nuts and washers.
Removing old coating ↑
To get rid of the old coating, use sandpaper. It is not necessary to remove absolutely the entire top; it is important to create a smooth and even surface. Restoring chairs yourself will not seem too exhausting if you use a sander.
Advice. You can remove the varnish with technical acetone. They moisten a napkin with it and wipe the product well. At the same time, the natural color of the wood remains.
A grinding machine will speed up the process of removing the old layer.
Finishing: painting and varnishing ↑
Since wood absorbs liquid quite well, you need to prime the surface before finishing, this will reduce material consumption. A colorless primer is suitable if the wood will only be coated with varnish. Otherwise, choose a white primer. Chairs in white or black look great with contrasting upholstery.
Important! Before work, put on a respirator and gloves.
- Apply 1-2 coats of primer. When the chair is dry, go over it with fine-grained sandpaper.
- Now use wax balm, it will give the surface a special shine. Then polish everything with a brush.
- Paint the chair twice. The second layer is applied to a dry surface.
- Apply a thin layer of varnish along the grain of the wood.
Advice. Use water-based paint, it is easy to apply and dries quickly. You will also need a stencil if you want to decorate the chair with an original design.
Polishing and painting is best done outdoors.
Dismantling and reupholstering the seat ↑
You will need: a furniture stapler, staples, a screwdriver with bits, foam rubber 5 cm thick (or two pieces 2-3 cm thick), thick fabric for the backing and upholstery fabric for the top. Filling for seats can be padding polyester, batting, or foam rubber.
- First remove the seat and upholstery. Do not throw away the solid wood base.
- Turn the chair over and remove all the fasteners that hold the seat in place. Remove the factory staples.
- Pull out the frame with the spring. Free it from any remaining filler.
- Cut a rectangle from thick fabric to the size of the seat; cut out the upholstery with a margin. The allowance should be 6-8 cm.
- Place a thick fabric backing on the spring. Use a furniture stapler to attach the fabric to the frame.
- Place a layer of filler on top. The optimal thickness for the seat is 4-5 cm.
- Then install the upholstery material; it is most convenient to do this with an assistant. The upholstery can be special textile material, as well as linen and leather.
The fabric at the corners can be fixed in this way
The process of restoring the Viennese stool step by step
Do-it-yourself restoration of Viennese chairs involves several main stages, including:
- complete or partial disassembly;
- restoration of frame parts, restoration of joint strength;
- seat repair;
- sanding and painting the product;
- chair assembly.
Disassembly of the structure
It is necessary to disassemble the old chair in the following sequence: first, remove the seat and back, then disconnect the legs from the drawer and transverse parts.
The way in which the Vienna-type chair will be disassembled depends on the method of fastening:
- To disconnect parts that are fastened using the tongue-and-groove principle, adjacent elements must be carefully loosened and the first one pulled out from the second.
- It is enough to simply unscrew the fastening with screws with a screwdriver, having previously lubricated it with special oil.
- The adhesive joint must first be heated with a hairdryer or a rag moistened with hot water until the glue softens, after which the parts can easily move away from each other.
Frame restoration
Viennese chairs are restored, starting with removing the old layer of varnish and paint, eliminating visible defects and chips on the frame.
If splits in the integrity of the parts are found in the wood (this especially often happens in places where bends or nails are driven in), any construction glue must be poured into the cracks, the parts must be pulled together and secured with a clamp.
Deep chips and cracks are hidden by covering them with a mixture of fine sawdust and glue. Minor defects can be eliminated using wood putty.
If the legs at the bottom are badly damaged, you may consider repairing them by cutting off the outermost parts. This will slightly reduce the height of the chair, but will return the legs to a beautiful look.
Repair of Viennese chair fastenings
To restore the strength of the fastenings of an old chair at home, you need to resort to the following manipulations:
- If the legs are fastened to the drawer by inserting the upper thinned part into a round or square hole, then you need to drive a wedge between them and then press the leg all the way. For greater bonding, you can lubricate the parts with glue.
- Breakage of the tenon element is eliminated by replacing it with a small wedge made of wood chips, which is inserted during the joining process.
- The holes for the bolts, which over time have become much larger in diameter, should be sealed with a dowel. It is not recommended to use bolts that are too large, as this may cause the wood to split.
- To ensure greater strength of the entire structure, you can install trapezoidal wooden inserts at the corners of the drawer, smearing the ends with glue and screwing them with self-tapping screws.
Seat repair
Depending on whether the seat is hard or soft, you need to restore it as follows:
- A well-preserved piece of plywood must be sanded to remove the old varnish. Then install it in place.
- A part with partially chipped top layers can be puttied and then painted or decorated in any convenient way.
- If the seat is missing or split into pieces, it should be removed and replaced with a new element, cut to the size and shape of the drawer from plywood of the same thickness.
Reupholstering the seat with new upholstery occurs in the following sequence:
- Old fabric and foam rubber are removed.
- Foam rubber 2-5 cm thick is placed on a flat surface. The seat is placed on it and the workpiece is cut out exactly along the edge of the part.
- In the same way, a workpiece is cut from any suitable material, but taking into account the bends. The part is enlarged on all sides by 5-7 cm.
- The surface of the seat is lubricated with a small amount of glue, onto which the foam rubber is attached.
- Place the seat on the wrong side of the fabric with the filling facing down. Sew along the entire perimeter with a stapler.
Using the same principle, deficiencies in the elements of the back of the chair are eliminated with one difference - when replacing the upholstery, the back wall must be draped with fabric or tape, gluing it so as to hide the staples.
Sanding parts
Restoring a Viennese chair with your own hands involves sanding, which will help completely remove the old coating down to the wood. First, work with a grinding machine or manually, using coarse sanding with coarse sandpaper. Then level the surface with fine-grain sandpaper.
Repeated sanding and polishing may be necessary after applying putty or covering chips with a mixture of glue. It will help make the surface completely flat.
Frame painting, decoration
After all defects have been eliminated, the parts of the chair can be stained, painted or varnished. In addition, they use decoration methods such as decoupage with fabric, napkins, wallpaper, applying various patterns and ornaments, creating a mosaic from pieces of glass, filling with varnish or epoxy resin.
Creative solutions for exclusive design ↑
- First, paint the chair with two different colors, for example turquoise (1st layer) and white (2nd layer). Then the surface of the back and legs is carefully treated with fine-grained sandpaper to create a “scuffed” effect. The color of the upholstery material should be in harmony with the color of the painted part.
- To give the chairs a vintage flair, they are painted in cream, blue, and pink colors. After this, the entire chair or only part of it is decorated with painting. Then individual parts are highlighted with gold paint or craquelure varnish is applied to the entire surface. Small cracks will create the effect of antiquity.
Also a curious vintage
- If you want to recreate the empire style, choose milky satin with a floral print. Cover the frame with “golden” paint.
- Make a chair cover; it will not only protect the furniture from dirt, but also change its design.
Sewing a cover will take a couple of hours, even a novice seamstress can cope with such work
- The seat upholstery can be made from 30 different colored leather straps. They are intertwined with each other according to the “basket” principle and fixed from below with self-tapping screws.
Seat strapping
Patchwork - patchwork upholstery for a “bright” mood ↑
Often there are things in the closet that have not been worn for a long time. An old shirt and worn jeans are quite suitable as “raw materials” for upholstery material for country chairs. If suitable scraps have been found, you need to select shades and cut out the component elements.
Tip: Do not use elastic materials. At first, choose simple, uncomplicated drawing schemes.
- Do all the preparatory work first.
Patchwork upholstery is a fashionable touch to a cozy interior - Use old upholstery as a template.
- If restoring chairs is new to you, it is better to use square or rectangular elements for scraps. Calculate the required number of components, placing them on top of the old upholstery. You can also use fabric rectangles of different widths if you want to get a “mosaic” effect.
- Sew ribbons from the pieces. This can be done on a sewing machine or by hand.
- Collect the resulting strips into one canvas. Attach the template to the new upholstery, trim off the excess.
- Fasten the new upholstery around the perimeter of the base.
Bright accents will dilute the strict monotony
Decorating a stool using decoupage technique ↑
Looking to update your kitchen in a low-cost way? Decoupage can make the most unprepossessing furniture original and attractive. You will need napkins or fabric with a suitable pattern; leather appliqués are also suitable.
You can find special cards for decoupage on sale.
- After sanding, the cracks are sealed with putty, the product is primed and coated with water-based emulsion.
- Then cut out a suitable picture from a napkin, spread glue on the surface of the chair and carefully apply the picture. Moving from the center to the edges, smooth it out.
- The completely dry surface is varnished.
You can decorate the seat, back or legs in this way. Decoupage is ideal for furniture in a nursery or kitchen
An excellent solution for transforming an old stool
Making a Viennese chair
Knowing how a Viennese chair is made, you can complete the job within one day. Previously, the curved back was made from beech wood rods, but now it can easily be replaced with iron rods or even plastic. Making a chair with your own hands is carried out in four stages:
Viennese chair details
- Making a seat. To do this, take a rounded wooden plate, to which foam rubber is applied according to size. You can cover it with any fabric or leather, the main thing is that the material is not too thin. The product is secured on the bottom side using a construction stapler.
- You'll have to tinker with the back a little longer. You need to know how to bend metal or plastic correctly so that it takes the desired shape and does not crack. The form is at your discretion.
- The legs are made of the same material as the back. You can make them straight, but it is better to create a slight bend, this will give more charm and lightness to the finished product.
- Assembling all parts into a single structure.
The Viennese chair with your own hands should be painted with some kind of paint at the end of the work. In accordance with the style, you need to choose light shades; they look more elegant and easily complement the interior of many rooms.
Viennese chair, Voltaire chair and venerable wardrobe
Most pieces of furniture, when we talk about them, require additional description and explanation. If a chair, then what kind of chair? What material, what color, what shape, soft or hard seat and back? If it’s a sofa, what size, what design, what upholstery, folding or not?
But there are some pieces of furniture for which there are bright and apt names. Suffice it to say: a Viennese chair, a Voltaire chair, a respected wardrobe - and a complete image of this piece of furniture appears before your eyes. These are the types of furniture we will talk about today.
the banquette is associated with a banquet, that is, a solemn and rich dinner for a large number of people.
At the same time, it is quite difficult to imagine guests sitting on banquettes during a banquet. Comfortable soft chairs are more suitable for such a special event. In fact, the word “banquette” comes from the French word “banquette,” which translates to “bench, bench.” Banquettes came to Russia in the 18th century from France and gained great popularity. They were located in noble living rooms and served to accommodate guests in magnificent dresses.
Nowadays, banquettes are most often used to decorate hallways, bedrooms or waiting areas in offices and clinics. Banquettes can be seen in hotel rooms and even in the halls of the Grand Kremlin Palace.
Dumka , or dumochka is a purely Russian affectionate name for a small pillow. The word pillow itself is also sweet and affectionate: “here’s a soft pillow under your ear.” A Dumka is an elegant sofa cushion, designed not for sleeping, but for pleasant thoughts, thoughts in a moment of rest.
The Viennese chair is a design of ingenious simplicity and elegance made from steam-bent beech wood. Two arches for the back, combined with the rear legs, a circle for the seat, front legs and a dozen screws - a case where simplicity became the key to long-term success. The mass production of Viennese bent furniture was started in Austria-Hungary, in Vienna, in the middle of the 19th century by Michael Thonet. By 1930, more than 50 million Viennese chairs had been sold.
Voltaire's chair is a term that is used only in Russia.
In other countries, similar models of chairs are called “grandfather’s” or “winged”. The peculiarity of this model is its wide and high back, which has protrusions on the sides (“ears” or “wings”). This design provided good protection from drafts and supported the head, which was appreciated by older people. It is not known why this piece of furniture received such a name in Russia, but it was very popular during the time of Tolstoy. Kutuzov, in an unbuttoned uniform, from which, as if freed, his fat neck floated out onto the collar, sat in a Voltaire chair, placing his plump old hands symmetrically on the armrests, and was almost asleep.
L.N. Tolstoy “War and Peace”
A slide is a small closed glass cabinet (unlike a sideboard) for storing and displaying the most valuable household dishes and other items of pride. The functions of the slides are similar to museum and trade display cabinets.
The term “hill” to designate this type of furniture was used in pre-revolutionary Russia due to the fact that dishes in such cabinets were often stacked in a pile. Recently, there has been renewed interest in slides; they decorate living rooms and dining rooms.
The word trellis has almost fallen out of use. Many people confuse a trellis with a dressing table, and most often call this piece of furniture simply a dressing table with a mirror. Confusion is also caused by the fact that the word trellis has another meaning - a lattice vault or arch in the garden entwined with ivy or grapes.
But at the moment we are not talking about garden architecture, but about an interior item. A trellis is a three-leaf mirror, the side parts of which can be rotated and installed at the desired angle. The trellis is very convenient on a makeup table, it was popular in Soviet times as an element of living rooms and hallways, it is also used by actors in dressing rooms. The trellis allows you to simultaneously see your face from different angles without using an additional mirror.
Unlike a trellis, a dressing table is a simple single-leaf mirror on a dressing table.
The Dear Wardrobe , or Chekhov's Wardrobe , is, contrary to popular belief, not a wardrobe, but a bookcase. This is a large antique solid oak cabinet. The term comes from a phraseological unit that came out of A.P. Chekhov’s play “The Cherry Orchard.”
“Do you know, Lyuba, how old this closet is? A week ago I pulled out the bottom drawer and looked and there were numbers burned into it. The cabinet was made exactly one hundred years ago. What's it like? We could celebrate the anniversary. An inanimate object, but still a bookcase after all. […]
Dear, dear closet! I greet your existence, which for more than a hundred years has been directed towards the bright ideals of goodness and justice; your silent call to fruitful work has not weakened for a hundred years, maintaining (through tears) in generations of our family vigor, faith in a better future and nurturing in us the ideals of goodness and social self-awareness.”
Gaev's monologue from A.P. Chekhov's play “The Cherry Orchard”
Updating an old chair
Updating an old chair
Restoration of the Viennese chair is carried out at home and does not require much attention. The first step is to thoroughly polish all the details of the old product, eliminating all irregularities and old elements. Then it is advisable to coat it with varnish and leave it until completely dry.
Repairing a chair requires checking all nails and bolts. If something doesn't hold well, it's worth replacing that part. After the varnish has dried, we begin to restore the seat. It can be with a foam seat, or simple, wooden. The foam version can simply be covered with new fabric or leather. You can choose a large pattern that will harmoniously combine with the graceful lines of the back.
Knowing how to restore an old product, you can avoid spending money on buying new furniture. Moreover, a piece of antiquity in an apartment has now become very fashionable, and many people try not to throw away interior items handed down to them from their ancestors. Such models are suitable for almost all apartments, and decorating with fabrics will allow them to fit harmoniously.
1. Materials for restoration 2. Remove the connection, which is attached with small nails. Then we use a sander to go over the wooden frame 3. Sand all the parts 4. First sand the edges of the crack. We pour wood glue into it and secure the desired place with two small clamps 5. Having removed the old covering and removing the layer of almost decayed cotton wool, we leave clean plywood 6. Using a stapler, we attach the foam rubber and upholstery fabric 7. We start painting. If desired, the chair can be painted twice 8. Attach the seat and the chair is ready
It is worth noting that Viennese chairs are very durable and models made back in the fifties serve their owners well.
That's why we restore antiques, and do not get rid of such durable models of chairs. Their endurance was tested by throwing them from the Eiffel Tower. This chair was the only one that withstood a blow from such a height and was practically undamaged. The remaining models did not pass this test, as they mostly fell apart or became unusable.
Popular models and modern manufacturers
Stylish and comfortable Viennese chairs are an excellent option for creating an original and attractive interior. They are produced taking into account ancient traditions using the latest technologies, thanks to which these products fully meet all norms and quality standards. Well-known manufacturers of these pieces of furniture are Poland and Belarus. On the territory of these countries there are the best production facilities for the production of Viennese chairs, which have managed to win worldwide recognition and have become a standard of impeccable quality.
Well-known Polish manufacturers include the following factories:
- Paged. Specializes in creating traditional Viennese chairs using natural wood. They can be considered the best option with the optimal combination of affordable price and excellent quality. The range is presented in a wide range of colors such as oak, beech, walnut, cherry or cognac.
- Fameg . Produces high-quality Viennese chairs intended for use both at home and in public places. Children's models and dinner items deserve special attention. Each of them is unique and inimitable in its own way, which is favorably reflected in the general atmosphere of a particular room.
- Meblomech . Luxurious Polish chairs from this company, presented in the form of Viennese works of art, surprise with their diversity. Among them there are exquisite models with a backrest, solid ones with armrests, as well as classic options in the form of stools. All of them are extremely stable and very beautiful.
The most popular Polish-made models are:
- "A-1814". Viennese beech chair, made in a classic style. The black lacquer coating gives it a special appeal, thanks to which it perfectly complements any interior.
- "A-1860". An elegant and very stylish piece of furniture, characterized by comfort, functionality and practicality.
- "A-1870". An original model with beautiful decor in the form of inserts, presented in different colors.
Polish companies use many years of experience of craftsmen in the production process, who, with the help of modern equipment and advanced technologies, create truly high-quality and reliable Viennese chairs.
Productive Belarusian producers are the following:
- "Gomeldrev". It produces modern Viennese chairs that harmoniously combine affordable cost and excellent quality. The products are very practical and functional, which makes them in demand in the global market. The model range is represented by a large abundance of products for almost any type of interior.
- "Pinskdrev" . It produces stylish Viennese chairs using unique technology, which makes the products original and unique. The design of the products looks quite presentable and reliable, and the cost is quite acceptable for everyone.
- "Mozyrles". Produces beautiful and comfortable Viennese chairs from the highest quality materials. All products are durable and practical. Each model is thought out to the smallest detail, thanks to which this or that copy is in perfect harmony with other interior items.
Why Viennese chairs?
Many people wonder how to update Viennese chairs. To begin with, we should note their phenomenal strength, which is why it is easier to update them than to purchase a new one. Also, do not forget about convenience, because you can sit on such furniture for several hours and a person will not feel tired. Another advantage of this furniture is its original appearance. These chairs are perfect for the living room, kitchen and even bedrooms. Now it is possible to install them on the balcony near a light table.
Restored chair Restored chair 2 Restored chair 3 Restored chair 4 Restored chair 5 Restored chair 6
Judging by the large number of advantages, making them will be much more convenient than buying them. Moreover, now it will not be easy to get such a durable and high-quality model at a fairly reasonable price. Therefore, you shouldn’t rush to send them to the landfill; by changing their appearance you can complement the interior of your apartment in an original way. Moreover, on the Internet there is a large amount of photo and video materials with step-by-step instructions that describe each action in detail.
Don't rush to throw away old furniture. From a life-worn and moth-eaten “four-legged friend” you can get a real work of art with just a little effort and imagination. Today you will learn how to update an old chair with your own hands to add freshness and newness to your home interior.
Method number 1: decorating a chair with paint
Not only the real “old man’s” Soviet chair, but also the wooden “Vienna” and folding country versions can be easily transformed with paint.
Dyeing technology
To paint old chairs you will need:
- acrylic paint;
- flat synthetic brushes (separately for varnish, paint and putty);
- gloves;
- putty;
- white spirit (for metal);
- varnish remover (for varnished models);
- matte varnish or wax;
- fine and medium grain sandpaper.
Restore old chairs according to this scheme:
- The first step is to prepare the furniture for painting: wash it, sand it with sandpaper. The surface should remain slightly rough.
- It is better to degrease the iron model with white spirit before painting.
- Treat lacquered furniture with a special varnish remover.
- Mask all cracks and scratches on the surface of the legs and back with furniture putty.
- After this, paint the entire surface of the furniture in 2-3 layers, waiting for each layer to dry completely. Open the product with varnish.
Interesting! If you want to achieve an interesting scuffed effect, then initially apply dark paint to individual areas, and then cover them with wax. Paint the entire area with the desired shade in 2 layers, and then use fine-grain sandpaper to go over the previously marked areas to “expose” the dark areas.
Useful tips for coloring
- If you haven't decided what color to paint your furniture, you can't go wrong with a bright white shade. This color is universal and goes well with all bright upholstery materials.
New! Chalk paints are a newfangled type of paint that is not yet very common in stores, but we recommend using them due to their bright colors and super-fast drying.
- Use masking tape to paint individual areas of the surface.
Method number 2: seat reupholstery
Restoring old chairs with your own hands using the reupholstery method is the second most common technique after paint.
Interesting! Even if the stool does not have a comfortable soft seat, you can make it yourself.
Washing process technology
To work you will need:
- thick upholstery fabric;
- furniture stapler;
- screwdriver or screwdriver;
- meter tape;
- self-tapping screws;
- overlocker for finishing edges or sewing machine.
An old soft chair is restored in this way:
- Turn the product over, placing it with the seat on the work surface. Use a screwdriver or screwdriver to unscrew the soft part from the frame of the product. If it is screwed not with screws, but with nails, then pull them out with pliers.
- Measure the width and length of the seat, add 7 cm to each value, and open the part from the new fabric. Finish the edges of the fabric using a sewing machine or overlocker.
- Place the pattern face down on your work surface. Place the seat on it with the wrong side facing you. Make sure that the distance of future pattern bends is the same on all sides.
- Fold and staple two opposite sides of the upholstery fabric to the seat. At the same time, slightly stretch the material. The staples of the stapler are attached in increments of at least 10 cm, and the corners are not yet secured.
- Do the same with the other parties.
- Lastly, pull the corners into the center of the seat and also secure with staples.
- Place the seat on the frame and re-screw it with self-tapping screws. If it was initially held in place with nails, then it makes sense to replace them with self-tapping screws.
Useful tips for restoration
- The soft seat can be decorated with beautiful furniture nails around the perimeter.
- Select upholstery material so that it matches the style of the stool. So, classic jacquard does not look good on modern designer furniture, and an old wooden chair with a back and patterns looks strange with upholstery with a geometric print.
- Often, chairs look perfect if their style uses the same fabric from which the curtains or drapes in the room are sewn.
The match looks harmonious.
Method No. 3: sewing a cover with gathers in the corners
The clear advantage of sewing a cover is that this method is much cheaper than reupholstering a seat.
It is enough to purchase 2-2.5 m of fabric, make the pattern correctly and sew it.
The fabric is selected on the basis of resistance to wear, since products are constantly subject to increased stress, especially in the dining room and kitchen.
To sew a cover for an old chair, follow these steps:
- First of all, you need a pattern. For measurements you will need masking tape, paper or newspapers.
- Attach a large spread of newspaper to one or another part of the product, mark the outlines of the furniture on the paper, and remove the excess with scissors.
- Prepare the second part and attach it to the first, gluing it with masking tape. Having assembled the pattern completely, cut it in the places where the seams will be. Thus, you will have a more or less accurate pattern specifically for your product shape.
- Remember to leave seam allowances and take into account the directional direction of the fabric, especially if it has a pattern in the form of stripes or large flowers. Pay special attention to the back. It happens that in order to recreate exact bends you will have to cut out a separate part along its side. If you do not have the goal of conveying all the delights, it is enough to make wide allowances of 5-7 cm along the side cut of the back.
Important! It’s better not to make the cover on the back very narrow, otherwise you simply won’t be able to put it on the chair. Cut the back wide or flared, then fold the excess into a pleat and tie a pretty bow at the back. If you like a “tight” cover, then install a twisted zipper in one of the seams.
Method No. 4: Decoupage a chair with paper
Remaking old chairs with your own hands does not always require drastic changes. Sometimes you can make a new chair out of an old one if you disguise minor defects, scratches and stains with an original fashionable print or beautiful patterns.
Decoupage will help you. Take:
- multi-layer napkins with the desired print;
- PVA glue;
- a pair of brushes;
- scissors;
- matte clear varnish;
- roller
To make original designer furniture from old chairs, follow this algorithm:
- Clean the furniture, paint as described in method No. 1.
- Separate the top layer of the napkin with the pattern, cut out the desired size fragment from it.
- If you want to change the entire decor of an old chair: from the back to the legs, then chaotically tear the napkin into 10x10 cm pieces.
- Apply PVA glue liberally to the desired area of the future decor. Place a cut piece of napkin on the desired area of furniture, smooth it with a brush with the remaining PVA, removing bubbles and smoothing out the wrinkles with a roller.
- The top layer of PVA should be as thin as possible. Leave it to dry for a day.
- Finally, cover the entire surface of the furniture with clear varnish in 3-4 layers, allowing each layer to dry.
As you can see, remaking an old chair is not as problematic as it might seem at first glance.
Method 3. Decoupage a chair with paper
Do you want to decorate a chair with a cool print or cover up minor defects like scratches and stains with patterns? This can be done using the decoupage technique.
Master class on restoring an old Viennese chair with your own hands with step-by-step photos
Viennese chair - made from steam bent beech wood, it is very light and durable. Therefore, well-preserved examples of this furniture have reached us, which are already more than 150 years old.
If you have at your disposal an already shabby and unattractive looking Viennese chair, why not give it a makeover. This material will discuss how to give new life to an old chair.
Creative furniture decor solutions
- To give an old stool a vintage touch, you can paint it pink, blue or cream. Gold or silver paint is useful for painting. On top of everything, apply craquelure varnish to the entire area. The antique effect is created by small cracks from the varnish.
- An old stool will be saved by upholstery made of multi-colored straps. Intertwine them according to the “basket” principle and secure them at the bottom with self-tapping screws.
- Let your kids get creative with acrylic paints. Cover the result with varnish. You will not only receive designer furniture, but also possibly a future family heirloom.
Popular posts
- Chair for dressing table Chairs for dressing tables in Moscow - 189 Products Company from Moscow, delivery 29643 a In…
- Silicone sanitary sealant Silicone sanitary sealant white in Moscow - 1491 products Company from Moscow, delivery (tomorrow) 140...
- Shelf in the hallway Currently, there are a huge number of different options for shelves in the hallway, and this is directly ...
- Insulation of the floor in a wooden Insulation of the floor in a wooden house from below: materials and installation technology SHARE ON SOCIAL NETWORKS One of the common…
Examples in the interior
Finally, it’s worth talking about such an important point as the use of Viennese chairs in the interior. Many people think that such chairs will only be appropriate if you have a room in a classic style. But this, of course, is not at all true. If you have good taste, then it is quite possible to install such a chair even in the most modern apartment. Let's look at a few examples to understand everything in practice.
Classical
Let's start with the simplest - with the classics. Viennese chairs with exquisite curved legs and beautiful design are something that will perfectly complement any classic interior. Here, some basic models made of natural wood are best suited. They can be used in the living room, bedroom, and home library or office, if you have such rooms in the house.
Baroque
Another style in which it is logical to use Viennese chairs is Baroque. As is known, an abundance of decor and demonstrative luxury are important for this trend. So, spectacular products with curved legs and beautifully decorated seats would be quite appropriate in such an interior. You can combine Viennese chairs with cabinets, coffee tables and massive wooden tables. This will add a drop of luxury even to a modern interior.
Provence
The use of such furniture is also relevant for the Provence style. True, the most suitable options here are those with upholstery decorated with floral prints in pastel colors. In combination with light wood, they will emphasize the lightness and beauty of your interior and perfectly convey the atmosphere of the French province.
Modern directions
In modern style, minimalism is more relevant, which means that massive wooden furniture may be superfluous here. But you can also play it up in an interesting way, for example, placing a couple of chairs next to a minimalist table made of dark wood. This way everything will be combined with each other at the same time, and not go beyond modern styles.
Viennese chairs are elegant and beautiful. Furniture has long earned a good reputation, which means you can not be afraid of disappointments. Choose high-quality furniture, and you will definitely enjoy the fact that you have such an authentic and durable item in your interior that can serve you for many years.
You may also be interested in the restoration of Viennese chairs. You can find out exactly how this happens in this video.
This type of Viennese chair was first made at the beginning of the 19th century, and since then it has become an integral element of many interiors.
This is an original product made of beech wood, which is made using a unique technology - steam processing of the material.
This is because it goes well with both strict minimalist elements and modern non-standard accessories.
Each model in this series has its own distinctive features. But, in general, they are united by incredible strength and lightness of construction.
It can be placed in any room, and it will look incredibly organic. But which specific option to choose for different stylistic designs?