Can non-woven adhesive be used for vinyl-based wallpaper?
If you are also interested in the question of whether it is possible to glue vinyl wallpaper with non-woven glue, then you can safely begin work. After all, the answer is affirmative. There is no fundamental difference between the mentioned types of glue. The only difference is the type and quantity of additives.
If a manufacturer recommends using a certain adhesive, then it should be 100% suitable for a specific application. However, you can use a different composition. So, if you purchased paper wallpaper, you can use non-woven glue. However, it needs to be made more liquid.
Are you ready for a disruptive renovation?
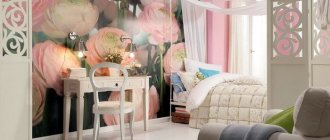
First of all, it is necessary to talk about the advantages of vinyl wallpaper. This material is more expensive than paper and acrylic wallpaper, but the investment is worth it:
- Vinyl wallpapers are highly wear-resistant: they can last for many years, during which they will not lose their color and quality;
- The pattern on such wallpaper does not blur and fades very easily;
- Vinyl wallpaper can easily withstand moderate mechanical damage: for example, when bringing new furniture into a room, you don’t have to worry that if you accidentally hit the wall, the vinyl wallpaper may tear or there will be dents and scratches on it.
When renovating a space, you always need to keep in mind one hidden but significant factor: the age of the house.
The fact is that every building during its “life” undergoes a process of shrinkage. Even if the foundation is reliable and the soil under the house is quite dense, the building begins to sag under its own weight from the moment of construction. This leads to slight deformation of walls and ceilings.
Therefore, if you move into a new house and immediately begin making repairs, choose vinyl wallpaper . They are made of a material that, due to its elasticity and strength, can withstand shrinkage of the house, while paper wallpaper in new buildings develops tears and cracks after a few years.
Instructions for working with vinyl wallpaper: preparation
The impression of the room will depend on how well you cover the walls. Even if the coating is beautiful and expensive, the interior may turn out to be hopelessly damaged.
To ensure that your time and energy are not wasted, you must follow the instructions. It provides for the need to remove old wallpaper. It is recommended to do this with a narrow spatula. The coating is pre-wetted with water. If some pieces are firmly stuck to the wall, you should use a special solution to remove wallpaper, but in this case you should work with gloves.
Preparing the walls
Once you have figured out whether vinyl wallpaper can be glued with non-woven adhesive, you should check the walls, which should be clean, dry and free of cracks. If defects are found, they must be covered with putty.
The surface should absorb moisture normally. To check this characteristic, the wall must be sprayed with water. If drops remain on the surface, then absorbency is reduced. In this case, the surface is peeled off with wallpaper paper.
If the splashes form dark spots and remain on the wall, then the absorbency is too high. In order to eliminate problems, it is necessary to apply a paste, primer or wallpaper glue.
Glue preparation
When you are no longer wondering whether it is possible to glue vinyl wallpaper with non-woven adhesive, you can start gluing the walls. At the next stage, the technology involves preparing glue. The composition must have a special purpose. In order to properly prepare the mixture, you should continuously stir the water in the container, adding the contents of the package.
The resulting mass is stirred until a homogeneous composition is formed. Now you can proceed to preparing the wallpaper. They are cut into pieces with a margin of 5 cm. Using a plumb line, you need to draw a line vertically on the wall, which will guide you when gluing the first canvas.
Tips and tricks for wallpapering
Quite often you can hear the question of whether it is possible to glue vinyl wallpaper on a paper base with non-woven glue. Now you know the answer is yes. However, all rules for using such compositions must be followed. If the walls and wallpaper have been prepared, you can also apply a primer, which will help adhere the finish to the surface even more securely.
After this, the canvas is smeared with glue and left for a few minutes, then you can begin to paste the wallpaper on the wall. Sometimes experts recommend applying the composition only to the surface to be treated. You can read the instructions for a specific material by looking at the packaging.
Vinyl wallpaper is glued end-to-end, the panels should not overlap each other. It is important to remember that the material stretches greatly when gluing. You should try to match the pattern while cutting the fabric. Some of the material will end up in waste. Short pieces can be used for gluing surfaces under and above windows. You can use the remains for subsequent repairs.
If you are wondering how to glue paper-based vinyl wallpaper with non-woven glue, then you should know that this coating uses polyvinyl chloride as the top layer. It is responsible for moisture resistance. This suggests that the walls after repair can be washed even with the use of special products.
Foam paper wallpaper: characteristics
So, what is paper-based foam wallpaper? As the name suggests, they are made on a backing made of paper. Thus, they have two layers - outer and inner.
Foam wallpaper
These canvases are produced using the screen printing method. Here's how it works. Heating occurs inside the oven, reaching a high temperature. This, in turn, starts the process of evaporation of special substances that are part of the composition of the vinyl layer.
Give the home a mysterious look
Accordingly, small cavities, also known as pores, are formed inside. It turns out that due to their formation, the vinyl layer becomes “foamed”.
Helpful information! Due to the fact that the vinyl layer (PVC) has an increased density, it resists the evaporation of atmospheric moisture. This has a positive effect on the characteristics of the canvases, since they prevent the formation and spread of mold and mildew.
Profile foam wallpaper
In addition, such canvases are also known as “foam profile wallpaper”. As for their surface, it is quite soft and pleasant to the touch.
Here is what is typical for this surface:
- Being slightly rough, it may have a clearly defined relief or pattern.
- Perfectly hides minor damage, chips and scratches on the working surface of the room walls.
- It is characterized by a wide variety of colors and shades, which has a positive effect on the possibilities of designing interior design in various styles.
- Such a voluminous texture of the wallpaper can create the feeling of using attractive relief plaster to decorate the walls of the room.
Recommendations for choosing adhesive
For vinyl wallpaper, it is important to choose the right adhesive, which should fix the canvas to the wall quite quickly, but not instantly. This will allow you to fit the strips along the joints and align them horizontally and vertically. The glue must prevent the development of fungus and mold. This is extremely important. After all, vinyl does not allow air to pass through well, and as a result, microorganisms appear under the coating layer.
The consumption of a specific type of glue can be found in the instructions or on the packaging. You should not assume that increasing the amount of glue will provide a better quality surface. The mixture may seep through the seams and stain the surface of the fabric. If you are faced with the question of how to properly glue vinyl wallpaper on a non-woven backing in a room, then you should also know that the glue should not form clots or lumps. After all, they lead to unevenness on the surface. The prepared mixture can be stored for no more than a day. But when closed, the composition can be stored for several years.
Types of vinyl covering
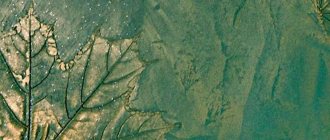
Foamed vinyl. The most common coating. Wallpaper covered with foam vinyl has a high relief. But due to the low density of the top layer, they are not very moisture resistant. But they have good breathability. Another advantage of foamed vinyl is its ability to mask wall imperfections due to its convex texture. It is easy to glue such wallpaper: it weighs little and sticks well to the walls, unlike wallpaper with a thick vinyl layer. In addition, popular paintable wallpapers are vinyl wallpapers coated with foam vinyl.
- 1 of 1
On the picture:
Foamed vinyl is one of the most recognizable types of vinyl wallpaper.
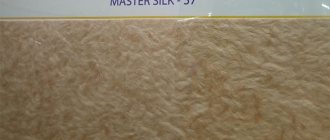
Silkscreen printing. This coating is the most beautiful. Silk-screen printing imitates luxurious textile wallpaper, but costs much less. At the same time, wallpaper with silk-screen printing is much more durable and durable. There is an opinion that silk threads are added to the top layer of such wallpaper. In reality, silk-screen printing is just a way of applying a pattern. A similar method is used to print designs on T-shirts and baseball caps. To cover walls with wallpaper with silk-screen printing, you will need glue for heavy wallpaper.
- 1 of 4
On the picture:
Screen printing is a type of vinyl coating that is produced by hot stamping. Silk-screen wallpaper is stronger and more durable than textile wallpaper.
Smooth (thick or kitchen grade) vinyl. This coating is easy to distinguish from others, primarily due to its slightly glossy surface, but not necessarily flat; there are also embossed varieties. For example, under cork, tiles, stone, etc. This coating is often covered with “washable wallpaper”, usually vinyl wallpaper with a non-woven backing. Due to the fact that dust and dirt are easily removed from smooth vinyl, wallpaper with this coating is equally suitable for the kitchen, bathroom and hallway. Some smooth vinyl wallpaper with a non-woven backing can be cleaned with a vacuum cleaner or a damp brush with detergent. When installing wallpaper with a smooth vinyl coating, you must use heavy wallpaper adhesive.
- 1 of 5
On the picture:
At first glance, dense vinyl differs little from other types of wallpaper with a smooth surface.
Hard vinyl. Appeared quite recently. It should be noted the high cost of wallpaper with hard vinyl coating. True, the high price is compensated by a lot of advantages. Solid vinyl is dense, moisture resistant, but at the same time has good breathability. Its structure consists of special valves that allow the wall to “breathe” under the wallpaper. Hard vinyl coating can imitate various materials and textures: Venetian plaster, rough brush painting, fabric, leather, suede and even paper. To cover walls with such wallpaper, you will also need glue for heavy wallpaper.
- 1 of 4
Recommendations for working with wide wallpapers
The method of covering walls with wide wallpaper does not differ from the technology that involves the use of standard canvases. Wide ones should be glued from the middle and from the top. If unevenness does appear, then you need to make a small cut at the edge and overlap the edges on the wall. If you purchased meter sheets, then it is better to use two stepladders, since this approach can ensure good leveling of the strips. And your assistant will not have to move additionally.
If you are faced with the task of how to properly glue wide vinyl wallpaper on a non-woven backing, then you should first determine the length of the wall in order to calculate the number of whole stripes. Starting from the window, you will need to mark the first canvas. Then you need to move deeper into the room. Stepping back from the corner of 105 cm, you will need to draw a vertical line to the floor. It is recommended to use a plumb line and a pencil.
If the corner has an irregular shape, then you need to leave about 2 cm of margin. In the process, you will certainly decide the question of how to properly glue wide vinyl wallpaper on a non-woven backing in the corners. This stage requires special attention. Experts recommend leaving an overlap at the corner, otherwise a gap may remain on the wall.
You will need to glue the prepared canvas so that the narrow strip extends slightly onto the other wall. Excess wallpaper should be trimmed with a sharp knife, and it is recommended to brush along the edge of the canvas again, pressing the material against the wall.
If swellings have formed, and the vertical edge extending onto the adjacent wall was not glued tightly to the wall, cuts are made on it, made obliquely. After this, the material is pressed again. At the very top of the corner you will need to run a sharp knife to cut off any remaining wallpaper.
Non-woven wallpaper sticker
How to hang non-woven wallpaper: a step-by-step description of the process
The question of how to glue non-woven wallpaper worries many who have chosen this practical and high-quality material. Its main feature is its thickened structure, thanks to which it is possible to successfully hide minor wall defects. The non-woven coating is wear-resistant, moisture-resistant, light-resistant, does not require maintenance and has an original relief surface. If you want to change the interior design, this coating can be repeatedly painted with dispersion or acrylic dyes. The process of pasting walls is simple and does not take much time; you just need to familiarize yourself with some secrets of working with wallpaper.
Sequence of work
Gluing non-woven wallpaper with your own hands has some features. To know how to properly glue non-woven wallpaper, we recommend that you familiarize yourself with the following recommendations to avoid mistakes during work:
- before starting work, be sure to read the manufacturer’s instructions included with the rolls and the packaging of the adhesive mixture;
- Before gluing the canvas, prepare the surface of the walls. You should start gluing only after the primer has completely dried;
- pay close attention to gluing the first blank - the quality of the entire work directly depends on this;
- The pasted sheet should be leveled using a rubber spatula (if the surface of the wallpaper is smooth) or a wallpaper roller (if the canvas has a textured surface);
- Each subsequent sheet must be glued without overlap - strictly end-to-end. If this is impossible to do, for example, when gluing the canvas in the corners, use the double-cut method: placing two sheets on top of each other by 5-6 cm, you need to make an even cut with a stationery knife at the point of their connection, then carefully removing the excess. This way the angles will be perfect;
- the joints of the sheets (especially the corners) should be carefully ironed with a spatula or roller, removing excess glue to the side free from the wallpaper;
- To remove excess glue, use a damp sponge, carefully wipe the seams in the corners, do not worry about the condition of the canvas - moisture will not damage it.
Stages of gluing non-woven wallpaper on a wall
Preparing and marking the walls is an important point that should be given special attention before gluing non-woven wallpaper. You should also cut the sheets correctly and choose the appropriate composition for gluing them.
Preparatory work
Non-woven wallpaper can be used to cover any surface. If you plan to paint wallpaper in the future, you should take care in advance that the walls have a uniform color, not very different from the color of the chosen paint, since non-woven material is a thin material and the color of the base may be noticeable in the future.
The walls should first be cleaned (remove the old coating) and any existing defects should be eliminated. Then it is necessary to carefully treat the surface with a primer; it is better to apply a deep penetration primer - this will increase the adhesive ability of the glue. After the primer has completely dried, you can proceed to marking the walls. It is recommended to start pasting meter-long wallpaper from the corner - use a level to apply vertical lines on the walls, at a distance of 1 m from each other, this will avoid unevenness and defects in the work.
The next step is preparing the canvas. If you choose a plain material, there will be no problems with cutting. If you plan to glue a canvas with a pattern, make sure that it matches; to do this, you will have to periodically move the next sheet down or up. When cutting, be sure to leave a height margin of 5-7 cm - an allowance for the ceiling; cut off the excess part with a stationery knife after it has completely dried.
When cutting wallpaper sheets, do not forget to leave a small margin
Sheets must be cut on a clean surface with the roll face down. Having measured the required length of the workpiece (taking into account the margin), you should make a notch, bend the sheet evenly (make sure that the edges of the bottom part of the sheet coincide with the edges of the bent part) and cut it along the fold line. The next piece must be rolled out in the same way and before cutting, check the fit of the pattern. Further work is performed in a similar sequence.
After preparing the walls and canvas, you can begin to solve the next question - how to properly glue non-woven wallpaper? An important point is the choice of suitable glue; the quality of the final work depends on this.
Choosing glue
To paste walls with non-woven wallpaper, you should use a certain adhesive composition, which can be purchased at a specialized store selling construction and finishing materials.
Before preparing the adhesive mixture, carefully read the instructions for the gluing process that come with the wallpaper - some manufacturers recommend applying glue not only to the walls, but also to the canvas itself.
Wallpaper glue must be diluted and applied strictly according to the technology specified in the instructions
- does not contain toxic substances and is absolutely safe for human health;
- has excellent adhesive properties, allowing the mixture to be applied to any surface;
- easy to use;
- does not leave stains;
- has a long shelf life in a closed container (up to 10 days).
The process of making the adhesive mixture itself is not complicated - the powder should be diluted in the amount of water specified in the instructions, constantly stirring until the mass thickens.
How to properly glue meter-long non-woven wallpaper
Gluing non-woven wallpaper with your own hands is not a labor-intensive process, but if you choose a meter-long canvas, you should take into account several nuances. Many people prefer meter rolls, since this greatly simplifies the gluing process, there are fewer joints and less material consumption.
How to properly glue non-woven wallpaper 1 meter wide? Let's look at the basic rules:
- The main task is to carefully prepare the walls - their surface should be even and smooth. The walls should be pre-treated with putty and primer - this will level the walls and improve the ability of the adhesive mixture to bond to their surface.
- If you cut meter-long wallpaper incorrectly, you can often encounter a lack of length of the last sheet. To avoid this situation and save material, before gluing the sheets, we recommend that you first glue the ceiling plinth to a clean wall, avoiding the need to set aside allowances (if such finishing is planned in advance).
- If you are sure that the ceilings are even, it is enough to leave a 2-3 cm headroom when cutting sheets. If the ceilings are uneven, you should leave more margin - up to 10 cm.
- You should not start gluing meter-long non-woven wallpaper strictly from the corner; draw an approximate line in advance, stepping back slightly from the edge of the wall - this will avoid distortion of the pattern if the corners of the room are uneven.
- Smoothing the sheet glued to the wall should begin from the top, gradually moving towards the center and leveling the edges of the sheet.
- The edges of each subsequent sheet should be applied as close as possible to the adjacent canvas, matching the seams and monitoring the pattern if you have chosen a non-solid color coating.
- Interior decoration Ceiling
- Walls
- Doors, arches
- Window
- Stove, fireplace
Before you start work, be sure to study all the recommendations and prepare the necessary materials - this will greatly facilitate and speed up the process.
How to properly glue wallpaper in hard-to-reach places
The question of how to properly hang non-woven wallpaper in hard-to-reach places, especially in corners, is an important one. Difficult places also include areas with sockets, switches and near batteries. When sticking the canvas near sockets and switches, you should first turn off the power and unscrew the protective boxes. Carefully coat the wall with glue, attach the sheet and only after the glue has dried, make a cut of the required size, remove excess wallpaper and screw the boxes into place. When gluing the sheet near the batteries, carefully treat the edges of the sheet with adhesive. Corners require special attention. There are two options for successfully wallpapering corners:
A. If you have chosen a single-color canvas, you need to paste it, starting from the corner, then glue the next sheet on the adjacent wall, grabbing part of the glued canvas, and then cut both canvases evenly with a stationery knife, removing the excess.
B. If you prefer a canvas with a pattern, the sheet is also glued from the corner, and the overlap with the next canvas should be 2-3 cm - this will hide the defect in case of an uneven corner.
- Kitchen decoration
- Bathroom, toilet
- Corridor, hallway
- Balcony, loggia
- Other rooms
- Finishing of buildings Country and private houses
- Wooden houses
- Baths, saunas
- Finishing materials Drywall
- Cladding panels
- Wallpaper, cork
- Tile
- Laminate, linoleum
- Decorative plaster
- Finishing work Plaster
- Primer
- putty
- Painting, whitewashing
Cosmetic repairs or finishing work after leveling surfaces and other serious activities is a great opportunity.
Decorating the walls of a private house begins with choosing suitable materials. When purchasing you need to pay attention to.
When it comes to wallpaper, an association immediately arises with materials that are often used for.
How to properly glue non-woven wallpaper with your own hands
Non-woven wallpaper has a durable base and is today a popular material for finishing the walls and ceilings of residential and office buildings. They are made from environmentally friendly raw materials, which meets sanitary standards. Non-woven fabric is stronger than paper and can withstand mechanical stress. In order for such a coating to serve for a long time, it must be glued correctly.
Non-woven wallpaper has a durable base and is today a popular material for finishing the walls and ceilings of residential and office buildings.
Advantages of non-woven wallpaper
The basis of the wallpaper is non-woven fabric, which gives it a number of advantages:
- high wear resistance and durability;
- the ability to hide unevenness and other errors in the surface of the walls;
- they are easy to remove, there is no need to soak;
- they do not fade from the sun;
- They can be wet cleaned;
- they are fireproof;
- you can paint them many times.
Before gluing, it should be taken into account that non-woven wallpaper (unlike paper wallpaper) is not deformed, and its structure and dimensions do not change. You can read about gluing vinyl wallpaper here.
Tools for work
Before you begin the gluing process, you should prepare the necessary materials and tools.
To complete the work you will need:
- ruler, tape measure;
- pencil, calculator;
- wallpaper spatula;
- rubber roller;
- scissors;
- brush;
- clean container for glue;
- soft sponge;
- level or plumb line;
- dry rags;
- a bucket of clean water.
Preliminary preparation of walls and wallpaper
The walls need to be freed from the old covering.
The walls need to be freed from the old coating, sanded, and putty on the cracks. potholes and other defects. The surface must be smooth and dry. After this, the walls are primed with a special compound that penetrates deeply into the surface. This makes it possible to increase the bond between the wall and the wallpaper. The primer must be completely dry before painting can begin. Water-based paint cannot be used as a primer.
To prepare the adhesive solution, pour cold water into a clean, prepared container and pour in the adhesive powder in a thin stream.
It is better to use glue based on polyvinyl acetate . To prepare the adhesive solution, pour cold water into a clean, prepared container and pour in the adhesive powder in a thin stream. Stir quickly and let sit for a while. Then stir again and remove any lumps.
As for the amount of wallpaper needed for a room, you can calculate it by knowing the perimeter of the walls and the height of the ceilings. It is easier to calculate based on the number of stripes required. It should be noted that the standard width of non-woven wallpaper is 1 m. Divide the perimeter of the room by the width of the wallpaper. By dividing the length of the roll by the height of the walls, you can calculate how many strips it will produce.
It is better to immediately cut blanks for all walls.
Next you should prepare the wallpaper. It is better to immediately cut blanks for all walls. If there is no picture, then cutting is not difficult. You need to measure the height of the ceiling at different points in the room (for example, every 40 cm) and cut strips with a 10-centimeter allowance. If there is a pattern, it must be adjusted along the entire length of the canvas. Lay polyethylene on the floor and unfold the roll face down. Measure the required length and make a notch with a knife. The wallpaper must be folded along it so that the edge of the bent part and the main lower sheet coincide. Cut along the fold line.
Wallpapering process
After preparing the materials, you can proceed directly to gluing. It is better to do the work during the day, so that it is possible to turn off the electricity (even spotlights). This will eliminate the possibility of electric shock when working near outlets. Windows should be tightly closed, without drafts. The room should be warm and dry. The recommended temperature is +20–22°C.
The glue is evenly applied with a roller to the wall. It is advisable that the width of the smeared area be greater than the width of the wallpaper strip. It is better to avoid drips; in their places the wallpaper may wrinkle. After application, leave the glue on the wall for about 5 minutes to allow excess moisture to evaporate.
If the wallpaper has deep relief, then it is better to smooth it with a roller, being careful not to press too hard.
When gluing the canvas to the wall, start from the window or corner. The first sheet should be placed clearly vertically. If there are any deviations, the joints of the strips will be very difficult to adjust. It is better to first make markings with a pencil to avoid curvature during pasting. To tightly fasten the panel to the wall, you need to smooth it with a spatula. Excess glue is squeezed out in the direction of the wall that has not yet been covered. If the wallpaper has deep relief, then it is better to smooth it with a roller, being careful not to press too hard.
Excess fabric is trimmed at the bottom, then at the top. You need to consider how much the baseboard can cover the cut line. The glue on the ceiling is washed off with a damp sponge. Carefully wipe the corner seams to remove traces of glue.
The second strip is not applied immediately. One edge needs to be held, the other must be carefully joined to the already pasted canvas. There should be no gaps. It is strictly forbidden to glue overlaps. You need to roll out the panel vertically from top to bottom along the surface, joining the elements of the pattern, moving it towards the glued strip. Then smooth out from the center to the edges.
If there is curvature in the walls and it is difficult to join the strips exactly, it is better to leave a small gap than to overlap. It will be very clearly visible already a meter from the wall.
The joints must be washed to remove any remaining glue, otherwise an unwanted shine may remain when it dries. Non-woven wallpaper should dry at a constant temperature .
You cannot stick a whole piece of cloth onto a corner. It is cut so that its edge extends 2–3 cm onto the next wall.
The most time-consuming part is gluing the corners. At this point, the canvases often peel off, so before applying them, the corners need to be well coated with adhesive. You cannot glue a whole piece of cloth onto a corner. It is cut so that its edge extends 2–3 cm onto the next wall. The next strip is glued close to the corner. At this point there is a slight overlap.
As for the ceiling (read about puttying the ceiling here), the technology for gluing them with non-woven wallpaper is practically no different from gluing walls.
But some nuances . It is better to place the canvas on the ceiling parallel to the shortest wall. The first sheet is glued to the area opposite the exit.
It is very important to glue wallpaper along the direction of the rays of light that come from the window. In this case, the joints will not be noticeable.
The wallpaper is pre-cut exactly to size and raised to the ceiling. It will not be possible to install wallpaper on the ceiling without outside help.
You can wallpaper a room with a total area of 20 m² yourself within a day, provided that all the necessary tools and materials are at hand.
Manufacturer selection and prices
The most popular manufacturers of non-woven wallpaper are those from Italy, Germany, Russia, Sweden, and Belgium. German wallpapers have the highest quality indicators . Among the manufacturers we can highlight Erismann (from 665 rubles/roll), Rasch (from 400 rubles/roll), Marburg (from 530 rubles/roll) and others.
Italian wallpaper is distinguished by a special base that protects the top layer from excess moisture. They are also highly durable.
The most popular brands: Sirpi (from 616 rubles), Italreflexes (from 1392 rubles). From Russian manufacturers - Palitra, ART, Mayakprint. The cost of domestic wallpaper starts at an average of 400 rubles/roll.
If you resort to the help of craftsmen when pasting, the cost of the work may vary depending on the region, the characteristics of the wallpaper, and the reputation of the master. Work on leveling the surface of walls or ceilings is paid separately. On average, gluing directly will cost from 100–150 rubles per m2. The cost of work, including surface leveling, is from 350–400 rubles/m2.
It’s not for nothing that non-woven wallpaper is so popular today. As you can see, the process of gluing them to the surface is quite accessible. The material itself is quite reliable and practical. By following all the recommendations for wallpapering, you can be sure that they will last for many years. For reliability, you can invite craftsmen to do the job competently and efficiently.
Video instructions How to glue non-woven wallpaper - step by step instructions
Non-woven wall coverings do not require special care. Wet cleaning completely renews the wallpaper. Contaminated areas can be easily removed with special cleaning products. The undoubted and important advantage of non-woven wallpaper is its stunning visual effect.
Non-woven wallpaper after sticking is resistant to deformation, shrinkage and stretching. Acrylic and dispersion dyes are perfectly applied to non-woven wallpaper. They are not at all afraid of moisture, so they are easy to clean. If necessary, it will not be difficult to remove old wallpaper during repairs and then stick new ones. Thanks to the relief, you can create the illusion of beautiful relief plaster.
Preparation for pasting non-woven wallpaper Necessary tools
- laser level;
- tape measure 5m;
- special roller with long pile;
- plastic spatula: which should have a soft edge for ideal rolling of wallpaper;
- brush: used for smoothing pasted wallpaper;
- sharp knife for cutting wallpaper;
- a special mesh for removing excess glue from the roller;
- narrow metal spatula;
- two buckets: for glue and clean water;
- foam sponge;
- pencil.
Preparation and marking of walls
First, you need to inspect and prepare the wall surfaces for gluing. An excellent surface for gluing non-woven wallpaper can be: paper, wood, plasterboard, chipboard, plaster, concrete and other similar materials.
Tip: the color of the wall surface for wallpapering before painting should be uniform. It is desirable that the color of the surface is not very different from the color of the painted wallpaper.
Please note: the interlining is thin, so the color of the base may be noticeable.
Preparing walls for pasting begins with cleaning the surface of old wallpaper, dirt and eliminating defects. It is advisable to remove old paint. As a last resort, carefully sand the painted surface with sandpaper (medium caliber). Be sure to treat the prepared surface with a primer.
Non-woven wallpaper has smooth, high-quality edges. This allows you to use the “butt” gluing method. At the same time, visually adjacent panels look almost seamless, like one panel. Because non-woven wallpaper is most often produced in a wider format, then next we will look at how to glue wide non-woven wallpaper. It is better to start work from the corner of the room. From the corner of the room at a distance of 1 meter, strictly vertically, using a level, draw an approximate line.
The purpose of marking: when gluing wallpaper, strictly adhere to vertical lines. Using a level, strictly vertical lines are drawn along the entire wall in increments of 1 meter. The standard width of non-woven wallpaper is 1.06 m. Therefore, as a rule, when sticking, a certain margin of width is created. Then it is convenient to use it when creating a clear joint in the corners of the room.
Drawing a strictly vertical reference line. Photo — kvotvet.ru
Preparing wallpaper
So, the surface marking for the wallpaper is ready. The next stage is preparing the wallpaper for stickers. We recommend cutting wallpaper blanks for all walls of the room at once. The complexity of cutting depends on the wallpaper pattern.
If joining the pattern is not required, cutting does not cause any difficulties. The only note: before cutting the next piece of wallpaper, measure the height of the wall at different points (for example, after 30 cm). And only after making sure that the height of the walls is the same everywhere, cut the wallpaper blank to the required size.
If you are gluing wallpaper with a large pattern, then the wallpaper will require selection of the pattern. You can find out what size fits your wallpaper by simply looking at the pictogram on the label. When marking, make sure that the pattern matches. To do this, you will periodically have to move the subsequent workpiece up or down. The main thing is to avoid mistakes and prevent you from having to add pieces of wallpaper from the bottom or top.
On some sites you can find advice to leave a height margin of 10-15 cm when cutting wallpaper with a pattern. Please note: if you have high ceilings, this does not always save the situation.
For example: the fitting size is 48 cm and the room height is 2.5 meters. In this case, according to the cutting rules, the length of each workpiece must be a multiple of 48, but must be greater than the height of the room. For our case: the required length of the workpiece is 2.88 m.
After mathematical calculations, we proceed to cutting. Lay a clean plastic film directly on the floor or wash the floor well. Roll out the wallpaper roll face down. We measure 2 m 88 cm (with a margin for adjustment) and make a notch with a knife. Then we bend the wallpaper along the notch so that the edges of the bent part and the main lower panel coincide. Having checked everything, cut the sheet of wallpaper along the fold line.
We spread the next sheet of wallpaper, turning it on the same side as the previous one. Then we check the fit of the drawings of the two resulting canvases: the lower one, lying on the floor, and the upper one, cut off, bending their edges. To control, we find and visually highlight a noticeable detail of the drawing. Let's try to combine both blanks according to this drawing. If everything is done correctly, we proceed to preparing the next workpiece.
Attention: the roll must be rolled out sequentially, on one side. In this way, workpieces are cut for the entire room at once.
A special table for marking wallpaper. Photo – mega-anunt.ro
Preparing the glue
What kind of glue should I use to glue non-woven wallpaper? To stick non-woven wallpaper, you must choose a high-quality adhesive composition designed specifically for non-woven wallpaper. The technology for its preparation is simple. To do this, gradually pour adhesive powder into a small amount of water as required according to the instructions, in a thin stream, stirring the mixture vigorously. Let the mixture sit for a while, and then stir it again and remove any lumps, if any. The glue mixture is ready.
Step-by-step instructions for wallpapering
Now let's talk directly about how to glue wallpaper on a non-woven basis.
Step 1. To avoid misunderstandings, first read the factory instructions included with the wallpaper. Perhaps there are specific comments on the sticker technology. Some, a few manufacturers recommend coating not only the wall but also the wallpaper itself.
Attention: we recommend that for better adhesion of the edges of the wallpaper to the wall, coat an area slightly larger than the width of the wallpaper.
Try to apply the adhesive mixture evenly. When gluing non-woven wallpaper, as a rule, the adhesive mixture is applied with a roller only to the surface of the wall. Undoubtedly this is a more comfortable and simpler way of wallpapering. Use glue intended for non-woven wallpaper and do not try to use glue left over from a previous renovation.
Step 2. The result of all work depends on the quality of the sticker of the first blank. It is the first sheet that will be the starting point for comparing verticality for subsequent blanks. Therefore, be especially careful and strictly vertically position the first sheet of the workpiece from top to bottom. To attach a sheet of wallpaper to the wall, smooth it with a spatula. Squeeze out excess glue to the side where there is no wallpaper pasted.
Note: if you are using wallpaper with a deep texture, then use a wallpaper roller to smooth it, but do not press it too hard.
Step 3. Cut off the excess wallpaper at the bottom. The plinth can only cover 3-4 cm, so don’t cut off too much. Then we look to see if there is any extra wallpaper near the ceiling. Carefully trim, leaving a small margin for later covering it with the ceiling plinth. We cut off the excess strips of wallpaper by pressing the spatula with the wallpaper into the corner. In this case, the knife does not come off the cutting line, but only the spatula moves. This technology for removing excess wallpaper allows you to keep the cutting line straight.
Trimming wallpaper, top left, bottom right near the floor. Photo – axsoris.com
Step 4. Remove traces of excess glue on the ceiling by washing the surface with a damp sponge or rag. Don't be afraid to soak non-woven wallpaper. Carefully wipe the corner seam to remove all traces of glue. Manufacturers of adhesive bases sometimes claim that the glue will not leave marks after drying. But still, places with glue will shine unsightly.
Step 5. Glue the next sheet end-to-end to the previous glued blank. The wallpaper does not shrink after the glue dries, so gaps will not appear. We roll out the prepared wallpaper sheet strictly vertically along the wall, matching the outlined details of the pattern and at the same time moving it towards the previous blank. We iron the joints with a roller. Remove excess glue to the side free from wallpaper. We cut off the excess wallpaper from the bottom and top.
Step 6. Glue and trim the wallpaper in the corners in the same way. The difference is that we carefully press down both panels on both sides of the corner with a spatula and cut them at the same time. We take out one of the excess cut strips from under the cloth. To ensure secure fastening, we additionally coat the corner with glue if it has had time to dry and press the wallpaper panel to the corner.
Video: Gluing non-woven wallpaper
- How long does it take to dry vinyl wallpaper with a non-woven backing? How long does it take to dry for vinyl wallpaper with a paper and non-woven backing? When carrying out repair work, it is important to know...
- How to properly glue non-woven wallpaper Detailed instructions on how to properly glue non-woven wallpaper February 10, 2014 Despite…
- How long does it take for non-woven wallpaper to dry? How long does it take for non-woven wallpaper to dry? For those who plan to do renovations and use wallpaper with…
- How to glue vinyl wallpaper on a non-woven backing Home › Wallpaper › How to glue › Gluing vinyl wallpaper on a non-woven backing – processing,…