Garlands are beautiful, original and festive; it is not surprising that they are a traditional decoration for the New Year. They can be simple or complex, plain or multi-colored, made from paper, cones, fir branches, sweets and other available materials. The article describes more than 20 options on the topic: DIY New Year's garland, each with detailed instructions.
Materials for home decoration
The simplest and most used is paper. You will need white paper for snowflakes, colored paper for colorful crafts, and corrugated paper for fluffy garlands.
You may also need brushes and paints, threads and yarn, glue, fabric, cotton wool, toothpaste.
Interesting crafts for home decoration can be made from scrap materials: plastic bottles, unnecessary cans. Candy will also come in handy.
We express our tender feelings with the help of a garland
The following types of garland will be a great addition when creating an atmosphere to express your feelings.
Garland of hearts
How to make a garland for March 8 or Valentine's Day? Or maybe it's your wedding anniversary? There are a huge number of cute garlands, especially those designed in the shape of hearts.
The variations in execution are also multifaceted. For example, you can use the technique for a classic garland of circles by simply changing the shape to a heart.
Let's consider several more types of such decoration. To create a pleasant and stylish decor, you need to prepare:
- Colored paper strips. Their length should be 15 cm and width about 1.5-2 cm.
- Stapler.
Now let's move on to creating the decoration:
- We bend the strip in the middle and secure it in this place with a stapler. After this, we bend the edges of the paper in the opposite direction.
- At the junction of the ends we again place the strip bent in the middle, but now we staple the edges of the previous strip and the middle of the new one.
- Fold the edges of the second strip back.
- The steps are repeated until the garland reaches the desired length.
A bright and voluminous garland will be a wonderful interior decoration.
Another way to make a garland of hearts:
- Prepare the necessary materials: scissors, glue, pencil, colored paper and thread.
- Draw a heart of the desired size on thick cardboard, and use its template to cut out a large number of the same elements.
- Then we take one heart as a basis and on its flat surface we glue exactly the same part, bent in the middle, and to it two more elements in the same way. The result is a voluminous and bright decor.
- Using glue, we attach the elements to the thread and hang them.
Important! You can use paper of different colors and even ornaments on it, due to which the hearts will turn out very colorful and bright.
Flower garland
Again, a universal way to make a garland of flowers is traditional and simple decoration using paper templates in the form of flowers and stitching on a sewing machine.
But how unexpectedly cardboard sleeves can come in handy!
DIY paper flower garland and brief instructions for its creation:
- Prepare several cardboard rolls. Press them in half to form a flat rectangle.
- Cut strips of equal width about 1-2 cm. This way we got the petals of future flowers in the shape of a pointed oval.
- Apply glue to both outer sides of each petal and connect to the others, the glued areas will be the center of the flower.
Important! To create one flower you will need five parts in the form of petals.
- After all the elements have dried, thread a bright, dense thread through the petals.
Important! You can paint the resulting flowers with acrylic paint to make them brighter and more saturated.
DIY paper Christmas decorations
Paper is the simplest material for creativity; even a small child can handle it.
Snowflakes, cards, New Year's collages, gift bags, garlands and much more are made from paper. It is used to decorate windows, doors, cabinets, and chandeliers.
Paper pompoms (MK)
The decoration looks delicate and beautiful, and also stands out from the general background. Pompoms can be of different colors and sizes, which allows you to make them to match the style of the room or holiday.
To create a paper decoration you need to prepare:
- kraft or corrugated paper;
- threads;
- scissors.
You can make pompoms in the following way:
1. Several sheets of colored paper are placed on top of each other and folded into an accordion. If you need a small ball, 4 layers are enough, for a medium ball – 5-6, for a large ball – 8 or more layers of paper.
2. When everything is ready, the middle of the folded sheet is tied with thread or wire. To accurately guess the middle, you need to fold the accordion in half and tie it at the bend. If this is not done, the ball may end up skewed.
3. The edges of the accordion are cut into a triangle or semicircle. Next begins the most difficult and patient work. Each sheet is carefully straightened individually so as not to damage the paper. First you need to move to the center of the sheet, and then straighten out the individual layers. For convenience, it is better to divide the layers in half - this is much easier than separating each sheet separately from the total mass.
Stages of making a paper pompom
On video:
paper pompom.
Window
Snowflakes are considered a traditional window decoration. They can be the most ordinary, cut out of paper, napkins, or foil.
Or you can try and make large voluminous decorations. Small curtains made from such crafts will look good, especially if you decorate them with beads and feathers.
Multi-colored garlands will be a good addition to snowflakes. Even a child can do the simplest of them.
Frosty patterns on the windows look great. For this design you don’t even need special glass paints. You can get by with toothpaste and an old brush to blend it out.
If you have an artistic streak, you can paint a whole picture with the winter wizard and his sleigh. If you are not very good at drawing, then you can limit yourself to snowflakes and light patterns.
A festive garland is a bright guarantee of a cheerful mood
A holiday in itself is already a wonderful event that gathers loved ones and friends around the table. And if you emphasize the theme of the celebration, it will become doubly more fun. One of the decoration options could be a DIY garland.
Paper masterpieces are easy to create and a fun activity for the whole family. And this method of decoration is also minimal in cost.
If you decide to make a garland, we advise you to pay attention to the following nuances:
- Before you start, decide what shape your paper decoration will be.
- Depending on the type and shape of the garland, choose the appropriate paper.
Important! Thin material is better suited for light, weightless decorations that can sway pleasantly when the wind blows. Thick paper is distinguished by its undoubted reliability, but at the same time it is more demanding during operation.
- The connections of the elements must be strong so that the garland does not fall apart. Especially if you use thick material or cardboard, as the final product will be heavier than regular paper.
- Determine the location of the garland and how to attach it. For example, you will hang it from the ceiling or hang it on the wall.
Types of paper for garlands:
- Lightweight: crepe, tracing paper, foil.
- Dense: all kinds of cardboard variations - corrugated, metallized, mother-of-pearl.
The widest range of colors, effects and designs will allow you to create the most incredible and beautiful garland for any holiday on the chosen theme.
Mounting methods
You can connect parts together using several methods:
- Glue. PVA is most often used, as it is convenient, affordable and ideal for working with paper.
- Stapler. Simply and conveniently fastens layers of paper together in one motion.
- Paper clips. This connection method is especially relevant if the garland is collapsible with your own hands.
- Scotch. Adhesive tape can also be used as a connecting material.
Doors
Doors are usually decorated with New Year's wreaths. To make them you will need wire and cones.
You can add bows, ribbons, large beads, artificial flowers and leaves. Flowers and leaves can be made from corrugated paper or cut out from a regular sheet and painted.
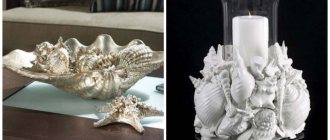
- DIY photo frames are popular ways to create from scrap materials. 110 photo frame ideas: wooden frame with buttons, decor with stones and shells, salt dough frame, collages, decoupage
How to make a picture frame with your own hands? Choice of design and sizes. Instructions for making from scrap materials: cardboard, plinth, newspapers, buttons
- Do-it-yourself drawings on T-shirts - step-by-step instructions, necessary materials, advice from craftswomen. 120 photo ideas on how to make a print on a T-shirt
A Christmas stocking where Santa Claus can bring candies and cookies every day will be a good source of entertainment for the kids.
In addition to wreaths, the door can be decorated with New Year's pictures. A simple technology for such drawing is special glass paints. After the holiday is over, they can be easily removed from the door and stored away until next year.
You can also place contrasting snowflakes, winter paintings, figurines of fairy-tale characters, animals, Christmas trees, Snowmen, Santa Clauses and Snow Maidens. Templates for New Year's decorations can be made with your own hands, or you can download them from the Internet.
Garlands of sweets
From sweets: 3 options
Many people decorate the Christmas tree with candies, but sweets can also be beautifully made into a garland. Before work, it is advisable to eat well so as not to eat half of the parts.
You can fasten candies in one of three ways:
- Fasten the tails of sweets to each other using a stapler or thin short wires. To make the decoration look harmonious, it is better to use candies of the same size but different colors.
- The second method is to tie the candies separately using rope cut into small pieces. Connect the candies by tying them one by one so that there is a piece of rope between the tails of the candy wrapper.
- The third method is the most labor-intensive, but also looks much more interesting. For the garland, prepare one long piece of rope the length you want the finished decoration to be. The rope should be thick enough to support the weight of all the candy. Using thinner ropes or ribbons of different lengths, tie each candy separately to the main cord. In this case, the more varied the candies, the better.
With edible light bulbs
This undoubtedly original decoration is very easy to make. To work you will need:
- m&m's candies or similar (you can take chocolate-covered raisins, but then the garland will not be so bright);
- jelly candies (it is most convenient to use jelly worms);
- knife;
- fishing line or thread with a needle;
- lighter.
In this case, m&m's candies will play the role of the light bulb itself, and the gummies, cut into small pieces, will be the base. Prepare the details. For each jelly bean, cut out small jelly cylinders. On the one hand, using a lighter, melt the jelly a little and attach it to the “light bulb” with the hot edge. When the required number of parts is ready, string them onto a thread through a jelly “base”. The thread should not be too thick, otherwise the jelly will break.
From popcorn and breakfast cereal
An edible garland will look great on the green branches of a spruce tree. To make it you will need:
- thread or fishing line with a needle;
- popcorn;
- dry breakfast in the form of multi-colored circles.
Thread popcorn onto a string, alternating it with cereal. It is not necessary to follow any sequence; the elements can be strung in a chaotic order.
Candlesticks
Candle stands can be made from glasses, glasses, unnecessary cans, and plastic bottles. The base can be decorated with woolen threads and beads, pine cones and branches, pieces of cotton wool and multi-colored paper.
DIY gift baskets are a universal gift for any occasion! 80 photo ideas for decorating baskets: romantic, formal, children's, Italian, Brazilian, for movie fansA DIY gift for your loved one: for Birthday, New Year, Valentine's Day, anniversary. 110 photo ideas for original and fun gifts that will surprise your loved one
Do-it-yourself lambrequins - manufacturing instructions with patterns. Types of lambrequins, choice of variety. Preparation of material and tools. Step-by-step manufacturing guide
The candlesticks themselves can be placed in the center of a fluffy snowflake, with elegant tangerines placed around them.
Garlands made from natural materials
Made from pine cones, dried oranges and felt pieces
Making such a garland is very simple, you just have to collect pine cones in advance and prepare orange slices. Citrus is cut into thin slices and dried in the open air or in the oven. Garlands of this type are usually assembled on hemp rope. To work you will need:
- dried oranges;
- fir cones;
- rope;
- felt;
- hot glue;
- any other natural decor (cinnamon sticks, bay leaves, mistletoe, pine branches, acorns, etc.).
Table Christmas trees
New Year's trees are made from thick paper and tinsel, cardboard and colored paper, fabric, felt, salt dough or plasticine. Small candies or miniature toys are used for decoration.
Christmas trees
What do you need:
- colored paper
- compass
- scissors
- pencil
- glue stick
- strong thread and needle
1) Take colored paper and draw a circle using a compass.
2) Mark a triangular sector on the circle using a pencil and ruler.
3) Let's cut out the sector.
4) Roll the sector into a cone and secure it with glue.
5) Repeat steps 1 - 4 three times.
6) Armed with a thread and a needle, we will thread the thread through the tops of the three cones. It turned out to be a Christmas tree! We can make as many Christmas trees as we want. They look especially good if hung from the ceiling.
New Year's bouquets
Instead of a Christmas tree, you can put up New Year's bouquets. They are made from tree branches and decorated with cotton wool, multi-colored dragees, and snowflakes.
If you think about this question in advance, then by the New Year you can even get fresh green leaves on such branches.
Sweet bouquets
Bouquets of sweets and chocolate are used as magnificent non-standard gifts and an excellent way to create a New Year's mood.
And if you place juicy tangerines and an unusually decorated bottle of champagne next to each other, a festive mood is guaranteed.
- DIY beads are interesting photo ideas for creating original jewelry. Step-by-step master class on creating jewelry from scrap materials
- DIY Tilda for beginners. History of the toy, materials and tools for creation, step-by-step manufacturing process. Sewing tilde: secrets of mastery
DIY Christmas nativity scene: history and traditions, the main components of a Christmas nativity scene. Nativity scene using toys, plasticine figures, nativity scene made of paper and cardboard
Happy New Year
A wonderful family holiday, for which it is customary to prepare in advance. Here you can’t do without festive home decorations. How to make a paper garland with your own hands for the New Year?
New Year's chain
This decoration is familiar to many from childhood. Let's remember how to make a garland from links.
To begin, prepare the tools and materials:
- PVA glue.
- A simple pencil and ruler.
- Scissors.
- Colored paper.
To make a garland, cut sheets of paper into strips of equal width, 2-3 cm each. Cut them out evenly, fold the prepared parts. Now let's move on to the assembly:
- We connect one strip into a ring and secure it with a small amount of glue along the edges.
- We thread the next strip into the resulting link and secure it in the same way.
- We repeat the steps until we get a garland of the required length.
Important! Alternate the colors of the details of the chain to make it rainbow and bright.
You can create an original paper chain if you use unusually shaped links.
Important! You can use not just rings, but figurines - Santa Claus, Snow Maiden, Snowman, sweets and other New Year's paraphernalia.
Garland of pine cones
How to make a garland that can surprise everyone? Use cones! They will not only decorate your home, but also fill it with a magical pine aroma.
If you liked this idea, then:
- First of all, take a walk through the forest with the whole family and collect the most beautiful pine cones.
- Then use wire to attach loops to them and thread a bright ribbon through them.
Important! Using white acrylic paint, apply light strokes to the outer scales, then you will get a magical effect, as if the cones were dusted with snow.
DIY tangerine peel garland
Tangerines are a kind of symbol of the New Year! Their citrus taste and aroma are inextricably linked with this joyful holiday. How to make a garland from the peel of this fruit? Everything is extremely simple, but at the same time very unusual and extravagant.
To create such an “appetizing” garland you need:
- Scissors.
- Glue.
- Regular ballpoint pen.
- Tangerine peel.
- Cardboard.
- Lace or twine.
Sequencing:
- First draw various patterns on cardboard. For example, Christmas trees, snowflakes, balls, whatever. Cut them out.
- Using a pen, trace the outlines of the patterns on the tangerine peel and cut out all the details.
- Prepare a cord to which the elements will be attached. Place them on top of it.
- Using glue, attach the entire decor to the thread.
Important! Hot glue works well for these purposes.
In addition to the decorative effect, your home will be filled with the wonderful aroma and freshness of tangerine.
Textile
The bedroom and children's room will be well decorated with pillows and blankets, bed linen made in New Year's or Norwegian style, slippers and warm socks with frosty embroidery.
You can put a “Santa Claus bag” near the bed. For its manufacture, both a new, self-sewn fabric bag and one that was used in the summer at the dacha are suitable. You just need to wash it and decorate it with applique and large tassels.
The lightest garlands
The easiest way to make garlands is using ready-made templates. Print and cut out.
If you are not afraid of a pencil, you can simply fold a sheet of paper many times, draw and cut out an image (for example, Santa Claus or a Christmas tree). After cutting, the figures will be connected to each other.
If you want something more interesting, you will have to arm yourself with thread and glue!
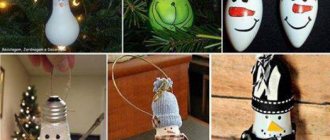
DIY New Year's decorations for 2019
Symbols of the year can be made from anything that the eye falls on. These can be figurines, embroideries, paintings, appliqués, Christmas tree decorations, garlands for windows or cabinets.
Beautiful and light garlands can be stretched between cabinets and a chandelier, hung on windows, stretched under the ceiling, turning the room into the Snow Queen's castle.
Photos of handmade New Year's decorations show a variety of crafts designed to decorate the house and create a festive mood.
Paper garlands
From paper Christmas trees
Even a child can handle making such a simple decoration. To work you will need:
- Christmas tree template (you can draw it by hand or find it on the Internet and print it);
- thick paper or cardboard with a bright pattern (it is desirable that the patterns be varied, then the garland will be colorful and festive);
- scissors;
- hole puncher;
- rope.
On the back side of colored cardboard, trace the prepared template and cut out the required number of Christmas trees along the contour. Use a hole punch to make a hole in the top of each piece. Put all the Christmas trees on a rope. Thread the string twice through each hole. Then the flat parts will be more stable and will not slide along the cord or deviate to the sides.
Carved Christmas tree
This option is somewhat similar to the previous one in execution and idea, only the Christmas trees are radically different thanks to the original design. You will need:
- colored or patterned paper;
- rope;
- scissors;
- ruler;
- pencil.
Draw isosceles triangles on the back of the sheet. They can be the same size or different. There is no need to make the parts too tall or narrow. If the width of the base is 10 cm, then the sides should be no more than 12-13 cm. Next, you need to make serif lines on the tree in several levels. The intervals between them should be the same. The first notch (the place of the future cut) is a line parallel to the base, which does not reach the sides by about 0.5 cm. Stepping back from it upward, draw two notches opposite each other parallel to the previous one, from the left and right edges. Naturally they should not converge in the middle. The next notch repeats the first and so on. Cut the parts along the drawn lines. At the top, use a hole punch to make a hole through which the Christmas trees will be attached to the cord.
"Snowflake"
There are many ways to make garlands with snowflakes. Only one of the possible ones is described below. To work you will need:
- thick cardboard of different colors;
- scissors, hole punch;
- fishing line or string.
On the back of the cardboard, draw snowflakes according to the chosen template. The optimal element size is 10-12 cm in diameter. Make holes with scissors or a hole punch: one on opposite rays and two in the middle. Place the cut out snowflakes on a thread or thin rope through the holes, alternating colors. The red and white garland looks very interesting. If you want to make patterned snowflakes, cut them out of thin paper or napkins. Then place it on a flat surface and coat it with glue water (2 tablespoons of PVA per glass of water). After drying, the parts will keep their shape as if starched.
Christmas trees made from paper cupcake tins
The garland is a rope on which small three-tiered Christmas trees made from colored molds are attached. They are very easy to make. You will need:
- Cupcake tins (in multiples of 3);
- Glue or stapler;
- Colored cardboard;
- Hemp rope.
Fold one mold in four, this will be one tier. Glue three molds folded into a triangle together, forming a Christmas tree. You can use paper clips or a glue gun. Decorate the top of the Christmas trees with small stars made of colored cardboard. Using the same paper clips or a glue gun, attach the Christmas trees to the twine.
Advice! Try combining several elements on one garland, for example, differently made Christmas trees and snowflakes.
From paper spiral
This decoration is very easy to make, but it looks unusual and interesting. The spiral garland can be placed on a chandelier, window or ceiling, anywhere where it will hang freely. To work you will need:
- thick cardboard;
- scissors;
- small Christmas balls;
- ribbons;
- glue.
Photos of DIY Christmas decorations
Read here - Do-it-yourself bag from old jeans - patterns and sewing master class. A simple and practical handbag, a patchwork bag for every day, a shopping bag, a backpack bag. 90 photo ideas for inspiration
Help the site, repost 
0