Video material
That's the whole process of gluing chairs, which will quite simply help you get rid of swaying and creaking furniture. If the tenon joints of the chairs are sufficiently damaged or the grooves become much smaller, it is necessary to increase them. For help in this matter, you can contact a professional workshop.
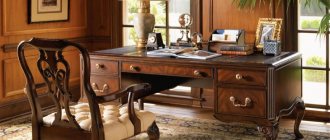
Wooden furniture has always been held in high esteem and to this day remains a source of pride for owners. However, nothing lasts forever and everything falls into disrepair one day. Our specialists have sufficient experience in the repair and restoration of wooden furniture and will tell you how to glue a wooden chair together.
Additional gluing points
Experts recommend thoroughly cleaning the connecting areas, which are subsequently glued together. If the old glue is difficult to scrape off, apply warm vinegar or solvent to the cleaning area.
If, after repairing the structure, creaks and other problems remain, and the seals did not help, it is advisable to use the services of professionals and contact a workshop for help.
Restored chair restored chair 2 restored chair 3
How to glue a wooden chair yourself
I would like to immediately note that gluing a wooden chair, although a feasible task, requires a painstaking approach and time. It will not be enough to simply buy any glue at the nearest store and use it to connect the broken parts, as many believe. Due to its structure, wood requires a special approach to repair.
One of the features of old-style wooden chairs is their structural composition, which includes many individual parts. They, in turn, are connected with glue, which is where the problem lies. Over time, the composition weakens or the joints become loose, although the individual elements of the chair retain functionality.
Softening old glue with steam
Steam flows from the kettle on the stove through a rubber or plastic hose to the socket in the chair. Hot water will flow down the tenon nest wrapped in a cloth. This way the remaining glue will dissolve faster.
To thoroughly strengthen a loose connection, the individual parts must first be separated. To do this, especially on frames with crossbars, it makes sense to separate the still quite strong adhesive seams.
If the chair wobbles not only because the glue joint has become loose, but also because the legs are different lengths, you should wait until the frame is glued back together. Only after this will it be possible to accurately determine the difference in the length of the legs.
If the glue is very strong, try steaming it. Regular glue dissolves in water. Steam can soften the glue even in tightly closed seams.
For this purpose, use a rubber hose that is used for squeezing juices, or buy a thin gasoline hose with a diameter of 6 or 7 mm at an auto parts store. Attach a suitable metal tube to both ends of the hose, insert one of them into the drilled plug, and it, in turn, into the spout of the kettle. This way you can direct the steam to the right place.
Before you start steaming, move a chair closer to the stove and position it so that you can easily reach the area to be treated. Make sure that the water formed as a result of cooling the steam does not drip onto other places, especially the soft upholstery.
Wear a mitten on the hand with which you will hold the hose, as the hot steam will cause the hose to become very hot.
Direct the steam to the edge of the glue joint and try to move both pieces of wood apart after a while - it is likely that this can be done in a couple of minutes.
This method will help remove old glue on exposed trunnions. Steamed wood must first dry before it can be glued again.
This is what the connection between the drawer and the back (above) and front (below) legs of the chair looks like.
A more labor-intensive method is gluing a chair, in which the drawers located under the seat are inserted and tenoned into the legs, and to increase stability, all corner joints are secured from the inside with triangular or trapezoidal blocks made of solid wood. Here you are faced with a rather complex connection, where it is not enough to separate just one glue seam.
If you use force, you will break the thorn of the tsar, or even break it off completely. This is where hot steam comes in handy.
Make sure that the frame is subsequently glued at exactly the same angle.
Thin wedges can be inserted into the large tenons on the sides to ensure a tight connection to the chair leg.
How to glue a chair with your own hands
To glue a chair, you must, in addition to glue, have the following tools and devices:
- hammer with rubber nozzle;
- construction knife or chisel;
- sandpaper;
- clamp, press or tightening belts;
- a clean piece of scrap fabric.
Restoration work on a wooden chair should be carried out in the following sequence:
- disassemble the loose knot by removing it from the groove, even if to do this you have to separate other strong seams;
- remove the remnants of old glue from the tenon or dowel using a knife or chisel (if the glue is difficult to remove, steam it with water steam);
- thoroughly clean the axle of the leg (or other piece of furniture) with sandpaper and remove shavings and dust from it with a cloth;
- apply a thin layer of glue to the axle and, inserting the chair part into the groove, hammer it in until it stops with a hammer with a rubber tip;
- be sure to remove any excess glue with a cloth;
- Depending on the place of gluing, tighten the chair fragments with a clamp, belts or press with a press.
The time for complete hardening of PVA glue is 24 hours. After a day, you need to remove the tightening straps (remove the clamp) - and you can use the repaired chair. If you want your restored wooden chair to last as long as possible, buy only high-quality PVA glue from our store!
We suggest you read: How to propagate jasmine? Propagation by cuttings in summer. How to root bush branches? How to plant jasmine by division or layering?
If you have wooden chairs in your home, then knowing how to glue them will be very useful. Of course, you can contact us in the workshop and we will do everything quickly and reliably, but many people want to do it themselves; at home, we will post instructions for them on how to independently glue solid wood chairs.
And so, preface. A wobbly chair is always unpleasant, a creaking sound and a feeling of insecurity in the piece of furniture underneath you. You’re just waiting for the chair to fold up and you’ll find yourself on the floor. And if there are guests in the house, would you risk letting them sit on such a chair? Children are another matter; a wobbly chair is a real attraction for them. In fact, such rocking literally destroys the wood in the connecting places, but more on that later.
In fact, there is nothing difficult about gluing a wooden chair; it does not require much effort and many tools. The reliability of the structure after the work you have done will depend on the quality of the glue used and your diligence.
Gluing the back of a chair using a clamp. The placed bars protect the varnish from damage and evenly distribute pressure on the sides.
What glue do you use to glue chairs?
The first question that arises is “How to glue wooden chairs together?” There are several answers to this question, and which glue you choose depends on your personal preferences.
PVA wood glue is very popular when gluing wood. When purchasing PVA, you must choose those types of glue that are suitable for gluing wood and furniture. Furniture properly glued with PVA is quite reliable and strong; the only drawback is the greatly varying quality of glue among manufacturers. We can recommend using PVA produced in the USA or Western Europe.
You can use other adhesives whose chemical composition is neutral. Neutrality of the chemical composition is necessary so that the wood does not change color or become deformed. For example, you can use Moment wood glue.
When restoring chairs, “Fish glue” can be used when gluing. It is made from fish remains and is therefore completely natural. The most common use is in antique furniture to preserve the authenticity of the piece.
We have been using PVA glue for many years and trust it, the main thing is to choose a high-quality and reliable manufacturer. Further instructions will be described using his example.
Thanks to the straps, you can secure several elements at once during re-gluing. In the photo there are 4 legs attached at the same time.
Stripping tenon joints
Before you start gluing the chairs, the connecting areas must be cleaned of old glue. To make it easier to scrape off, apply warm vinegar or a little solvent, then remove the residue from the surface.
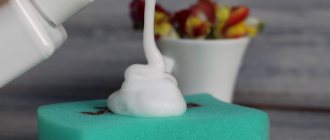
Sealing chairs
After stripping the tenon joints, you can proceed to direct gluing. PVA takes quite a long time to dry; the time required for it to harden is indicated on the label. It is necessary to securely fasten the parts to be glued so that they are pressed against each other with sufficient pressure.
In order to securely fasten the parts to be re-glued, use a clamp or tension belts. To ensure that no traces are left on the varnished surface of the wood after this, it is necessary to use spacers. These can be wooden blocks or thick rubber, but fabric will not work.
You will need several clamps to secure all the parts. Using belts you can fasten several sides at once, which is very convenient. Check the tension of the belts and if they are loose, tighten them immediately.
This is how you can quite easily get rid of squeaking and swaying chairs. If the tenon joints of the chairs are severely damaged or have become much smaller than the groove, they need to be extended. For this procedure, you can contact our workshop. Good luck with your work!
We suggest you read How to stretch sneakers at home, can you take them in?
When restoring furniture, you need to have not only high-quality parts, but also glue. The reliability of the design depends on this. Incorrectly selected products can ruin the appearance of the product and its functionality. The instructions do not always help you find out what material the glue is suitable for.
There are many types of glue, differing in color, consistency, and composition. There are suitable products for each material. If you select them correctly, the structure will be durable.
Leg gluing and complete repair
The legs of a wooden chair can be glued with fresh glue that meets the specified characteristics. You should also stock up on a hammer with a rubber tip, sandpaper, a press and a chisel. Simple repairs are carried out in several stages:
- You should pull out the loose leg and clean the remaining old glue from the part where the product is loose.
- Fresh glue is applied to the leg, inserted back into the seat, and then sealed.
- It is necessary to place a press on the seat, remove the remaining glue and hold the parts to be glued for the time indicated on the glue packaging.
3. Using a chisel, remove the remnants of old glue and wood chips from the tenons of the strapping and in the grooves of the chair legs. 4. Only after this will the new adhesive joint hold. Apply glue to the grooves at the tenons, under the seat and spacers 5. Pull them horizontally, installing one clamp in the center, in the places of gluing, strapping and spacers. Gaskets will protect furniture
When asked how to glue a chair that has cracked in other places, you should first carefully disassemble the damaged parts. Repairing a chair with a drawer (frame connecting the legs of the chair) is considered difficult, since all the parts are glued and connected with a tenon groove. After disassembling the loose parts, it is necessary to clean the seams and apply glue to the joints. If the seam diverges, just drill a good hole and inject glue with a syringe.
If it is impossible to pull out the loose element, you should stretch the frame further and inject the adhesive into the groove. For strong stability, a narrow wedge can be inserted into the trunnion socket and secured with glue.
What glue to use
Craftsmen have different opinions about glue. There are many good adhesives from which you can choose the right one for a particular case.
Among the most effective:
- PVA glue. Most often used. However, you need to choose it wisely and a product from a stationery store will not work. When choosing, you should pay attention to the manufacturer. The composition from the USA or Europe is of decent quality. The only drawback of PVA is that it takes quite a long time to dry.
- Casein. It has the appearance of a light powder that dissolves with water to the consistency of thick sour cream. Characterized by high resistance to temperature fluctuations. The disadvantage of the composition is its visibility on the surface of the wood.
- Synthetic. It can be used without preliminary cleaning of the surface. Characterized by its moisture resistance, strength and resistance to low temperatures.
- Carpentry. Also a good composition for gluing wood. Its strength qualities depend on the quality of preparation and adherence to proportions when mixed with water.
There are a large number of special adhesives for wood on the market, among which the carpentry “Moment” can be noted.
Stripping tenon joints
Before you start gluing the chairs, clean all connecting areas of old glue. To make it much easier to scrape off, apply warm vinegar or a small amount of solvent, then remove all residue from the surface.
On some upholstered chairs, the seat panels are not tightly connected to the frame, and as a result, it loses the necessary stability. This defect can be eliminated if triangular or trapezoidal solid wood chocks are tightly screwed to the frames that form the internal corners of the frame. This will strengthen the frame, it will remain stable even if the chair, for example, tips over or begins to be moved.
If the chair is used frequently and is heavily loaded, the reinforcements may also become loose. In this case, replace the old screws with new ones: they should be slightly thicker than before.
Drill holes in the corner chocks and frames so that the heads of the screws sink into them.
For corner chocks, choose screws of such length that they, without going through the frame, provide sufficient strength to the joint.
It is better to cut a new log from well-dried hardwood.
A careful inspection of the old chocks will help you determine whether they need to be replaced or whether it is enough to scrape off the old glue and apply fresh glue, and then screw in new screws. Be sure to replace cracked or split logs with new ones, which must be cut out of hard wood exactly according to the shape of the old ones, then glued into the drawer frame and screwed with screws.
Adhesive joints must be secured with clamps, clamps or cords until the glue has completely dried.
The glue must dry under pressure. Therefore, it is recommended to tighten the newly glued frame using clamps, clamp vices or cords and keep it that way for about 12 hours. At the same time, you should not create too much pressure, otherwise a lot of glue will leak out of the grooves. After some time, loosen the tension a little.
Make sure that when tensioning, the chair frame is at the correct angle and is not distorted. This requirement is easy to fulfill when repairing ordinary chairs. The situation is more complicated, for example, with English chairs or rocking chairs. However, at least the front of the chair can be controlled using a plumb line.
What glue should I use for repair work?
If a wooden chair is broken, then it is recommended to use the best wood glue for repair. Nowadays the greatest demand is:
- "Kleyberite."
- "Moment" carpentry.
- "Trebond."
Professional carpenters put forward the following requirements for glue:
- It must be resistant to sunlight.
- Universal to use.
- The adhesive connection must be strong.
- It is recommended to use moisture-resistant glue.
- There should be no sticky residue left on the surface.
- Should not be toxic.
If you ask a professional craftsman how to glue a wooden chair, he will probably recommend using epoxy glue. It is best suited for wood products. PVA glue can be used. Some people use a two-component composition.
Urea resin
Urea resin adhesive is prepared from thiourea or synthetic urea through a heating process. Such compositions create very strong compounds of wood products. They are resistant to moisture and can be used in extreme conditions.
This glue is acid-curing, and after mixing with a hardener its service life is short - up to 4 hours. It is used for hot pressing.
Reference! This glue is transparent, which is very beneficial when gluing wooden furniture.
Advantages of do-it-yourself restoration
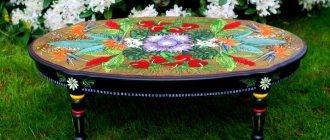
Independent work on updating chairs is remarkable because the imagination in implementing the plan is not limited in any way and the furniture can acquire completely unexpected features, sometimes even becoming more interesting than when purchased. In this case, the entire work will take a minimum of time, as well as materials.
Processing and decorating a chair does not require special skills and tools. It is enough to remove the old coating, replace the upholstery and complete the surface by covering it with varnish. During the restoration process, you can make adjustments to the design of the product or repair broken areas, thereby extending the service life of the furniture.
Chair restoration: before and after
One of the advantages is the minimal cost of work, which will not exceed the price of a new product. You can use leftover paint, textiles, leather substitute.
Polyurethane glue
When high strength, resistance to liquids and mechanical loads are important, you can safely opt for polyurethane adhesive.
A well-known representative is Soudal 66 A, produced in Belgium. It can be used in harsh environments to bond wood products even if they are wet. It is compatible with most building materials.
We suggest you familiarize yourself with Methods for removing resin stains from various types of materials
Reference! When hardened, the composition foams, which allows it to fill all seams and cracks.
Polyurethane wood adhesive mixture can be used for complex carpentry work indoors and outdoors. They love it for its excellent strength, water resistance, and reliable grip.
Kleiberit 501.0 is another polyurethane composition, but from a German manufacturer. This is a good universal furniture adhesive that is not afraid of high temperatures and moisture. Can be used when combining different materials.
The adhesive receives good reviews due to its convenient use, flawless connection and optimal consistency. When working with it, it is important to ventilate the room and protect the skin.
Methods of restoration by decorating a chair
There are several options for designing the appearance of furniture. The chair can be updated in the following ways:
- coloring;
- lamination;
- decoupage
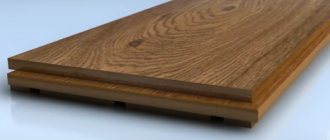
It is necessary to use wood species that are similar in density and texture so that the chair is functional and looks presentable.
As decoration, you can use both the upholstery itself, choosing a fabric of interesting colors like a tapestry, and other parts of the furniture, making them carved and figured.
You don't have to place the fabric on the outer sides of the seat.
A plain seat is decorated with smooth embroidery or appliqué. This must be done before starting the sheathing.
A plain seat is decorated with smooth embroidery or appliqué.
The wooden surface of the supporting structure and the back are laminated, that is, covered with durable varnish in several layers. The tone of the coating is selected closer to the natural shade of the wood (light, dark or moderate). A Viennese chair or any other looks best in this design.
A restored chair can be further decorated - make the wooden surface lighter or darker, or design the back or legs differently.
You can completely replace the back with a curly one, if the design allows. Select the wooden base according to its density and texture in advance, cut it to size and use a pattern to create the desired design. Round the edges using a jigsaw and sand the edges with sandpaper.
The wooden surface of the supporting structure and the back are laminated, that is, covered with durable varnish in several layers.
The chairs included in the set must be decorated in the same style so that they do not stand out from the overall picture - “different-sized” furniture may look good in different rooms, but at a common table, for example, when celebrating a family celebration, it looks careless.
When updating, you can use a variety of materials.
In addition to the fact that you can independently restore the former appearance of a chair, when updating furniture, various techniques are used that allow you to radically transform interior items and breathe new life into them. Wooden surfaces are painted in various colors, laminated, decorated with designs using the decoupage technique, and soft parts are made using patchwork technology.
Textile seat upholstery with an interesting pattern can serve as a decorative element.
When laminating the wooden surface of a chair frame, a transparent or tinted varnish applied in several layers is used. The shade should be close to natural. Also, the wooden frame is painted in contrasting colors, the legs and back are decorated - it can be made curly.
After the transformation, the chair will organically fit into the interior in the Provence style
Patchwork technique
Bright patchwork upholstery is a simple and original way to update the appearance of an ordinary chair. You can use old clothes, jeans, and all kinds of scraps as material. The main thing is that the fabric has a dense structure and is resistant to wear. If you lack experience in this technique, it is better to choose a simple pattern and square or rectangular patches.
Kitchen chairs decorated in patchwork technique
Old upholstery is used as a pattern when cutting and arranging patches. The pieces of fabric are sewn together on a machine, bringing them together tightly. Then, according to the template, the excess is trimmed and the seat is assembled.
The process of sewing patches on a machine
Decoupage technique
One of the most effective and low-cost ways to decorate furniture is the decoupage technique. This method is simple to implement, but looks quite impressive and amazes with the variety of design variations.
Chairs decorated using the decoupage technique
Step-by-step instructions for decorating a chair using the decoupage technique are given below. Conventionally, the work can be divided into 2 stages - preparatory and main.
Screwdrivers
We suggest you familiarize yourself with How to get rid of fleas in the domain using folk remedies
Table 2. Preparatory stage
| Illustration | Description |
| First, you need to inspect and repair the chair, strengthen it by gluing the loose parts. |
| All fastening points are pulled through with a screwdriver. |
| To remove the old layer of varnish, use a remover, which is applied to all wooden surfaces of the product. |
| Using cling film to cover the seat, legs and back of the chair will help speed up the drying process of the wash. |
| After the remover has dried, the old varnish or paint coating is removed using a spatula. The instructions on the wash package indicate the time interval for which it is left to dry. If necessary, repeat the procedure. |
| All elements of the chair are sanded with sandpaper. |
| The chair is wiped with acetone. |
| Damage and holes on the surface of the chair are filled with oil putty. When it dries, you will need to clean the area with sandpaper. |
Table 3. Chair decoration
| Illustration | Description |
| The chair is painted in the chosen color. If this is Provence style, then the paint is chosen with a delicate, muted shade, for example, lilac. Painting is done twice and left to dry. |
| To give the surface a slightly aged appearance, after drying the chair is sanded with A14 grit sandpaper, creating natural abrasions. |
| The chair is coated 2 times with acrylic varnish. After it has dried, the product is sanded again with medium-grit sandpaper in those places where the design applied using the decoupage technique will be located. |
| Then apply acrylic varnish again in a thin layer and smooth it with your palm. The procedure is repeated. |
| The printer prints a mirror image. |
| A fragment of the drawing is cut out and placed with the picture down in the place where the image will be transferred. |
| The drawing is fixed with molar tape. |
| A cotton pad is lightly moistened with acetone and rubbed in a circular motion over the fixed sheet with the image. |
| Place the disc on the sheet and make circular movements with a spoon, pressing lightly. |
| The leaf is carefully removed. |
| In the same way, transfer the drawing to the seat. |
| If the drawing is not clear, then using gouache paint and a thin brush you can complete the main lines, making the image more expressive. |
| The chair is coated with matte varnish. |
Causes of breakdowns
Before you look for how to glue a wooden chair together, you need to understand what caused the breakdown. This type of furniture consists of many parts that are attached with glue. Over time, the joints become unstuck. It happens that the legs move away from the harness. They are usually attached using spikes.
Some products may have manufacturing defects. A man sits on a chair with wooden legs and falls because one of the legs falls off. Don’t think that furniture is no longer usable and should be in a landfill. Breakdowns of this type can be easily repaired with your own hands without spending a lot of money on repairs.
Leg gluing and complete repair
Once you have decided on the choice of glue, you should make sure that you have the necessary tools. It has a significant influence on the strength and durability of the connection. For successful repair you will need:
- Sandpaper, sharp knife, chisel. Used to remove old glue residues, remove grease and prepare the joint of a leg or other part.
- Hammer. Required for reliable and tight driving of the tenon into the groove. It is important that it has a rubber nozzle (to avoid damage to the varnished coating).
- Clamps. To tighten the parts tightly. Pressing the glued parts of the chair as tightly as possible is not the least important element of a successful repair. In some cases, belt clamps are perfect.
To tighten parts, it is also possible to use improvised means, for example, ropes or a heavy object.
There are several main stages of repair:
- First you need to disassemble the chair. Pull out the loose leg and other parts that will prevent easy access to the damaged connection.
- Using a knife, chisel and sandpaper, clean the surface of the tenon and groove (trunnion).
- Lubricate the joint with pre-prepared (if required) glue according to the instructions. Place the part in its place.
- With light blows of a hammer with a rubber nozzle, hammer the tenon into the groove until it stops.
- Remove the squeezed out excess glue from the product. A piece of ordinary fabric will help with this.
- Press the joint using clamps or improvised means.
- Wait for the glue to dry completely according to its instructions.
So with a few simple operations you can give your furniture a new life. This is especially important when you need to glue together your favorite chair, which you don’t want to replace with a product made of plastic and metal, because high-quality wooden furniture, although it costs much more, is more durable and aesthetically attractive.
Chairs made of natural wood look elegant, but over time they dry out and creak. You can restore rickety wooden furniture using high-quality glue.
The question arises, what exactly should I use to glue a wooden chair together so that it is durable and long lasting?
Wooden chairs are environmentally friendly, reliable and fit harmoniously into any interior. However, the peculiarity of the assembly necessitates their periodic restoration. Furniture items made of wood are assembled from several elements, fastened with glued tenons or dowels.
During operation, the fasteners lose strength, and the legs of the product begin to wobble and creak. This problem is solved by strengthening loose nodes. The quality of work directly depends on the fastening composition.
That is why the question of how to glue a wooden chair is very important. The wrong choice of glue type will lead to the need for repeated restoration.
How to glue a wooden chair
Before gluing a wooden chair, you should decide what glue to use. It is best to repair wooden home furniture using adhesives that have the following properties:
- light and water resistance;
- good adhesion to porous surfaces with the formation of a strong, dense and reliable adhesive seam that is resistant to mechanical loads;
- colorless when drying, so as not to leave stains on the surface of the glued pieces of furniture;
- high drying speed;
- environmental safety and absence of toxic substances.
Based on these properties, PVA, BF, epoxy, polyurethane, syndeticone and other adhesives can be used to repair wooden chairs. But still, the best glue for chairs is considered to be polyvinyl acetate dispersion and PVA glue made on its basis. In addition to the properties already listed, the advantages of this glue include:
- convenience and ease of use - PVA glue is sold ready for use;
- resistance to aggressive environments and temperatures, the formation of fungus and other microorganisms;
- durability of the adhesive connection;
- low cost.
Modern industry produces different brands of PVA glue, differing in the concentration of the dispersion and the presence of additional substances in the composition, which improve water resistance and increase adhesion to various materials. When choosing which glue to glue wooden chairs with, you should pay attention to special PVA wood glue or plasticized dispersion of brands D40P - D53P.
Main stages of restoration work
Before proceeding with the decorative finishing of the chair, it is necessary to bring it into proper operating condition, ensure the stability and reliability of the structure, since due to the natural drying of the wood, the glued tenon joints can no longer cope with their function.
We invite you to familiarize yourself with the DIY snow removal attachment for a walk-behind tractor.
When disassembling a chair, the parts of which are fastened with a tenon joint, act carefully, trying not to damage the fastening points. To do this, you can lightly tap them with a hammer and try to loosen the tenon. When the chair is disassembled, use a chisel or knife to remove dirt and glue residues from the grooves. The elements are coated with casein or flesh glue, assembled and clamped with a clamp for 3 hours.
Types of tenon joints
Repairing a chair may involve the following steps:
- When loosening a bolted connection, you can place a metal or plastic washer under the nut, and then tighten the nut tightly.
- You can ensure a tight fit of the wooden fragments to the eyes by increasing the missing volume using thin pieces of wood.
- If a tenon breaks, a new part will need to be made.
- If the upholstery or soft filling is damaged, they are completely replaced. This stage can already be attributed to decorative design, since you can choose absolutely any color of the upholstery, design of the back and legs of the chair.
Tape (belt) clamp
Restoration involves the preliminary removal of the existing decorative coating. To do this, you can use sandpaper or a sanding machine.
Sanding a chair
Random orbital sander
The purpose of this stage is to create a smooth and even surface. To remove varnish, use technical acetone, which is applied with a napkin. This will preserve the natural shade of the wood.
Stage 3: coloring
Wood has a high level of water absorption, so before you start painting the wooden surface, it is primed.
The primer is applied in 2 layers and, after drying, processed using fine-grain sandpaper. The paint is also applied in two layers, allowing the previous one to dry completely. Water-based paint is easy to apply and dries quickly. If desired, use stencils. The varnish is applied in the direction of the fibers.
If the chair is to be finished with varnish while preserving the natural shade and texture, then use a colorless primer. The primer for paint should be white.
Over time, the chair not only becomes loose, but its soft part, the seat, also becomes unusable. The inner filling loses its shape, and the fabric upholstery wears out and even breaks. Therefore, one of the stages of chair restoration is reupholstering the seat. To do this, you will need to stock up on a furniture stapler and staples for it, a screwdriver or screwdriver, foam rubber at least 5 cm thick, and upholstery fabric.
Attaching fabric to staples
Stapler prices
Construction stapler
Table 1. Restoration of a wooden chair with an upholstered seat
| Illustration | Description |
| The chair needs to be disassembled. To do this, use a screwdriver to unscrew or bend the factory fasteners that hold the chair seat. |
| After the seat is removed, it is disassembled, separating the supporting base from the filling and upholstery fabric. |
| The thickness of the plywood base can be measured and a new one made. |
| If the legs are unsteady, then the hole for the self-tapping screw or furniture bolt is sealed with a small piece of wood. |
| The wooden elements of the chair are treated with fine-grained sandpaper. |
| The structure of the chair is strengthened. |
| The wooden frame is treated with stain. |
| Then coated with colorless varnish. |
| Before applying the second layer of varnish, the wood is treated with fine-grained sandpaper. |
| Cut out the soft filler - foam rubber. To do this, lay the base on the material and trace it, stepping back a few centimeters from the edge. |
| The workpiece is cut out using a stationery knife. |
| The plywood base is coated with glue. |
| Foam rubber is glued to the base of the plywood seat. |
| When cutting upholstery fabric, 10 cm are removed from the edge of the plywood base. |
| The fabric is fixed to the staples with a furniture stapler. |
| The seat is installed in place. |
We invite you to familiarize yourself with DIY thick wire
Epoxy resin
Epoxy resin glue is good for gluing wood together. It's also great for filling gaps. It is waterproof and has optimal strength characteristics.
The glue is two-component, that is, it consists of a resin and a hardener. To prepare, they need to be mixed in a certain proportion, as indicated in the instructions. The positive side is that this furniture glue does not shrink.
Reference! Different ratios of elements give the glue different properties, which can be controlled under certain conditions. What’s also good is that gluing does not require long pressing.