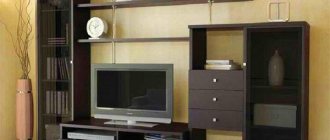
The back wall of the cabinet - what is it made of?
Share on social media networks:
The topic of today's article is the back wall of the cabinet: what it is made of, different methods of fastening.
The purpose of the “backdrop” is to impart rigidity to cabinet furniture and hold the entire structure in a stable position. And rigidity is not the last characteristic for pieces of cabinet furniture. During use, the closet becomes filled with things. Due to uneven load distribution, an insufficiently rigid structure quickly deforms. It is the stiffening ribs inside the product and the back wall that make the furniture more stable. The most common types of materials for making “backdrops” are laminated chipboard or fiberboard. Now let's talk about how to attach the back wall of the cabinet. The sheet is mounted on the already assembled body in the “lying” position. Installation is carried out using nails or staples, overlapping. If installation is carried out on standing furniture, then the sheet is cut into pieces and mounted in fragments.
This option has only one advantage - low cost. There are many more disadvantages:
- The strength of a structure, especially a high one, is very relative.
- The surface of the fiberboard sheet is laminated or painted on only one side, so the material is susceptible to dampness.
- A small assortment of colors - about 5.
- Since the installation is overlapped, the material is visible from the end of the product.
- It is necessary to allocate a special place for installation. This is not easy in a small apartment.
- Often the material has a persistent unpleasant odor.
- Difficulties in attaching tall wardrobes to the wall.
How to make a cabinet from plywood?
First, you should choose a location for the cabinet, and, based on the available space and your needs, decide on the size of the future cabinet.
Photo – Measuring the space under the closet
According to our project, our closet will be located in the corner of the room. The cabinet dimensions are shown in the drawing below. You can of course choose your sizes.
Photo – Drawing of a plywood cabinet
In accordance with the drawing, we cut out two side walls measuring 200 by 40 cm from sheets of plywood using a circular saw, which are, in fact, a frame.
Photo – Sawing out the sides of the cabinet
The second step is cutting out the shelves. According to the project, the dimensions of the shelves will be 60 by 40 cm. The height of the shelves will be determined based on what you plan to store in the closet: whether it will be books or stacks of folded clothes - the choice is yours. According to the drawing, the height of the shelves will be 40 cm, so we need to prepare 6 plywood blanks, two of which will go to the upper and lower parts of the cabinet frame.
It is worth noting that the length of the shelf will not be exactly 60 cm, it will be shorter by two thicknesses of plywood minus the depth of the grooves. In our case, the thickness of the plywood is 16 mm, and the grooves are 5 mm. Accordingly, the estimated length of the shelves will be equal to 578 mm, or 57.8 cm. These are the shelves we will cut.
Photo – Preparing shelves
The next step in assembling a cabinet from plywood with your own hands is to mark and make grooves on which the shelves will rest. This is done with the intention of making fewer holes so that the outer surface of the cabinet remains smooth and beautiful.
Attention! If you use plywood less than 16 mm thick, you may have to secure the shelves without inserting them into the grooves, but by attaching metal corners.
The dimensions of the grooves must correspond to the thickness of the plywood; we make the groove across the entire width of the cabinet. To mark the grooves as accurately as possible, it is best to attach the two sides to each other and mark them together. The easiest way to cut grooves is with a milling cutter, but at home you can get by with two cuts to a depth of 4-5 mm and further gouging out the remains using a chisel or chisel.
Photo - Making grooves in the sides of the cabinet
Now that the entire frame is ready, it's time to put it together. First, we fasten the sidewalls to the upper and lower bases.
Attention! It is best to attach it to furniture bolts, so you can easily disassemble the cabinet later, for example, for painting. Use finishing nails only if you know for sure that you will never want to dismantle the cabinet, for example, when moving.
Photo – Assembling the cabinet frame
The next step on how to make a cabinet out of plywood with your own hands is to prepare the back wall of the cabinet from fiberboard and secure it with screws or finishing nails. The dimensions of the back wall should be 60 by 200 cm.
Photo – fiberboard for the back wall of a plywood cabinet
Attention! Before screwing in screws and furniture bolts, be sure to drill holes of the appropriate diameter. Driving screws into plywood without drilled holes is not recommended.
When the plywood cabinet is almost ready, we’ll give it a little decor - we’ll attach wooden molding to the ends of the plywood. Today, construction stores have a very large selection of decorative overlays. We chose flat timber for the sides and profile molding for the shelves. We will attach it to the finishing nails using a pneumatic hammer.
Photo – Attaching molding to the ends of the cabinet
And finally, the final stage in assembling a cabinet with your own hands is painting the plywood.
If furniture bolts were used during the assembly process, then when the paint has dried, we put decorative caps on the caps. This will give the cabinet greater aesthetics.
Photo – Plastic furniture plugs
So, this concludes the instructions for making a cabinet from plywood. Now you can assemble it yourself.
What is the back wall of the furniture made of: chipboard
This is the preferred option, although the costs will be higher. The advantages of this option are the following:.
- Structural strength.
- Several mounting options - corners, euroscrews, eccentrics.
- If the fastening is “inset”, cabinet furniture has a neat appearance.
- Many color options. You can match the color of the back wall to the color of the body.
- Possibility of assembling the cabinet in a standing position. This means that there are conditions for working in confined spaces.
- Resistance to mechanical damage and high humidity.
Do you need a back wall in wardrobes?
Rigidity for large cabinets, such as sliding wardrobes, is an important characteristic. The internal content of an ordinary wardrobe is quite uneven; voluminous niches with rods alternate with narrow and dense shelves. The load inside the cabinet is distributed extremely unevenly. Both the shelves and the body require additional rigidity.
Another thing is built-in wardrobes and dressing rooms. Here, rigidity is given to the shelves in a different way - through additional consoles.
All other freestanding cabinets with sides, bottom and roof require a back wall, of course.
The consequences of deformation due to insufficient rigidity of the overall structure can be serious. Therefore, in addition to the rear wall, stiffening ribs made of the main material - chipboard - are laid between the wide spans of the internal sections at the project stage.
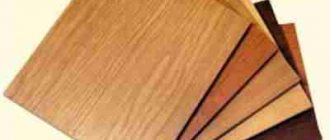
What materials are used for the back walls?
The back wall of the wardrobe is most often 3-4-5 mm thick fiberboard, which is overlapped onto the ends of the chipboard.
The back wall is attached to the chipboard using small nails, but to increase the strength of the fastening, you can use self-tapping screws with a thickness of 3.5-4 by 16.
You can also find cases where the back wall is a laminated board 8 mm thick, hardboard and even OSB.
To decorate open niches, mirrors, various decorative panels with texture and embossing, painted glass, plastic are often used as back walls, complemented with built-in lighting.
If the wall is posterior, it doesn’t mean it’s unimportant!
Cabinets can be produced in the form of a separate case or built-in.
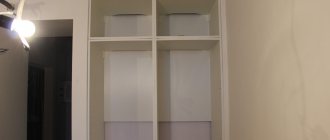
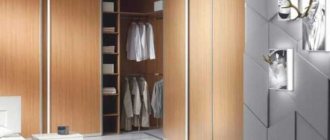
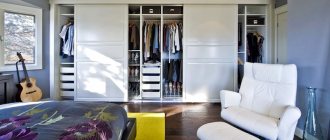
Built-in ones are mounted directly to the wall of the room at their location. The advantage of individual models is the ability to disassemble, move and place them in any place. Cabinet models always have a cabinet back wall. It isolates the interior space of the cabinet and makes it aesthetically pleasing, especially if the wall behind it is uneven and unfinished. The rear wall of the cabinet rigidly fastens the entire structure and holds it strictly in a vertical position.
The back wall of the cabinet is made of fibreboard (fibreboard).
For safety and reliability, it should be made from chipboard.
The wardrobe is divided into sections, drawers, shelves and is filled with things very unevenly. Under load, the wardrobe may become deformed. To prevent this, in addition to the rear wall, special stiffening ribs can be provided inside.
In addition to the rear wall, special stiffening ribs can be provided inside.
Wood-fiber boards have a good margin of safety.
Fiberboard back wall fastening
There are two main ways to fasten fiberboard - overlapping and in a groove. The latter is typical for wall-mounted kitchen cabinets.
Let's now figure out how to properly attach the back wall in sliding wardrobes.
Difficulties arise at the assembly stage. The cast design of the assembled wardrobe is quite heavy and bulky. The most correct thing is to stuff the backdrop when the cabinet is “lying” face down. Then it is definitely not skewed and all diagonals are aligned.
However, this is not always possible.
- Firstly, to assemble a large cabinet lying down, you need a lot of free space. In ordinary small-sized apartments and narrow hallways there is simply no room for this.
- Secondly, if the cabinet is designed for the ceiling, then there is no point in assembling it lying down. Because of the diagonal, you simply cannot lift it later if the sides are laid solid from floor to ceiling.
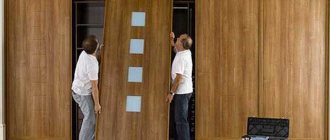
- Thirdly, when lifting and moving, you can damage the front finish of the cabinet - after all, this is difficult to do even with a partner.
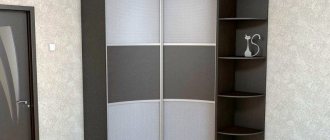
The back wall of the wardrobe, is it needed and what should it be made from?
In ordinary cabinets with hinged doors, as in other cabinet furniture, the back wall is always present. Sliding wardrobes with a more voluminous design are an exception. There is not always a back wall in them. Let's figure out why some wardrobes are made without back walls and whether they are needed at all.
What to make of and how to attach the back wall of the cabinet
Any cabinet, sideboard, china cabinet or cabinet is complete without a back wall. Backdrops, as furniture makers call them, can be made from different materials and mounted in different ways. But they all perform the same function - they maintain the correct geometry of the furniture.
Why do you need a back wall in cabinets?
Each closet has a number of shelves, drawers, hooks and hangers that serve as storage for clothes, shoes, accessories, books, dishes, small and large household items. All structural elements of the product experience different mechanical and physical loads. As a result, some shelves on which light things lie retain their shape, while others become deformed or warp under the weight of bulky household belongings.
In classic wardrobes without a back wall, hinged doors sag over time, and in coupe models, the doors move to one side or fall out of the sliding system guides. The backdrop gives the furniture structure additional rigidity and stability, preventing it from skewing and loosening.
A furniture box assembled in compliance with all technological processes will last for many years. The back wall covering the back of the cabinet will not only provide strength and hardness to the product. It will protect the interior of the wardrobe from ubiquitous dust, hide defects in the room walls from view, and give the product a finished look.
What is the best material to make the back wall of a cabinet from?
Furniture manufacturers most often use fiberboards with a thickness of 3, 4 or 5 mm to make backdrops. This decision is justified: fiberboard differs from other materials in its low price, it does not deform or crack under tensile and tearing loads, and does not occupy the internal space of a wardrobe or wall-mounted wall.
Depending on the design features and purpose of the furniture, backdrops are cut from different types of fiberboard:
- standard - the cheapest possible, having a natural grayish-brown tint;
- painted white, black and other colors;
- laminated;
- lined with a film that imitates the longitudinal section of wood (walnut, cherry, alder, etc.).
The second most popular material for backdrops is laminated particle boards. Compared to fiberboard, they are more durable, reliable and aesthetically pleasing. Laminated chipboards are resistant to scratches and high humidity. The large selection of colors available on the furniture market allows you to choose the desired texture, color and thickness.
Less popular materials for wardrobe backdrops include plywood, OSB boards, HDF, MDF panels (painted or covered with PVC film).
How to attach the back wall of a cabinet
The method of fixing the backdrop depends on several factors: the design of the product, its size, and the type of material used. In practice, furniture makers use 3 methods - overlapping fastening, in a groove and in the form of an internal insert.
Overlap fastening
The first method is the most common, due to its simplicity and accessibility. Anyone who knows how to use a screwdriver can master the technique of fixing an overlapping backdrop onto a frame. To do this you need:
- Take measurements from the back of the wardrobe without the back wall and transfer them to a sheet of fiberboard. Reduce the resulting parameters by 2 mm on each side. If this is not done, the “shaggy” edges of the fibreboard, protruding beyond the structure, will give the product an untidy appearance.
- Cut out the backdrop, place it on the box and secure it with screws (3x16, 3.5x16, 4x16). Start the fasteners from the corners of the body, and screw in the screws at a distance of 10-15 cm from each other.
Using a few tricks, you can make your work easier and improve the quality of the product:
- You should not use nails for fastening. They will not be able to be securely fixed in the chipboard and will fall out when transporting or moving the cabinet inside the apartment.
- If possible, it is better to use a solid backdrop. If the dimensions of the cabinet do not allow this, you need to cut out several fragments corresponding to the size of each section.
- It is more convenient to screw the backdrop if the cabinet is placed horizontally with its front side on the floor. This will avoid distortions and better fix the geometry of the product.
A large backdrop can be assembled from 2 separate pieces of fiberboard. To do this, you need to purchase a special plastic profile with 2 grooves from a furniture store and install it vertically in the center of the structure.
Groove mount
The second method of fixation is more often used when assembling kitchen sets. Due to the fact that the backdrop does not protrude beyond the frame, wall cabinets fit more tightly to the wall and are easier to adjust when hanging. The aesthetics of this option are often used by manufacturers of compact cabinets, buffets and sideboards.
Fastening into a groove requires great precision. Before closing the gap with the backdrop, you need to do some manipulations:
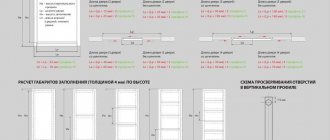
- Stepping back 10 mm inside the cabinet, cut a groove 5 mm deep around the perimeter of the bottom, roof and end racks of the wardrobe. The width of the groove must correspond to the thickness of the material used.
- Attach the backdrop at the stage of assembling the structure. First, screw the sides to the bottom, then insert the sheet into the grooves, cover with a lid and finally secure.
If the width of the groove is not sufficient for a sheet of plywood or fiberboard to fit into it without effort, the edges of the backdrop can be cut off a little with a sharp knife or ground off.
Function of the back wall in cabinet furniture
For a person who uses furniture at home, the back wall is assessed from the point of view of practicality. First of all, it covers all the cracks that arise due to the cabinet not being tightly connected to the wall:
- protects against dust, dirt (partly moisture) getting inside;
- serves as a barrier in the way of small objects - prevents them from falling off the inside of the shelves.
However, those who design, manufacture and design furniture know that the role of the back wall is much greater.
First of all, it enhances the rigidity of the entire structure. Thanks to it, the cabinet does not warp and “holds” its original geometric shape. Anyone who has assembled furniture knows how much easier it is to hang and adjust the fronts when the back is set diagonally and nailed to the body.
Also, the rear wall of the cabinet, as a connecting element in a plane perpendicular to the body, helps redistribute the load on the shelves. During operation, some shelves are loaded very heavily, while others are used to store something less heavy. Niches with clothes under hangers also provide a certain load. Unevenness leads to deformation, but due to a single back wall it is reduced.
How to fix a cabinet to the wall - a clever idea!
This article is based on a video. If you don't want to read, watch the video. Of course, everything didn’t fit into the video—the text describes the process in more detail.
The article is not a ready-made instruction. We are simply suggesting how to attach to a soft surface. Using our advice, you can solve your problem.
1000 people on the Internet are looking for how to fix a cabinet to a wall made of plasterboard, foam concrete, plastic panels. Because none of these materials can support the load. And on balconies this happens - there is no wall at all behind the plastic panels.
Now we will tell you how to secure a cabinet without drilling a single hole in the concrete.
The balcony is not at all simple; behind this wall there is a cardboard partition to the neighbor. There is absolutely nothing to attach to.
The master inspects the corners.
Marks the depth of the cabinet. Rearranges the laser level and makes marks on the walls. The shelves, ribs, and side walls will be placed according to the marks.
Next, the master takes the rail and screws it on. Wait, what is he doing? He didn't drill a single hole in the concrete.
After installing the first slats, the master attached the second ones to them. The joints of the slats overlap. This will add rigidity to the structure. All slats rest on the floor.
In the same way, the installer screws the strip to the ceiling panel.
One gets the feeling that the master doesn’t care at all what the cabinet’s surroundings are. If there had been drywall or foam blocks, he would have done the same.
Then it's time for shelves. There's an interesting point here. The professional rests the top rail against the floor and secures it to the vertical one. He screws the slats from the shelves to it.
He makes the response part in a similar way. First comes the horizontal rail. It rests on the vertical one, and it rests on the floor. The slats from the shelves are screwed to the vertical part.
The structure is then connected by installing shelves. The shelves provide such rigidity that even with excessive efforts it is impossible to move the frame.
But now the cabinet is not yet fully functional. It needs to be strengthened so that the weight can be placed on the shelves.
And here is that very secret moment. A professional screws on the vertical rail. He cut it out very tightly.
This is the secret. Throughout the cabinet, under each stick, the master secures a support. And each of its elements transfers its weight to the floor, and not along the walls. Moreover, our closet is built-in, not cabinet-mounted.
And this is what it looks like at the bottom. Again the supports were cut with high precision. We rested them on the floor again and screwed them back to the panels.
Here's a panoramic view. Supports stretch from the floor to each shelf. They are the ones who take the entire load that lies on the shelves.
If you like the cabinet itself, look at the instructions on our website. And then you can assemble one with your own hands.
Why are sliding wardrobes made without a back wall?
For built-in and partially built-in wardrobes, the back wall is not required. Such models often have internal filling in the form of a frame without side walls, and the shelves are additionally attached to the wall - therefore, from a design point of view, its role is minimal.
However, some customers of built-in furniture want to see the back wall in their closets. Usually this desire is explained by the fact that the wallpaper can be wiped off with clothes, and the backdrop is more practical and wear-resistant. But in order to install it, you have to make changes to the internal design of the wardrobe, add sections and racks, which leads to additional material costs and an overall increase in cost.
In voluminous non-built-in wardrobes (having side walls, a bottom and a roof) there is also sometimes no back wall. This is also due to considerations of economy and assembly features.
- To properly install the back wall, you need to assemble the cabinet lying down. In this position it is easier to catch the diagonals, align the body and fill the back. But in most cases, a large wardrobe is assembled “standing up” - too much space is needed to lift it and move it to the right place. Especially if the location is, for example, a narrow hallway.
- To make the wardrobe more rigid, with correctly installed rear sections, it is better to design it sectional. When each section is assembled separately and fits tightly with the rest, it is easier to assemble, move and attach the back walls. But this option will cost more, as was already written above.
How to strengthen the back wall of a cabinet?
Fastening the back wall of the cabinet is not an idle question at all. Some people suggest nailing the backs of cabinets.
The advantage of individual models is the ability to disassemble, move and place them in any place.
Yes, this method allows you to do it quickly, but such fastening of the rear walls of the cabinets reduces the rigidity of the structure and its strength. In this case, the material of the body and walls is destroyed, creating difficulties in the future when disassembling such a product. The use of a construction stapler is also not recommended. It is best to use self-tapping screws with a washer.
The back wall of the cabinet, the material of which is made of chipboard, is better in all respects, but also costs five times more.
If laminated chipboard is used, then holes are first drilled so as not to split the board, and then self-tapping screws are screwed in. Improves the rigidity of the entire structure and the fastening of sheets in the grooves selected using a milling cutter in the end posts, cover and bottom of the product. In this case, it is important that the dimensions of the sheet to be fixed coincide very precisely with the dimensions of the area to be closed.
Particleboard is a mixture of sawdust and resins.
Fastening is carried out around the perimeter:
- to partitions and end walls;
- to the ceiling from above;
- to the base of the structure;
- to permanently fixed shelves.
They also differ in the degree of response to moisture, fire resistance, and exposure to sunlight.
What to make the back wall of a wardrobe from
The choice of material for the back wall of the wardrobe depends on the design and installation method.
The rear wall overlaps the body
If the backdrop is stuffed on the reverse side, overlapping the body, then it is better to use fiberboard with a thickness of 3-5 mm. This is a practical and inexpensive option. Less commonly, hardboard, plywood, OSB and other flexible sheet materials with a fibrous structure are used as back walls for sliding wardrobes of this type.
Step by step, installing the back wall on the wardrobe body will look like this:
- We align the assembled body of the wardrobe, “catch” the diagonals relative to the back wall. The backdrop cut to fit the section should be 2 mm smaller than the external dimensions of the niche on each side. For example, for a cabinet 2000x800 the backdrop is 1998x798, excluding the base.
- We screw the corners of the backdrop to the body. If you need to pre-mark, we mark. For fastening we use 3x16, 3.5x16 or 4x16 self-tapping screws. Small nails for installing fiberboard to chipboard are not recommended! Unreliable connection, popping out at the slightest attempt to move the cabinet.
- Next, we screw it onto self-tapping screws in the center of the sides, roof and bottom, then along the quarters, etc., until the distance between the fastening points is 10-15 cm. Here you can use small nails if the economy of self-tapping screws is so critical.
- We mark the fasteners along the internal stationary shelves and partitions in order to additionally “grab” the backdrop. It is not recommended to use the “eye” - there is a risk of making a hole in the fiberboard in the wrong place or damaging the shelf/partition by screwing in a self-tapping screw not in the center of the thickness of the chipboard. The distances between the shelves are measured, taking into account the thickness of the chipboard, 16 mm from the edge and 8 mm in the center are drawn along the fiberboard, and only then, along the line, starting from the center, screws are screwed in.
How to attach the back wall of the cabinet to the front?
The back decorative thin wall from the closet in the hallway has moved away, and the nails from this material are sticking out.
The nails were nailed into the back; the cabinet could not be moved; it was firmly pushed against the walls. Is there an alternative method of attaching/gluing the backing material to the cabinet without having to take it apart? I plan to remove the carnations, but together with the caps, I don’t know how to do this yet, it would also be interesting to hear advice on this matter.
At the moment I’m thinking of cutting that thin material into fragments in order to completely pull it out, remove the nails along with the heads, and then attach them back in segments to the cabinet frame, or attach them to the wall, and expand the area of the cabinet shelves, also adding thin material, and In this second method, you can use short self-tapping screws. But with regards to the first method - attaching fragments of thin material directly to the edges of the frame, will furniture superglue be enough, or should I use some kind of rubber corner / thin block for better gluing / for using short self-tapping screws?
Pull the back wall out to the side if possible. Attach pre-made blocks to the wall around the perimeter of the cabinet from the inside. The blocks should be made of such thickness that they reach from the wall to the walls of the cabinet. And attach the back wall to these blocks from the inside, cutting the wall a little with a hacksaw to the internal size of the cabinet. If it is impossible to pull the back stack out to the side, cut the back wall into pieces with flex or a hatchet and throw it away. For the BV website. The new wall must be made from fiberboard cardboard.
If your back wall has partially come off, you can try to repair it from the inside. If for some reason you decide to replace the entire back wall with a new one, then it will need to be completely beaten off and this is not an option (from the inside). I would not recommend attaching the blocks to the wall and attaching the back wall to them. Gluing the back wall into place from the inside is also problematic and most likely will not work. In cabinets, the back wall was usually attached to the side walls with nails. The back wall can be separated from the cabinet frame and cannot be used in this condition, since the cabinet frame without the back wall loses its rigidity and will soon fall apart completely.
The best option for repairing the back wall of the cabinet would be to completely empty it of things and remove hanging elements such as doors, shelves, and a cross bar for hangers. Then they move the cabinet away from the adjacent wall so that they can crawl into it and repair the back wall. To completely replace the back wall, it is advisable, if space allows, to lay the cabinet frame face down. Set the diagonals to the same length (with the back wall removed) and then pre-fix the sheet(s) with several nails (so that the frame is fastened and does not lose its geometry). The remaining fastenings can be made with thin screws or self-tapping screws. It is better to place figured or regular washers under screws or self-tapping screws.
If there is no room to fill the cabinet, then set the diagonals equal by placing bars or slats under the standing cabinet. After installing the back wall, the frame is pushed into place against the wall and finally assembled, and the position of the doors is adjusted.
Now I’ll tell you one option on how you can tighten a wall that has moved slightly away from the frame without moving the cabinet from the front. In fact, there are many options for doing this, but I’ll share the simplest one. To do this you will need a wire with a diameter of 2.5-3 mm. The required number of hooks are made from this wire. Sometimes you can get by with just one. The approximate shape of the hook is shown in the figure.
Then holes with a diameter of 2-2.5 mm are made in the detached wall, slightly smaller than the diameter of the wire closer to the edge of the inner wall of the cabinet. The number of holes corresponds to the number of hooks. The hook is threaded through the hole and pulled to the side wall of the cabinet with a self-tapping screw. The screw head is closed or selected so that it does not damage the contents (linen, clothes, etc.)
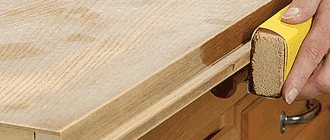
MDF, chipboard and fiberboard - what are the differences and what is better
MDF is a fine wood fraction from which furniture boards are made using hot pressing. The material is relatively new and environmentally friendly. It, unlike chipboard, does not use formaldehyde or other adhesive components. Often, these raw materials are purchased abroad, where safety standards are very strict. One of the positive aspects is the relative simplicity of processing the material, which allows products to have a more complex shape. The downside is the relatively high cost.
Advantages of a plywood cabinet
First, let's look at the advantages of why you should choose plywood as a material for making a cabinet:
- Plywood is a convenient material for manufacturing. It has a smooth finishing surface that does not require additional processing. It will only need to be painted.
- Due to the peculiarities of plywood manufacturing technology, which includes heat treatment and drying processes, plywood, unlike wooden boards and beams, does not dry out, which will not lead to a possible loss of appearance after some time.
- Plywood is considered to be a very durable material. Based on your needs, you can choose plywood sheets of the desired thickness, which can vary from 3 to 30 mm.
- Environmental friendliness. Domestic manufacturers provide emission class E1, which regulates the formaldehyde content.
In this article we will look at the design of the simplest plywood cabinet, which will be easy to assemble with your own hands, even at home. The photo below shows a cabinet that has already been assembled and painted, and yours should look the same.
Photo – Plywood cabinet in the interior of the apartment
It should be noted that according to our project we will make a wardrobe for the living room. The cabinet will not have doors, and it is unlikely to be suitable for the kitchen.
Materials and methods of furniture cladding
Regardless of which board you choose for your future furniture, its final cost will also depend on the material with which MDF or chipboard is lined. Today, the most popular are three options: veneering (veneering), lamination and caching.
Veneering , or in common parlance veneering, is the lining of a slab with a thin cut of natural wood. This method allows you to make the product as similar as possible to furniture made from solid wood. These products will, of course, cost more than laminated ones, but they will look very status and respectable. In addition, the vacuum pressing method allows you to literally wrap the veneer around complex carved parts, which means it gives even more naturalness. However, veneer requires careful treatment and special care, just like wooden products.
Lamination is the application of a composition of paper and polymers to a finished chipboard or MDF board, which, under the influence of high temperature, literally melt into the surface of the material, simultaneously acquiring the desired texture. This method of cladding is considered optimal in terms of price-quality ratio, because is not afraid of moisture, sun, temperature changes and retains its original appearance for many years.
Caching , unlike lamination, involves the use of glue. That is, a finished film with the desired texture is glued onto an array of MDF or chipboard. This method is the least expensive of those listed, but also not the most reliable. This cladding is much softer than laminate, which means it is not as resistant to mechanical damage and air humidity. If this option is quite acceptable for the bedroom, then for the kitchen it is better to choose a more reliable coating.
Materials for processing furniture edges
The appearance of the finished furniture depends not only on the method of facing the slab, but also on the quality of the edge covering. Today, manufacturers use several materials for processing sections:
Melamine edging is a relic of the past, but is often used for economy-class furniture. It is a strip of decorative paper with hot-melt adhesive applied to one side. A special unit heats it and presses it tightly to the cut. If the paper is too thin, then all the flaws in the end, tubercles and pits, will be visible. The service life of such a coating is short, and melamine is not resistant to mechanical damage. If handled carelessly, it can crumble and crack, which will ruin the appearance of the product.
PVC (vinyl based) and ABS (acrylic based) edgebands are superior to melamine in both thickness and durability. These materials are more modern and therefore safer. In addition, they have a certain amount of flexibility, which allows them to stay on the cut for a long period of time. Such edges cost a little more than the first option, but their quality is much higher.
PVC profile is another method to cover the ends of the slabs. To do this, a special groove can be cut out in the cut (for a T-shaped profile) or it can simply be put on the edge (if the profile is U-shaped). This method does not ensure tightness, so it is absolutely not suitable for kitchen or bathroom furniture. But it is quite possible to decorate a work or computer desk by choosing a profile in a contrasting shade with the tabletop.
How to choose quality fittings
There are a great variety of alloys from which furniture fittings are made, so there is no need for a non-specialist to understand all these intricacies. In addition, manufacturing companies are constantly improving the quality of their products and patenting new compositions. The main things you should pay attention to when choosing accessories:
- The manufacturer's logo must be in the most visible place and clearly legible.
- The color of the metal must be uniform, without stains, burrs, roughness, or streaks.
- Open fittings are a thing of the past; it is better to give preference to hidden mechanisms.
- When opening and closing doors, they should not creak, knock, wobble or generally cause any suspicion.
- Drawers should not rattle, jam, or slide to the side.
- The finishing mechanism, if present, must work without any complaints.
By following these recommendations, you can not only choose high-quality furniture that is suitable in price and functionality, but also purchase a product that will last for many years, maintaining its presentation.
Source: pitmebel.ru