Types of lambrequins. Advantages of hard
There are several options for this decorative element of curtains:
- simple;
- hard;
- soft;
- combined.
The first is a strip of fabric gathered into folds on a curtain tape or by hand. A rigid lambrequin has a fabric front side and a dense non-woven back or inner part.
The soft one consists of a certain number of alternating sequentially complex elements with folds - swags, de jabot, molds. Combined is a combination of the two previous options.
The advantage of a rigid lambrequin is that with a fairly simple sewing technology, a very beautiful, effective decorative product is obtained. This effect is achieved thanks to the ability to make a complex curly bottom that will be fixed.
What are soft lambrequins
Not everyone has the skills to work with wood and therefore many prefer soft lambrequins. This type of window opening decoration is beautiful and elegant, but requires an additional line of curtains. When the curtains move daily, the lambrequin should remain motionless. During the monarchy, lambrequins were most often used to frame a bed, but even now a common design move in the bedroom is identical lambrequins above the window and above the bed.
It would be more appropriate to hang this type of decoration in the nursery - for girls it will be the room of a princess from a fairy tale, and for boys you can choose a sea or space theme. The main fabric of the curtains must be secured to the wall with cords, since during games the panels can serve as anything but curtains. And this leads to rapid wear and tear and danger, since a fallen curtain will not bring anything good.
Lambrequins will look great in a children's room
A soft lambrequin can be made from one or more fabrics, and consists of stripes (the simplest type), swags and crossovers.
Craftswomen make soft creases or draperies with their own hands. But this is not the easiest thing, since patterns for decoration are more complex and require skills in working with a sewing machine and the ability to cut.
What is a bando
A hard lambrequin is made with your own hands on the basis of dense non-woven material. The following can be used:
- bandeau;
- interlining;
- doublerin;
- proclamin;
- wooden frame.
The first one is best. The bandeau can be self-adhesive, hot-melt, with one or two adhesive sides. May vary in density. It's convenient and easy to work with. Compared to a wooden frame, it is light in weight, and the lambrequin is easily attached to the cornice using regular Velcro tape.
Bando
Picture 1 of 43
Bando. Salon of curtains "Monet"
Bando - hard lambrequin
Today, design elements such as lambrequins are actively returning to fashion. There is a lot of controversy around them - some people really like them, because with their help a touch of luxury is introduced into the interior, the windows take on a festive, elegant look. Others, on the contrary, consider lambrequins a relic of the past that clutters the interior and collects dust.
But the reality is that the fashion for lambrequins has returned, but, of course, modified. Today's lambrequins are less pretentious, made from modern fabrics, and very often designers prefer a type of lambrequin on a rigid base - a bandeau. It is beautiful, elegant, stylish, modern and can be given any shape, organically fit into any interior.
There are a lot of bando options. They vary in hardness, density, thickness and width. They can have a very unusual and interesting shape due to the fact that the material from which such a lambrequin is made is pliable and easy to work with.
It is worth noting that, in addition to the function of decorating the interior, the bandeau also has practical value, because it covers the cornice on which the curtains hang, visually increasing the height of the room.
A bandeau can be made in the same style as curtains, from the same fabric, or, on the contrary, it can contrast both in color and texture of the material, it can even be a separate element without curtains, or it can be a complement not only to classic curtains, but also to modern ones types of curtains, such as blinds. It looks very unusual and stylish. They also often create a single lambrequin, using both the hard part and the soft part with folds.
Bando is most often used to decorate windows in living rooms and bedrooms. In the first case, the bandeau makes the interior elegant, in the second, gentle and cozy. But today we are increasingly seeing the work of designers in which we find rigid lambrequins in kitchens, because they are very restrained and elegant, and in children’s rooms, because on a bandeau from different scraps of fabric you can create something like a picture, making a lambrequin from several elements, for example, the sun, clouds and rainbows, characters from your favorite cartoons, can be simply cutely decorated with children's toys or the lambrequin itself can be made in bright positive colors.
Another advantage of the bandeau is the ease of installation; it is secured using a special Velcro fastener or also called textile Velcro.
If you would like to decorate your windows with a bandeau, but have not decided what shape, thickness and width you would like a bandeau, then you can contact a curtain designer who can offer a stylish and convenient option specifically for your windows and, if you already have ready-made , specifically your curtains.
In the Monet curtain salon you can order a wide variety of bandeaus, in any style, color and using a wide variety of fabrics.
Order selection of fabrics and sewing curtains
Call / Free designer visit
How to sew a rigid lambrequin
So, you have decided to decorate your interior with this decorative element. The operating procedure will be as follows:
- Take basic measurements.
- Draw a diagram of what you want to see.
- Prepare materials in the required quantities.
- Draw a pattern on paper and cut it out.
- Place it on the bandeau, trace around without allowances and cut out.
- Place the non-woven fabric template with the adhesive side on the inside out of the fabric, which is best secured to a table or ironing board. Leave an allowance of 2 cm on top, 1.5 cm is enough for all the rest. For the best gluing, you should turn the product over and run the iron along the front side.
- Make the lining for the bandeau from the same fabric. To do this, fold the flap with the right sides inward so that the fold line runs no closer than 5mm to the most protruding element of the bottom edge.
- Pin both layers along the allowances so as not to damage the adhesive base.
- Sew the side seams and the bottom edge at a distance of 3mm from the bandeau. The value depends on the thickness of the non-woven material. Do not stitch the top edge.
- Cut off the excess fabric, leaving 0.5 to 1 cm to the seam.
- On the arched parts, carefully make notches with scissors, trim the corners so as not to damage the stitching.
- Turn the product right side out through the top edge.
- Run a finishing stitch along the outline.
- Iron the top edge allowances inward.
- On the wrong side of the lambrequin, sew a Velcro strip, the other part of which is glued to the cornice.
By following all the steps in sequence, you can make a beautiful hard lambrequin (photo above) of any shape.
What is a rigid lambrequin for curtains
A rigid lambrequin or bandeau is a lambrequin made on a solid base that allows you to close ceiling curtains. Properly selected fabrics from which rigid lambrequins are made can visually increase the height of the room.
Rigid lambrequins are suitable for small rooms
Thus, decorate:
- Living rooms;
- Bedrooms;
- Children's rooms;
- Kitchens.
Designers often use this type of curtains to give the interior a finished look, as well as to change the proportions of the room.
If you try, you can create such a work of art yourself.
Bandeaus are made classic, themed, modern - it all depends on the design of the room and its purpose in the house.
The most correct size of a lambrequin is considered to be a height that is 1/6 of the length of the curtains. The selection of fabrics is very important; they must either be combined with the fabric of the panel, or made from the same material as the main curtain. Hard lambrequins can be easily combined with various types of soft ones.
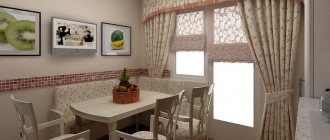
In some areas of the house, a rigid lambrequin serves to increase the height or decorative decoration of a room, for example in the kitchen, where thick curtains are rarely hung. And the housewife will be pleased to cook in a beautiful kitchen. But a gang can cover not only a window, but also a doorway. A room designed in the same style attracts you, creates a feeling of comfort and tranquility.
Most people think that creating such beauty is the job of professionals, but if you have basic sewing skills and a great desire, you can make a hard lambrequin with your own hands.
Product diagram
Before you start sewing or even making a pattern, draw, or better yet, draw to scale a diagram of your curtain with a rigid lambrequin. It will allow you to see how the element will look, and will also help when building a template according to size.
It is better to make the diagram on a scale of 1:10, when in 1 cm on the sheet you will have 10 cm of real ones. In this case, when creating a pattern, you can easily find out the length of any element.
What fabric to choose for a rigid lambrequin?
A rigid lambrequin, as already noted, can be made from fabric of any texture, so the main task is only in choosing the color scheme and pattern.
- In classic interiors, lambrequins that are the same color as the curtains look most impressive. In this case, it is not at all necessary to match tone to tone: a difference of several shades will only emphasize the style decision.
- An equally advantageous option is plain curtains and lambrequins, sewn from fabrics of various textures.
- In fairly large rooms you can place a lambrequin with a large ornament or pattern, but in small rooms this choice will reduce even more.
Patterns: we make them ourselves and use ready-made ones
To sew a rigid lambrequin with your own hands, you will need a template from which to cut out the parts from the gang.
If you are going to make a lambrequin of a simple shape, it is easier to create a pattern yourself on a 1:1 scale.
It makes sense to use ready-made options in case of repetitions of some module or a very complex asymmetrical shape, which, due to lack of skills, cannot be drawn by yourself.
If you decide to make the pattern yourself, prepare the following materials:
- a long strip of paper corresponding to the size of the lambrequin. You can use unnecessary wallpaper, graph paper, whatman paper, glue together a format from office printer paper or newspapers. The last option is not very good, since the paper is too thin, and using the template you will have to trace the outline of the product on the gang.
- pencil;
- ruler;
- square;
- a compass if you will have arcs or semicircles;
- scissors or knife.
You need to build a pattern like this:
- Draw a rectangle corresponding to the maximum dimensions of the lambrequin in width and height, respectively.
- Construct an axis of symmetry if the shape is like this.
- From the completed center line, set aside the required distances to the left and right and line up the figures.
If you have previously made a diagram to scale, then you can simply measure from the lower left corner the lengths that you take from the diagram, multiplied by the scale factor. For example, on your sketch you have 3cm, with a scale of 1:10 on the pattern it will be 30cm.
If your bottom edge is made in the form of repeating shaped modules, it’s enough to build one on another sheet, and here just circle it several times.
Having mastered the creation of patterns for rigid lambrequins, you will be able to make templates of any complexity yourself. You won't have to look through a lot of images on the Internet, wasting your time. An idea appeared, they took it and implemented it, first in the pattern, then in the material.
How to perform sewing steps
You should follow the instructions:
Pattern of a rigid lambrequin.
- Apply a special pattern prepared in advance to cut out the base of the bandeau.
- Iron the fabric with a warm iron.
- The fabric is glued onto the bandeau with a warm iron.
- Excess fabric from the edges is trimmed to 5 cm.
- Next, the fabric is placed on the lining.
- Using pins, pierce three sides without the top.
- Sew one centimeter from each edge of the bandeau.
- Next, the excess fabric is trimmed.
- After this, the product is straightened to the front side.
- The upper edge is turned right side out, pulled taut, and pinned with a pin.
- After this, you need to pin the Velcro on the hard side to the cornice.
- After this, the Velcro is fixed with machine stitching.
- Next, you need to trim the material exactly next to the adhesive tape.
- After this, the adhesive tape is unscrewed and pierced with a pin.
Related article: Types of cassette doors and installation rules
If this method of making a rigid lambrequin is too complicated, then the panel is made without a special lining, cutting off the fabric exactly where the edge of the adhesive base passes. Using a glue gun, reinforce the finishing material along all edges. The decoration can be cord, braid, fringe.
In the process of making a rigid lambrequin yourself, you should follow a few simple steps:
To sew a lambrequin you will need a roll of thick fabric.
- Make a regular pattern. First, for the template, exactly all the dimensions of the future gang lambrequin are taken. It is first necessary to determine exactly how the product will look, covering the entire cornice. The shape of the bandeau can be strict or have shapes and teeth.
- You will need to buy a frame, that is, a finished bandeau-pro product in a roll. This is a dense fabric, which is non-woven or dublerin, perhaps also a material for decoration.
- According to the pattern, it is necessary to cut out the frame, taking into account all seam allowances (5 - 6 cm on all sides).
- Prepared pieces of fabric need to be glued to the bandeau panel (you can use a steam generator, which is ideal for appliqués).
- The edges of the bandeau are treated with Velcro, which is glued at a distance of about 3 cm from the edge so that it is invisible.
- The decorated lambrequin should be placed on a special cornice where it was planned.
Decorative finishing
Any curtains that have a rigid lambrequin (photo below) look stylish and very original due to the shape of the part. However, additional decoration will also come in handy. You can decorate the edges of the finished product as follows:
- fringe;
- braid;
- cord;
- bugles.
Usually this is done from below. The surface of the part can also be decorated with a sewn pattern from the elements listed above or use other objects, such as:
- bows;
- flowers;
- butterflies and dragonflies;
- beads;
- eyelets;
- sequins.
The choice of decor is determined by the fabric, shape and model of the lambrequin. If it is sewn from several multi-colored parts of a complex shape or the fabric has a contrasting bright pattern, additional decor will not be required.
Changing the proportions and appearance of the window
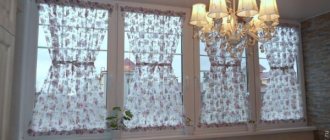
The photo shows a rigid lambrequin for curtains, decorated with fabric to match the curtains. This creates a harmonious image of the window.
Unfortunately, the shape and size of the window do not always correspond to the desired ones. However, a rigid lambrequin can come to the rescue in this difficult situation.
What you think is a small window can be visually enlarged with a lambrequin with elongated sides covering the opening.
For wide windows, bandeaus with a curved edge rather than a straight one are best suited.
Changing the shape of a window is quite simple. It is easy to turn a rectangular opening into an oval one by choosing the semicircular shape of a rigid lambrequin.
Accordingly, in order to give an oval window a square shape, preference will have to be given to an accessory with a strict geometric shape.
How to make an openwork drawing
If you don’t like to overload the space with dense fabrics, but at the same time want to do something original, make an openwork hard lambrequin with your own hands. The operating principle and technology are the same as described above. The difference lies in the template used. In this case, it is not just a rectangle with a figured edge, but a carved decorative pattern.
If you know how to draw, you can easily design the ornament yourself. You can also find any vector (contour) image on the Internet. If the file is in exactly this format with the extension *.cdr, *.ai, *.eps, you will simply scale it without losing quality in the appropriate editor. For such a service, you can contact an advertising agency that offers large-format printing. There they will make a template for you on a scale of 1:1.
It will be difficult to make such a pattern using a jpg file, since when enlarged the contours will turn out blurry, but if you try, everything will work out with such a sample. It is worth paying attention that the ornament should not contain too many small and complex elements. It will be difficult to do this in the material, especially if you are a beginner.
Industrially, openwork lambrequins are made using special laser cutting equipment, when the design is made directly from a two-layer base. You will have to do all operations manually.
So, you have learned how a rigid lambrequin is made. It's not difficult if you follow the sequence of steps. Having correctly calculated the dimensions, you can easily create a pattern yourself or modify any ready-made template. Design, sew, decorate your interior.
Swag pattern
Swag is a type of soft lambrequin. It is a beautiful semicircular draped element.
To create a pattern, terms such as:
- depth - the degree of sagging of the element;
- length – the length that the element will occupy on the cornice;
- The shoulder is the immediate side part with drapery.
The swag must be cut taking into account its shape. A common option is an equilateral element. It has identical shoulders, so it is used where there is other decor on the curtains.
There is also an asymmetrical swag. It has 1 shoulder wider, the element is suitable for non-standard design solutions. Finding a ready-made pattern for an asymmetrical component is not easy; you may have to create the pattern yourself step by step.
For an equilateral swag, you need to use a detailed master class that will fully describe the construction algorithm. It looks like this:
- The size of the element must be determined. They often start from standard indicators, when the depth is 45 cm and the length of the lower sag is 140 cm, while the total length is 90 cm.
- The pattern is made for a square piece of fabric, defining the fold line. Lower the perpendicular to the last one, set aside half the length of the swag.
- Leave 7-10 cm for processing - this is point A2.
- On the fold line, the value of the swag depth is set aside with a coefficient of 2 - by the total amount of sag.
- An arc is drawn from the lowest point of the swag depth, which is equal to the sag (+4-5 cm for processing). The end point can be designated as G.
- The swag shoulder is obtained by connecting point A2 to G. This is enough to make folds.
Features of cutting and draping depend on the characteristics of the fabric.
