Scarves and hats
Can you knit? Then you should not have a question about how to decorate the bottle. It will be very easy for you to do this. Knit a small scarf and a miniature hat. Dress the bottle in new clothes. This decor looks good on any alcoholic drink. Most often, people use knitted hats and scarves to decorate alcohol for the New Year. This is understandable; in the cold, you want to not only wrap yourself in a blanket, but also wrap up everything that catches your eye.
A bottle tied with a scarf will look more original than a bottle tied with a ribbon. But, of course, it’s up to you to decide how to decorate your gift.
Bottle cook
Do your friends know good cooks? Or maybe they work as cooks? Then the choice of gift should be obvious. How to decorate a bottle? Sew a chef's costume. What should such vestments consist of? From an apron and a cap. It will be very easy to build a miniature apron. It is enough to take a rectangle of fabric and sew four ribbons to it. Two on top and two on the sides. To decorate clothes, you can use all kinds of stripes and stickers. You can make a patch pocket and put some nice souvenir in it. For example, a few sweets or a wooden spatula.
How to make a cap? You need to cut a circle from the fabric and gather it along the edge with the seam first, needle first. Now pull the edges together, put the resulting cap on the bottle and fix the size in this position. To keep the hat in shape, you can place a piece of cardboard inside it.
Gift bottle
A bottle of champagne can be a wedding gift or an addition to it if you decorate it using the decoupage technique. This gift fits perfectly into wedding traditions. To make your own champagne, you will need the following:
- glue (PVA or decoupage);
- printed congratulatory text;
- wedding-themed appliques;
- acrylic paint of a suitable color;
- glitter, sequins, rhinestones;
- foam sponge;
- white acrylic or primer;
- brushes
It is better to print the congratulation text for the newlyweds on pastel-colored paper. Before decorating the bottle, it is coated with primer or acrylic and allowed to dry. Then proceed like this:
- Wedding symbols are glued (images of ruts, doves, hearts, etc.).
- A piece of congratulations is pasted on the other side of the bottle.
- The bottle is painted in a suitable tone using a sponge.
- The contours of the pictures are outlined with glitter.
- Attach decor from sparkles, beads and rhinestones.
- In one corner, next to the text, flowers made of polymer clay are placed.
- A bow is tied on top of the congratulations.
- Cover the craft with decoupage varnish and leave until dry.
All that remains is to wait for the holiday and solemnly present the gift to the bride and groom.
Gentleman's bottle
Do you want to surprise your guy? Sew a costume onto a bottle. For some reason, many people think that such a bottle outfit is only relevant for a wedding. Nothing like this. If your friend gets together from time to time to play board games with friends or just sit in a male company, he will definitely like this gift. How to decorate a bottle? You need to sew a vest and tie. If you wish, you can also make a shirt. But this is not at all necessary. A small collar will suffice. If you don't know how to tie a tie, you can make a bow tie. If you don't attach the costume to the bottle, the clothing can be reused.
Gift for February 23
Don't know how to decorate a bottle for February 23? Use ribbons. With their help you can create absolutely any costume. If your man served in the army, then you should create the attire of the division or type of troops to which your friend is directly related. If the guy did not serve in the army, then you can design the bottle in any style, it will not be so important. Let's consider one of the options. How to decorate a bottle with your own hands in the same way as shown in the sample? Take thin green, white and black ribbons. First you should decorate the neck. We make something like a shirt and tie a tie. Now we close the neck of the bottle with green loops. You need to glue the decor to the glass using a hot gun. When the neck is completely closed, you can move down. We overlap the tape onto the body of the bottle, remembering to fix it from time to time. Lastly, you should create shoulder straps.
Painting with gold and glitter
Champagne bottles covered with gold paint
To make wonderful gilded bottles we will need the following tools:
- Newspaper/fabric that you don’t mind getting dirty;
- Decorative gold sparkles (gold glitter) - you can buy ready-made ones, or you can work a little and cut them yourself;
- Aerosol gold paint;
- Empty bottles/alcohol bottles;
- Glue – you can use both aerosol and special liquid for decoration;
- Paper towels;
- Gloves;
- Shallow bowl.
Step 1
Let's start by clearing the bottles of labels - you can rub them with dishwashing detergent, soda, or try heating them with a hair dryer , from which the label should easily come off the bottle.
Paint bottles with gold spray paint
Lay out newspapers or unnecessary fabric, arrange the bottles. Wear gloves so you don't have to worry about scrubbing paint off your hands later. We begin to paint the bottles with gold spray paint.
To prevent the paint from flowing and to apply evenly, spray it at a certain distance, without coming very close to the bottles.
Read also: Pickled cabbage for the winter is finger-licking good
Apply 2 layers and let the paint dry. If this is your first time painting, then you should read in detail the technique of painting a bottle with spray paint in this article.
Painted bottles in 2 layers
Step 2
- Place decorative glitter in a bowl.
- Spray/coat the bottles with glue and sprinkle them well with glitter.
- If you notice that you missed areas of the bottle, don’t be afraid, add glue and sprinkle more.
To make sure the napkin holds better, secure it with tape
STEP 3: how to cover only part of the bottle with glitter.
- To decorate part of the bottle, take a paper towel and wrap it around the bottle a few centimeters above the bottom .
- Make sure the paper line is straight. Cover the rest of the bottle with glue and sprinkle with glitter, wait for it to dry and remove the napkin.
This way you can decorate a variety of bottles and build your own collection!
Also, based on this master class, you can experiment with color and texture. For example, champagne in red or covered with colored glitter looks chic at a wedding.
Also, don’t forget to decorate the glasses for the newlyweds in the same style. You can also use glasses to make chic candlesticks for table decor - just click on the button!
A pineapple
One of the aesthetic ways to decorate a bottle is to create a pineapple out of it. This decor is universal. Both the girl and the guy will like the gift. How to decorate a bottle with your own hands? You will need to find candies in gold packaging, a band-aid and green construction paper. It is advisable to choose textured green leaves with small vertical veins. The “Decorating Bottles” master class will help you get the job done. The first step is to seal the bottle with adhesive tape or paper. This is necessary so that the candies do not slide off the smooth surface of the glass. After this stage, you can glue the decor. Row by row, we fix the candies on the bottle until you reach the neck. We should stop here. Now you need to cut out thin long leaves from green paper and seal the top of the bottle with them. To prevent the pineapple from being damaged during transportation, it can be packed in transparent wrapping paper.
Painting a champagne bottle and decorating with rhinestones
If the prospect of working with acrylic paints does not cause much excitement, then it is better to get acquainted with a simpler technique using paints in aerosol cans.
The next master class is dedicated to decorating wedding champagne bottles with your own hands for a golden or autumn wedding.
We buy two bottles of champagne of any type and manufacturer. You can even take different types of drinks. The main thing is that the bottles are of the same type in appearance.
The only tools we need are a heat gun and tweezers. But for materials you will have to go to a specialized store for needlewomen. There you will need to purchase champagne-colored satin fabric measuring 30*350 and peach-colored fabric measuring 40*250. You will also need 1 m of peach satin ribbon and 15 cm of champagne color. Buy white beads of various sizes there.
To paint bottles, we purchase golden-colored paint in an aerosol can.
Before decorating the bottles, remove the factory labels. This can be done using a soap solution or a stationery knife.
After this, degrease the glass by wiping it with alcohol. When the alcohol evaporates, we begin coloring.
Shake the aerosol can vigorously. We place the container with paint at a distance of 40 cm from the surface to be treated. We begin to spray the golden solution, carefully turning the bottle itself.
Keep in mind that when working with an aerosol, drops of paint will fly apart. It is better to work outside or cover the work surface with newspapers. You also need to build a cardboard wall behind the work surface to avoid painting the walls.
After the first staining, leave the bottles to dry for 15 minutes.
In the meantime, let's start making decorative roses. To do this, we cut the pieces of fabric into long strips 5 cm wide. The result should be 8 peach-colored strips 25 cm long and 6 champagne-colored strips 35 cm long.
We burn the edges of the resulting ribbons with a lit candle to prevent the threads from fraying.
Each strip must be folded in half and connected securely. They can be easily stitched on a machine or simply sewn by hand. It will be easier for someone to use a heat gun.
We begin to form roses from voluminous ribbons. First, twist the edge and secure it with glue.
We continue to twist the fabric, not forgetting to treat the edge of the base with glue. Using this method, we twist the entire strip.
The result should be 8 peach roses and 6 more voluminous light ones.
We begin decorating the dried bottles by gluing ribbons. First, glue a wide, light satin ribbon at an angle, as shown in the figure. On top of it you need to attach a narrower peach one.
In this way, you can cover defects and uneven edges of the foil.
Now you can move on to attaching the roses themselves. To do this, apply glue to the base of the flower and attach it to the surface of the bottle in the right place.
Think about the order and angle to place all the buds.
Let's move on to decorating the bottle with beads.
Scatter them over the entire empty surface, along the neck.
Place small beads on some of the buds, as well as a large bead on the joint of the ribbons at the neck.
Our wedding champagne is ready.
If desired, the bottles can be tied with a light transparent bow.
You can decorate glasses and ring cushions to match the golden bottles. This design of wedding paraphernalia will fit perfectly into a peach, gold or autumn wedding.
But even if you choose a different color scheme for the holiday, you can easily replace gold with a suitable shade, and also choose contrasting or shading ribbons for roses.
Beautiful and original wedding table decor is very important at a wedding. Why is it so important to decorate the table with a couple of creatively decorated bottles of champagne? As a rule, wedding bottles are decorated by the bride and groom with their own hands. And this champagne is not touched throughout the celebration.
- The first bottle is saved for the wedding anniversary.
- The second one is opened when the first child is born.
There are many ways to decorate champagne. Let’s voice a few of them; the master class offered below will help us figure it out.
Whatever decor option you choose, first you need to remove the label from the bottles and prepare the surface.
To do this, place the bottles in a saucepan or basin, pour in warm water and add dishwashing detergent. We wait 30 minutes and then carefully remove the label. Wipe dry and degrease with acetone or alcohol.
Champagne bottles covered with gold paint
To make wonderful gilded bottles we will need the following tools:
- Newspaper/fabric that you don’t mind getting dirty;
- Decorative gold sparkles (gold glitter) - you can buy ready-made ones, or you can work a little and cut them yourself;
- Aerosol gold paint;
- Empty bottles/alcohol bottles;
- Glue – you can use both aerosol and special liquid for decoration;
- Paper towels;
- Gloves;
- Shallow bowl.
Let's start by cleaning the bottles from the labels - you can rub them with dishwashing detergent, soda, or try heating them with a hairdryer, from which the label should easily come off the bottle.
Paint bottles with gold spray paint
Lay out newspapers or unnecessary fabric, arrange the bottles. Wear gloves so you don't have to worry about scrubbing paint off your hands later. We begin to paint the bottles with gold spray paint.
To prevent the paint from flowing and to apply evenly, spray it at a certain distance, without coming very close to the bottles.
Apply 2 layers and let the paint dry. If this is your first time painting, then you should read in detail the technique of painting a bottle with spray paint in this article.
Painted bottles in 2 layers
- Place decorative glitter in a bowl.
- Spray/coat the bottles with glue and sprinkle them well with glitter.
- If you notice that you missed areas of the bottle, don’t be afraid, add glue and sprinkle more.
To make sure the napkin holds better, secure it with tape
STEP 3: how to cover only part of the bottle with glitter.
- To decorate part of the bottle, take a paper towel and wrap it around the bottle a few centimeters above the bottom.
- Make sure the paper line is straight. Cover the rest of the bottle with glue and sprinkle with glitter, wait for it to dry and remove the napkin.
This way you can decorate a variety of bottles and build your own collection!
Also, based on this master class, you can experiment with color and texture. For example, champagne in red or covered with colored glitter looks chic at a wedding.
We suggest you read Who eats ladybugs from birds
Also, don’t forget to decorate the glasses for the newlyweds in the same style. You can also use glasses to make chic candlesticks for table decor - just click on the button!
To transform these bottles you will need:
- A bottle with colored glass and a bottle of unusual shape;
- Adhesive tape or paper;
- Spray silver paint;
- Volumetric paints for design;
- Gloves;
- Newspaper/fabric that you don’t mind getting dirty.
Take a bottle with colored glass and remove the label from it. We glue tape or paper onto the bottle the way your imagination wants. Be sure to run your finger over the glued part to remove any air bubbles.
Step-by-step technique for creating stripes on a bottle
Lay down newspaper/cloth and wear gloves. Apply 2 coats of paint to the bottle and let dry. Carefully remove the paper or tape;
Take your time to avoid jagged edges.
Apply volumetric paint, then apply 2 coats of paint
- We take an unusually shaped bottle and remove the label from it.
- We apply dotted volumetric paints to the bottle, drawing any patterns with dots. Let it dry.
- Apply 2 coats of paint to the bottle and let dry.
TIP: Volumetric paint can be replaced with any thick glue, such as “liquid nails”
Using the same technology, you can make letters of the newlyweds on a bottle: first we apply adhesive paper in the shape of the letter, paint it and remove it after drying.
Making letters on a wedding bottle
You can use the same method to make vases from a bottle: photos and Master classes in this article
Mosaic
Want to create a piece of art from a bottle? Then you can safely decorate it with mosaics. This method of decoration is quite labor-intensive, but the game will be worth the candle. Such a bottle, after you drink the contents from it, can be turned into a vase or a jug. Making a craft will be difficult, but with due diligence you should succeed. You need to start by pricking the tile or glass into small pieces. Now we cover the container with soil and bury the pieces of tile in it one by one. It will be interesting to look not at abstraction, but at some kind of drawing. It should be invented in advance, since it will be difficult to invent an image during the work process. After the entire bottle is decorated, you can grout the seams or use art pastels for this purpose.
Traditions of wedding champagne. How to store the drink and when to drink it?
What are wedding bulls? The history of this name dates back to pre-revolutionary Russia. Previously, in villages it was customary to give the newlyweds a cow and a bull as a gift for a wedding - this was the most significant gift . They were brought to the yard of the newly-made family, their antlers wrapped with red ribbon. At urban weddings, animals began to be replaced with a couple of bottles of champagne, but the name and tradition of bulls remained.
At a wedding, champagne is poured from simple bottles, and beautifully decorated sparkling wine stands on the newlyweds’ table as an additional decoration . If you plan to install a champagne pyramid at the holiday, then the wedding bulls can be placed next to it.
Photos of wedding bulls
When to drink two bottles? Following traditions: on the 1st wedding anniversary, one bottle of champagne is opened and drunk by husband and wife. A sparkling drink in a beautiful glass is reminiscent of fireworks and brings back high spirits, like on your wedding day.
The second bottle of champagne opens when the first child appears in the family and the newlyweds become parents.
In order for champagne to last a long time and not lose its taste, it is important to know how to store it correctly . Bottles must be kept horizontally in a cool, dark place. The shelf life depends on the manufacturer and grape variety. Wine from famous brands can be stored for a couple of decades. More common champagne, for example, Abrau-Durso, should not be kept for more than 3 years.
Classic “Soviet” champagne is not recommended to be stored for more than a year. Therefore, when purchasing for a wedding, you need to pay attention to the production date of the drink and store it correctly.
Eggshell
If you like the mosaic effect, but find it too difficult to break tiles, you can decorate the bottle in an easier way. Cover it with eggshells. How to decorate a bottle of cognac in this way? You need to prepare all the necessary materials. It is better to take shells from raw eggs. It needs to be washed and dried, and then split into small pieces. Now you should degrease the bottle and prime it. Next, we tint the vessel in the chosen color. If you are preparing a gift for a man, give preference to dark colors. Now we cover the bottle with eggshells and arm ourselves with a sponge. The shell should be tinted in a contrasting color so that it stands out well against the substrate. Although no one is stopping you from experimenting. You can, for example, cover a bottle with brown acrylic and glue a dark green mosaic on top.
Discs as decor
Do you throw anything away in the hope that it will come in handy someday? Then it's time to give the discs a second chance. Today, people store all the necessary information on flash drives or on remote servers. The discs are out of use. But these beautiful shiny circles can be given a second life. They are perfect for bottle decoration. You need to cut the disk into small pieces. They can be of any shape or strictly geometric. Now you should apply a primer to the bottle and, using the principle of a mosaic, drown the shiny particles in the viscous substance. You can lay out a drawing or cover the entire space of the vessel. Choose a design and act.
painting
This is one of the most labor-intensive, but also the most beautiful ways of decoration. To create such beauty you must have artistic skills. After all, you have to draw twice: the first time on paper, and the second time on glass. Where to start? From creating a sketch. You need to come up with a drawing, and do this taking into account the fact that the image will not be viewed equally well from all sides. Therefore, it is advisable to choose a plant motif. Now you should remove the patterns from the bottle and transfer the selected design onto them. Now you need to tint the bottle and only then will it be possible to apply the image “as a clean sheet”. When all these operations have been completed, you should arm yourself with a brush and start creating. This is the easiest and most enjoyable part of the work, tracing the outline with paint, creating thickening in some places and loosening the pressure to a minimum in others.
Decorative grapes
How do people decorate bottles? You can see a photo of one of the options above. Looking at the picture, you can understand that decorating does not require special skills, but a well-developed imagination. A person of any skill level can create a bottle like the one attached above. The first step is to degrease and tint the vessel. Now you need to glue a branch at the very neck. It should somewhat resemble a slingshot, that is, have branches. Now you need to glue the pebbles under the branch. If you don't have anything like that, you can use large beads or buttons. Once the shape of the bunch is laid out, you can start making the leaves. They should be cut from rough canvas fabric. Tint the blanks with green pastel. All that remains is to glue the leaves to the base of the branch and decorate the neck of the bottle with coarse thread. A transparent bead can be glued to the bottom of the neck.
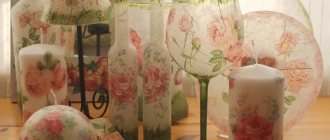
Ideas for decorating champagne bottles
So-called “wedding bottles” with champagne or another drink are table decor that is gaining popularity. Glasses of the bride and groom are also added to them. And even if the newlyweds are not at the table, it is immediately clear where their place is, since the design itself shows the honorable place of the heroes of the occasion.
- The simplest way is to spray paint champagne.
To do this, remove the sticker (leave the foil), wash off the remaining glue and work on a dry surface. It’s easy to stain the decor with spray paint, so it’s better to work outdoors in calm weather, laying newspapers under the souvenir. On top of the painted surface, you can tie the bottles with ribbons and bows and stick on accessories. You will need white acrylic paint, multi-colored satin ribbons, cardboard and decorative elements - beads, bows, lace or textile flowers - For handicraft lovers, sewing clothes with feminine and masculine attributes will be easy.
This is easy to do, but do not rush to wrap glass containers with fabric. It is better to sew the veil, skirt and jacket separately, and then wrap or champagne and carefully secure with glue (liquid nails, a glue gun, but superglue leaves stains). At the same time, you should not give personality traits (lips, eyes) to the container, only gender differences in the form of clothes. "Clothes" for champagne in the style of the bride and groom - Light decor in the form of ribbons and headdresses is the simplest option.
For a bride, making a veil from translucent or lace fabric is easy. It is also recommended to wrap the base of the bottle with a white guipure or lace strip. Summer black or blue satin - for “Him”, you can build a butterfly on the neck. Both bottles are tied at the bottom with wide golden ribbons, as a symbol of wedding rings. You can make a hat for “him” based on a Kinder Surprise egg case or a small lid. Elegant bottles of champagne for the newlyweds' table - Volumetric decor - coins, stones, artificial flower petals and other wedding-themed decorations.
Roses and flowers made from polymer clay require time and perseverance, but it's worth it! It is better if the stucco decoration is the same color as the base - white or golden. Wedding champagne with voluminous decor - French decorating style or decoupage is a unique technique using special napkins.
Postcards or photos with thematic designs are recommended as inserts, from which the top layer is removed when soaked. You can find a lot in craft stores. Champagne decoupage in gold color - You can buy stickers and wedding-themed decor or make your own appliques using any adhesive base for needlework.
You can paste photos of the newlyweds and inscriptions with the wedding date
We suggest you familiarize yourself with What to put in a hole when planting a tomato
You can write the names of the newlyweds on the bottles
French decorating style or decoupage is a unique technique of wrapping with special napkins. Postcards, photos, thematic drawings are recommended as inserts, from which the top layer is removed when soaked. Their surface is varnished. You can find a lot in craft stores.
If you want to make your wedding more unique, or maybe add a little coziness to your home, we recommend that you look at more ideas for decorating and painting bottles. Unusual candlesticks, bride-groom attire, original pots and much more - all from ordinary glass bottles! You are sure to find the very option that fits perfectly into your life!
Of course, I didn’t buy this paint to paint window frames, radiators or anything else. And in order to paint the bottle! Yes, yes, I was not mistaken. I needed to paint a bottle of champagne.
And so the most wonderful event in the girl’s life was approaching - the wedding!
It was necessary to make two bottles. Everyone probably knows the tradition - two bottles of champagne are placed on the table for the newlyweds, which are taken away by the newlyweds after the banquet and the first bottle is drunk on their first anniversary, and the second on the birth of their first child. Therefore, the bottles should be beautiful and original, they should stand in the wall for a whole year and delight you. So .
First, soak the bottles in basins for 10-15 minutes (the water should not be hot). Then you can easily remove all the paper - leave the foil. After this, we wipe the bottle with an alcohol solution to degrease it and begin the painting process. We take a sponge and paint the bottle with point movements. It doesn't take long. Then leave it for 10-15 minutes and apply a second layer of paint and leave the bottle until completely dry.
You need to think in advance about how you will decorate the bottles. You can decorate with ribbons, you can draw, write, stick on stickers, or just leave them white and dress the bottles in special outfits that are sold in any store.
I didn't look for easy ways. Having molded a large number of roses from polymer clay of different sizes in pairs, baked them in the oven, you can use self-hardening clay, but I prefer to work with this one. Then I applied glossy gel and left it until completely dry.
Now, armed with glue, let's start creating. You can arrange the flowers in different ways, but that’s how I wanted it. I added half beads and this is what happened)
We also made a rose from ribbon, tied the bottles and decorated them with a rose.
You can also decorate the bottle with roses made from ribbons. The roses were made using a glue gun and using a simple pattern, although it was a little inconvenient to sculpt the roses, since the ribbon was narrow. But you can also buy similar roses in stores that sell fabrics, although you can’t always find the right shade, but there are a lot of ribbons, it’s better to make it yourself. Well, we added sequins, and that’s what happened.
Well, just recently, a bottle was also made for the New Year. We take a napkin, separate the excess parts, cut out the design, and glue it onto the bottle; you need to make cuts or tears in the corners to glue everything evenly. We wait for it to dry, apply a glossy gel and then do as your imagination pleases.
For any occasion, you can decorate your table with a beautiful bottle or make an unforgettable gift! If you are good at drawing, you can draw any picture, make a beautiful inscription, or use decoupage napkins, rhinestones, beads, seed beads and whatever comes to hand!
–Categories
- For the kids. (56)
- Children's (31)
- Rus. Slavs. (4)
- Culture. (2)
- Rus. Slavs. (2)
- (1)
- Rus. Slavs. (0)
- (0)
- (1)
- Audio (42)
- Always needed (438)
- Embroidery. (147)
- knitting (1470)
- cook in a slow cooker (19)
- Decor (108)
- Decoupage (115)
- Must be delicious (1279)
- Spirituality (62)
- Health and personal care (716)
- Art (160)
- History of Russia (47)
- cinema (222)
- Space and us (18)
- Beauty and comfort in the home (347)
- Modeling for decoration. (38)
- Literature (62)
- Music (84)
- Weaving from newspapers, etc. (48)
- Various crafts (354)
- Liked (321)
- Orthodoxy (25)
- Holidays (57)
- psychology (82)
- Pushkin A.S. (1)
- Patchwork (187)
- Plants in the house (58)
- Gardening matters. (397)
- Theater (3)
- We sew ourselves (275)
- Esoterics (38)
We invite you to familiarize yourself with Formation of grapevines in the Moscow region
New Year's decor
Any girl will appreciate such a gift. Despite the fact that the bottle is decorated with coarse thread, the overall impression of the gift will be light and romantic. How to decorate a bottle of champagne? First, degrease the glass. Now we attach the end of the thread to the neck using a glue gun and begin to wrap the bottle. From time to time you need to attach the rope to the glass with a drop of silicone. When the bottle is completely wrapped, you need to decorate its lower part with lace. Now you should make a beautiful accent. It will be something similar to a boutonniere, consisting of a cone, a fir branch, a ball, a bell and a thread. You can use whatever is at hand to create such a decorative element. Buttons, nuts and paper decor are suitable.
How to decorate a bottle of champagne with ribbons
For a wedding or anniversary, the following champagne bottle decor will also suit you.
You will need:
Satin ribbon (3.5 m)
Gold brocade ribbon (1.5 m)
Glue (preferably instant)
Scissors
Champagne bottle with gold foil
1.
Prepare a bottle and tape and measure its approximate length for the first layer. To do this, attach the tape to the neck of the bottle.
2.
When you have measured the length, cut the desired piece of tape and mark several points on it with glue.
The holidays are already so close, so today we will look at how to decorate a bottle of champagne with your own hands for the New Year 2020, using various techniques. On New Year's Eve it is customary to invite guests to your place or to visit yourself. Any housewife sets a generous festive table for guests and household members. And guests often bring with them a traditional New Year's drink - champagne. In order not to be trivial and turn an ordinary bottle into a chic New Year's gift, you can decorate the bottle in a New Year's and festive way!
To decorate a bottle with a festive drink, you can use the following techniques:
- decoupage;
- kanzashi;
- appliqué;
- floristry;
- sewing;
- knitting and others.
We will analyze all the options with detailed examples and descriptions. In addition, you can combine techniques, add something of your own, and, if desired, use another material different from what is given in the master classes.
Video:
Wedding bottle
Do you want to decorate champagne so that it looks simple and tasteful? Then you should pay attention to this option. Typically the champagne on the wedding table is decorated with lace and ribbons, but this design will use two colors of acrylic and artificial flowers. If you wish, you can replace the flowers with real ones. You need to tear off all the labels from the bottle, then degrease the glass and tint it white. Now you need to apply gold paint using a sponge. We do this with careful movements to paint only the center and not touch the edges. Once the paint has dried, you can begin gluing the decor. According to a pre-designed pattern, you need to arrange flowers, beads and drops of paint. You can also use rhinestones and beads.
DIY wedding champagne bottles in white and green tones
Only, at first glance, it seems difficult to decorate bottles without having certain skills. Get acquainted with detailed master classes and such doubts will disappear.
We suggest decorating wedding champagne with your own hands for the holiday in shades of white and green. This decor is also suitable for a wedding decorated with green apples.
Choose green bottles of champagne, which is necessary for the basis of the main symbol - the apple.
To decorate bottles you need to stock up on the following materials:
- white acrylic primer;
- white and light green acrylic paint;
- decorative white and green roses - fabric or made from polymer clay are suitable;
- beads with a diameter of 3 mm, pearl and green;
- satin green ribbon 25 mm wide;
- green tulle.
To work you will also need an available tool:
- flat brushes with bristles No. 12 and No. 20;
- foam brush with a round pad;
- hot glue gun;
- tweezers.
Additionally, you will need glue and regular alcohol. When preparing the workplace, don’t forget to lay out cotton pads, several napkins and paper towels or newspapers.
To begin with, we completely clear the bottles of industrial labels.
This is easy to do if you place them in a soap solution for half an hour. After this, it will be enough to walk with a sponge to remove all the paper and glue. All that remains is to rinse the container under running water.
We wipe them dry and begin degreasing the surface. We will treat the glass with cotton pads soaked in alcohol.
Now you can start painting. But before applying the primer, you need to make the base of the future “green apple”. To do this, find a suitable picture of an apple.
You can use a ready-made template: copy the picture to your computer and print it on a printer.
Cut out the finished image of the apple along the contours. All that remains is to moisten it with plain water on the reverse side and apply it to the bottle.
Before applying the base paint, the glass must be primed. We will do this with white acrylic primer. Please note that the primer must be suitable for working on glass, as not all materials are suitable for this.
To apply primer to glass, it is better to use a brush with a flat base.
Advice! Apply primer in one direction.
After the first layer has dried, you can cover the bottles with base a couple more times. This is important when working with glass.
When the material is completely dry, we move on to working with paints.
Since the outline of the apple has already been outlined, the template can be removed at this stage.
If the sticker is difficult to remove, use a regular blade.
If desired, you can paint the champagne bottles the same color. But for a wedding it is better to make them multi-colored. In our case, we will paint one container snow-white, the second bright green.
You can choose the appropriate shades and even color scheme yourself.
To apply acrylic paints, we need a brush with foam rubber in the form of a round pad.
But even if you haven’t found such a tool, don’t be discouraged. Take regular foam rubber or cut a piece of dishwashing sponge.
Advice! Apply acrylic paint by touching the foam to the surface. Do not smear or rub the paint.
Paint the bottle 3 to 5 times in total to achieve a uniform and dense surface.
The paint on the bottles must be completely dry.
Only after complete drying do we begin to decorate the wedding champagne with our own hands. We start by decorating the contours of the apple with beads.
Carefully remove excess paint from the very base of the apple with a blade. But the outline will still remain sloppy. Therefore, it is better to decorate it with beads in the color of the bottle.
The beads will be glued with instant glue “Crystal”, which does not leave marks or streaks on the surface. Apply glue using a gun and immediately glue the bead, which is best taken with tweezers.
Arrange the beads so that the holes overlap adjacent beads. Don't be afraid to make mistakes. You can remove an incorrectly placed bead at any time. In this way we process the entire outline of the apple.
Read also: Building a cellar in a garage with your own hands step by step
Now let's start decorating the bottle with roses. Pick up ready-made satin flowers in the store.
By the way, decorative flowers are easy to make yourself from satin ribbon.
If desired, you can decorate the bottle with ready-made petals and flowers made from polymer clay.
Imagine how to lay out a pattern of roses yourself.
In our case, the flowers are glued as a decorative trim above the apple and along the bottom of the bottle.
Just like beads, roses can be peeled off if they are placed incorrectly and moved to the right place.
In this case, it is better to apply the glue to the base of the flower itself and attach it to the painted surface of the bottle using tweezers.
All that remains is to tie the ready-made wedding champagne with a satin ribbon in the form of a bow. If desired, you can place tulle under the ribbon, which will give a more festive look to the wedding “bulls”.
A beautiful pair of champagne bottles is ready for the holiday.
It is ideal for a spring or apple wedding, as well as a holiday in white and green colors.
If decorating the bottles did not cause any difficulties, use the same technique to decorate wedding glasses, which will perfectly complement the composition.
Bride and groom
One of the most popular wedding champagne designs is to recreate the newlyweds' outfits. How to decorate bottles for a wedding in this way? For this you will need ribbons of different sizes and colors. First we will make the groom's suit. Starting from the neck, we decorate the bottle with ribbon loops. We lay two white ones first, and cover the rest of the space with black ones. Closer to the base of the bottle, you should switch to a different method of attaching the tapes. They just need to wrap the vessel in a spiral. Be sure to attach the tapes to the glass with glue. Beads that will act as buttons and a bow tie will help complete the look.
The bride's champagne dress is made by analogy with a men's suit. First, the top of the bottle is closed with loops. But the lower part will be decorated with wide ribbons. We assemble one edge with the seam forward, the needle and tighten the workpiece. We tie the resulting assembly around the bottom of the bottle and secure the tape in this position. In a similar way, you need to create three tiers of the skirt. After the dress is ready, you can decorate it with beads and bows. You can copy the color scheme from your own outfit or just choose a nice combination of colors.
Decoration with kanzashi flowers
Kanzashi is a technique that uses pieces of fabric folded in a special way. Most often, holiday flowers are made this way. Creating such decor is relatively simple if you use ready-made flowers. It is better if they are silver or pastel shades with a pearlescent tint. To decoupage wedding champagne you need to prepare the following:
- 7−9 flowers of different sizes;
- silver satin ribbon 2.5 cm wide;
- 1 cm thick ribbon to match the kanzashi elements;
- glue;
- multi-colored beads or rhinestones.
Cut a piece from a wide satin ribbon and glue it to the very top of the bottle, where the cork is located. The ends of the tape should extend slightly onto the sides of the cork. The following actions:
- Wrap the neck with tape to a height of 5 cm, starting from the edges of the first segment.
- Starting from the end of the upper winding and extending slightly onto it, wrap the neck with another tape (1 cm wide) until it widens.
- The process should result in a pattern resembling a “Christmas tree”.
- The corners of the herringbone should be directed downwards.
- The places where the tape intersects are coated with a thin layer of glue; there should be just enough of it to fix the satin.
- Take a thick silver ribbon and make one herringbone circle, starting from the edge of the previous winding.
- The entire bend is wrapped using the same technique using thin tape.
- The straight part of the bottle is also wrapped with colored satin ribbon, but without the “Christmas tree”.
- Kanzashi flowers are glued onto the wrapped surface, placing them diagonally.
- The upper flower is placed opposite the second thick winding, and the lower one should not reach the bottom by several centimeters.
- Rhinestones and multi-colored beads are attached to the second thick winding.
The second bottle is decorated in the same way. If the region has a tradition of placing “bulls” on the table, they should also be decorated in this way. By the way, this decoration option is suitable not only for a wedding.
Decoupage a bottle of champagne with your own hands allows you to prepare a gift for another holiday, for example, a birthday, anniversary, and so on. Decorated bottles with expensive drinks are best given to women or married couples.
Simple decor
If you don’t have time, but still have the desire to decorate a bottle of champagne with your own hands, you can easily find a way out. Use glue and glitter. First you need to tear off the labels from the bottle. This will be easy to do if you first soak the bottle in water. Now you need to degrease the vessel. The next stage is toning. Give the bottle any color, preferably it matches the tone of the sparkles. When the paint has dried, apply a thin layer of glue to the bottom of the bottle. Sprinkle the vessel with glitter and shake it a little so that the layer does not turn out to be too thick. You will no longer wonder how to decorate a bottle for February 23rd. After all, you can decorate any alcoholic drink for any holiday with sparkles. You can experiment. For example, use sparkles of different colors or lay out a design from them. If you try hard, you can even post a portrait of the person to whom you are giving an unusual gift.
Decoration with napkins
Using napkins, you get a stylish and delicate decoration using the decoupage technique. You can decorate the dishes yourself. Napkins with interesting scenes and designs are sold ready-made, so those who do not have artistic talents can decorate the bottle. Here's what you'll need to get started:
- napkin with a picture;
- acrylic paint of a suitable color;
- decoupage glue;
- foam sponge;
- brushes;
- white acrylic paint or primer mixture;
- a bottle of champagne.
To paint a bottle of champagne for a wedding, it is better to take brushes with natural bristles. Instead of glue for decoupage, you can use PVA, but you just need to dilute it with water in a 1:1 ratio.
First prepare the bottle. It is well cleaned of labels and glue residues, degreased and the surface dried.
Further actions:
- Apply primer to the surface with a wide brush (or white paint with a foam sponge).
- When the layer is dry, apply the design elements cut from the napkin.
- Coat all parts with glue from the middle to the edges.
- If any air bubbles remain, remove them using a wide brush.
- The glass surface not covered with a pattern is painted over with acrylic paint to match, using a sponge.
- When the paint dries, the product is coated with a fixative;
- After drying, the bottle is ready to be on the holiday table.