A do-it-yourself wooden gate is much cheaper than a custom-made product. Moreover, it is quite simple to make. If a person has the necessary skills and uses the tools correctly, the work will become even easier. Therefore, it will be useful to understand the technology for self-fencing a site.
On this topic:
How to make the work of a summer resident easier: a miracle shovel with your own hands,...
Aug 15, 2020
A note to poultry farmers - how to make a drinking bowl for chickens...
Aug 1, 2020
How to make a tree of happiness with your own hands - general...
Jun 2, 2020
DIY polycarbonate gazebo, photo
May 14, 2020
BACK FORWARD 1 of 44
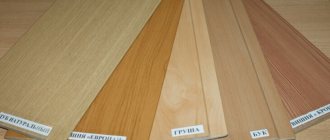
What wood?
The first problem arises at the stage of choosing wood. It is necessary to use the criteria of price and durability of wood. Good wood, when properly processed, gains increased strength and resistance to aggressive external environments.
Among the wood species, you need to take a closer look at the following:
- Pine. People often choose pine because, due to its high resin content, the wood is less susceptible to destruction, and the material is easy to process. However, a problem arises when covering a wooden gate with your own hands with paints and varnishes, because you have to look for compatible substances.
- Larch has a high degree of strength, but is easily processed with a plane and other tools. Lumber stores set a high price tag for its wood, which scares off many buyers.
- Cedar. The moisture-resistant structure of cedar does not have favorable conditions for the development of putrefactive bacteria, pathogens and mold fungi.
- Oak. Of course, oak material has the best performance properties, but problems may arise at the wood processing stage due to its high strength.
There are other breeds, but not all of them are ideal:
- Aspen. Despite the slight complexity of processing and preserving the structure, aspen wood is not often used when constructing a fence gate from wood with your own hands, since its strength leaves much to be desired.
- Poplar. If the sash is made from poplar, you need to buy mostly dry boards. Losing moisture, wet material will cause deformation of the installed product.
- Birch. If you choose birch, after a short amount of time the cracked door in the fence will have to be replaced with a new gate.
Peculiarities
It is unnecessary to talk about the functional significance of the gate without mentioning the importance of the fence itself. After all, it all starts with him. The strength and reliability of the gate and fencing eliminates the possibility of uninvited guests entering the private territory, and also ensures sound sleep for the owners and confidence in the safety of property.
When planning a fence, you need to determine and decide where and how the gate door will be installed. Sometimes homeowners decide to build the fence themselves. In this case, it would be best to do the same with installing a wicket entrance. Some plot areas allow owners to install two gates at once: one for the main entrance, the other for various household needs.
Read also: Kt8232a1 how to check with a multimeter
To make the gate, the same material is used that is used to install the entire fence. If this is not the case, it is important to consider the compatibility of these two (or more) materials so that no problems arise during installation.
The standard width of the product is usually at least a meter. This is the optimal size of the opening, which, if necessary, will allow you to bring large items or furniture inside. The height of the wicket product, according to the requirements of SNiP, should not exceed the maximum height of the fence - 2 m 20 cm.
The optimal depth for fence posts is 1 m. It depends on the type of base. Sometimes you can limit yourself to 70 cm. If a heavy soil layer predominates on the site, it is necessary that the pillars be installed below the freezing point.
Sometimes owners have to terracing the dirt strip under the fence in order to even out differences in height between sections, unevenness, and also eliminate gaps that provide a chance for uninvited guests with four paws to get into the yard.
The handle and lock of the gate are usually located at a level of 90 cm from the ground. However, even minor flaws in the placement of these elements will not affect their functional value.
One of the inventions and innovations of our time is the automatic gate.
Opening and closing of the product occurs using automatic means, and also includes a number of advantages:
- Remote control. The gate is opened and closed even when the homeowner is at a considerable distance from the entrance.
- Increased security. In combination with other elements of the security system (video surveillance cameras, intercom), it makes it possible to find out and establish the identity of the person who comes remotely, as well as decide whether to open the door gate or not, without leaving the house.
- Save time. The automatic gate opens by pressing just one button.
- Strength of the material. Wickets with an automatic function can be made of high-strength material.
This is just a small list of the advantages of an automatic product from a huge list. However, just like in its functionality, the price of this purchase also differs significantly from simpler and standard options.
In this article we will look at options for decorating a gate yourself and make sure that it is not so difficult, especially since creativity and creativity take place in the process of performing this work.
Canvas design
How to make a wooden gate with your own hands? There is one fairly simple scheme. There is a rectangular or Z-shaped frame, which is the most reliable. Note that it will be better if there is another crossbar in the middle dividing the rectangle into two squares, which will increase the rigidity of the structure.
On this topic:
What can be made from rose petals - simple, beautiful and...
Apr 15, 2020
Beautiful gift Christmas tree made of fabric with your own hands
Dec 4, 2019
BACK FORWARD 1 of 83
Wooden panels are nailed to the frame, which form the door leaf. There are two design options here:
- Blind, where the sash consists of boards tightly fitted to each other, and the cladding does not allow the formation of cracks.
- Through, where gaps appear between the elements of the attached sheathing, as well as strut parts that prevent deformation of the product, are found.
Which option should I choose? There are a few important notes to keep in mind here:
- a blind wooden gate requires more wood;
- the closely spaced crossbars become bent when drying, as a result the entire structure “moves”;
- a blind gate weighs more, so it will fail earlier;
- to form a through fabric, an accurate eye is needed, since the gaps must be equal and even, otherwise the design will be ugly;
- blank canvas is more suitable for decorative purposes; you can paint pictures on it or pin on decorations;
- For safety reasons, choose a blind gate.
Features of installing a gate made of profile pipes
To construct and install a gate made of profile pipes, you will need the following tools and materials:
- profile pipes;
- Bulgarian;
- metal rods;
- welding machine;
- lock or latch;
- hinges and handles;
- protective primer.
All work is carried out in several stages:
- Dig holes for supporting structures - at least one meter deep. The diameter of the pits should be 20 cm greater than the diameter of the support pipes.
- Fill the holes with cement. Install the pipes and fill them with crushed stone.
- Install special covers on the tops of the pipes to prevent rainwater from getting inside the supports.
- Using a grinder, cut the profile pipes to the required length. Arrange the finished elements in the shape of a gate.
- Weld all the joints, connecting the pipes together into a single structure.
- To increase the strength of the gate, weld metal rods around its perimeter.
- Install hinges on the support pipes.
- Secure the finished gate to the posts. In this case, the distance between the structure and the ground must be at least 10 cm.
- Treat each element of the gate with a protective primer.
If you want to paint a gate made of profile pipes, you need to do it as follows: degrease the structure; remove the remaining plaque; Apply two layers of primer to the pipes; paint all elements in one or two layers; After the paint has dried, cover the gate with a protective compound.
Preparing for work
Before work you need to find and buy tools:
- screwdriver;
- roulette;
- plumb line;
- hacksaw;
- square;
- pencil.
All the necessary tools for building a wooden gate with your own hands are clearly shown in the photo:
Tools and materials
To get the job done within one day and not be distracted, you should prepare the necessary tools in advance:
- Drill:
- Set of drills;
- A grinder will help you cut and clean metal. Cleaning wheel, cutting;
- Welding machine 220W, or semi-automatic
- A compressor that will help you paint without smudges and quickly enough;
- Hammer;
- Tape measure with nylon thread and protractor.
This is a list of the most necessary tools. You should also purchase the necessary material. Make a drawing. Choose a profile that suits you, carefully calculate the dimensions.
Attention: Determine the dimensions of the structure accurately. Consider all the nuances; there should be no obstacles when closing and opening the wicket and gate. Choose the optimal width; a larger one will increase sagging over time.
When measurements are made, you can calculate the material and purchase it:
- Profile pipe . You should not take a very thin one; the structure must be rigid enough to withstand the loads of its weight and the external environment;
- Anti-corrosion liquid or gasoline, primer, paint;
- Hinges for wickets and gates (see Hinges for doors: their types and selection rules). Take powerful ones to withstand the load, preferably with a built-in bearing, this will ensure smooth movement of the structure;
- If you prefer to sheathe , purchase the necessary material;
- A lock for the gate and a bolt for the gate (see Mortise lock for the gate). Or you can take automatic. It all depends on desire.
Installation of pillars
This needs to be addressed first, since after work you may find that the space for the gate has changed.
Therefore, if you do this last, then the canvas may simply not fit in size. On this topic:
Homemade mousetraps from a plastic bottle - two...
DIY refrigerator incubator: two simple models...
How to improve a summer cottage with your own hands (photo)
Do-it-yourself beds made from plastic panels are easy to...
BACK FORWARD 1 of 43
Please note that it is better to choose iron supports for both the gate and the fence. With wooden supports, the fence will quickly become lopsided and downright ugly. When installing ready-made pillars, you will need sand, crushed stone and cement.
How to install supports correctly:
- First, buy metal supports.
- Calculate the places where they will be dug in. It is better to choose the distance between them slightly wider than the sash.
- Under them, holes about a meter deep are dug with a drill. Please note that you should use a special tool; do not make holes for the supports with a shovel, since in this case the earth is loosened and the gate quickly becomes loose.
- Then pour sand (about 5 cm) onto the bottom and compact it.
- After this, the next layer of crushed stone (5 cm thick) is poured into the pits.
- Before immersing the iron pillar, it is treated with a blowtorch.
- The pillars are being immersed.
- Their evenness is checked using a plumb line.
- If the pillars are level, then crushed stone is poured into the holes, and then they are filled with concrete mortar.
- Finally, the top of the pillars is painted to protect against corrosion.
DIY gate
When planning to make a gate with your own hands, you cannot ignore the existing fences and gates. Depending on what building materials were used for their construction, you need to choose the material for the gate.
Types of gates
The main types of gates are:
- wooden gate,
- gate made of corrugated sheets,
- metal gate.
Everything you need to make a wooden gate
The most common option is a wooden gate. It’s quite easy to make with your own hands. Its cost is low, even when using high quality boards. If you purchase less expensive coniferous boards, the gate will be even cheaper.
Wooden gate
For a wooden gate you will need:
- 10-11 boards measuring 200x14x2 cm;
- two boards measuring 200x15x5 cm;
- door handle and latch, gate awnings;
- fastening material – about 40 screws;
- antiseptic for wood processing;
- wood primer and varnish;
- cement, sand and water for making concrete mortar.
Tools you will need:
- plane, chisel, hammer, hand drill;
- screwdriver, drill, pencil, tape measure, building level and sanding material (numbers 25-16 for the first stage, and 10-9 for the final stage of processing).
Manufacturing and installation of a wooden gate
First you need to install the support pillars. They are dug in at a distance not much greater than the planned width of the gate. The standard width of the gate is 1 m, and the height should be at the same level as the height of the entire fence.
Wooden gate diagram
Support columns made of asbestos cement are dug into the ground to a depth below the freezing level, with mandatory concreting.
It is necessary to attach the sides of the gate - wooden beams the height of the fence - to the prepared and installed asbestos-cement pillars using self-tapping screws.
Manufacturing instructions
After preparing the support pillars and sidewalls, you can begin making the gate itself. First, the boards need to be treated with an antiseptic. It will protect the wood from the influence of temperature changes and precipitation, and prevent rapid rotting or damage to the wood. After that, boards are laid out on a flat surface in the form of a gate, maintaining the required width and height. Two crossbars are placed across them - on top, at least 20-30 cm away from the edge, and on the bottom at the same distance. For greater rigidity, and therefore strength, it is also necessary to fill the jib - a small part of a wooden beam, placing it diagonally across the gate leaf - from the beginning of one crossbar to the end of the other.
In order for the gate to work, that is, to open and close, you need to attach the hinges for the gate both to the side frame and to the gate itself. Metal hinges are susceptible to corrosion, so it is necessary to lubricate them from the inside with grease and from the top with bitumen varnish. For a longer service life of the gate, this operation must be repeated once every one to two years.
Gate valve
After attaching part of the hinges to the gate leaf and the counter parts to the sidewall, you need to put the gate on the hinges and attach the latch and handle using self-tapping screws.
Everything you need to make a metal gate
Iron
You can make a metal gate yourself from corrugated sheets or metal sheets.
It is almost impossible to make forged products yourself without any experience and special equipment.
Construction materials and tools
Frame for metal gate
To install a gate made of corrugated sheets you will need:
- metal profile for creating a gate frame, gate canopies, fasteners;
- profiled sheet with a thickness of at least 1.5 mm;
- asbestos-cement or metal pipes with a diameter of at least 10 cm;
- a means of protecting metal from corrosion – waterproof enamel paint;
- primer for metal;
- welding machine with electrodes with a diameter of 1.6 to 5 mm; pencil, tape measure and level;
- grinder for metal, shovel and hand drill.
Just as in the case of a wooden gate, support pillars are installed. You can use a corrugated sheet of the required width as a gate cloth. Initially, the frame is prepared - it is connected using a welding machine - along the perimeter of the entire profiled sheet. When welding the metal base under the gate, you need to provide a place to place a mortise lock.
Wicket made of corrugated sheets
Unlike the frame, the profiled sheet must be fastened using self-tapping screws with a rubber gasket - its use will prevent early destruction of the material at the fastening points.
From the upper left corner of the frame to the lower right it is necessary to attach a jib from the same metal profile from which the frame is made.
Installation diagram for a gate made of corrugated sheets
Since a gate made of corrugated sheets on a metal frame is much heavier than a wooden one, more powerful canopies must be used: for example, with a steel bearing inside.
The last step in installing the gate will be priming and painting it.
Video
For example, watch the video on making metal gates:
Photo
With decorative elements
Made of wood
Wicket door made of aluminum profile filled with roller shutter profile
Gate made of metal and wood
garden gate
With an unusual design
Gate with a lock in a metal frame
kakpravilnosdelat.ru
Construction assembly and cladding
How to put together a wooden gate with your own hands so that everything is level? The following recommendations will help you with this:
- First, assemble it without nails on the floor so that everything is level. Make sure of this using a corner and a ruler.
- Mark on the wood with a pencil where all the boards are located.
- Remove any extra planks and leave only a rectangular or Z-shaped frame (depending on what you choose).
- It is necessary to fix all the joints of the structure; to do this, you can put something on them or ask someone to stand on the corners.
- If the structure is securely fixed, then when knocked together it will remain the same level.
- After assembling the frame, check again that the angles and lines are correct.
- Then slowly nail down the remaining planks.
Take your time, this is a crucial moment on which the beauty of the gate depends.
There are two methods for “putting” the canvas on a load-bearing support:
- First, the hinges are nailed to the gate, and then the entire structure is nailed to the post.
- First, the hinges are screwed to the post, and then the door is nailed to them.
In general, both methods are equivalent; each master prefers his own method. But we recommend the first method, as it can be improved:
- In the passage you place a strong, non-wobbly block stand made of bricks, a box, just pieces of wood and other improvised items.
- Place the gate on it (already with hinges) and adjust everything so that it stands level, check with a plumb line.
- Next, you screw the hinges to the support posts.
Don't forget to install a limiter that will prevent the gate from opening too wide. It is advisable that water does not accumulate at the gate; for this purpose, the space under it is laid out with tiles.
A selection of photos of garden gate designs:
Studying materials: features of different variations of wickets
Wood, chain-link, profile pipe, forging – which material should you choose? In order not to regret your choice in the future, we recommend that you familiarize yourself with the main features of all four product variations.
- Made of wood . This natural material is perfect for a country house gate due to its wide range of advantages: high strength, long service life, wide variability of appearance. It must be remembered that wood is a fire hazard.
- From chain-link . Mesh is an economically available material that does not require careful maintenance and has a long service life. The chain-link is resistant to corrosion, sunlight and temperature changes. But keep in mind that the chain-link allows you to freely view your personal plot.
- From a profile pipe . The lightweight design with a base made of profile pipes is a practical option that, thanks to its versatility, will fit into any exterior. The main advantage is the combination of low price and high decorative qualities.
Read also: What is sandpaper made of?
- Forged . Such gates are very impressive - they stand out with their extraordinary appearance and attract attention to the house. The forged structure is durable, resistant to precipitation and undemanding in maintenance, so it does not cause any hassle in operation. The only negative is the high cost.
Now let’s figure out how to properly build such gates with your own hands.