Today, even the oldest houses can be made in a modern style.
On the streets of the former countries of the Soviet Union, you can often see monuments of antiquity that remind city residents of their past - of the Soviet Union. In many cities, and especially in the periphery, such houses make up the majority. Therefore, many people have a question: “How to decorate your Khrushchev building and make it more modern?” First of all, the renovation should start from the ceiling - this will become an excellent basis for finishing the walls, floors and other surfaces in the house.
Ceiling heights in Khrushchev-era buildings: photo and design of a modern house
One of the main problems in Khrushchev apartments is the ceiling is too low. A height of 2.5-2.6 meters quite often may not be enough even for ordinary people. This problem concerns most houses that were built in the Soviet Union: this issue is faced by residents of so-called “Stalinka” houses - houses built during the reign of Joseph Stalin.
What are the opinions of different people regarding Khrushchev:
- Ceilings too low. This problem is the most common, since a more or less tall person will be able to reach the ceiling simply by standing on his toes. It is impossible to install a cabinet or refrigerator that is too high in a Khrushchev-era apartment, which limits the residents of such houses.
- Apart from the height of the ceilings, the area of the apartments and their rooms is quite small. This problem especially concerns kitchens: Soviet architects clearly “spared” the free space for this room.
Types of standard layouts, series, photos, descriptions and years of construction of Khrushchev houses
SERIES 1-464 – (year of construction 1960-1967)
Khrushchev - series 1-464
Five-tier panel houses with four apartments on one site.
The height of the premises is 2.5 m;
Features: storage room, built-in wardrobes, balcony.
The living room area in 1-room “Khrushchev” apartments of this type is 19 m², in 2- and 3-room apartments it is 17.3 m²; 19 m² and 20.4 m² depending on the layout. The storage room is located at the end of the bedroom or between the 1st and 2nd bedrooms. Exit to the balcony from the living room. Bathroom combined next to the kitchen.
SERIES 1-335 – (year of construction 1963-1967)
Khrushchev - series 1-335
Five-tier panel houses with four apartments on one site.
The height of the premises is 2.5 m;
Features: storage room, built-in wardrobes, balcony.
The living room area in 1-room “Khrushchev” apartments of this type is 18 m², in 2- and 3-room apartments it is 17.1 m²; 18.2 m² and 19.1 m² depending on the layout. The storage room is located at the end of the living room or between the 1st and 2nd bedrooms. Exit to the balcony from the living room. Bathroom combined next to the kitchen.
SERIES 1-434 – (year of construction 1958-1964)
Khrushchev - series 1-434 (1 room)
Khrushchev - series 1-434 (2 rooms)
Khrushchev - series 1-434 (2 rooms)
Khrushchev - series 1-434 (3 rooms)
Khrushchev - series 1-434 (3 rooms)
Five-tier panel houses with four apartments on one site.
The height of the premises is 2.5 m;
Features: storage room, built-in wardrobes, balcony.
The living room area in 1-room “Khrushchev” apartments of this type is 16.7 m², 17.7 m², 18.2 m², in 2- and 3-room apartments 16.7 m²; 17.0 m²; 18.6 m²; 19.3 m² and 20.4 m², depending on the layout. The storage room is located at the end of the living room in a 1-room apartment, at the end of the bedroom in a 2-room apartment, or between the 1st and 2nd bedrooms in a 3-room apartment. Exit to the balcony from the living room. Bathroom combined next to the kitchen.
SERIES 1-434С – (year of construction 1958-1964)
Khrushchev - series 1-434С (1 room)
Khrushchev - series 1-434С (2 rooms)
Khrushchev - series 1-434С (2 rooms)
Khrushchev - series 1-434С (3 rooms)
Panel five and four storey houses with four apartments on one site.
The height of the premises is 2.5 m;
Features: storage room, built-in wardrobes, balcony.
The living room area in 1-room “Khrushchev” apartments of this type is 15.9 m²; 16.9 m²; 17.4 m²; 18.2 m²; 19.5 m²; 20.7 m²; in 2 and 3 room apartments 16.2 m²; 17.2 m²; 18.1 m²; 18.6 m² and 19.3 m², depending on the layout. The storage room is located at the end of the living room or at the end of the bedroom in a 2-room apartment, and between the 1st and 2nd bedrooms in a 3-room apartment. Exit to the balcony from the living room. Bathroom combined next to the kitchen.
Khrushchevka. This term has become a household name, symbolizing cramped conditions, poor quality construction and extremely limited living quarters. Nevertheless, a considerable part of Russians live in buildings erected under this project. Such houses can be criticized, but for many this is the only opportunity to acquire their own corner.
We will talk about the features of apartments in Khrushchev panel buildings, their dimensions, ceiling height and how to expand the available space in this article.
How to make ceilings not seem so low
How to deal with the problem of low ceilings?
There are several ways:
- As you know, dark colors can increase the height of a room. But there is one drawback - they visually reduce its area and width. If your room is too small, then this option will not work for you.
- You can use non-plain wallpaper. The top of the walls can be dark and the bottom can be light. This solution is suitable for those with low ceilings in rooms with a small area.
- Vertical lines. This method is very popular not only in construction and design: short people are recommended to wear clothes with vertical lines. Wallpaper with this pattern is best suited for homes; it visually makes the room tall.
- Use of mirrors. As you know, mirror surfaces can increase space and make a room taller. This option is the most universal: it is suitable for any room.
- Curved ceiling. This method of finishing the ceiling can make your room visually taller.
It should be noted that these methods of enlarging a room do not actually add a single centimeter to the total area of the home; they simply solve the problem of people who are embarrassed by low ceilings: tall people will still feel awkward in such houses.
You need to avoid using too bright details in the interior: wallpaper or furniture in bright colors can draw attention to the overall size of the room.
If you have a small room, then you should adhere to minimalism: the furniture should be neutral shades. Its dimensions should be small.
Advantages and disadvantages of Khrushchev buildings
Small-sized housing is characterized by a lot of disadvantages. Utility and residential premises have a minimum area, and difficulties arise with redevelopment. The bathroom and toilet resemble a pantry; they are absolutely different from their “brothers” even in European hotels. The window size in Khrushchev is so small that installing modern double-glazed windows requires an individual approach. In such houses there is practically no noise and sound insulation; conversations in the neighbors’ apartment can be heard.
Despite the huge number of shortcomings, millions of Russians live in such apartments all their lives. There are advantages to such a layout. Compared to Stalin buildings, Khrushchev buildings have more modern engineering communications, so it is easier to create conditions that are comfortable for living. Electrical wiring in Stalinkas is not designed for heavy overloads; short circuits often occur. No such problems were identified in Khrushchev buildings, only in case of violation of the rules for operating the network.
Two-level ceilings in Khrushchev buildings: advantages
There are several opinions regarding this issue.
The advantages of two-level ceilings include:
- Quick installation.
- There is no need to level the surface of the ceiling.
- Excellent aesthetic appearance.
- They will look good in any room: in the hallway, in the hall, in the corridor and in the bathroom.
Disadvantages of two-level suspended ceilings in Khrushchev-era buildings
Naturally, lovers of suspended ceilings in old houses also have opponents.
Why you can’t use two-level stretch ceilings in Khrushchev buildings:
- Suitable for large rooms only. It is not recommended to install this ceiling in a brick Khrushchev-era building.
- High cost of materials for the ceiling and for its installation.
- The height of the ceilings is further reduced.
If we consider the last point, it should be noted that suspended ceilings “take away” the ceiling height not only visually, but actually reduce it. Most experts do not recommend using two-level ceilings because they are expensive and make the problem of low ceilings more obvious. Of course, you can try to take a chance, but you should not install this type of ceiling with your own hands: it is better to entrust it to specialists who will do everything better.
Actual and design height
Khrushchev apartments are the smallest apartments offered on the real estate market. The massive construction of houses of this type was carried out at a time when they tried to save money in all areas, but at the same time achieve large-scale results.
As a result, a house project appeared that was quite inexpensive due to the reduced dimensions of the living space. This approach made it possible to build many apartments and at the same time save on the consumption of building materials. By all measures, Khrushchev-era apartment buildings were not the most comfortable housing, but a lot of them were built and now, a considerable part of the housing stock is still apartments of this type.
If you ask what the standard ceiling height should be in a Khrushchev building, you can find out that the standard value chosen was 2 meters 50 centimeters. There are deviations in both directions, but, as a rule, they do not exceed three to five centimeters.
Some residents of such houses will object that in their apartment the ceiling is located much lower - 245 or even 240 centimeters. But, in practice, this means that the floor in the house is simply raised or a suspended ceiling structure is installed. Oddly enough, but at that time almost everywhere was built in compliance with basic standards.
Much more often, you may encounter the fact that on different sides of the room the walls have different heights. This problem is familiar to many and is aggravated by another one - the presence of rather massive beams under the ceiling. These beams cause a lot of inconvenience when decorating the interior, since they are a design feature of such houses and simply removing this element will not work.
We have to look for a more prosaic solution. Most often, they are left as they are and simply finished with the same material as the rest of the surface. They don’t decorate in any way anymore, although this is wrong. It is better to use them as a basis for creating decorative decoration of the floor plane. With the help of modern building materials this can be achieved at low cost.
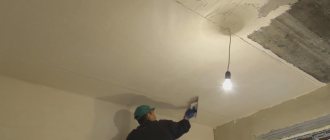
Preparing the ceiling for installation
Repair is a rather complex process, so before carrying out repair work you should carefully prepare and study the necessary information.
First of all, you should mark your ceiling.
This should be done as follows:
- At the lowest point of the main ceiling you need to mark a point, and then, using a water level, you should transfer it to all corners.
- Between the marks you need to fill a line using a chokeline.
- Then you should mark the surface for the CD profiles. Marks should be applied every 50 cm.
- You should put exactly the same marks on the opposite wall.
Bright ceiling
Painting ceilings in rich shades is a fashionable design technique. Unfortunately, with low ceilings it will look unsuccessful, because the room will literally “press” on a person and seem even smaller. Only in the bathroom can charcoal gloss, coupled with many built-in lamps, “dissolve” in the air and visually lift the walls. In Khrushchev, experiments with ceilings are rarely successful - it is better to leave them white, or make them very light, as a continuation of the walls.
Plain ceilings in light shades are better suited for small rooms.
How to make a ceiling in a Khrushchev building with your own hands: installing a frame
The ceiling installation process itself is quite complicated.
Frame installation includes the following items:
- Installation of UD profile.
- Installation of the dummy dowel.
- Fastening U-shaped hangers on which CD profiles will be attached.
- After cutting the CD profiles, they need to be inserted into the UD profiles, but they should not be screwed to the ceiling.
- You need to screw the screws under the CD profiles and tighten the nylon thread.
- During the penultimate stage, all profiles should be screwed on: you need to navigate along the nylon thread that was previously stretched.
- At the very end, you should protect the electrical wires with corrugation.
The next stage is the installation of plasterboard sheets. This is the final stage, so the work should be done as carefully as possible.
Installation of plasterboard sheets
This process is the most complicated, so you cannot do it without the help of friends and acquaintances.
Algorithm for installing plasterboard sheets:
- The work itself should be done by two or three people. If the work is carried out by one person, then this will be a huge risk, since the plasterboard can be broken.
- The plasterboard sheet should be installed using self-tapping screws. Their length should be 25mm. About 60 screws are used for one sheet. The distance between them should be at least 30 cm.
- To prevent the sheets from tearing, it is better to use a special plasterboard attachment.
- The sheets must be applied end-to-end: one sheet must butt with half of the other.
- When installing plasterboard sheets, you need to bring out the wires for future lamps.
- The joints should be sealed with fugenfüller, and the screws themselves with putty.
Installation of plasterboard sheets on the ceiling (video)
Despite its poor condition, Khrushchev is a work of art that tells us about the past. This is a real storehouse of knowledge about the Soviet Union, about our grandfathers and great-grandfathers. Khrushchev must be treated with respect, like an elderly person. If you respect your home and treat it like your relative, then Khrushchev will reciprocate your feelings, and your apartment will look amazing.
- Author: admin
Rate this article:
- 5
- 4
- 3
- 2
- 1
(0 votes, average: 0 out of 5)
Share with your friends!
Multi-level ceilings
Previously, massive gypsum board ceilings with spotlights were very popular and were used everywhere. Now they are not trendy, and besides, they are not at all suitable for low-height ceilings. If the apartment already has such a structure, it is recommended to remove it, because it seriously reduces the height of the room. An excellent option is simple stretch ceilings with a matte texture or carefully leveled and painted surfaces. They preserve the length of the wall as much as possible and do not cause an oppressive feeling when entering the room.
A multi-level ceiling significantly reduces the height of the room