Why do you need a chest of drawers at all?
To free up as much space as possible in the room, make it spacious and tidy, things in the apartment should always be in their place. At the same time, I want to have quick and convenient access to these things.
You can use the mouse wheel to zoom in or out of an object. The "ESC" key disables the "Segment" tool.
- The gap between the facades is 3 mm minimum (that is, when you measure the size of the facade (both in length and width), immediately subtract 3 mm from the dimensions (which will be obtained in the drawing) for the gap, and 1 mm from each end to edge (this is if you are going to glue a 1 mm edge), and write down the resulting length and width in the detailing.
- Edge gap, 1 mm thick = 1 mm (2 mm = 2 mm, etc.)
- Thickness – 13 mm (there is an indentation on the drawings)
- Fiberboard (back wall and bottom of drawers) – 1 mm less on each side
The structure of the material is always located along the length of the part.
We also immediately write down what fasteners and accessories we will need.
How to assemble a chest of drawers based on a drawing
To do this, you need to know the places where parts and accessories are attached (what, at what distance and from where to attach). If you are near the computer, then you can immediately look at the distances on the drawing using the same “Segment” tool in the Compass program.
In this article, we have provided a small selection of drawings with exact dimensions, according to which it is quite possible to assemble a chest of drawers for storing things.
What types of wood are used in the manufacture of solid chests of drawers?
Chests made of solid wood have the best characteristics. They are made from wood panels.
In this case, shields can be of 2 types:
- Carved from a layer of wood;
- Glued from wood plates.
The second option has increased strength. Wood practically stops warping when exposed to temperature changes or contact with water.
The types of wood varieties also differ:
- Soft. These are alder, linden, teak, the lion's share of conifers (pine, spruce);
- Medium hard. This includes oak, beech, ash, larch, maple, walnut;
- Particularly hard. Boxwood, acacia, many exotic species.
Based on the hardness classification, remember that it refers to the fiber structure and characterizes how much wood can be processed. Resistance to contact with water is another story.
Therefore, a little more about the varietal properties of rocks:
- Pine. Despite its softness, as well as some looseness, it is not at all afraid of moisture or heat. Perfect for bathrooms and kitchens. It has a beautiful textured pattern in warm tones;
- Oak. The wood is predominantly light-colored, ranging from yellowish to almost white. Less common with a green or brownish tint. Massive and heavy models “for centuries” are most often made from it. Very durable. Not afraid of loads, rotting;
- Nut. This breed has a tendency to darken with age. The older the tree, the darker the color (even black) and the better the characteristics. Very durable. It does not form scratches. Favorite material for carving. A good alternative to overly expensive exotics;
- Birch. Should not be used as a base. It warps greatly when heated, is afraid of water, quickly deteriorates, and rots. It is often used to make slabs, boards or veneers simulating other species. Karelian birch is of particular interest. Its unique design often resembles marble;
- Beech. Despite its strength, it lends itself well to bending. But he is afraid of water and is very capricious. The color has a red tint of varying intensity;
- Linden. It is distinguished by its white color and weak resistance to pathological microorganisms. Cannot be used without impregnation with antiseptics.
Why do you need such a chest of drawers at all?
To free up as much space as possible in the room, to make it more spacious and tidy, things in the house should always be in their places. And at the same time there should be quick and convenient access to these same things.
Moreover, just one may not be enough. After all, there are also things that cannot be hung on hangers or simply put on closet shelves. Such things include underwear, socks, handkerchiefs and many others.
A family in which a small child is growing up cannot do without such a useful device as a chest of drawers, since children's things must have their own specific place, separate from the parents' things. These are the things that a chest of drawers is needed for.
Also, the chest of drawers occupies not the last place in the overall interior of the room. Since the chest of drawers is one of the design elements in the interior of the room, it must fit harmoniously and best suit the interior of the room.
Styles
A well-chosen style will help to correctly decorate a chest of drawers in the interior:
- Country. One of the main rustic styles. Correct contours while maintaining classic geometric shapes. The wood undergoes a minimal amount of processing. Most often it is not even polished. Naturalness, naturalness, warm shades come first;
- Provence. Although it is called "French countryside", the style has a pretense of sophistication. Curved legs and rounded shapes. The facade has a wave-like shape due to the combination of a straight body with convex drawers. The decor is discreet. Basically, these are fittings and hand painting;
- Bul. One of the main outstanding movements of the Baroque. Differs in calmer forms. But complex legs are actively used. Often there are 6 or 8 of them. Moreover, they are united by lower crosses of complex intricate shapes. The most actively used decoration method is gilded inlay;
- Minimalism. A modern trend that promotes correct forms and a strict minimum of decor;
- Vanguard. Here you can find the most extravagant shapes and unexpected color combinations. A bold style that will appeal to the creative and young.
How to use drawings
As a rule, everything is available; drawings of chests of drawers are made using the Compass 3D program, the file format of which is “cdw”. Therefore, to work with such drawings you will need the Compass 3D or AutoCAD program. That is, download any drawing of a chest of drawers you like and open it using one of the above-mentioned programs. The drawings show the main dimensions, so see if they will suit you.
How to make detailing based on a drawing of a chest of drawers?
To do this, using one of the programs, for example “Compass 3D”, open the drawing you need, then use the “Segment” tool to determine and write down the dimensions, that is, the length and width of all available parts that are indicated in the drawing.
You can find out how to determine the size of parts in a drawing in the Compass 3D program here
.
Using the mouse, you can easily zoom in or out of the selected object, and using the “ESC” key you can disable the “Segment” tool.
- The gap between the facades must be left at least 3.0 millimeters. For example, when measuring a facade (length and width), it is necessary to subtract 3.0 millimeters from the resulting dimensions for the gap and 1.0 millimeters from all ends per edge. The value of 1.0 millimeter is the thickness of the furniture edge, which is glued to the ends; if you have a different value, then subtract it, after which the resulting length and width must be written down in the detailing.
- The gap on the edge must be extremely precise, if the thickness of the edge is 1.0 millimeters, then the gap should be 1.0 millimeters, if 2.0 millimeters, then 2.0 millimeters, etc.
- The thickness of the guide is 13.0 millimeters; there is an indentation in the drawings.
- The fiberboard back wall of the chest of drawers and the bottom of the drawers are 1.0 millimeters smaller on all sides.
The structure of materials is always located along the length of the parts.
You also need to immediately write down what kind of fasteners you will need.
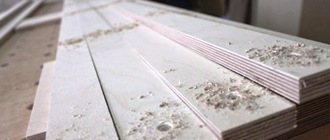
Preparing parts and cutting maps
When preparing parts for a future product, you need to follow these steps:
- Finished drawings are applied to paper.
- Next, you need to attach the patterns to the tree and trace them evenly with a pencil.
- Parts of the optimal size are cut out of wood, clearly following drawn lines.
- Next you need to prepare the edges of the parts that came out during the cutting process. To do this, use plastic tape.
The creation of elements is best done in special woodworking shops, where there are jointing and thicknessing machines.
Measurements and cuttings must be taken with great responsibility so that the finished furniture looks as attractive as possible and can withstand the required weight. Even small deviations from measurements can become a big problem.
How to assemble a chest of drawers based on the drawing?
To do this, you need to know the exact places of fastening of all parts and (what, and at what distance and from what should be fastened). If, during the assembly process, you have the opportunity to be near the computer, then all the distances can be viewed in the drawing, using the same “Segment” tool in the “Compass 3D” program.
The distance should be measured from the extreme point of the part and directly to the center of the fastening point, for example, the middle of the plate is 16.0 millimeters = 8.0 millimeters. If you do not have the opportunity to use a computer, then you need to immediately put down all the dimensions on the drawing using the Compass 3D program and print the finished drawing.
In the Compass 3D program, using the Dimensions panel, use the Auto Dimensions tool as shown in the figure.
Imagine: how you measure the distance on a chipboard board with a tape measure and indicate these distances on the drawing (the dimensions in the drawing in this program are indicated in centimeters, but when adding dimensions you indicate them in millimeters, for example 10 centimeters = 100 millimeters) and print it.
- Preparing to create
- Tools and materials
- Step-by-step instruction
A chest of drawers is a very convenient and functional piece of furniture. Its main advantage is that it allows you to store many different things without taking up much space. The disadvantage is the high cost of factory-made products. Not every person has the opportunity to allocate money to purchase such furniture. But everyone can figure out how to do it. This piece of furniture may have a different shape and size, but the manufacturing technology remains the same in any case.
Preparing to create
Making a chest of drawers with your own hands begins with its design. Before making calculations, determining the appropriate size of the countertop, assembling drawers, etc., you need to choose a place to install the chest of drawers. Take a careful look around your room. Study the structure of the baseboards, see if there are switches, sockets, etc. on the wall, which must be taken into account when choosing the size of the chest of drawers. It is important that it does not cover anything and that nothing interferes with its use.
Making a chest of drawers with your own hands begins with its design. Before making calculations, determine the appropriate size of the tabletop, assemble drawers, etc.
Figure 1. Chest of drawers.
Next you need to choose the size of the chest of drawers. The most comfortable chest of drawers is considered to be one with a width of 80-130 cm and a height of 80-85 cm. The best chest of drawers is one that you would be comfortable using. If you can't figure out what your chest of drawers should look like, visit your local furniture store. Surely you will like something, and in the future you will be able to focus on the model you like.
Most often, home craftsmen make chests of drawers from wood. This is a relatively cheap and easy to process material. If you have never made furniture with your own hands before, opt for a wooden chest of drawers.
Next, you will need to create a project for your homemade chest of drawers. To do this, you can use special computer programs or draw it on paper. The main task at this stage comes down to determining what parts the chest of drawers will consist of. Next you will need to create a drawing. You can take the diagram in Fig. as a basis. 1.
A drawing is a must. If you can still do without a project, then you won’t be able to work without a drawing.
The drawing must show at least a side or top and front view.
It will be better if you can depict it in cross-section. Be sure to include the dimensions of each part. This will allow you to see how all the parts will fit, where indentations are needed, etc. When drawing up a drawing, it is recommended to focus on the following dimensions:
- thickness of wood or slabs – 1.6 cm;
- the distance between the outer parts of the drawers and the back wall of the homemade chest of drawers is at least 1 cm;
- a gap of 3 mm must be added to the dimensions of the inset facades, i.e. 1 mm for each individual end.
Return to contents
Interior layout options
Now that it’s already clear in general terms how to make a beautiful chest of drawers out of wood with your own hands, we should talk about what options there are for this furniture and how to arrange it.
Light furniture does not visually reduce the volume of the living room, dark furniture looks more massive.
This interior element looks great in many rooms, so you can try different options:
- The most standard option is a linen chest of drawers for a bedroom or nursery. It is quite simple, but at the same time very elegant.
- There is such a thing as a chest of drawers. It differs from other options in its great length and sophistication.
- For a children's room, such a product is a must, and can be combined with a changing table. It can accommodate all children's things, toys and other accessories.
- There is a subspecies that has an open shelf. The TV is usually placed on it, and the shelf is used to store books. This product is best suited for a bedroom or living room.
Chests of drawers made of natural wood emphasize the nobility and luxury of the living room.
A wooden chest of drawers, made according to your own design, will definitely not leave any of your guests indifferent. But this thing will also attract the attention of the creator himself, because he will be proud of the thing of his own production. In order for the product to be of the highest quality, you need to take a responsible approach to the selection of materials, the creation of drawings and the manufacturing process.
Tools and materials
thickness of wood or slabs – 1.6 cm; the distance between the outer parts of the drawers and the back wall of the homemade chest of drawers is at least 1 cm; a gap of 3 mm must be added to the dimensions of the inset facades, i.e.
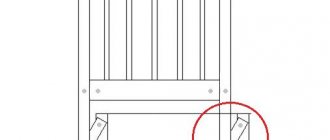
Figure 2. Sidewall markings.
Almost all cabinet furniture is supplied to the retail chain in disassembled form. This makes it easier to transport and less likely to be scratched during transportation. Assembly of the finished furniture structure is carried out according to the diagram attached to the product by the manufacturer.
How to assemble a chest of drawers bought in a store? This task can be completed independently by a person who has the skills to handle a standard set of household tools and has perseverance and patience.
General rules for assembling cabinet furniture
There are general rules for assembling cabinet furniture, following which you can assemble any cabinet product quickly and efficiently:
- Assembly is carried out according to the rule “from large to small”: the main body of the product is immediately assembled, and then equipped with parts
- To avoid unwanted distortions, the structure is assembled on a flat surface
- To protect product parts from mechanical damage and contamination, the working surface on which assembly is performed is covered with a soft cloth or cardboard.
- To avoid cracks in the chipboard or MDF parts of the product, you should not be overzealous when tightening the bolts.
What tools are needed to assemble a chest of drawers?
To assemble cabinet furniture, the following set of tools is required:
- Roulette
- Phillips screwdriver
- Drill/driver
- Hammer.
In addition, when assembling most modern models of chests of drawers, special keys for confirmants (euroscrews) are used, which are used to connect the main parts of the furniture structure. These tools usually come with the product.
How to assemble a chest of drawers
Before you begin assembling the chest of drawers, you need to check the presence of all components (their list contains instructions for assembling the product) and make sure of their quality and color matching. If a defect is discovered, you can immediately file a claim with the store and demand replacement of low-quality parts or the entire product. If everything is in order, you can start assembling.
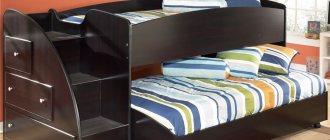
Dressers come in a wide variety of sizes and shapes. The design of individual models may contain elements that are unusual for a classic chest of drawers - a low cabinet with drawers. For example, in a changing chest intended for a newborn baby’s room, instead of the usual top cover there is a special changing table, and in a chest of drawers or a chest of drawers for a living room there may be hinged cabinets with stained glass windows, etc.
Despite the external differences, all chests of drawers are assembled in approximately the same way. The assembly diagram of these products consists of the following main steps:
- Housing assembly
- Assembling drawers
- Securing the drawer system guides
- Installation of fastening fittings and installation of doors (in models with sections with hinged doors)
- Installing handles on drawers and doors
- Installing the top cover of the chest of drawers.
Assembling the chest of drawers
The components of the chest of drawers are:
- Sidewalls
- Horizontal connections
- Base strips (not available on all models)
- Back wall.
If the model is equipped with legs or swivel casters (mobile version), before starting to assemble the case, these parts are secured to its bottom cover.
If there are no legs (swivel casters), the assembly of the chest of drawers begins by connecting the base strips to the bottom of the chest of drawers (to the horizon). Next, using tightening screws, the sidewalls are fixed and horizontal connections are installed - strips, to which the chest of drawers is subsequently attached.
The final stage of assembling the case is installing the back wall. Typically this part is made of hardboard or chipboard. The back wall is secured with small self-tapping screws or special furniture nails.
This completes the installation of the housing.
Assembling drawers
Components of boxes:
- Side walls
- Bottom
- Facades.
Before you begin assembling, all the parts of the boxes must be placed in stacks (each box separately). This will avoid confusion while working.
The process of installing box boxes is similar to assembling a body: the side walls are fastened together with confirmations (or other suitable type of fasteners), the bottom is fixed with self-tapping screws.
The last stage of assembling the drawer is installing the front and decorative handles. The fronts can be attached to the front panel of the drawer using short self-tapping screws. When using this method of fastening, you must be very careful - the length of the self-tapping screw is chosen taking into account that when fixing the facade to the front panel of the drawer, its tip does not damage the front side of the facade.
There are usually ready-made holes for handles in the front and front panel of the drawer. If they are not there, then drill the holes yourself with a drill, having previously made markings.
How to properly install the front on a drawer is shown in the video:
After assembling the main elements of the chest of drawers, guides are installed on the inner surface of the sides of the body and on the drawers. First, using a tape measure, determine their location and make markings with a pencil. The guides are fixed using self-tapping screws, which are screwed in with a screwdriver.
If the guides are installed correctly, they will ensure the drawers move smoothly and will not cling to each other.
The final stage of assembly is the installation of the upper horizon (dresser lid). It is attached to the horizontal connections of the body.
Step-by-step instructions for assembling the chest of drawers are in this video:
Assembling a chest of drawers, in general, is not difficult. To do it yourself, you don’t have to be a professional furniture assembler. However, if you don’t have at least the basic skills of a home craftsman and a suitable tool, you still shouldn’t take on this work - it’s better to seek help from a specialist. An experienced craftsman can assemble the product even in the absence of an installation diagram. You can order the services of professional furniture assembly specialists on the Yudu service.
Did you buy a new chest of drawers? Amazing! All that remains is to assemble it correctly. If for some reason it is not possible to use the services of a professional furniture assembler, there is only one way out - self-assembly.
This process is not so complicated, especially if you use the recommendations of experienced craftsmen.
All types of cabinet furniture (cabinets, chests of drawers, walls, hallways and many others) have only different sizes and shapes. In all other respects, these interior items are similar, including the assembly process. It is for this reason that the assembly rules for all types of cabinet furniture will be universal.
- Unpacking.
All components of the furniture are unpacked and removed from the boxes very carefully. Careless or sudden movement can lead to scratches and damage to the surface of the furniture.
Packaging with chest of drawers. Weighs about 30 kg.
All parts are compactly folded.
- Preparing for assembly.
The parts of a cabinet or chest of drawers are placed on the floor for better visibility, and all the fittings are placed in a box. Such organization of the workplace will speed up assembly and will not allow you to lose screws or other small parts.
All components are stacked correctly to avoid damage.
You can start assembling the chest of drawers.
- Instructions.
Do not neglect the instructions included with the furniture set. It will greatly facilitate the task and protect you from possible mistakes.
Instructions are included in the kit; it is recommended to carry out assembly by referring to it.
What tools are needed to assemble a chest of drawers?
To achieve a quick and good result for assembling the chest of drawers, the instructions suggest stocking up on tools. There are no professional specific devices on this list; everything can be found in every home.
Required tools include:
- Screwdriver - you can also use a screwdriver, but a screwdriver will significantly reduce the time spent at this stage of work;
- M hammer - this tool will be needed to fasten the back wall of the chest of drawers;
- Pliers;
- R Uletka;
- Pencil.
Required tools for assembly.
These parts are just enough to assemble the furniture.
In some cases, a drill with a set of drills may be useful. This rarely happens, since most furniture companies produce furniture sets with ready-made cutouts for fasteners.
Each factory product is supplied with detailed instructions from the manufacturer, but the assembly diagram for all types of chests of drawers is the same.
- Frame.
Making the frame of the product is the first stage of work. During this process, the side walls, top cover and stiffening ribs located at the bottom of the frame are fastened together. To perform this work, you will need a screwdriver and suitable sized attachments.
Assembling the chest of drawers.
Fastening the side walls.
The frame is almost ready.
At this stage of assembly it is better not to sit on the chest of drawers, but soon you will be able to.
The back wall is made of 2 halves.
Attaching the back wall to the chest of drawers frame.
- Assembling boxes.
Many people are interested in the question of how to assemble a chest of drawers. The assembly scheme will begin (as in all other cases) with the assembly of the frame. Upon completion of this stage, they move on to working with the boxes. How to assemble a chest of drawers correctly? Fastening is carried out in the following order: first, the side, front and rear walls are fastened together and only after that proceed to installing the bottom. Often the kit includes a separate overlay for the sliding cabinet, which acts as a decorative element. In such cases, fittings are installed on the overlay and the overlay is secured to the finished cabinet.
Assembling boxes.
Fastening with Euro ties.
The bottom of the drawers is covered with plastic with a fabric pattern.
On the sides, the chipboard bottom is secured with guides.
Handles for drawers.
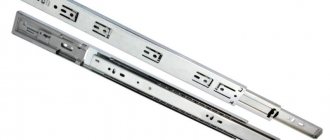
- Installation of guides.
After preparing the frame and all the drawers, many will probably think: how to assemble a chest of drawers with drawers to a finished state? To do this, there is one more stage of work - installation of guides. One part of this system is attached to the bottom of the box (it is this part that will slide and ensure smooth movement). The second part of the system should be mounted on the inner side wall of the frame. The most important thing here is to choose the mounting location. To do this, you need to arm yourself with a tape measure and a pencil. Identical segments are marked on the front and back sides of the frame on both sides (you can make sure the marks are correct using a level). Guides are attached to the marks made using a screwdriver.
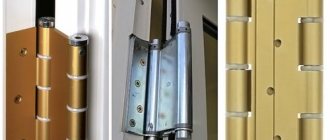
The guides with rollers were already screwed onto the side walls.
Roller guides for chest of drawers.
Screws that then do not interfere with pulling out the drawer.
The screws “sink” almost completely and securely fasten.
Ready-made fixed guides on the chest of drawers.
The finished chest of drawers looks very attractive and stylish.
Sometimes, in addition to standard parts, chests of drawers also have additional parts (mirror, changing surface). In this case, another problem arises: how to assemble a changing chest of drawers with drawers? In this case, the instructions will not change, only 1-2 more points will be added. The fastening of additional parts occurs on a completely finished product. A screwdriver can help with this - the holes are made according to the manufacturer's marks.
Legrabox boxes
The most modern and expensive systems of guides for drawers, occupying a high position in the list of all furniture components. The reinforced design stably withstands loads of up to 60 kg. The matte stainless steel surface emphasizes the rigor and sophistication of the stylish design of the legrabox.
Installation of this type of system requires pinpoint precision in drilling facades and side walls, and absolutely verified calculations in the manufacture of chipboard parts. It is also necessary to correctly and accurately mill the bottom.
Manufacturers of furniture fittings offer other ways to use guides. For example, fastening retractable baskets, nets, containers for various purposes.