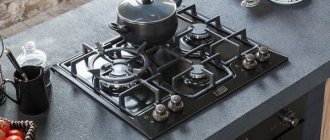
Modern furniture is often made with drawers, since such systems save space, which is especially important in small rooms (kitchen, bathroom, etc.), and increase comfort during use and maintenance. With a large selection of drawer systems, telescopic guides for drawers are popular.
Fittings for mounting a drawer
What is this type of fittings? What are its advantages and disadvantages? Read on to learn how to choose and install telescopic guides correctly.
Concealed mounting guides.
They are considered to be mega cool. Of course, when you pull out the drawer, you can’t see them at all, and that’s crazy cool. This may seem like a very expensive solution. Not really. They cost a little more than regular ball guides. But if you order furniture with such a solution on the side, they will give you a price tag as if they were made of gold. By the way, they also come without pressing.
And if you have a kitchen or chest of drawers made of solid wood, then you can admire and admire this creation:
My mistakes when choosing hidden mounting guides:
You can find instructions for each guide, and there will also be an additive diagram. If it is not included, download it from the manufacturer's website. On normal, simple hidden-mounted guides, you don’t need to drill anything special:
And here's what I bought. They were just for a promotion, and I was a victim of the promotion. At first glance, everything is the same, but you need to drill a lot more, even at the very edge. So be careful, if you don't have a drill stand or drill press, you will get depressed when assembling these boxes.
DIY drawer frame repair and replacement
Summarizing all of the above, we can identify several repair methods to return the drawer to its former strength and smooth operation:
- Strengthening the structure itself . It is necessary to add rigidity by installing strips along the back wall. You can also level furniture that is standing unevenly so that its geometry becomes correct. After checking all the corners, you can repair the drawers and replace the fittings (if required).
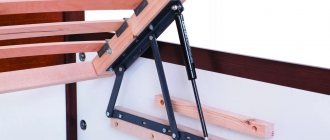
- Strengthening the drawer frame and strengthening the bottom . If during operation it becomes clear that the fiberboard bottom is not able to withstand the load and is expected to fall out even after replacement, there is a reason to strengthen it. To do this, install a stiffener horizontally or vertically along the bottom - a partition. You can additionally attach the bottom to this part. This method will also help make a large box more rigid without warping.
- Replacement of drawer boxes. Sometimes wooden tenon boxes that have fallen apart are easier and cheaper to replace than to repair. For example, make them again from chipboard. You can read how to calculate the dimensions of the drawer parts for replacement here. It is also worth doing if it turns out that the dimensions of the drawers were initially calculated incorrectly, and therefore fall out of the guides. Or the fittings themselves are already outdated and are no longer available (such as some types of guides with an insert into the groove of the drawer).
Ball guides.
Conventional ball guides, only with a built-in pressure opening system. Cheap and cheerful. But complete hemorrhoids with front adjustment - there is none. Those. it initially needs to be done smoothly the first time. Otherwise you will have to redo everything. So... before the installation, you are forbidden to drink and you need to take a sedative, especially if your patient has a whole kitchen.
How to replace ball or roller guides with metaboxes or tandemboxes
It is not so easy to replace a drawer with ball and roller guides with tandemboxes or metalboxes (metaboxes). And this is quite obvious, because the design of the boxes themselves is completely different.
Therefore, you will have to completely saw down the parts of the box, taking into account the height of the existing facades, and assemble a new box for installation in the same cabinet.
Blum and tandem boxes are interchangeable . Therefore, you can always exchange one retractable system for another by choosing a suitable analogue.
And this is not the only “successful” coincidence in terms of savings. For almost any fittings from well-known brands in the premium segment, you can find cheaper analogues. Let me clarify: I do not address the issue of quality and feasibility of such savings.
Door solutions
Special stops are purchased and mounted on the cabinet rack. There are magnetic and regular ones. I didn’t notice much of a difference, you have to look, touch in the store and choose what you like. When I made the cabinet, I used magnetic ones, but in order not to drill a hole for the counter part, I bought special stickers. Very convenient, sold in hardware stores.
Instructions for disassembling the doors from the Pax wardrobe.
The need to disassemble the doors of a Pax wardrobe usually arises when moving furniture to a new location. The entire system is quite large, it does not fit into the openings of interior doors when assembled, and transportation of all parts must be carried out extremely carefully so as not to damage the elements that make up the wardrobe door.
Following our instructions, one person can remove a narrow 70cm door with non-glass filling; for large and heavy doors you need to find help.
We prepare the cabinet for subsequent actions. First, we remove all things from the shelves. We take out the drawers and shelves, remove the rods. The internal filling must be completely removed from the wardrobe body.
We also free up space around the cabinet and cover the floor with a protective coating to accommodate the removed door. Free space for performing door disassembly work will protect us from “accidents”.
We disconnect the door closer, a device for smoothly closing the door.
This item may not be included in the package! Using a hex wrench (you can use a flat-head screwdriver that fits your size), on the top rail on both sides of the cabinet, unscrew the bolts in the bumpers, holding the door closer mechanisms from falling. RICE. 1
Next, disconnect the closer brackets on the inside of the doors. On the outer cabinet door in the roller mechanism, unscrew the two top screws and remove the bracket, then screw the screws back in. RICE. 2
On the inner door, unscrew one bottom screw on the roller mechanism, remove the bracket, and put the screw in place. RICE. 3
Unlock the restraints and remove the doors.
Remove the blanking strip from the outer door. Unscrew the four screws and remove the bar. RICE. 4
Below, inside the outer door of the wardrobe, unscrew the screws on the bracket plates moving along the bottom guide. We remove the plates one by one, carefully moving the door. RICE. 5
We move the outer door stops to their original position by pulling the plastic latch towards you. RICE. 6
Updated external door roller mechanism! Lift the lock element and pull it towards you.
Remove the door by carefully lifting it up without touching the inner cabinet door. RICE. 7
Roller guides
Roller guides
The guides are the simplest in terms of design and installation; by the way, you can also find the following names for these guides, such as runners for drawers or runners. Their price is small, on average 50-100 rubles. for a couple. The roller guides look like the photo below, you've probably seen them more than once.
The roller guides are covered with durable epoxy enamel; guides are available in different colors, the most common guides being cream. You can find roller guides for drawers with a depth of 250 to 800 mm, that is, for almost all cases.
Roller guides can withstand dynamic loads of up to 25 kg; you are unlikely to store anything heavier in a chest of drawers or in a drawer in a closet. The disadvantages of roller guides are the noise with which they extend and close; the extension is partial. But the low price eliminates these shortcomings.
According to the installation diagram, the gap between the outer part of the side wall of the box and the side wall of the product body should be 12.5 mm or 25 mm on both sides, usually 26 mm is taken in calculations. This means that the width of the box should be 25-26 mm less than the internal space of the cabinet.
Roller guides
Currently, the most widely used types of guides are roller and ball designs. Roller-type guides have a low cost; thanks to this quality, they are very widely used in furniture structures, most often on the walls of drawers.
Roller guides have a very simple design, which consists of 2 parts. The first part should be mounted on the side wall of the drawer, and the second part should be mounted on the inside wall of the cabinet, cabinet, etc. These guides can be made of steel or aluminum. The guides that are installed on the drawers have rollers that ensure their movement. To eliminate noise when the rollers move, their structure can be covered with a rubber sheath.
Since roller guides are not a structure intended for closed installation, their surface is coated with enamel, which is necessary to give a beautiful appearance to the entire structure. The most commonly used paint is white, black or brown.
The design of these guides is similar to rails, which allow you to open and close various moving furniture elements without putting much effort into it. This is due to the created inertial moment, which occurs after a small push on the box.
Return to contents
How to remove a drawer from the guides: short instructions
Modern design furniture is often equipped with telescopic runners. This is a simple design, convenient and reliable, but, like any mechanism, it can fail. If a part becomes unusable during operation, it must be replaced. This is where the owner has questions about how to remove the drawer from the guides.
At first glance, this seems incomprehensible, but if you follow the simple instructions given below, then everything will become extremely clear. The process itself will take no more than 1–2 minutes. So what is the procedure?
Dismantling sequence
Before you remove the drawer from the slides, note that each drawer has two of these features. You must act in the following sequence:
- Pull the drawer out as far as possible.
- Plastic fasteners will be visible in the window. Lower the special “tendril” down and then pull it towards you so that it comes out.
Before removing the drawer from the guides, please note that the arrangement of the antennae varies depending on the design: symmetrical or mirrored.
In the first option, lightly pull both elements down; in the second case, one “tendril” moves down, the other moves up. Determining which method is suitable in your case can only be done by trial and error.
3. Lowering the “antennae”, pull out the drawer. It comes out of the guides without much effort.
How to return the drawer to its original position
How to return the structure back is not difficult to guess. You just need to repeat the sequence of dismantling steps described in reverse order. Insert the box into the slides and push along the guides until you hear a characteristic click.
As you can see, figuring out how to remove a drawer from telescopic guides is not so problematic. Simple instructions will always come to the rescue if you are new to repairs and need express advice without leaving your home.
Some advantages of telescopic guides
Sometimes problems arise with such structures during operation, but these are just minor drawbacks compared to the characteristic advantages of telescopic drawer guides. Among the main advantages of retractable systems:
- Increased reliability of boxes of this type compared to roller mechanical systems.
- Long service life of structures.
- The quality of metal parts made from alloys that are durable. This ensures that the guides will not “twist” under the weight of the box.
- Easy and quick drawer extension completely or to the desired depth, combined with reliable fixation of the device.
- This option is more accessible due to its low cost compared to its analogue - tandem box.
Knowing how to remove a drawer from the guides and how to easily mount it back, you will not have problems using telescopic structures. With simple instructions on hand, consisting of just a few steps, you can dismantle the box yourself and just as easily return it back.
fb.ru
A little about the advantages of designs
Despite the fact that sometimes drawers with such fittings can cause problems when they need to be removed or disassembled, they are all negated by the undeniable advantages of telescopic guides:
- Compared to roller mechanisms - greater reliability and durability.
- The ability to easily and quickly extend the drawer completely or only to the desired depth, which is definitely very convenient.
- The cost of such a fittings system is an order of magnitude lower than tandem box analogues.
Source: moreremonta.info