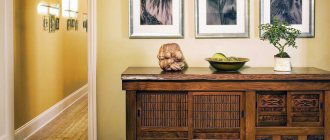
When practicality runs counter to the requirements of design and style, many still try to give preference to ergonomics, ease of use, and price. Things like countertop sockets can be a real treasure and can save a ton of space in your room, workshop or kitchen, similar to built-in appliances.
Retractable sockets in the kitchen: hidden extension cords built into the furniture
Today we cannot imagine our life without electrical appliances. There are especially many of them in the kitchen. Refrigerator and electric stove, dishwasher, blender, extractor hood... It is not surprising that the electrical networks in old houses cannot cope. You have to connect the equipment one at a time so that the plugs do not fly out. Residents of new buildings have another problem - they need to wire the apartment so that they don’t have to pull plugs out of sockets every time or trip over extension cords. And to do this, determine the number and type of sockets, for example, retractable.
How many sockets do you need in the kitchen?
- Determining the number is not difficult: there should be 20-25% more sockets than electrical appliances. Suppose you count 12 devices, then you will need to install 15 sockets. So much needs to be done so that you don’t have to urgently empty the outlet for a vacuum cleaner or fan.
- The power of sockets and wiring is also important. Calculate the total power of all devices; the electrical wiring lines must provide power to the devices with a double reserve. There are 2 types of sockets: 10 A and 16 A, that is, designed for loads up to 2.2 kW and up to 3.5 kW. The power of devices connected to one outlet should not exceed the rated load on it. For example, you cannot connect a professional mixer, a toaster (about 1000 kW) and the best meat grinder (up to 1500 kW) or a tabletop electric mini oven to a 10 A socket.
- The sockets are arranged in three tiers. The top ones are connected to the lighting under the cabinets and the hood. The middle tier is made just above the level of the countertops; all small household appliances are connected to these sockets. The lower one provides power to the most powerful electrical appliances that are constantly on.
- Metal electrical appliances with high loads (washing machines and dishwashers) require connection through separate grounded sockets and are connected through an RCD.
- Through automatic protective equipment and a separate wiring line, you need to connect especially powerful devices: ovens and electric stoves, boilers.
- For appliances that are not constantly switched on, it is convenient to use built-in or pull-out sockets.
Retractable
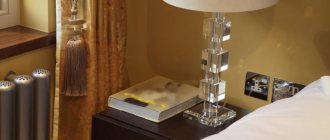
Pull-out sockets, also called hidden or built-in, are mounted directly into the countertop or the bottom of wall cabinets. Free sockets are not visible, all wires are also hidden under the table, which is especially convenient for the layout of a kitchen-living room apartment. Simply press the lever for the socket to extend to the desired height.
Advantages
- universal sockets;
- take up minimal space;
- ideal for small and non-stationary electrical appliances;
- There are waterproof, grounded and childproof models;
- fits perfectly into modern design;
- can be vertical or horizontal;
- They are simply mounted into a solid wood tabletop; they can be embedded into any surface;
- You can purchase options with additional sockets for telephone, Internet, audio output, cable TV, mobile phones.
Flaws
- relatively high price;
- take up space in a closet or under a table;
- cannot be mounted in a countertop above drawers;
- vertical ones can break upon impact or become loose from constant use, so they are not suitable for dependent sets of built-in furniture.
Built-in sockets for the kitchen. Typical designs
Pull-out socket block
Built-in sockets for the kitchen are divided into retractable sockets in the form of posts and sockets in the form of a rotating panel.
Still, most will prefer sockets that will be hidden in the surface of the table.
Most kitchen sockets built into countertops have a metal body and increased moisture protection.
As with any kitchen equipment, you must have a protective earth circuit available to which the recessed sockets are connected.
Without this, their moisture protection will be nullified.
Nuances of choice
All built-in sockets can be divided into 2 types: horizontal and vertical. Vertical ones are mounted in a cabinet; when you press a button, they slide up. They are also installed in wall cabinets, then the sockets extend down from the bottom. Such sockets require very careful use; they should be held with your hand while plugging/unplugging. If you pull the plug carelessly, the socket may become loose and break. But they are rightfully considered the most beautiful. Find out how to choose a freezer for the kitchen here.
It is much more practical to install a rotating retractable socket. It opens when you press the edge of the lid. Horizontal ones are much more difficult to damage during use; such sockets last longer than vertical ones. But it is difficult to connect angled plugs into them; they are inserted only with the wire facing up.
Retractable swivel sockets
This type of design is more ergonomic and safe, especially when we are talking about built-in sockets in the kitchen countertop. The rotating socket is good because it is more firmly held on the surface, it is much more reliable and can withstand any physical stress without any problems. At least from turning on the plug. Access to the socket block opens after pressing on a certain area, the entire block is rotated to a given angle and fixed. It is not for nothing that we describe in such detail the process of plugging a plug into such a socket, because its design includes a rotating mechanism, a locking mechanism, and also a movable conductor. These three elements also wear out and can break at any time.
In addition, a rotary socket, even the most reliable, has another important drawback - it is difficult to insert an angled plug into it. No, of course you can turn it on, but then the wire and part of the plug will unceremoniously stick up. This is not very aesthetically pleasing and inconvenient.
Many manufacturers, in order to raise the price of such sockets, install timers, three-volt adapters with a USB connector for charging mobile phones and tablets, and lighting. In a word, how important such a detail as a socket built into the countertop is, of course, is up to each of us to decide, but if you buy, you should still not skimp on quality, but trust more proven brands. Use quality equipment and don't waste money on nonsense. Good luck with the renovation everyone!
Where to place the hidden block
In fact, retractable sockets are a modern version of an extension cord; develop a drawing in advance. It makes sense to use them to connect small household appliances that do not work all the time. In a large kitchen, it is better to install several built-in units in different areas. In the working part you will need to make a block with 3-4 slots, built into a cabinet or countertop. You can connect a toaster, food processor, mixer or blender there. An outlet with a timer would be an ideal choice.
You can make an additional small block for an electric kettle or coffee maker in another part of the work area. With two separate pull-out sockets, it will be convenient if 2 people are cooking in the kitchen at the same time.
Separate care should be taken about sockets in the recreation and dining areas. It is enough to install a simple socket with 2-3 sockets in the dining table, which will be a spare one. And near the soft corner you may need a more complex and expensive block. It’s good if it includes a socket for a mobile phone and a cable output for satellite television.
How to install, build into a countertop, cabinet, drawer
Installation of these sockets will not be a problem and is accessible even to a beginner.
- Drill a 65 mm diameter round hole in the table top if you plan to install a vertical unit. The hole diameter may vary depending on the manufacturer.
- Then insert the block into the hole and secure with a nut.
- Connect the outlet directly to the power line or insert the plug of the extension cord into a fixed outlet on the lower tier. Wires that are too long can be hidden in the housing.
- Installation in a wall cabinet is carried out similarly, but from bottom to top. Before starting work, make sure that the cabinet itself is securely fastened.
- A horizontal outlet will require a rectangular hole. The block is secured using self-tapping screws or the included clamps.
Features of connecting a mortise countersunk
- All sockets of the retractable block are connected in parallel, take this into account when calculating the permissible load;
- The thickness of the tabletop when installed under it should be in the range of 25-52 mm;
- Connect kitchen retractable sockets to a separate power line or at least the least loaded one, especially for built-in electric stoves.
Where to buy a socket that will extend
A retractable socket is quite an expensive thing. It is worth looking for in large construction stores and supermarkets. In unverified shops or markets you can get a low-quality socket that will quickly break. This article will tell you about kitchen accessories and utensils.
If you want to save a little money, try buying these sockets online. To avoid troubles, immediately check the completeness of the delivery and the conformity of the ordered and delivered goods. Keep the receipt and warranty card.
A win-win option is to buy retractable sockets from official distributors. Brand stores or authorized retail outlets are usually listed on the manufacturer's website. Their prices are slightly lower, and you will be sure that the product is not a fake. Unfortunately, not all manufacturers have company stores.
Rules of operation and care if you install a recessed socket
- Do not install pull-out sockets near a sink or stove. Although they are protected from water when closed, the units can be damaged by moisture when they are pulled out. And you can’t install sockets very close to the stove, regardless of their type.
- Do not connect constantly used power devices to the drawer units. The coiled wires heat up when high currents constantly flow, this is unsafe.
- The power supply wiring should not come into contact with hot objects, be pinched by furniture, be stretched or bent too much.
- Do not connect the maximum load to the sockets, especially if they were not purchased from world-famous manufacturers. They may overheat and begin to melt.
- When plugging and unplugging, hold the outlet with your hand, especially the vertical outlet.
What is the advantage of countertop sockets?
The range of electrical equipment used in work is expanding. Sometimes you have to use a fax, printer, etc. at the same time. More recently, extension cords and tees were used to turn them on. The number of connections increased, and the number of cords also increased. This caused a lot of inconvenience. The recessed countertop sockets we offer eliminate unnecessary movements, which improves productivity.
Thanks to their neutral design, retractable table roses look great on any surface. This is a worthy alternative to splitters and other devices. Their extension is carried out by lightly pressing the button/lever. The catalog includes models with three and four slots. Their advantages are obvious. They are reliable, able to withstand intense loads, resistant to mechanical damage, and durable. Children cannot reach them, since when not in use they are hidden in the tabletop lid. The efficiency of connecting computers, projectors and other equipment to the network is guaranteed, regardless of its location.
Do you want your company's team to take a leading position? Create a positive atmosphere for them. Call us and order sockets built into the countertop! Company managers will help you make the right choice.
Wiring accessories for furniture
sudakovsky (7684.00)
There are switches, including touch ones. There are no sockets with a full depth of up to 18mm and there cannot be. It is enough to remember the length of the plug pins.
The Euro plug pins are 19mm long. Suffice it to remember that the front plastic part of the socket is thick
2 mm, and a gap to the mechanism to understand that furniture sockets can exist.
The Euro plug pins are 19mm long. Suffice it to remember that the front plastic part of the socket is thick
2 mm, and a gap to the mechanism to understand that furniture sockets can exist.
There is this option: https://www.svetcom.ru/product/1888/ But taking into account the eyeliner, it does not fit completely into the chipboard
One of the possible solutions (my own idea, repeatedly implemented): 1. Thickness of laminated chipboard = 16 mm; 2. On the inside, I apply the required size laminated chipboard (of the same thickness - 16mm) in a square or rectangular format, larger than the size of all the holes. I mark it by screwing in a 5 mm self-tapping screw in 4 places and using a D8 drill I make a shallow hole to recess the head of the self-tapping screw. Using wood screws 3.5 x 25 I screw this board in the right place; 3. In the right place, using a 68mm crown, I make the required number of through holes in both boards at the required distance, depending on the number of modules; 4. I trim the outer edges of the resulting holes with a round file; 5. I unscrew the inner chipboard and use a long D9 drill to make a hole for the cable from the desired edge (facing the inner wall of the furniture) to the drilled hole 68mm; 6. I take a blue GUSI Electric mounting box (or others, whoever likes them) for plastered installation in brick or concrete walls (not for plasterboard) and use a hacksaw to cut off 15 mm along with the end of the box - you get a through mounting box; 7. I insert through mounting boxes into each hole, ensuring that the outer edges of the mounting boxes are recessed and do not stick out; 8. I carefully screw it in two places inside the mounting boxes with 3.5 x 19 self-tapping screws so that the chipboard from the outside does not crack; 9. Inside, the cable from the internal chipboard can be hidden in a small cable channel; 10. I install sockets/switches; 11. I cover the inside with a sheet of fiberboard to match the size of the inner chipboard and carefully fasten it with self-tapping screws with a wide flat head; 12. I tint the edges of the fiberboard sheet on the side facing the outside of the furniture product with paint to match the color of the inner wall of the furniture product.
A good option if the customer is ready for something to protrude into the inside of his cabinet. If you are ready, then there is an even simpler solution - ordinary plastic furniture protective caps. From the inside of the cabinet we close the installation products with a cap, shooting the latter with staples with a furniture stapler.
Source: www.volt-m.ru
Kitchen work area lighting
Let's start with lighting, as one of the most important elements. Even many regulatory documents require additional lighting for the kitchen work area. Therefore, we will begin our story with these requirements.
According to clause 2.12 of VSN 59 - 88, the lighting of the kitchen working area must be at least 200 lux. The same standard applies to washbasin lighting. For comparison, the general lighting in the kitchen should only be 100 lux.
Based on this standard, it is necessary to provide so-called local lighting for the kitchen working area. There are quite a lot of options for its implementation at the moment, and you will certainly find something suitable for your design.
- Let's start with the option of simply installing additional lamps on the wall . These can be either fluorescent lamps or ordinary incandescent lamps. The option is quite simple to implement, but not very attractive from an aesthetic point of view.
Note! According to clause 7.1.46 of the PUE, all lamps with incandescent lamps in the kitchen installed above the tables must have protective glass. If fluorescent lamps are installed, they must have protective grilles that prevent the lamps from falling out and ensure their protection from mechanical damage.
- A more interesting option might be to install corner lamps yourself . Typically these are fluorescent lamps, which are mounted with one side to the wall and the other side to the bottom of the upper furniture drawers. This option allows you to hide the lamp itself.
- An even more interesting option would be to use spotlights built into the top drawers of the furniture. Typically, 12V lamps are used for this.
In this regard, you will need to install an additional 220/12V transformer. Usually it is mounted outside the furniture, and a wire with a voltage of 12V is pulled to the lamps. To lay such a wire on the wooden surface of furniture, you should use a metal corrugation.
- But the most interesting option is to use backlighting from the apron. This option can be implemented by using special glass or plexiglass as an apron. This option is almost ideal both in terms of efficiency and appearance, but its price is the main limiting factor in its distribution.
Sockets in the kitchen work area
No less important for the work area and sockets. A variety of temporary electrical receivers will be connected to them, such as a food processor, an electric meat grinder (see Russian-made electric meat grinder: which one to choose), a juicer, a toaster, a mixer and much more. Therefore, there should be a lot of sockets in the work area. Usually at least three are installed, and sometimes this number reaches five.
Sockets on the apron
The simplest option for providing the kitchen work area with electricity is to install regular sockets on the apron (see How to arrange sockets in the kitchen correctly and conveniently). But, as in any other business, there are some nuances here.
- One of these is the height of the socket on the kitchen apron. There are no clear regulations from regulations in this matter. As the PUE says, the main thing is that it is convenient to use. So let's think together.
- If the sockets are placed directly above the countertop, it will not be very convenient to use. In addition, debris from the table will often get into the sockets, which can lead to negative consequences. Therefore, the socket is usually installed at a height of at least 10 cm from the tabletop.
- But there is another option here. If you place the sockets under the very top edge of the apron, you can visually at least partially hide them. At the same time, they are still convenient to use.
- Another question that often arises is the location of the sockets on the apron relative to the center of the work area. If you have a stove on one side of your work area and a washbasin on the other, then the answer is obvious. We place the sockets in the center of the work area.
- If, on at least one side, your work area is limited by a closet, then this radically changes things. A food processor and power outlet will fit perfectly in this corner, thereby freeing up the main workspace. If you need to place other electrical appliances, then the length of their wires is usually enough to move across the entire surface of the working area.
- As for the technical aspect of connecting such sockets on the apron, it is no different from connecting sockets in any of the living rooms.
Corner sockets
But usually everyone wants to know how to hide sockets in the kitchen? A good option are corner sockets, which are now quite widely represented on the market.
- Due to the fact that corner sockets are attached simultaneously to the wall and the countertop or bottom of the upper cabinets, they are relatively unnoticeable. And this is their main advantage.
- A separate issue is the location of the corner sockets. Usually they are mounted at the tabletop level, but in order to avoid moisture and dirt, it is better to choose the top mounting option. After all, dirt gets in even through socket covers, which can lead to short circuits.
- An interesting option is to attach a corner socket to the side of a cabinet that limits the work area. But this option puts the sockets on display.
- From a technical point of view, connecting corner sockets can be done in two ways - by laying hidden wiring along the wall, or by installing open wiring on furniture.
- Our instructions advise choosing the first option. Indeed, in this case, you not only hide utility networks, but also do not incur additional costs associated with the need to protect the wire from mechanical damage. And when laying wire over combustible surfaces, you should use metal pipes or corrugation.
Sockets built into furniture
The next possible option for hiding sockets in the kitchen is to use electrical installation devices built into the furniture. This option is not used very often and has a number of limitations that are often neglected.
- Typically, sockets are built into the countertop. But this option has a lot of disadvantages. In addition to dirt, water can get into them, even into sockets covered with special covers. Therefore, such sockets should be located as far as possible from the sink.
- In addition to the disadvantages of operation, there are also disadvantages of installation. All of them are associated with PUE standards, which limit the contact of electrical installation products and wiring with flammable surfaces. And wooden furniture is one of those.
- To install sockets built into the countertop, you will first need steel insert boxes. They must completely exclude the possibility of furniture catching fire from the outlet.
- The wiring to the built-in sockets is also laid along the furniture. Therefore, it should be enclosed in a metal corrugation, which will also eliminate the possibility of fire in the event of a short circuit.
Note! The wire for connecting built-in and any other sockets must be selected in accordance with the total load of all sockets. The selection of the section should be carried out according to Table 1.3.4 PUE.
- At the same time, flooding or moisture may form in the kitchen. Therefore, the corrugation and the insert box should be equipped in such a way as to prevent the accumulation of moisture. Moreover, the PUE standards require that even the possibility of condensation accumulation be excluded.
Hidden sockets for the kitchen
Hidden sockets for the kitchen are one of the latest innovations and are essentially a modern solution for integrating sockets into furniture. They are becoming increasingly popular, but they are not the solution to all problems.
Source: elektrik-a.su
Swivel retractable sockets
Such sockets built into the countertop are safer and more ergonomic. They are interesting because they are held more firmly on the surface, they are much more reliable and can withstand any load without problems. At least the plugs won't break when turned on. After pressing on a strictly defined area, access to the entire block of sockets opens; it rotates into a corner where it is fixed.
The process of turning on the plug is described in such detail for good reason, since the block includes a rotary locking mechanism, and in addition, a movable conductor. These three elements wear out and can break at any time.
Also, rotary sockets built into the countertop, even the most reliable ones, have another significant drawback - it is difficult to insert an angled plug into them. More precisely, you can turn it on, but in this case part of the plug and the wire will look up completely unceremoniously, which is inconvenient and not very aesthetically pleasing.
There are manufacturers who install timers, lights, and three-volt adapters with a special USB connector in sockets, which are necessary for charging tablets and mobile phones.
In other words, how important the socket built into the countertop is is, of course, for us to decide, but even if you purchase it, you still shouldn’t skimp on quality, but it’s better to trust trusted companies. Use only high-quality equipment, and don’t waste money on nonsense.
How to place sockets in the kitchen: diagrams + tips
Modern kitchens are equipped with a large number of electrical appliances. Refrigerator, hob, oven, microwave, dishwasher, electric kettle - this is the minimum list of what almost every family has. And all these devices require electricity. Designer Olga Kashpurova tells how to distribute sockets correctly.
Rule 1.
The convenient and correct location of sockets can be thought out only after you have decided on the kitchen combination and know the overall dimensions of all cabinets and drawers - height, width, depth. At the kitchen design stage, you need to decide on the appliances - clarify the connection details and recommendations for the location of electrical outlets.
Rule 2.
It is important to remember that each household appliance should be placed on a separate machine in the electrical panel. Otherwise, you may lose the warranty on expensive equipment if it fails due to a power surge.
You will need:
Refrigerator socket
For built-in refrigerator
It is better to place the socket in the kitchen plinth - this way it will be accessible, and if necessary, the device can be turned off. The socket should not be placed behind the appliance - it may interfere with the installation of the frame and the refrigerator itself. If the kitchen configuration allows, you can place the outlet in an adjacent cabinet. In this case, the height of the outlet varies from 20 to 70 cm from the level of the finished floor and no further than 10–20 cm from the refrigerator itself.
For free standing refrigerator
It is allowed to place an outlet directly behind it. But the best option is 5–10 cm from the refrigerator: the socket will be in constant access, and if necessary, you will not have to move the refrigerator.
Sockets for hob and oven
If this is not a single appliance, the electric stove, hob and oven are connected to different sockets. When the oven is located in the classic way under the hob, the sockets are placed at a height of 10 cm from the level of the finished floor in the kitchen basement in the center of the frame or in an adjacent cabinet.
If the oven is built into a column, the socket is installed there, in the center of the frame at a height of 55-70 cm from the level of the finished floor, depending on the lower drawers. It can also be placed in the kitchen basement.
But the location directly behind the oven is unacceptable. There is a high probability that the plug plugged into the socket will interfere with the installation of the device.
Sockets for dishwasher and washing machine
PMM and SM are most often installed next to the sink: this is due to the convenience of water supply. The optimal option for placing sockets is directly under the sink at a height of 15–25 cm from the level of the finished floor. You can also place an outlet for a household garbage disposal there. When placing sockets under the sink, it is important to take care of their moisture protection.
Microwave socket
Socket for built-in microwave
can be located in the kitchen basement below or above the appliance, or above the kitchen if the appliance is built into the upper tier of cabinets.
For a free-standing microwave
located on the countertop, you should plan an outlet on the apron.
Socket for hood
For built-in hoods
The socket must be placed inside the closet or above the kitchen. The height of the socket depends on the height of the kitchen frames.
Socket for wall-mounted, dome hoods
can be replaced with a pin and connect the device directly. The main thing is to take into account the size and passage of the ventilation duct - it should not block the socket or outlet.
Socket and switch for lighting
But for lighting you need not only a socket, but also a switch. The optimal location of the switch is in a group with household sockets on the apron.
The socket can also be located above the kitchen or inside one of the wall cabinets. The height of its location depends on the height of the kitchen combination and frames.
INMYROOM Tip:
If the color of the tiles on the backsplash in your kitchen is different in color from the furniture facades and walls, you should not put up with it and buy sockets of a standard color - white, beige or gray.
Legrand
company
Celiane
sockets and switches with interchangeable frames, the color of which you can combine yourself: for example, green for sockets above the tabletop, beige, matching the color of the furniture, for the backlight switch, and make the socket for the TV gray.
Sockets for small household appliances
To connect small household appliances - kettle, coffee machine, toaster, blender - you need sockets on the kitchen apron. Their number directly depends on the number of devices. Analyze how the cooking process will take place, which devices will be permanently located on the countertop and in what location. To the resulting quantity, add 2-3 spare sockets for appliances that are not used daily.
The optimal height for sockets on the apron is 110 cm from the level of the finished floor; they are well placed in groups of 3-4 pieces in a single frame at a distance of approximately 1-1.2 meters from each other. It is important to remember that sockets should not be placed in close proximity to the sink and hob.
Sockets for TV, air conditioning and gadgets
If you plan to have a TV and air conditioning in the kitchen, make sure there are sockets for this equipment as well. To charge your phone, laptop and other gadgets, also plan a place, for example, in the dining table area.
I also recommend planning an outlet for connecting a vacuum cleaner or steam mop. It can be placed in an inconspicuous place above the baseboard.
Source: www.inmyroom.ru
Pull-out sockets for the kitchen - choosing a model and installing it in the countertop
Modern furnishing and design techniques are essential to make a kitchen practical and functional to use, as well as to add sophistication to its appearance. Recently, mortise electrical sockets that are mounted into the kitchen countertop have been gaining popularity among buyers. The design of this type of sockets allows, if necessary, to pull out the socket block from the inside, which makes their use convenient and completely safe. In addition, built-in sockets give the kitchen an aesthetic appearance, focusing attention on its interior and style. Harmonious custom-made kitchens in Sevastopol are offered by the Art Master furniture factory.
The need for a built-in socket
Built-in sockets in a kitchen countertop are, in theory, very useful. A person can never fully predict the exact location where a source of electricity will be needed, excluding traditional consumer connection points (TV, refrigerator, kitchen appliances, desktop computer) and work areas. If you need to connect another consumer, it is almost impossible to do without an extension cord. This means that the main and first task of a built-in socket is to connect electrical appliances without any plugs or wires.
At the same time, imagining the acumen of today's marketers, you can turn any nonsense into a stylish contraption, a designer accessory that can decorate the interior. The sockets built into the countertop have this property. In fact, in some interior they will look attractive and stylish. And in addition to aesthetics and saving space, they will also help save time.
Advantages of retractable sockets
The main advantages of built-in sockets are:
- The presence of several connectors and ports designed to connect household appliances, USB connections and other devices.
- Preserving the beauty and simplicity of kitchen decoration.
- Easy to install and takes only a short time.
The disadvantages of such sockets include the lack of water resistance, which leads to consequences in the event of moisture formation. When installing the device, problems may arise with the extension of shelves and cells. Also, electrical appliances regularly used in everyday life cannot be connected to the outlet.
Retractable built-in sockets have a characteristic feature: they become operational only after the device is pulled out from the countertop. For this purpose, the electrical outlet is equipped with a special design with spring mechanisms. Depending on the model, they may be presented in the form of a button or a cover. As long as the socket is hidden in the countertop, it will not be able to work.
Desktop modules DESK 2
Design and technology
The Desk 2 module has been specially designed for installation in offices, conference rooms, homes and public places. The module is made of aluminum and is available in various colors. There are standard configurations, but custom solutions can also be developed. Desk 2 is attached to the table with mounting brackets; the power cable connection is located on the rear side. Desk 2 received the 2011 Red Dot Product Design Award.
2012. The design of the module is quite strict; only high-strength materials are used for execution.
Advantages
• Design solution for modern automated workstations
• The module is located at an angle of 45°
• Hidden wiring to the edge of the table
Particular attention was paid to design in the DESK 2 product. Technically, DESK 2 is designed in the same way as its predecessor DESK 1. It has the same modular design, and can be equipped with various information and media modules depending on individual needs.
Types of mortise sockets
Depending on the location of the outlet on the surface of the kitchen countertop, there are:
- Vertical. This type of built-in sockets is characterized by the presence of several connection points and connectors for USB connections, which emphasizes their practicality. Vertical models are presented in a wide range. Among the more expensive units, you can choose sockets with a backlight function, equipped with a touch panel on the top cover.
- Horizontal. Mortise sockets got their name due to the corresponding design, which is mounted horizontally into the tabletop. Control is carried out using a button located on the top panel. Like vertical power sockets, the above type of sockets is equipped with connectors for USB connections, however, when connecting cables with a side arrangement, problems may arise due to the horizontal design.
The concept of a built-in socket
It seems that everything is elementary: built-in sockets in the tabletop, photos of which are presented in this article, are structures that do not protrude beyond the dimensions of a certain surface. At the same time, ergonomists and engineers have gone much further, and at the moment absolutely unexpected solutions have appeared on the market that directly relate to embedded systems. A built-in socket block in a countertop is today presented as a completely new trend in the overall design of a room. At the same time, we will talk today about the advisability of its use, as well as its effectiveness.
Laziness is the engine of progress. We have a desire to always have at hand everything that we need at a certain moment, without spending our calories on it.
In other words, comfort. He extended his hand and took the fork, extended the second and took the plate. This is natural. The same thing happens with the socket. It’s interesting that no matter how many sockets we place around the room, there will always be not enough of them, while surge protectors, as well as extension cords and sockets built into the wall in huge quantities, do not decorate the interior in any way.
It is likely that these two reasons became the impetus for the emergence of a new trend.
Manufacturers
A company of Polish origin, engaged in the production of furniture and electrical appliances. In particular, GTV produces built-in sockets that can be purchased at a low cost.
Legrand. The largest French concern, which is famous in the domestic market for the production of branded mortise sockets with the names “Estap”, “Vantage” or “BTicino”. Each model is characterized by high functionality, varied appearance and the presence of several modules.
Evoline. One of the European leaders in the development and production of electrical products from the German company SchulteElektrotechnik. Most of the Evoline brand models are also presented on the domestic market. In particular, “PortCuisine”, which has a special design that makes it possible to install USB connections and HDMI connectors at the buyer’s request.
A Swedish manufacturer of mortise-mounted vertical sockets produces a line of “SmartlinePopup” products equipped with power contacts, the necessary ports and connectors for connecting third-party devices.