A kitchen set is considered one of the simplest types of furniture to be assembled by hand for inexperienced craftsmen.
Furnishings for a relaxation room and hall, as a rule, require a professional approach and the use of extraordinary materials.
Today we’ll talk about how to assemble furniture with your own hands.
The use of laminated chipboard as the main building material
Today, natural wood in its pure form is almost impossible to find in the environment. After all, sets made from natural wood are considered expensive and quite elite pieces of furniture. Therefore, the array is replaced with an affordable material such as chipboard.
In most cases, the thickness of these plates reaches 16 mm. Sheets of greater thickness are also sold. The material is cut on machines.
You can do the work at home using an electric jigsaw, but unevenness and chips cannot be avoided. After all, it is almost impossible to saw off laminated chipboard evenly at home with a jigsaw.
Edges
One of the weak points of this material is considered to be the saw cut, since it is through it that moisture passes inside most easily. In this regard, due to poor quality protection, swelling of the ends is possible. Therefore, it is preferable to cover the ends with edges, as in the photo of the furniture you made yourself below.
There are several types of edges on the modern market:
- Melamine. This is the most affordable edge of excellent quality. You can glue it yourself using a regular iron.
- PVC is an excellent choice for edging. Its gluing is only possible on the machine.
- ABS edge, similar to PVC edge, but created from a natural material.
Facades
The façade and doors of furnishings, including DIY garden furniture, are made from the best quality material.
The facade is considered a separate piece of furniture and, as a rule, is made to order.
In cases where facades have unusual shapes, they can be produced over a long period of time.
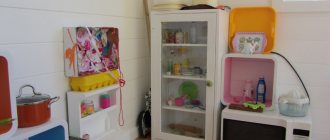
Requirements for children's furniture
If quite stringent requirements are imposed on factory products, this does not mean that homemade furniture should not meet them. The first requirement is safety. There should be no sharp corners, all parts should have a streamlined shape. If furniture is going to be covered with a hard hat, it must be non-toxic.
Inexpensive double comfortable beds from the manufacturer with delivery
The next requirement is aesthetics. It is advisable that the colors of the products match the gender of the child. Also, the furniture should match the interior style and overall color scheme.
The size of furniture should be age-appropriate and, if possible, adjustable. It is advisable to use natural wood, cardboard, fabric, neutral filler, paper as materials.
The fastening parts used are screws, bolts and nuts, closers. All of them must be inaccessible to the child so as not to cause injury. The fittings must not have sharp elements.
Boxes
There are many methods for making cabinet boxes, as well as DIY pallet furniture. One of the simplest is considered to be assembly around the perimeter using laminated chipboard.
If it is necessary to create an original facade, it must be screwed onto the frame main part from the inside.
In addition, the facade is often attached to eccentrics in the form of one of the walls of the box. In this case, the main task is not to assemble the necessary box, but to secure it correctly.
Note!
Original do-it-yourself shelves: how to make book, hanging, kitchen shelves (90 photos + video)- DIY wardrobe: how to make an inexpensive but stylish design project? (93 photos, drawings and diagrams)
- DIY chair - 63 photos of options for creating chairs using wood and textiles
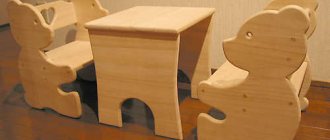
Plywood furniture
From thick plywood you can make almost any piece of furniture for a child, from a table to a loft bed. You need thick plywood, 1.5 cm or thicker. To work with it, you must have the skills of carving with a jigsaw, since you will have to round corners, cut out smoothly curved edges and round elements.
How to make an ottoman with your own hands: 70 photos and videos on how to make comfortable and beautiful furniture for your home- How to make a stool with your own hands: a step-by-step master class on making a stool. 125 photos of ideas and examples of their production
Do-it-yourself furniture restoration: a review of the best ideas and options for restoring furniture for beginners (150 photos and videos)
So, for example, for a loft bed it is necessary to draw and cut out the entire side parts, without seams. In one of them, cut rectangular holes-steps with rounded corners. The back and front walls of the bed are rectangles, the corners of which are also rounded.
The bottom of the bed is a rectangle of the same width as the front and back walls, and the length corresponds to the height of the child. You also need to drill or cut holes in the bottom to ensure ventilation of the mattress.
Connect the bed parts using self-tapping screws, the heads of which should be flush with the surface or recessed into it. Position the bottom so that there are sides on the sides.
The bed can be painted or varnished. Place a mattress on the bottom and you can provide it to the child. The play area, or attic as they used to call it, will be located below the bottom, which is why steps are needed to climb up to the sleeping place.
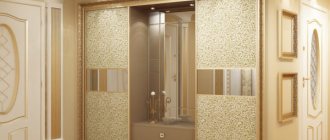
Doors
There are built-in wardrobes and free-standing ones. Internal filling is at the discretion of the owner; it is possible to carry out restoration of furniture with your own hands.
The main element of each cabinet is a sliding door leaf. It is not recommended to save on this part; it is important to purchase good quality fittings.
Basically, the closet is equipped with several doors, consisting of a frame into which decorative elements are inserted. Door leaves can be assembled from several materials, separated by an aluminum profile.
The movement of the canvases is carried out along special guides, which are installed with your own hands, just as you create furniture from cardboard yourself.
Cardboard as a material for furniture
Children's furniture made of cardboard can be quite durable and functional. Of course, caring for it will be a little different. In particular, such products will be afraid of moisture.
Modular sofa or ottoman in the shape of a cube. The principle of their manufacture is the same, only the sofa elements will have backs. To work, you will need boxed cardboard with a corrugated insert inside.
Boxes are needed for a large area from large household appliances or furniture. You will also need upholstery fabric, foam rubber, PVA glue, a furniture stapler, a stationery knife, and a ruler.
First, on a piece of whatman paper you need to draw a template in the shape of a square for the child’s height and attach to it a vertical rectangle also for the child’s height. This is the back. The whole pattern will look like an inverted letter H. For the ottoman you need a pattern in the shape of a square.
Cut out a template and use it to cut out approximately 50 identical pieces from cardboard. You also need to cut about 100 strips, equal in height to the entire future module, and in width to the back or slightly narrower than it. 200 strips need to be cut according to the height of the seat. Glue the strips in pairs. These will be spacers between the workpieces.
First, you need to glue gaskets to the first blank: a long one in the back area, and a short one where the seat is, one closer to the middle, the other to the edge. Glue the second piece to the spacers, aligning it with the first. Glue the spacers to the second blank again, then the third blank.
And repeat this until the last piece is glued. Each time you need to check that the workpieces do not move out. At the end of this stage, you will already have a chair frame, which needs to be placed to dry the glue for about a day.
Cover the frame with whatman paper on all sides and dry again. Cover the seat, back and top of the back with foam rubber and dry.
While the glue dries, you need to sew the cover on the chair so that it fits from top to bottom. Put it on and secure it from below with a furniture stapler. The module is ready.
Area of use of stainless fasteners- Modern do-it-yourself book shelf: drawings, diagrams, options and best bookcase designs (140 photos)
How to make a mini bar with your own hands - the best ideas for a modern bar counter at home and in the country (75 photos)
By making two or more modules, you can give your child creative freedom and allow you to arrange them in any order: in the shape of a sofa, as separate armchairs, in a semicircle, etc.
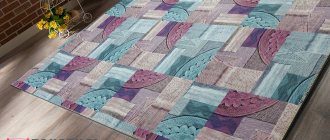
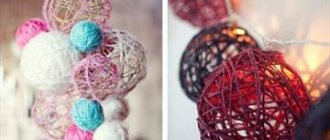
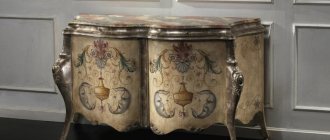
DIY furniture photo
Note!
- DIY wardrobe: how to make your own wardrobe? Drawings and interesting project options (74 photos + video)
Bright and stylish DIY hanger: 60 photos of interesting ideas and solutions
DIY coffee table: steps to create a masterpiece! 64 photos of instructions