Assembling children's furniture is a very labor-intensive process that cannot be completed without the help of a specialist. Every parent tries to create comfortable conditions for their baby. The design of a children's room is thought out to the smallest detail so that your beloved child has a comfortable area for play, relaxation and study. Furniture plays a huge role in planning the interior of a children's room. The practicality and functionality of the room will depend on the choice and correct arrangement of furniture structures. As a rule, a new bed, wardrobe, table, chairs are delivered disassembled and here a new problem arises: - How to assemble children's furniture?
To ensure that the purchased furniture structures for the nursery last for many years, perform all the tasks assigned to them, and are also safe for the child, the assembly should be entrusted to specialists. The 5VODNOM company offers professional services for assembling children's furniture in Moscow . Our team employs the best assemblers of furniture structures and carpenters who are ready to go anywhere in Moscow right now.
Requirements for children's furniture
If quite stringent requirements are imposed on factory products, this does not mean that homemade furniture should not meet them. The first requirement is safety. There should be no sharp corners, all parts should have a streamlined shape. If furniture is going to be covered with a hard hat, it must be non-toxic.
Inexpensive double comfortable beds from the manufacturer with delivery
The next requirement is aesthetics. It is advisable that the colors of the products match the gender of the child. Also, the furniture should match the interior style and overall color scheme.
The size of furniture should be age-appropriate and, if possible, adjustable. It is advisable to use natural wood, cardboard, fabric, neutral filler, paper as materials.
The fastening parts used are screws, bolts and nuts, closers. All of them must be inaccessible to the child so as not to cause injury. The fittings must not have sharp elements.
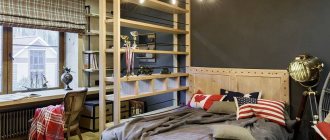
Designing a children's room for a boy
A children's room for a boy, its design and arrangement should correspond to the age, temperament and interests of the baby.
Of course, the decor in a room for a little boy and a teenager will be significantly different.
However, there are several basic rules that apply to a child’s room of any age:
- Items and materials used to decorate a boy’s room must be natural, safe, non-allergenic and comply with sanitary standards.
- Furniture should be reliable, non-traumatic, comfortable and age appropriate.
- When decorating, use bright colors and shades, but not aggressive ones. Give preference to wallpaper with educational pictures.
- It is very important that the room is well lit both during the day and in the evening, so provide your child with the brightest room for a children's room.
- For curtains, use natural organza or tulle, which transmit light well and are not flammable. For curtains, choose materials such as cotton and linen. Also use blinds to darken the room during the day.
- Fix and secure all furniture and heavier structures. Fabrics - curtains, curtains, bedspreads, bed linen - must be strong to withstand washing.
- Zone the room with different wallpapers. Do not use small decorative items: you can completely discard them when equipping a children's room for a boy.
This way you can provide your son with an excellent room that will take into account all his interests.
Cardboard as a material for furniture
Children's furniture made of cardboard can be quite durable and functional. Of course, caring for it will be a little different. In particular, such products will be afraid of moisture.
Modular sofa or ottoman in the shape of a cube. The principle of their manufacture is the same, only the sofa elements will have backs. To work, you will need boxed cardboard with a corrugated insert inside.
Boxes are needed for a large area from large household appliances or furniture. You will also need upholstery fabric, foam rubber, PVA glue, a furniture stapler, a stationery knife, and a ruler.
First, on a piece of whatman paper you need to draw a template in the shape of a square for the child’s height and attach to it a vertical rectangle also for the child’s height. This is the back. The whole pattern will look like an inverted letter H. For the ottoman you need a pattern in the shape of a square.
Cut out a template and use it to cut out approximately 50 identical pieces from cardboard. You also need to cut about 100 strips, equal in height to the entire future module, and in width to the back or slightly narrower than it. 200 strips need to be cut according to the height of the seat. Glue the strips in pairs. These will be spacers between the workpieces.
First, you need to glue gaskets to the first blank: a long one in the back area, and a short one where the seat is, one closer to the middle, the other to the edge. Glue the second piece to the spacers, aligning it with the first. Glue the spacers to the second blank again, then the third blank.
And repeat this until the last piece is glued. Each time you need to check that the workpieces do not move out. At the end of this stage, you will already have a chair frame, which needs to be placed to dry the glue for about a day.
Cover the frame with whatman paper on all sides and dry again. Cover the seat, back and top of the back with foam rubber and dry.
While the glue dries, you need to sew the cover on the chair so that it fits from top to bottom. Put it on and secure it from below with a furniture stapler. The module is ready.
Area of use of stainless fasteners- Modern do-it-yourself book shelf: drawings, diagrams, options and best bookcase designs (140 photos)
How to make a mini bar with your own hands - the best ideas for a modern bar counter at home and in the country (75 photos)
By making two or more modules, you can give your child creative freedom and allow you to arrange them in any order: in the shape of a sofa, as separate armchairs, in a semicircle, etc.
Thick foam
Do-it-yourself children's play furniture made from 30-density foam rubber will not only be comfortable, but also light. The child will be able to use it for its intended purpose, rebuild it for playing bus or plane, or place it in a playhouse at the dacha.
A modular sofa made from foam rubber is even easier to make than from cardboard. You will need to cut only 5 blanks in the shape of the letter L, in which the seat is slightly thicker than the back. Glue the pieces together with PVA glue.
Place batting or felt on the seat, back and top of the back so that the child does not feel the joints. All that remains is to upholster the chair with plush or other thick soft fabric.
You can give your child a sofa, for which you will have to glue 10-15 blanks, and a couple of armchairs. Such upholstered furniture for a nursery will decorate not only the room, but also any playhouse or loft bed.
Furniture assembly services
We provide services not only in Moscow, but also throughout the Moscow region. If you need furniture assembly in Moscow or furniture assembly in the Moscow region, then we are happy to offer you a comfortable service. We have many different services related to furniture installation. For example, we can assemble furniture and transport non-dismountable furniture. We have comfortable transport and qualified craftsmen for you.
Our craftsmen will disassemble the furniture during the move, load it into the car and assemble it in the new place. We deal with all types of furniture. We are glad to offer you installation of cabinet furniture and upholstered furniture. Well, we can also assemble luxury furniture. Residents of the capital and Moscow region willingly trust us with this difficult work. Of course, you can rely on our assemblers. In addition, the furniture assembly service is inexpensive.
Our service is:
- operational work;
- arrival of installers at a time convenient for you;
- travel to any point in Moscow.
Plywood furniture
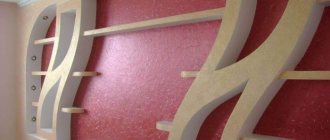
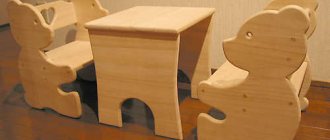
From thick plywood you can make almost any piece of furniture for a child, from a table to a loft bed. You need thick plywood, 1.5 cm or thicker. To work with it, you must have the skills of carving with a jigsaw, since you will have to round corners, cut out smoothly curved edges and round elements.
How to make an ottoman with your own hands: 70 photos and videos on how to make comfortable and beautiful furniture for your home- How to make a stool with your own hands: a step-by-step master class on making a stool. 125 photos of ideas and examples of their production
Do-it-yourself furniture restoration: a review of the best ideas and options for restoring furniture for beginners (150 photos and videos)
So, for example, for a loft bed it is necessary to draw and cut out the entire side parts, without seams. In one of them, cut rectangular holes-steps with rounded corners. The back and front walls of the bed are rectangles, the corners of which are also rounded.
The bottom of the bed is a rectangle of the same width as the front and back walls, and the length corresponds to the height of the child. You also need to drill or cut holes in the bottom to ensure ventilation of the mattress.
Connect the bed parts using self-tapping screws, the heads of which should be flush with the surface or recessed into it. Position the bottom so that there are sides on the sides.
The bed can be painted or varnished. Place a mattress on the bottom and you can provide it to the child. The play area, or attic as they used to call it, will be located below the bottom, which is why steps are needed to climb up to the sleeping place.
Pallets
Pallets are wooden boxes or pallets with low sides that are used to transport furniture or other goods. They have long been adapted for garden furniture.
You can also make children's furniture for playing with your own hands. Just before giving the pallets to your child, you need to make sure that they are perfectly smooth and will not leave splinters on his palms.
How to make a bench with your own hands: step-by-step instructions on how to make furniture with a back (105 photos)Instructions on how to assemble a computer desk - step-by-step instructions and features of assembling a computer desk (100 photos)
Do-it-yourself kitchen table - drawings, diagrams and a master class on how and what to make a table from (85 photos and videos)
It doesn't hurt to paint them in fun colors. From such pallets, a student can build a rack, a couch, a bench and other furniture. parents can help him or provide him with opportunities for creativity.
When looking at photos of homemade children's furniture, it is not always possible to distinguish it from factory furniture. At the same time, it will cost several times less or even be free.
Making a bed
A sleeping place for a child can be easily equipped from scrap materials. Use chipboard or MDF boards, as well as solid wood. For supports, bars of the same length are processed. It is better to make the bottom from lamellas rather than plywood. This is a more labor-intensive process, but this way the crib will be better ventilated.
To make surfaces even and smooth, use sandpaper.
Children's furniture can be varnished or painted. To do this, choose special non-toxic compounds.
The rest is purchased in specialized stores or ordered online