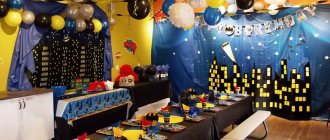
A child's birthday is a special holiday that should take place in an atmosphere of joy and fun.
Balloons, garlands and various inscriptions hung in the room will charge the birthday person with positivity and happiness from the very morning.
Buying jewelry is not difficult, but not everyone can afford it. It is much more profitable and interesting to create beauty with your own hands.
A number corresponding to the age of the birthday person is an original way to transform a room and delight the little creature.
Making numbers
Most often, small balls are used to create such decorations. But not everyone can make an air number for their birthday on their own.
There are other, no less beautiful options:
Photos of birthday gifts
Read here - DIY decorative fireplace: how to build and decorate a false fireplace. Secrets of making a decorative element (90 photos + video)
Help the site, repost 
0
From cardboard
You will need a large (or not so large) unnecessary box. On it you should draw a beautiful number corresponding to the child’s age, and then cut it out.
Next, the cardboard base needs to be decorated: painted with paints, covered with bright scraps of fabric or wrapped with floral film.
From photographs
A kind of collage made on a cardboard figure.
Photo cards should be selected in advance and arranged according to the desired pattern.
Original ideas
Before starting work, we carefully consider how the number should look, what size and thickness it will be, determine the color scheme, and surface texture. A lot of ideas can be gleaned from photographs of finished products.
The color of the craft can be uniform, two-color, or variegated. Colors can be arranged in spots, stripes or as a frame.
An excellent combination for the holiday - red and white. By gluing images, you can reflect a certain theme in the product - Africa, the underwater world...
Humor is appropriate: we put a hat on it, glue on ears, and tie bows. The number can be golden and solemn, or bright green with cheerful daisies, whatever you like, the choice is yours.
From flowers
The cardboard blank must be pasted over with many flowers made from colored or corrugated paper.
The decorations should be laid out closer to each other, and in this way fill the entire base with them.
What you need for work
The craft can be more or less complex, but in any case you will need the following: thick cardboard of a suitable size; scissors and stationery knife; pencil; ruler; To decorate the surface, any glue that bonds paper well is suitable, but it is preferable to use “Moment” or a glue gun; for the volumetric version you also need adhesive tape.
The rest of the materials depend on the design chosen: paints, napkins, corrugated paper, compasses, stapler, additional decorations.
From buttons
If you have a large number of buttons, you can paste them over a cardboard base.
Volumetric figures
If there is still time before the name day, then you can make a three-dimensional birthday figure with your own hands, which the baby can play with and move around the room.
The same cardboard is used as the basis, only this time you will need two identical parts. In addition to them, you need to prepare several cardboard strips of the desired width - these are the sides of future beauty.
You can assemble the number using masking tape or tape: to do this, glue the parts to each other one by one.
How to make a voluminous base
Since some skill is required to accurately make three-dimensional numbers from paper, small-sized crafts can be recommended for beginners.
We draw the intended number on cardboard, cut it out, then another one of the same kind. For the walls we cut out strips; their width should be equal to the thickness of the future craft.
We recommend reading:
- DIY polymer clay jewelry: review of the best master class with step-by-step instructions for beginners (150 photos of original ideas)
- DIY polymer clay flowers (120 photos of the best ideas) - simple instructions with full description + master class and video tutorials
Quilling for beginners (200 photos) - step-by-step instructions with description. The best master class on creating quilling crafts with your own hands
Using tape, we attach the strip to one of the blanks in the form of sides, put the second part on top and secure it in the same way. We cover the connection lines with strips of paper intended for decoration.
From napkins
To create a “fluffy” figure, in addition to napkins, you will need a lot of patience. But this is nothing compared to how happy the little birthday boy will be.
The process of creating a decoration is quite simple: a napkin (single-layer) must be folded in four and cut - you should get four squares. They should be stacked on top of each other and secured in the center. Wire, stapler or thread can help with this.
The sharp parts of the resulting part need to be cut off so that the final result is a circle. Then cut through the edges without touching the central part. All that remains is to lift and straighten the petals.
Note!
Crafts for the home made of fabric: we sew toys and decorations with our own hands (98 photos + video)- What crafts can you make from boxes with your own hands? 79 photos of great solutions for children
- Crafts from newspaper tubes: step-by-step instructions for the weaving process. 105 photos of newspaper crafts!
This creates one flower. To cover the figure completely, you will need quite a lot of them. Having prepared the required amount, you need to glue the flowers to the base, filling the entire space with them.
Personalized craft design
Today, any decor can be ordered or bought in a store, but only you know the tastes and desires of your birthday person and, based on the instructions on how to make a number correctly, you can create something individual that reflects the personality of the recipient.
So, for a little girl, a delicate pink and blue color scheme, a fluffy texture of flowers, and elements of jewelry are suitable.
Decorations for a more strict number of a birthday boy can be, for example, pictures with cars, animals - depending on interests. We take into account the child’s temperament, his favorite color, and hobbies.
Corrugated paper
A large birthday number decorated in this way will turn out simply incomparable.
In order to create beauty you will need a large amount of corrugated paper. It would be better if it were multi-colored. You should cut the paper into strips of half a meter.
The optimal width is 3.5 cm. At this stage, you need to monitor the veins on the paper: they should be directed along the future flower.
Then you should stretch the strip on one side. Hold the workpiece in waves upward and, grabbing the base, wrap it around its axis. Secure the bottom of the flower with thread or wire. Spread the petals of the resulting rose.
Note!
- Crafts for beginners: tips and ideas from a guru on creating beautiful things with your own hands (96 photos)
- Children's crafts: inspiring ideas for hobbies and hobbies for all ages + 56 photos
- How to make beautiful simple crafts with your own hands - step-by-step instructions for beginners + 62 photos
Cover the cardboard frame with flowers. For convenience, you can use a glue gun.
Paper flowers for covering
The original numbers made from corrugated paper look very nice. They are made like this: a cardboard base is covered with paper roses.
We cut strips of the same size, approximately 5 cm wide, up to 50 cm long. The shorter the length of the strip, the smaller each flower will be, therefore, more of them will be needed.
We bend the edge of the strip half a centimeter, roll it into a roll, tie it with thread at the bottom, the rose is ready. You need to make enough of them to completely cover the entire craft.