What does the chair-bed consist of?
In general, there are several varieties of the described device. However, each of them has those components that are similar to each other. Thus, the following aspects can be highlighted:
- Frame. It is also possible to consider in several proportions. By choosing steel material, the user is assured of durable operation. If we talk about aluminum, it is very important to emphasize its inherent qualities such as reliability and guaranteed strength.
ATTENTION! However, the product is not suitable for daily use. As for wood, special conditions for use are required. This includes not only a certain temperature, but also a special humidity indicator.
- Folding mechanism.
- Bed.
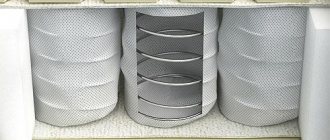
- Filler. When choosing it, it is recommended to place special emphasis.
- Linen box. Often, manufacturers equip the design with such a product, which adds additional positive aspects.
How does a chair bed function?
The answer to the question directly depends on the model of the bed. Thus, the following can be highlighted:
- Eurobook. The process takes place by pulling out the lower part of the furniture. Due to this, it becomes possible to expand the other part.
- Harmonic. Two sections fold out to reveal a third that functions as a seat.
- Roll-out mechanism. The name speaks for itself. The inverted base forms two sections.
- Click-clack. The main part rises, which means the blockage is removed and a solid mattress is formed.
- Dolphin. The part that folds out is located under the base; after it is pulled out, it transforms into a regular sofa.
Preparation
First you need to prepare the materials and tools for making a chair-bed. For the frame, it is better to take wooden blocks, which will provide the necessary strength. For the side parts, DPS is suitable (it is better to take 18 or 20 mm thick), and for the folding part you will need plywood 10 mm thick.
You can use foam rubber as a filler for covering. If you use solid sheets, the product will retain its shape longer. You should also prepare the upholstery fabric in advance.
The tools you will need are a jigsaw or a hacksaw, a drill, a screwdriver, a stapler and staples for it, and scissors. A pencil and tape measure will be needed for marking, and PVA glue and screws will be needed to assemble the elements.
Required Tools
What you will need:
- washers;
- 8 pieces of screws;
- 2 springs;
- 2 plugs;
- nuts;
- screwdriver;
- screwdriver
Step-by-step instructions on how to assemble a chair-bed
Follow the following sequence:
- It is advisable to first keep the parts in a warm room for at least two hours.
- Make room and prepare the necessary items.
- Place the packaging materials on the floor and unpack the products.
- Install the brackets on the sides and secure with screws and washers.
- Fix the supports and attach the nuts. Do the same with checkboxes.
- After which you can begin installing the drawer. For this you will need fastenings.
- The spring and plug should also be secured.
- Secure the sides to the mechanism with screws.
- Attach the backrest and make sure the structure is secure.
How to install a chair-bed correctly
When choosing a place that is suitable in your opinion, you should take into account not only personal preferences, but also adequately assess the situation. Thus, the size of the structure itself also influences the result.
REFERENCE! Naturally, it is recommended to choose the position directly under the structure in the unfolded version. And this is understandable, because when assembled, the furniture takes up less space. As a result, the device should not be in the way in the room, and its disassembly should not be complicated.
Simple DIY chair-bed
A chair-bed is the optimal solution for small spaces, as well as in case your guests want to stay overnight. This chair does not take up too much space, but will perfectly replace a full-fledged sleeping place.
The mattress is made up of homemade flat pillows: the base of the seat and two pillows for the back. The chair is equipped with a drawer for bed linen. It folds and unfolds easily. To build such a chair-bed with your own hands you do not need any special professional skills - even a beginner can cope with the task.
So, the chair consists of two parts, fastened together with ordinary one-piece metal hinges. Let's see what we need to make a chair-bed ourselves.
Materials:
– 8 boards of the same length for making the frame of a chair-bed; – 8 strips to strengthen the frame in the corners; – slats for the base of the chair, on which the pillow will rest; – slats and two strips for making a base board for the second part of the chair; – plywood panel – the bottom for the main part of the chair; – three pieces of furniture foam rubber 100 mm thick: two narrow for the back and one wide for the seat; – any suitable fabric for pillows; – furniture screws or ordinary wood screws; – furniture glue if desired; – any product for protective and decorative treatment of wood; – furniture varnish if desired; - nails; – metal one-piece hinges: large for connecting two parts of the chair-bed and small for fastening the shield in the bedding compartment.
Tools:
– hand-held circular saw or jigsaw; - Miter saw; – vibrating or orbital sander; – drill and wood bit; – screwdriver; – construction tape; – clamp for drilling at an angle; - pencil, square.
Step one: selection and preparation of materials
To make a chair-bed, you will need boards with a thickness of at least 30 mm and slats of suitable cross-section for the base of the pillows. Replace the plywood - the bottom of the bed linen box - with a sheet of fiberboard or chipboard if desired. Prepare 8 pieces of wood to reinforce the chair-bed frame in the corners.
Description of work
You should start working with measurements. If there is a specific room where the chair will be placed, then we can determine the width of the product, its length when assembled and unfolded. The decision is individual, so the length can be tailored to the height of a particular person. In addition, the height of the back and armrests is important.
The minimum width of a sleeping place is 60 cm; narrower designs are inconvenient to use.
Knowing the dimensions of the chair-bed, it is easy to calculate the consumption of materials. For clarity, you need to make drawings of the chair-bed with your own hands and indicate all dimensions.
Materials and tools
We determine what materials are needed to make the frame; only durable ones will do:
- 10 mm plywood for the folding part;
- Chipboard (laminated chipboard) for sidewalls with a thickness of 18-20 mm;
- Fiberboard or hardboard on the bottom;
- bars on the frame of the folding part.
Many people prefer laminated chipboard - an inexpensive, low-toxic, easy-to-process material that will last at least 10 years. Comfort when using the chair depends on the quality of the internal filling. It is better to sheathe the frame with foam rubber. Use only solid sheets of foam rubber, then the seat will not sag and will retain its shape and appearance longer.
You will need a set of tools:
- stapler with staples;
- screwdriver;
- hacksaw (jigsaw);
- scissors.
To mark parts, use a large metal or wooden ruler, tape measure, or sharp pencil. To assemble the frame parts you need to have screws and glue.
Case manufacturing
Based on the diagram, we cut out the parts of the chair body and the folding part; we take the dimensions of all parts from the drawing. We cut 4 squares out of plywood. 3 pieces will go to the sleeping part, one will go to the back. The cut can be done with a hacksaw or jigsaw.
- 6 pieces for the longitudinal part of the berth;
- 7 pieces for crossbars;
- 4 pieces for folding legs.
Mark the connection points of the parts and drill holes with a drill. We cut out armrests from chipboard, which we bolt to the main part of the structure. All parts are fixed using furniture screws into pre-prepared holes of smaller diameter. Foam rubber is glued to the sides, back, and parts of the bed.
Sheathing
There are many types of materials for covering upholstered furniture. This is a practical, easy-to-clean flock, and velor is not inferior to it in strength and color fastness. Upholstery made of tapestry and jacquard will look good in the interior. Nowadays chenille is a popular type of jacquard.
We cut the fabric, taking into account the thickness of the foam rubber and the dimensions of the structural parts. We disassemble the chair, cover each element with a piece of fabric, and fix it with a stapler. The body is made; to start using the chair-bed, all that remains is to connect the parts.
Installation of the mechanism
Operating conditions and the size of the room dictate the choice of transformation mechanism, there are several of them:
A roll-out mechanism is the best solution for a novice master. This mechanism is the most reliable in operation. To organize a sleeping place, you need to move two sections forward and lower the backrest to a horizontal position. To connect parts, you should use piano hinges and bolted connections. Using this transformation mechanism, you get a linen box located at the bottom of the box.
The disadvantages include the fact that when assembled, a model with a roll-out mechanism looks bulky, but its reliability and the presence of a linen drawer justify the choice.
DIY chair bed: drawings and manufacturing diagrams
If you make a chair bed with your own hands, you can not only save a lot of money, but also get at your disposal an interior item of the desired design, color and size. Purchased products do not always differ in the quality of workmanship and materials used. Personally assembled furniture will meet all the criteria of environmental friendliness, convenience and reliability. To carry out this process, you will need a little free time, a set of household tools and the ability to use them.
Deciding on design and construction
Before you start making a folding chair bed, decide on its design.
Important! When choosing a design, factors such as convenience and safety of operation of the product and ease of maintenance should be taken into account.
There are such types of designs of this furniture:
| Frame. | It is a wooden base onto which the soft part is attached. The parts are connected to each other with hinges; rollers can be used. The finished product is heavy and stable. |
| Frameless. | It consists of several fastened pillows that transform into a full-fledged sleeping place of the 60-80 cm standard. Due to the absence of armrests and a rigid base, the seat can be easily unfolded without clinging to the sides, has a low weight and compact size. |
How to update: step-by-step instructions
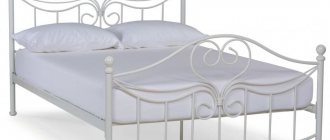
To reupholster the headboard, you need to disassemble the bed and remove the staples from the old upholstery. It is desirable that the surroundings be clean and that the parts are not mixed with other things. During the work, your bedroom becomes a mini-workshop. Step by step procedure:
- Remove damaged upholstery from the headboard.
- Remove the existing screws from the headboard to release the inserts (if any).
- Check if the foam is damaged.
- Prepare new fabric: iron it if necessary.
- Cut out the shape for the headboard so that you can wrap at least 5-10 cm around the edges (before you start cutting, trace the outlines with chalk, as for a pattern).
- Carefully secure the wrapped fabric along the edge with a staple gun (the distance between the fasteners is 20–30 cm).
- Check again that the fabric has no folds or unevenness and is well stretched.
- Cut out the shape for the buttons with a small margin.
- Using a circular motion, sew around the shape of the same fabric with strong threads so that at the end it can be pulled into the bag.
- Insert a button into the center of the form, tighten the form so that you get a large button pulled into the fabric.
- First, use a needle and then a stapler to attach the finished buttons to the headboard, already covered with new fabric (work with the stapler from the reverse side so that no traces of fastening are visible).
- Place the finished headboard in place.
If the headboard consists of separate parts (inserts), for example, on the sides or in the center, then they will all need to be covered with new fabric. Then the inserts will need to be re-screwed. Each part requires a separate pattern.
Attention
Buttons decorating the headboard are best placed centrally and in one line. It is also acceptable to use a larger number of decorations, which are arranged in a checkerboard pattern.
Leather and eco-leather
When upholstering with leather, the procedure is the same, but keep in mind that this material is thicker, it will be difficult to nail it to the headboard and stretch it without folds and wrinkles. The fabric is attached to the sides and in places that are not visible. It is also nailed along the edges with nails with large heads.
For reupholstery:
- Choose wear-resistant leatherette or eco-leather in the store.
- Disassemble the headboard, cut out the desired shape of the material along the contour with a grip of at least 10 cm.
- Pull well before stapler (start at corners).
Important
Leatherette is a very pliable material. It can be pulled directly onto a wooden surface to prevent the leather from stretching or sagging in the future.
Fabric
If the bed has a regular plywood or wooden headboard, then it can be visually improved by covering it with a beautiful fabric. To drag:
- Disassemble the bed, remove the entire bed and mattress.
- Release the wooden base.
- Using a utility knife, cut the foam padding to the size of the headboard.
- Glue the foam form onto the wood and secure it with a stapler.
- Cut the material to the size of the headboard with allowances of at least 15 cm, stretch, and secure the edges with a stapler.
Check that there are no folds. To additionally secure the headboard to the bed, you can use several wooden planks.
It is better to choose a fabric for upholstery that is very durable and abrasion-resistant. For beauty, textiles that imitate tiles, wood or antique panels are often chosen.
Advice
If you have experience, you can create a royal headboard by cutting out a beautiful shape with a jigsaw or saw and covering it with red or blue velvet with gold accents.
The video shows the process of reupholstering a bed with fabric:
Upholstery of the back of a polished crib
Polished furniture may develop scratches over time, spoiling the overall appearance. To eliminate the shortcoming, you need to reupholster the headboard. To improve the crib:
- Disassemble the body into pieces, remove any upholstery, if any.
- Glue the foam rubber, secure the fabric cut to the desired shape with a stapler.
- Reassemble the crib with a new headboard.
Advice
You can reupholster not only the bed, but also children's sofas and armchairs. For furniture, choose heavy-duty, but preferably natural materials.
How to make a carriage tie?
A carriage tie can transform any bed. Making it is not as difficult as it might seem. And most importantly: the method does not require large expenses at all. On average, for a standard double bed you will need to make 25 holes , which will then be pulled together, creating the effect of an unusual carriage pillow. Main material: cheap foam rubber, which can be bought at any hardware store.
For carriage screed:
- Free the backrest by removing the old upholstery.
- On clean wood or plywood of the headboard, apply a diamond pattern for the future screed.
- At the intersection points of each diamond, drill a hole with a diameter of at least 10 mm (there should be approximately 25 pieces).
- Sand the surface and hole so there are no nicks.
- Cut the foam to fit the area of the headboard.
- Glue the foam rubber to the headboard, secure it along the edges with a stapler (you can use special foam glue, for example, W-18).
- Apply the same diamond-shaped pattern to the foam base and make the finished holes wider using a tube or furniture support (two fingers should fit into the hole).
- Cut the fabric slightly larger than the size of the headboard to leave room for hems.
- Straighten the material over the headboard, gather it in the area of the holes to create beautiful folds.
- Use a wide needle to secure the fabric inside the holes and cover the hole with a wide button.
The buttons are usually covered with the same material as the entire headboard.
Advice
Before applying the design, make a simple sketch on paper. This way you can determine whether elongated or regular diamonds are right for you, how wide they should be and how many of them to make in general.
You need to chamfer the foam along the edges, then the finished headboard will look more rounded. When marking the foam, check that all corners are on the same line. To cut wide holes in the foam rubber, it is better to use a furniture tube (support), which must first be sharpened. Then the holes will be perfectly straight.
The sketch is drawn from the center: first into squares, then into rectangles, and then into rhombuses. Don't forget to leave an edge around the perimeter. Once everything is agreed upon and ready, transfer the drawing to the base. Start screeding.
If you decide to replace the headboard, then choose:
- high-quality MDF;
- laminate;
- plywood;
- or natural wood.
Sometimes such a base is attached directly to the wall.
The video shows how to reupholster the headboard with a carriage tie:
How to update a chair-bed?
The peculiarity of this furniture is that it is quite narrow and consists of a row of pillows. Each piece will have to be reupholstered with new fabric, including the sides, which may take time. If the frames have rotted or crumbled, then you will have to change them too . For reupholstery:
- Remove old upholstery from the recliner cushions.
- Replace broken parts (springs) with new ones.
- Cover the pillow with foam rubber.
- Open the mold for the new upholstery, stretch it, and then secure it with a stapler.
- Using the same method, tighten the seats and sides of the chair-bed (make sure that the material does not wrinkle at the corners).
Reference
Re-upholstery may take 1-2 days. But the result is worth it: after changing the upholstery, an old chair-bed can still last an additional 5–10 years.
The video shows the process of reupholstering a chair-bed:
Drawings and diagrams
To properly make a chair bed with your own hands, the drawings of each detail must be carefully thought out and checked. It is necessary to provide for all the nuances, including the installation location, the presence of furniture nearby and the procedure for cleaning soiled upholstery. Thus, frameless models when folded should be close to the wall so as not to tip over backwards
The dimensions of the bed chair can be arbitrary, but the dimensions (width, height, length) should be calculated for an adult.
The recommended data is as follows:
- thickness of the soft part – 10 cm;
- length when unfolded – 190 cm;
- width – 60-80 cm;
- Seat height when folded is 35-45 cm.
The diagram shows the following elements of upholstered furniture:
- frame in detail;
- loops;
- guides;
- legs;
- armrests;
- folding mechanism;
- patterns for covers.
Based on the drawing, calculations are made of the tool needed for the job.
Required materials and tools
The question of how to make a chair bed with your own hands should be approached creatively, but economically. In the apartment and at the dacha you can find the necessary materials and equipment.
To assemble upholstered wooden furniture you will need the following tools:
- roulette;
- stationery knife;
- hacksaw;
- plane;
- square;
- electric drill;
- screwdriver;
- construction stapler;
- scissors;
- marker;
- sewing machine.
To make a folding chair with a soft part made of foam rubber, the following materials are needed:
- wooden beam;
- chipboard;
- plywood;
- PVA glue;
- acrylic paint or wood varnish;
- sandpaper;
- screws;
- bolts with nuts;
- upholstery fabric;
- metal loops;
- detachable zippers;
- rollers.
This is a short list of necessary accessories. Hardware for connecting parts of the chair into a single structure can be purchased in specialized stores.
Attention! Buy upholstery material that is dense and strong. It should last for many years, subject to constant mechanical stress and regular washing.
The nuances of making a frameless model
Frameless chair-beds are preferred by young people. This type of furniture is practical and corresponds to modern fashion. The frameless chair-bed has no rigid parts; it is a transformer assembled from pillows.
Having several frameless chairs, you can combine them: make a sofa, move it to different ends of the room, placing it near the TV or coffee table. No carpentry work is required; for the work you will need a sewing machine, scissors, a ruler, and chalk.
The chair-bed can be made from sheets of foam rubber 10 cm thick. Glue them in pairs using PVA construction glue. We cut out the dried layers using a ruler and a marker, cut exactly according to the markings with scissors, we get the blanks:
- square 80x80 cm – 2 pcs;
- rectangle 30x80 cm – 1 piece;
- rectangle 20x80 cm – 2 pcs.
The pieces cut to size are 20 cm thick. The next step is cutting the fabric. While working, it is important not to forget about the seam allowances; they should be at least 2 cm; where the zipper will be sewn in, the allowance is larger - 3 cm.
When sewing parts, use braid for strength and durability of the seams.
Spare no time and money - sew 2 types of covers. Some are rough from inexpensive mixed fabric, the second are elegant from high-quality furniture fabric. You will get several rectangular blanks, folded in half; they are equal to the size of the foam rubber blanks. The parts are assembled into a single structure using zippers sewn into the covers. You will need 7 zippers, each 80 cm long. Now you know how to make a chair-bed with your own hands, you can take the proposed ideas as a basis, and come up with a more original solution for your apartment and implement it.
Manufacturing process step by step instructions
If working at home, prepare a spacious area for assembly. If possible, it is better to carry out sawing and polishing in a separate room or outdoors. If this cannot be done, then you should take the flowers out of the room and cover the furniture with construction film to protect it from dust and sawdust. When working with wood and a stapler, it is recommended to use assembly gloves to avoid rubbing calluses and to avoid splinters getting into your hands.
Important! During the assembly period, it is better to remove pets and children from the room, as they could be injured by the sharp edges of the tools or damage something.
Case manufacturing
It’s better to make the chair frame with someone, but you can do it yourself. An assistant will be needed when connecting the vertical and horizontal parts.
Housing assembly sequence:
- Based on the calculations and diagrams, the components of the frame are cut out and polished - vertical posts, middle slats, railing parts, bases for the seat and backrest.
- The sides are assembled using furniture screws. Their mirror compliance in all parameters is checked. If these parts are open, then balusters are inserted. The closed type product is sheathed on the sides with plywood.
- The backrest is attached to the rear pillars. Its size corresponds to the parameters of the seats.
- Guides are installed for the movement of the rollers. These pieces will serve as the base for the pillows.
- The bottom of the box is covered with plywood, and its top is covered with a hinged lid.
After checking the compliance of the dimensions with the calculated data, the structure is reinforced with transverse bars.
Installation of the mechanism
Products with a folding mechanism are convenient to use. Thanks to this device, the pillows are firmly fixed in the desired position. When purchasing a part, be sure to obtain installation instructions from the seller.
The frames of the base and seats are fixed in a given position. For this purpose, supports and tape are used. To be sure, it is better to take thin and long screws. When the structure is fixed, you need to attach both parts of the mechanism to it and make marks for drilling. After making the holes, the parts are bolted and lubricated at friction points.
Before further assembly, it is recommended to check the correct installation of the transformation mechanism. It should work gently, without any effort.
Sheathing
You should start by making patterns. It is advisable to first design the process. It is better to do this using two sheets of A4 paper. The canvas and parts that will be used for upholstery are cut to scale. After this, the optimal option for cutting the material is determined by trial. From the resulting patterns, covers are sewn with an allowance of 3 cm for fastening.
Then the side parts are finished. They are covered with 20 mm thick foam rubber. Fastening with brackets is carried out on the lower part.
100 mm foam rubber or 2 layers of 50 mm each are glued to the seat base. When the glue dries, the cover is pulled over the pillow. Nailing is carried out in the direction from the centers to the edges.
Decorating a bed chair
To give the finished product an original and stylish design, the following decoration options are used:
- embedding spotlights into the façade sidewalls;
- armrest trim with LED strips;
- covering with tapestries or embroidery;
- sewing appliques to covers;
- gluing mosaics to legs and balusters.
If time and opportunity permit, you can sew several replacement covers for all occasions. This option will allow you to quickly remove dirt or choose decor to suit your mood.
Almost classic furniture
The proposed chair-bed is such simple furniture that you simply won’t need drawings. Such furniture can always be offered to a guest for sleeping. Traditional materials - wood, plywood, polyurethane, textiles - make it a reliable support for many years.
Materials and tools
- For the production of the frame (backrest, railings, seat base) high-quality sheet plywood and boards will be used.
- Glazing beads.
- Saw.
- Furniture hinges.
- Self-tapping screws.
- Screws with nuts.
- Electric drill, drill bits.
- Wood glue.
- Grinding machine with attachments of different grain sizes.
- Varnish or paint for finishing.
The dimensions of the parts can be selected independently depending on personal preferences and capabilities.
Description of work
- First of all, we assemble the sides of the chair. The frame consists of parts:
- vertical racks, the lower part of which will serve as legs;
- three middle bars;
- bottom crossbar;
- railing
Before assembly, the components should be processed: remove roughness, smooth out corners. Drill holes for glazing beads in the lower part of the railing, lower crossbar, and vertical elements. Connect the structure with glazing beads and glue. The main thing is to prepare the same parts for the right and left parts so that they are mirror identical.
- Glue the decorative strip to the railing, moving it 2-3 cm to the front.
- Attach the bars to the bottom crossbar of the inside of the railing with self-tapping screws. This is where the base for the seat will be mounted.
- The back of the chair can be made in a similar way, but completely symmetrical and without legs. That is, the lower crossbar is installed at the ends of the side ones. The back of the chair will not be installed on the floor, but higher, so you don’t have to increase the height of the parts.
- Measure the length of the lower back. This size is the side for 3 identical squares that form the base and the fold-out bed. We make the side parts from bars, the bottom from plywood. For structural rigidity, we install additional bars in the middle of each box. All connections are made with self-tapping screws.
- We install hinges on the boxes, 2 for each connection, so that when unfolding we get a smooth surface.
- We lay the folding parts between the sidewalls. We fasten the bottom box with 4 screws to the sides, as can be seen in the photo.
- Install the backrest of the folding chair. The bottom edge of the backrest should be just above the edge of the top box. Thus, this part will not suffer from unfolding/folding, and will not interfere with transformation.
- Measure the height of the chair legs. You need to decide whether the legs will be on a folding part with a folding mechanism or made separately and attached.
- Cover the surface of the chair with varnish or paint, depending on which finishing method suits you best.
How to make a new chair-bed more comfortable with your own hands is up to you. You can decorate it with many beautiful pillows or equip it with a bright, tri-fold mattress.
DIY chair bed: drawings and manufacturing diagrams
If you make a chair bed with your own hands, you can not only save a lot of money, but also get at your disposal an interior item of the desired design, color and size. Purchased products do not always differ in the quality of workmanship and materials used. Personally assembled furniture will meet all the criteria of environmental friendliness, convenience and reliability. To carry out this process, you will need a little free time, a set of household tools and the ability to use them.
Deciding on design and construction
Before you start making a folding chair bed, decide on its design.
Important! When choosing a design, factors such as convenience and safety of operation of the product and ease of maintenance should be taken into account.
There are such types of designs of this furniture:
| Frame. | It is a wooden base onto which the soft part is attached. The parts are connected to each other with hinges; rollers can be used. The finished product is heavy and stable. |
| Frameless. | It consists of several fastened pillows that transform into a full-fledged sleeping place of the 60-80 cm standard. Due to the absence of armrests and a rigid base, the seat can be easily unfolded without clinging to the sides, has a low weight and compact size. |
Decor of objects Interior Modeling design Remaking old furniture Armchairs
Hi all! Me again . This time I decided to redo the chairs. This is what happened. The first chair. Instead of legs, they made wheels to make it mobile. I like it. The combination is called “Turquoise in Chocolate”
Now the process. The chairs were old and very bulky due to the huge armrests. They took up a lot of space. I wanted to make them easier. Since they were renovating, I needed a certain color, a bright spot that would match the sofa. I was looking for a matching color. quality and price of the material. When I found it, all that remained was to bring it to life. These were the old chairs.
The armrests were removed. The legs were removed; they were simply inserted into the holes.
I wanted a couch-type chair that didn't stop at armrests. This part was cut out of plywood. I was lucky: my niece’s husband was visiting and made my life much easier with male help. He cut it out. It would have taken me much longer to do this. Of course, before that I crawled on the plywood with a piece of wallpaper. trying to make the pattern of the part as accurately as possible. By the way. I took the sides apart twice. First I covered it with foam rubber and only then remembered that I forgot to insert the bolts that would secure the sides. And I made the second chair about two weeks later. I forgot the sequence and having already covered the inside of the side with dermantine, I remembered that the ties had to be hidden under it. I had to take it apart again. Conclusion: you need to do it right away. in hot pursuit.
Drawings and diagrams
To properly make a chair bed with your own hands, the drawings of each detail must be carefully thought out and checked. It is necessary to provide for all the nuances, including the installation location, the presence of furniture nearby and the procedure for cleaning soiled upholstery. Thus, frameless models when folded should be close to the wall so as not to tip over backwards
The dimensions of the bed chair can be arbitrary, but the dimensions (width, height, length) should be calculated for an adult.
The recommended data is as follows:
- thickness of the soft part – 10 cm;
- length when unfolded – 190 cm;
- width – 60-80 cm;
- Seat height when folded is 35-45 cm.
The diagram shows the following elements of upholstered furniture:
- frame in detail;
- loops;
- guides;
- legs;
- armrests;
- folding mechanism;
- patterns for covers.
Based on the drawing, calculations are made of the tool needed for the job.
Required materials and tools
The question of how to make a chair bed with your own hands should be approached creatively, but economically. In the apartment and at the dacha you can find the necessary materials and equipment.
To assemble upholstered wooden furniture you will need the following tools:
- roulette;
- stationery knife;
- hacksaw;
- plane;
- square;
- electric drill;
- screwdriver;
- construction stapler;
- scissors;
- marker;
- sewing machine.
To make a folding chair with a soft part made of foam rubber, the following materials are needed:
- wooden beam;
- chipboard;
- plywood;
- PVA glue;
- acrylic paint or wood varnish;
- sandpaper;
- screws;
- bolts with nuts;
- upholstery fabric;
- metal loops;
- detachable zippers;
- rollers.
This is a short list of necessary accessories. Hardware for connecting parts of the chair into a single structure can be purchased in specialized stores.
Attention! Buy upholstery material that is dense and strong. It should last for many years, subject to constant mechanical stress and regular washing.
Completion of work and summing up
Chair bed upholstery diagram.
At the very end, the folding chair bed is disassembled into its main elements, and the upholstery is formed on it. The upholstery technology is identical for each element:
- The soft part is formed using batting. You shouldn’t skimp on the material, because... in the future it should serve faithfully for decades. You can give it any shape, and glue is used for fixation.
- If you plan to put sewn covers on top, you will have to use spunbond. If just fabric goes on top of the filler, then this step is skipped.
- Covers are sewn for the side panels, and the fabric is simply stretched over the main part of the bed. In any case, a stapler is used for final fixation. The staples are driven point-blank to ensure maximum fixation.
Manufacturing process step by step instructions
If working at home, prepare a spacious area for assembly. If possible, it is better to carry out sawing and polishing in a separate room or outdoors. If this cannot be done, then you should take the flowers out of the room and cover the furniture with construction film to protect it from dust and sawdust. When working with wood and a stapler, it is recommended to use assembly gloves to avoid rubbing calluses and to avoid splinters getting into your hands.
Important! During the assembly period, it is better to remove pets and children from the room, as they could be injured by the sharp edges of the tools or damage something.
Case manufacturing
It’s better to make the chair frame with someone, but you can do it yourself. An assistant will be needed when connecting the vertical and horizontal parts.
Housing assembly sequence:
- Based on the calculations and diagrams, the components of the frame are cut out and polished - vertical posts, middle slats, railing parts, bases for the seat and backrest.
- The sides are assembled using furniture screws. Their mirror compliance in all parameters is checked. If these parts are open, then balusters are inserted. The closed type product is sheathed on the sides with plywood.
- The backrest is attached to the rear pillars. Its size corresponds to the parameters of the seats.
- Guides are installed for the movement of the rollers. These pieces will serve as the base for the pillows.
- The bottom of the box is covered with plywood, and its top is covered with a hinged lid.
After checking the compliance of the dimensions with the calculated data, the structure is reinforced with transverse bars.
Installation of the mechanism
Products with a folding mechanism are convenient to use. Thanks to this device, the pillows are firmly fixed in the desired position. When purchasing a part, be sure to obtain installation instructions from the seller.
The frames of the base and seats are fixed in a given position. For this purpose, supports and tape are used. To be sure, it is better to take thin and long screws. When the structure is fixed, you need to attach both parts of the mechanism to it and make marks for drilling. After making the holes, the parts are bolted and lubricated at friction points.
Before further assembly, it is recommended to check the correct installation of the transformation mechanism. It should work gently, without any effort.
Sheathing
You should start by making patterns. It is advisable to first design the process. It is better to do this using two sheets of A4 paper. The canvas and parts that will be used for upholstery are cut to scale. After this, the optimal option for cutting the material is determined by trial. From the resulting patterns, covers are sewn with an allowance of 3 cm for fastening.
Then the side parts are finished. They are covered with 20 mm thick foam rubber. Fastening with brackets is carried out on the lower part.
100 mm foam rubber or 2 layers of 50 mm each are glued to the seat base. When the glue dries, the cover is pulled over the pillow. Nailing is carried out in the direction from the centers to the edges.
Decorating a bed chair
To give the finished product an original and stylish design, the following decoration options are used:
- embedding spotlights into the façade sidewalls;
- armrest trim with LED strips;
- covering with tapestries or embroidery;
- sewing appliques to covers;
- gluing mosaics to legs and balusters.
If time and opportunity permit, you can sew several replacement covers for all occasions. This option will allow you to quickly remove dirt or choose decor to suit your mood.
Preparatory work
Once the drawings for the folding chair bed are ready, and at the same time the materials have been selected, you can begin manufacturing the wooden system:
Drawing of a bed chair (A—without pillows, B—with pillows laid): 1—first pull-out section; 2 — chair reinforcement bar; 3 — side of the chair; 4 - guide bar; m5 - transverse panel; 6 — pillows (on the chair — regular down pillows); 7 — chair seat; 8 — second retractable section; 9 - furniture corner; 10 — overhead shield.
- At the very beginning, 6 bars of 55 cm each are cut out to mark the length of the bed. They will be positioned in such a way that the last 5 cm overlap.
- Then 5 more beams of 45 cm and 2 of 40 cm are cut out, which are safely fixed at 3 control points of each pair of longitudinal beams. Fixation occurs in such a way that there is always 1 connecting beam, thanks to which the system can fold and unfold back. In order to ensure mobility, you will have to resort to hinges.
- 4 bars of 20 cm each, which will serve as legs for retractable structural elements, are attached to furniture hinges so that they go inward when folded. The hinges themselves are attached not from below to the beams, but from the inside, due to which the likelihood of breakage is significantly reduced.
- For the main element, armrests are made from 50*50 cm chipboard. The fastening is carried out using a washer, so that in case of minor deformations of the structure, no element suffers. Extensions are made on the bottom and top of the side shields (a strip of 50*3 cm), which are directed outward, so that such a step does not disturb the vacationer.
- Using a jigsaw, 4 slabs of 50*50 cm are cut out, 3 of which will be placed as a bed, and the last one will become a backrest. The last plate, if necessary, must be able to tilt back, so you will have to install a movable mechanism with clamps.
Fixation is carried out using furniture screws. But before screwing them in, you need to prepare a narrower hole using a drill.