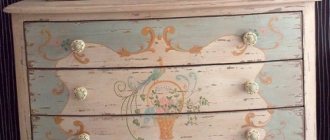
Patchworking was recognized as an art form only at the beginning of the twentieth century. Now many people, using this style, make curtains, bedspreads and bags with their own hands. Some talented individuals, by sewing together various pieces of fabric and waste of natural leather, make unique clothes. Let's consider knitting in the patchwork style for beginners; diagrams, photos and descriptions will help with this.
Not everyone knows patchwork –
product made from scraps, literal translation from English. Historians claim that this technique was used in ancient times. There is an outfit decorated with patchwork patterns that is more than three thousand years old and is kept in the Tokyo Museum.
Rules for cutting and joining parts
This needlework is simple, but if you don’t know the basics of patterns and sew the pieces of fabric incorrectly, you may end up with a vinaigrette rather than a patchwork. First of all, you need to collect the required number of cuts; it is best to take cotton fabric, it does not stretch and irons well. Even if there is a material of a different texture, the product must be assembled from textiles of the same quality.
In order to sew a beautiful product, we draw and cut out a template into the parts from which we will connect the fabric. The diagram itself will help you make the pattern.
- a piece of cardboard or soft plastic;
- ruler;
- pencil;
- scissors.
- Templates for patchwork patterns are sold in special stores; you can make it yourself using the pattern provided. We print from a computer or transfer to size onto cardboard.
- If it is a square, make sure the corner is straight and all sides are the same size. The length of the lines depends on your desire.
- Draw a square on cardboard. Mark the middle of each side and connect the dots. It turned out to be another one, only smaller.
- In the same way, draw another one inside. As a result, four large triangles, the same number of smaller ones, and a small square.
- In order not to get confused, we number all the details.
- From this base you can make many different drawings, and from them interesting templates. Divide the main square into smaller ones, or triangles, rectangles and many more desired shapes. The main thing is not to forget to put numbers or letters on the figures and recalculate how much and what color the required quantity needs to be cut out.
The simplest product is to cut out a tie from four squares. Choose the right range of colors, sew it exactly, place it on the lining, and make the finishing stitch. At the same time, he will learn how to work with a machine and a rag.
Types of patchwork
There are several styles of this needlework; in English Crazy, the flaps are sewn together in a chaotic manner, the seams are processed with ribbons, threads and even beads. The Japanese type is one of the complex ones, it uses silk fabric, it is difficult to work with, it requires a professional. Each joint is finished with a quilted seam.
Knitted patchwork
Any item made in this style looks good, let it be slippers or a sweater. Even novice amateurs who have just learned how to cast on loops on knitting needles can easily cope with the product. Knit small squares of different colors and gradually assemble a whole blanket.
- yarn of different shades, but of the same thickness;
- knitting needles according to thread size;
- scissors.
- We put 31 loops on the knitting needles, this is the base: 15 pieces on the left, 1 in the middle (central), and fifteen on the right.
- The technique is always performed with a facial loop, on one side and the other, except for the last. In every row, it is always purl.
- We knit the first line. We start with the edge loop, it is always removed, make sure that it does not twist, then the edge will be even. Then 13 loops (all knitted). Through the next 3 loops, we stretch one, now it will be the central one. Thirteen again. Turn the last one inside out.
- We knit the next row simply with the front one, except for the edge loops, they are always made the same way.
- Then we remove one loop, 12 front loops, 3 together, twelve more, one purl.
- Thus, we knit until there is 1 loop left on the knitting needle.
- We cut it off from the ball, pull the tail into the last ring of thread, and tighten it.
How to sew a patchwork blanket
For beginners, it is better to choose patterns with large fragments, this will allow you to make a blanket faster. For experienced needlewomen, there are many master classes that talk about creating complex patterns from small shapes.
Only the upper part of the patchwork cover is made from scraps, and a whole cloth is taken for the bottom layer. This simplifies the work and increases the wear resistance of the product. To sew fragments together with a machine, it is better to use a regular edge stitch. Undoubtedly, linen stitching is stronger, but it may not penetrate fabric consisting of three layers.
- “Quick squares” - patchwork bedspreads are sewn from square fragments.
- “Watercolor” – special attention to color.
- “Strip to stripe” is a blanket made of long rectangles sewn alternately.
- “Log cabin” - in the central part there is a square, and stripes are sewn around it in a spiral.
- “Magic triangles” - simple or complex shapes are made from triangular fragments.
- “Checkerboard” - the blanks are sewn in a checkerboard pattern.
- “Russian square” – multi-tiered sewing.
- “Honeycomb” is a pattern of hexagons.
Pillow made using the Dresden plate technique (MK)
If you want to create patchwork sofa cushions with your own hands, not from regular geometric shapes, but something more original, you can try the “Dresden Plate” patchwork technique. At this master class, accompanied by photos, you can better understand the essence of the technique.
To begin with, select fabric of different colors. They use from 5 to 8 types and think through the combination in advance. And they begin to perform step-by-step steps:
1. Start making templates that will be used for cutting. They are made in full accordance with the dimensions of the finished pillow. The patterns are a circle and petals.
2. At the next stage, they begin to cut out the parts for the patchwork pad. When making blanks from fabric, do not forget to leave allowances. Usually they are 1-1.5 cm. To facilitate the work and obtain identical patterns, you can make templates taking into account allowances.
Article on the topic: Kisey: thread curtains - how to make it yourself
3. The prepared petals begin to be sewn together. It is necessary to fold the front sides of one and the second part and sew a stitch. You need to start from the center. To stitch more accurately, you can attach a template to each petal without any allowance and trace it with chalk. In this way we get the line along which the line should go.
4. After all the petals are connected, a circle is sewn into the center, you will get a flower, which is called the “Dresden Plate” patchwork. Next, this flower is sewn onto the base of a square pillow.
5. At the next stage, they begin decorative finishing. To begin with, four strips 3 cm wide are sewn to the base along the perimeter. After all the lines have been laid, the workpiece must be ironed.
6. Then sew the outer border in the same way as the previous strips. Only the width of the border is slightly wider, about 10 cm. In the corners of the resulting square with a border, four decorative squares with sides of 10 cm are sewn.
At the final stage, the backing fabric is sewn on and the pillow is stuffed with padding polyester. This pillow can decorate any sofa.
As you can see, there are no particular difficulties in creating a pillow using the patchwork technique, even for beginners. You just need to be patient and show a little imagination.
Crazy style patchwork - what is it? (2 videos)
Simple and original pillow options (58 photos)
The best posts
- Decorative suitcase – gift wrapping or creative DIY item |+58 photos
- DIY wedding decor: master class on creating invitations and other ideas
- Do-it-yourself original lamps from various bottles (3 MK)
- 6 ideas for decorating your phone - how to stand out from the crowd (42 photos)
- Homemade products are the best gifts for loved ones (+42 photos)
- How to make a decorative cage with your own hands (2 master classes)
- Making a wall clock from cardboard: decoupage and quilling (master class)
- Creating a unique collage from photographs: design options
Tips for a beginner on where to start sewing using the patchwork technique
Simple tips to make it easier for beginners to sew patchwork bedspreads with their own hands:
- determine the exact size - a lot depends on this parameter;
- choose a color - the organic nature of the entire product depends on their compatibility;
- prepare the fabric - soak for 10 minutes in hot water;
- To make working with textiles easier, it is recommended to starch and iron it;
- cut into fragments of the required size, leaving allowances;
- prepare the backing textile.
- needle and thread;
- scissors;
- pins;
- sample;
- pencil;
- sewing machine
Stages of creating a patchwork carpet
- To begin, prepare basic consumables. These are elements in the shape of a square, circle or rectangle.
- Next, start combining the blanks with each other.
- And at the final stage, a base for the carpet is created, which is hemmed from the back.
Ready-made patchwork path
Like any work done by yourself, the carpet must be formed using a sole. Manipulations are done manually. And if you like what you have created, you can start stitching the blanks on a sewing machine. Before you start using the carpet, you should wash it.
Working technology step by step
The main stages of making patchwork bedspreads with your own hands:
- drawing a sketch;
- choice of material;
- stitching flaps;
- formation of the finished product;
- Drawing a sketch.
The most important part of the process, because the appearance of the product depends on it. You can draw a sketch on paper, take it from the Internet, or lay it out on the floor from fragments, following the patchwork style. Many ideas on how to sew a bedspread are available in master classes, which greatly simplifies the creation process.
Material selection
Choosing fabrics to match is not easy, but it is very important. The appearance of the bedspread depends on this. In this matter, it is worth relying on the taste preferences of the craftswoman. For two-color products, the only choice rule is dark and light colors. With multi-colored bedspreads the situation is more complicated. Colored fragments should be sewn not in disorderly chaos, but by laying out a pattern, based on existing patchwork patterns.
Technique of stitching flaps
The sequence of actions when stitching fragments is as follows:
- You need to cut two equal strips from textiles of different colors.
- They are folded inside out to each other, stitched, and ironed.
- Now from the textile of the third shade you need to cut a strip equal in width to the first two.
- The third and first two are folded right sides together and stitched.
This technology allows you to make a double-sided sleeve, from which squares are then cut. Next, you need to decide on the pattern, and then you can start connecting.
Fragments of a certain shape are sewn together in pairs if the pattern is complex. Then you should connect 4, 8, and so on until the composition is complete. If the bedspread is made of squares, the joining technology is slightly different. Square blanks are sewn into strips, and after carefully ironing the seams, they are assembled into a finished patchwork product.
Formation of the finished product
When the front part is ready, you should start sewing the back side. To do this, a piece of selected fabric is laid out on any flat surface, face down. If the bedspread is insulated, then a layer of synthetic padding should be placed on the reverse side.
The front side with a patchwork pattern is placed on top, and the product is stitched around the perimeter. The edging is made from a strip of fabric approximately 8 cm long, sewn along the edge. If the edging according to the sketch is wide, then more fabric is needed to make it.
Pillow made using the Russian square technique (MK)
To create a pillow in the Russian Square patchwork style, you must complete the following steps, which are presented in the step-by-step instructions:
1. Initially, patterns are prepared. The product consists of a square located in the center of the product. It will be followed by 5 stripes around the perimeter, consisting of four triangles obtained from a square cut diagonally. The central square has dimensions of 6.5x6.5 cm. The squares for the triangles used in each floor have sides of 7 cm, 9 cm, 11 cm respectively.
Related article: DIY wedding decor: master class on creating invitations and other ideas
2. First, sew the central pink square with blue and white triangles. To do this, fold the flaps right sides together, combining the parts in the following way: the side of the square and the base of the triangle. After this the line is laid. All four triangles are sewn in this way.
3. Next, the elements are straightened and steamed using an iron. The result will be a new square, which at this stage needs to be leveled. To give the element the correct shape, trim off all excess and tidy up the edges of the seams.
4. At the next stage, new triangles, larger in size, are sewn to the resulting square. All actions described above are performed. Each time you will get new squares with a larger perimeter. Having completed all the stages, you will get a patchwork pillow element from various patches measuring 32x32 cm.
As a result, you get a pillowcase that needs to be ironed well. To give the patchwork pillow a more stylish look, the front part must be quilted.
On video: how to sew a quilted pillow in patchwork style.
DIY baby blanket in patchwork style
For beginners, the “Fast Square” technology is suitable. To make a patchwork bedspread for a girl, you should choose more pink textiles, for boys - blue.
You will need the following materials and tools:
- 4 types of textiles;
- fleece for the back;
- needle and thread;
- ruler, pencil;
- scissors;
- sewing machine.
The simplest option is children's patchwork bedspreads made of 48 squares. To make such a thing, it is enough to cut the prepared fabric into square fragments of the selected size, adding 0.5 cm to allowances on each side. The squares are sewn together in strips, each seam is carefully ironed. When all the strips are ready, you should sew them.
Spread the fleece on the floor, place the front part on it, carefully round the edges with scissors and sew. The child will be happy to cover himself with such a blanket.
DIY patchwork bedspread master class
To ensure that all the squares are even, you need to use a ruler. For the same purposes, the fabric is laid in several layers. In our case, the patchwork bedspread will be two-color. Having laid each type of textile in a double layer, we cut off the edge to even it out.
Using a special ruler, mark the width and cut off the strip. You can use a regular ruler, but then it is better to secure the fabric with pins before and after the cutting site.
Here are the cut square pieces, ready for stitching. Their number and size are determined by the dimensions of your product.
The synthetic winterizer also needs to be cut into squares to make the quilted patchwork bedspread warm.
Now you need perseverance. We take a fragment of padding polyester.
Cover it with a yellow cloth.
Turn it over, cover it with textiles with a pea pattern, and secure the “sandwich” with pins.
Now we need to mark the lines in the middle. To do this, take a pen, apply a ruler at an angle of 45 degrees and draw.
When the square piece is stitched diagonally crosswise, you can put it aside and move on to the next one.
The photo shows the process of creating fragments. Also in the left corner there are two stitched squares.
We continue to make preparations.
This is how the fragments will be arranged - in a checkerboard pattern.
First we sew in pairs, then in 4 pieces. The photo shows 3 blanks consisting of 4 squares.
Patchwork bedspread in a modern interior 61 photos
Examples of original ideas can be seen in the photographs. Here are bedspreads made in patchwork style that fit perfectly into the style of the home. Products can be cotton, cotton and others. The color should “echo” the main color chosen for the design of the room.
Handmade things retain the warmth of the craftswoman. The tutorial above shows that even something as large as a bedspread is easy to make. The only thing a beginner may lack in the process is patience.
Have you been looking in stores for a long time at beautiful samples of bedspreads made from scraps of fabric of various colors and patterns , but was the price too high?
Do you love to sew, but have a lot of leftover fabrics of different colors accumulated at home?
Then you can make your dream of a beautiful patchwork quilt come true with your own hands. patchwork will help you with this .
Variants of popular schemes
Sewing pillows is not that difficult, although many are afraid to take on the work. The main condition is to know where to start. For those who are getting down to business for the first time, it is better to choose a simpler scheme and follow the master class.
For beginners, there are several types of pillows that can be made with a little effort:
- Set of triangles. This decorative item is made from scraps of fabric of different colors and textures. Identical triangles are cut out of them and sewn together sequentially in a certain order.
- Patchwork American square. A very convenient scheme for beginners. In this case, scraps of fabric in the form of rectangles are required. They can also be different in color, but they must have the same width, and the length can be different.
- Russian square. If you look at this diagram, it may seem that it is difficult for beginners. But this opinion is wrong. The pillow consists of patches shaped like squares and triangles. The square is located in the center, and triangles are sewn to its sides. As a result, this combination also forms a square.
- Patchwork Dresden plate. This is a diagram consisting of elements that resemble flower petals. As a result, an original element is obtained in the center of the square pillowcase; such a pillow will be especially appropriate in the interior of a nursery or bedroom.
Related article: Do-it-yourself bird's nest - a beautiful craft made from scrap materials
Style Description
The word patchwork translated from English means a product made from multi-colored patches .
Initially, things were made from leftover fabrics for economic reasons. This then grew into the process of creating unique, unusual products.
Patchwork is a very hard and painstaking work that deserves respect and admiration.
Sometimes craftswomen create simply works of art consisting of many small pieces.
These include pillows , napkins, bedspreads and baby blankets of extraordinary beauty .
To work you will need:
- Sewing machine.
- Scraps of fabric.
- Fabric for the reverse side (about 1.5 meters by 2.20).
- Needles and pins.
- Threads in the color of the fabric.
- Well sharpened scissors .
You also choose colors according to your taste, but no more than 6-7 different colors .
- Also, experienced needlewomen in master classes advise taking one color as the main one, and the remaining pieces should be harmoniously combined with it.
Stages of work and stitching techniques
Patchwork consists of 3 main stages :
Selection of fabric pieces
Look at the remaining fabrics at home, sort them by materials and colors.
Preparing scraps for the future bedspread
Or buy in the store those fabrics from which you would like to make a bedspread.
Creating a Sketch
At the second stage, needlewomen come up with a design that they ultimately want to get on the finished product, or select ready-made patterns.
Sewing the patches
The last stage is the direct assembly of the pieces together to obtain a whole canvas .
Also, for the back side of the product you will need a single piece of fabric a layer of synthetic padding placed between the top and bottom sides to give the pillow or blanket shape and volume.
Selection of pieces (shreds)
There are various techniques for stitching pieces together, from connecting squares of the same size to laying out a complex pattern of geometric shapes of various shapes and sizes (triangles, squares, etc.)
The result is unique work, it all depends on your skills, available fabric and imagination.
Types of patchwork according to the method of stitching elements:
- “Quick Squares” – it is based on prefabricated square blocks of different colors.
- “Watercolor” based on the selection of the required color scheme.
- “Strip to stripe” - connecting multi-colored strips of fabric of different lengths at different angles.
- “Log cabin” - stripes go around the square in a spiral.
- “Magic Triangles” is a technique for creating complex shapes from initial triangular scraps.
- “Checkerboard” - the shreds are arranged in a checkerboard pattern.
- “Russian square” is a multi-tiered pattern of a square in the center, triangles and stripes.
- “Honeycomb” - the original pieces of fabric have the shape of a hexagon.
Variety of styles
Chaotic patchwork also has its own directions. Not all of them are ideal for creating blankets using this technique. Styles are:
- classical. The most suitable for sewing a blanket, as it easily fits into the selected dimensions and monotonous decor of the room. This style includes patches of equal size, often in two color schemes, which are placed in clear symmetry or in a checkerboard pattern;
- Oriental. More suitable for decorative small blanket. The style is maintained in the use of flaps of different shapes and sizes, adding to them a variety of embroidery with threads, beads, beads, as well as zippers, buttons, chains and any other type of decorative design. However, unlike the next type, the eastern one adheres to a certain system and symmetry in stitching the flaps;
- crazy patchwork is a “crazy” patchwork technique. The style, which is not limited in the shapes and placement of flaps, combines the chaotic clumsiness of the placement of parts and a mixture of color schemes. More suitable for blankets and bedspreads of outdoor garden decor.
Related article: How to properly furnish a room?
Quilt patches come in many forms:
- squares - simple stitching of square flaps of the same size;
- stripes - flaps of stripes can be sewn either alternating or in a circle, into a spiral, decreasing their length as you work, using a template in the form of a lined square;
- triangles - in order to achieve a smooth square canvas at the end, such flaps are cut in the form of isosceles triangles;
- honeycombs - symmetrical hexagons, which are combined with triangular flaps along the edge;
- lapachikha is a type of patchwork made from patches of different shapes, assembled into a specific pattern according to a pre-prepared template.
With your own hands
To create a patchwork bedspread for beginning craftswomen, it is advised to take simple pattern patterns and patches in the shape of squares of the same size, for example 23 by 23 centimeters.
STEP 1 Place the pieces on the floor in the correct order as in the diagram.
We lay out the shreds according to the planned pattern. STEP 2 Take the first two scraps, fold them right sides together and sew with a small seam allowance of half a centimeter.
STEP 3 Then machine sew 2 more pairs of pieces. Then connect them into a ribbon of 6 squares, 160 cm long.
Sewing the patches
We make 11 ribbons in a similar way, carefully ironing the seam allowances.
STEP 4 Then take 2 stripes with the pattern facing each other, pin them with pins with an allowance of 1.5 centimeters and sew them together.
The remaining strips are connected in the same way, resulting in a canvas 160 by 220 centimeters.
STEP 5 The next stage is hemming the padding polyester .
It is taken a little larger than the resulting cloth from shreds.
Hemming padding polyester
The synthetic winterizer is laid out on the wrong side of the fabric and stitched on a machine along the same seams connecting the squares and stripes.
STEP 6 The last step is to connect the upper part with padding polyester and the lower part of the bedspread.
Bonding all layers
the patchwork part of the bedspread down 1-1.5 cm and sew it with the bottom using a machine.
Ready product
The result is a beautiful, handmade bedspread, one of a kind.
Finished bedspread fabric
Patchwork needlework technique
Regardless of the needlework method you choose - sewing or knitting, it is recommended to prepare the base for the carpet in the shape of a square or circle. Practice shows that decorative patchwork work itself is delicate. And to make the coating practical, it is worth strengthening it with a base of dense fabric. It is hemmed on the back side of the rug or blanket.
Base for the rug
From denim scraps
And if you have a lot of old jeans and shirts lying around idle in your house, then they can become an excellent source material for a bedspread and even pillows for it.
How to sew a blanket from old jeans?
STEP 1 First strip out the clothes , leaving only those pieces of fabric that do not have stains, signs of heavy wear, zippers or other accessories. Then wash and iron them.
STEP 2 The next step is to cut out squares, triangles or other shapes according to the design or pattern you have chosen.
STEP 3 Next, the patches are sewn together 2 at a time, then in strips, then the strips are joined together.
STEP 4 Sew on the padding polyester and the lower part of the bedspread.
STEP 5 If you wish, you can trim the patchwork bedspread around the perimeter with a satin ribbon, decorate it with beads, sequins or braid .
The resulting product will be dense and wear-resistant due to the properties of denim, and one of a kind.
In conclusion, we can say that patchwork is a fascinating, but very labor-intensive process of matching scraps to each other, and then connecting them to obtain an overall design.
Experience working with fabrics, a machine, as well as perseverance and patience will help you master this unusual style quickly enough. Piece by piece, it will become one of your favorite things to do!