One of the most important points during repairs is to do everything in a certain sequence. Often a mistake made here then turns into quite serious consequences. However, this point is often the subject of controversy. For example, quite often the question arises: what do they do first - glue wallpaper or install interior doors?
Let's look at this situation more seriously. Surely everyone knows that in a room covered with wallpaper, the level of humidity seriously increases. Moreover, this process does not tolerate drafts. If you are planning to change your front doors, the question of what to do first can puzzle many. Indeed, the absence of doors may well provoke such an unwanted draft. However, this problem can be solved by simply closing all windows. At the same time, they try to open the entrance doors as rarely as possible.
On the other hand, if you put the doors first, then due to high humidity, the frame and the canvas, in the absence of a protective layer, may well swell. Accordingly, the answer to the question that interests us in this case is obvious - first of all, you need to hang the wallpaper, and only after that should you install the doors. However, here I would like to make a small clarification. Replacing doors should be approached with all responsibility.
In particular, it is recommended to first call a measurer so that you know all the required dimensions and do not make a mistake when purchasing. If you have the necessary knowledge, then you can do it yourself. Next, make sure that the width and height of the opening remain unchanged. If you move it to another place, be sure to ensure that the dimensions match. After the wallpaper is glued, you can put the box and hang the canvas. Don't forget that the foam must dry well. During this period, the opening is strengthened with spacers. It is better not to touch the canvas again while it is drying, so as not to provoke distortion. In the end, you just need to remove the excess foam with a knife and attach the trim.
We have sorted out the question of what needs to be done first - gluing wallpaper or installing doors. However, I would also like to consider the procedure for repairs in general. Here the sequence is very simple:
- ceiling;
- walls;
- door installation.
In other words, work is performed from top to bottom. This approach makes it possible to obtain an almost 100 percent guarantee that already repaired areas will not be damaged in any way during the finishing process of the next ones. However, one very important clarification is worth making here. If you plan to completely tear down the floor and pour a cement screed, then the work will need to start from the bottom.
In all other cases, the ceiling is done first. The most common options are drywall, tension board, or a combination of both. After the ceiling is done, you can start working on the walls. The material for leveling here is selected depending on their curvature. Often, putty is enough - starting and finishing. But if the walls are very crooked, then you can’t do without plaster. The best option is, of course, to completely rip everything off, to the ground. After this, apply a layer of plaster and then level it with putty. First, the starting one is applied, then the finishing one.
Do not forget that each layer must dry thoroughly. There's no need to rush here. The thing is that modern wallpaper has a non-woven base. Accordingly, moisture that has not had time to dry will come out on top of the layer of finishing putty. She will have nowhere else to go. The thing is that the base of the wallpaper does not allow moisture to pass through. Accordingly, mold forms on the wall. Ultimately, its spores will still leak through the non-woven fabric onto the surface of the wallpaper, and everything will have to be redone.
If you decide to lay laminate, linoleum or parquet on the floor without pouring a screed, then first of all it is recommended to level the surface using OSB boards. It is best to do this while the putty is drying - this way you will not lose much time. If the work is done by several craftsmen, then you can glue wallpaper and, say, lay laminate flooring at the same time. One works against one wall, the other works against the opposite wall. And finally, finishing work. This is the installation of interior doors (frames and leaves), baseboards, and the very last stage - attaching the trim.
In some cases, due to certain circumstances, the sequence of work may differ slightly from that described above. However, this scheme is considered the most optimal. Many craftsmen make repairs in exactly this sequence. Of course, we have not mentioned many more mandatory steps - dismantling old coatings, laying new wiring and communications, installing plumbing. However, then the description of the entire sequence would be too long. In addition, there are also a number of purely individual factors.
When undertaking renovation work on a house, many owners are at a loss. At the initial stage and during the process itself, many questions arise, especially during the period of interior finishing work. To make work easier and streamline all actions, you should develop a plan in which each stage is clearly distributed. It will help you avoid making mistakes and save time, nerves and money.
Finishing stages
So, when starting to decorate the premises, it is worth familiarizing yourself with the sequence in which the work should be carried out. As mentioned earlier, such an approach will help to complete the repair quickly enough and avoid various shortcomings, and, consequently, their correction.
Main finishing stages:
- The main direction of work is top to bottom. In other words, the standard practice is to finish the ceiling first, then the walls, and finally the floor. This unusual principle serves to preserve ready-made parts of the room from damage during processing and installation of other areas.
- If a floor screed is required before laying the finished floor covering, do it first. A screed is an intermediate layer that serves as a base for the floor covering, adding rigidity to it, and hiding communications. The better it is made, the longer the coating will last. Screeds vary in composition, method of adhesion and installation, as well as purpose.
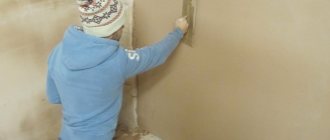
- You can level the walls using plaster. Depending on the original condition of the walls, one or more layers may be needed. Before plastering, the walls must be primed to improve the condition of the surface and subsequently the paint will adhere better.
- Finally, at the end of preparing the walls, they are puttied. All irregularities and communication points are carefully sealed. The walls are prepared for finishing.
- Installation of door frames. The door can be installed immediately and covered with thick polyethylene to protect it from dirt and mechanical damage.
- Cover the walls with wallpaper;
- Laying finishing flooring (laminate, linoleum, parquet).
- Fastening ceiling plinths, decorative elements, switches, sockets and trim.
Repair work should begin from the furthest rooms and move towards the exit. The finishing of the corridor and hallway is carried out at the very end. All this will prevent dirt and dust from getting into the finished rooms, as well as damage to fresh coatings.
Having finished one room, the door leading into it is closed and curtained with thick plastic film. This will protect clean finishing materials from dirt, dust, paint or plaster.
Advantages and disadvantages of the method
The positive aspects of such installation include the ease of laying the laminate, the attractive appearance of the coating, which has no gaps near the doorway. The installation of the canvas is carried out according to the actual height of the floor, which saves the master from difficult calculations and guesswork.
After laying the laminate, you can order a door of a certain size, which will save time on adjusting all the elements.
The disadvantage is the likelihood of damage to the laid coating. Laminate is easily scratched, so you need to be careful while working.
If you still haven’t decided which to choose first: doors or laminate, then choose the appropriate method depending on what is easier for you: be careful when installing the door or spend time cutting holes for the trim in the laminate.
Definition of initial data
To correctly answer the question of what is done first, the floor or the doors, it is necessary to obtain initial data on the object. What flooring will be provided (parquet, laminate or linoleum), what doors will be installed (interior or entrance, determine the material). All this is necessary in order to draw up an accurate action plan, otherwise it is called a “construction organization project” (COP).
Repair work, like new construction, must be carried out in accordance with the PIC. For this purpose, special technological maps are developed for each type of work, the sequence and stages of repair are taken into account. In other words, to make repairs, it is advisable to have a ready-made project.
Technological sequence
If there is no project, you need to include logic. The main problem when installing doors after laminate flooring is the likelihood of scratching the finish of the finished floor with rough work. The problem is installing the floor before the door is installed - difficulties with the dimensions on the threshold and the same rough work.
In general, do-it-yourself repairs are only done when you are confident in your abilities and can do everything correctly. If there are any doubts, it is better to entrust this work to professional teams who will complete the work quickly and efficiently.
When carrying out personal work, installation of doors and work on the floor must be carried out in parallel. This is not a general flow in which you lay the laminate with one hand and install the doors with the other. This is an adjustment of the stages of work. It is necessary to complete all rough work in two directions and only after that begin finishing work.
Preparing the floor and doorway
Before installation begins, it is necessary to remove the old floor covering and dismantle the old doors if the repair conditions require it. Then install beacons over the entire floor area and level it using a cement-sand screed. The work is carried out along guide rails, which must withstand the required horizon.
Door slopes must be installed in the openings. If necessary, replace the lintels, inspect the wall and repair damaged areas. It is necessary to completely prepare the opening for the installation of the door frame.
At this stage, you should already decide on the thickness of the laminate and select the doors taking into account the dimensions obtained from the leveled floor.
Installing the door before laying the laminate
It is believed that doing the floors first is much easier than the doorway. However, if there is a desire or need, you can start by installing doors. Usually doors are installed first when it is planned to make a threshold. In this option, the door frame can be rested on the subfloor, and the laminate will be laid up to the threshold, then after it.
If the doorway is provided without a threshold, the door frame should not rest on the subfloor; it must be secured to the wall. Therefore, during the initial installation of doors, a lining is placed under the door frame, which will raise it to a height slightly above the finished floor level. It’s better not to guess this size; you need to either calculate it accurately, or start making the floor first, and only then install the doors.
Installing the floor before installing the doors
Installing the floor before installing the doors seems more profitable, but this also has its own nuances. It is clear that installing laminate flooring everywhere will not be difficult, but subsequent dirty installation processes can cause irreparable harm to the beautiful floor.
Therefore, it is necessary to carefully monitor the processes being performed. It is best to lay several layers of industrial cardboard on the laminate where the doors are installed, which will protect the surface from damage, and only then begin work.
If the floor is already ready, then all that remains is to make the door frame only of the hinged type. In this case, it is necessary to ensure that the box does not press on the surface of the laminate. If you have not guessed correctly with the dimensions of the doors, then it is better to cut them before installing them in a horizontal position. When the box is standing in place, it is inconvenient to do the sawing, and it is unlikely to work smoothly without a special tool.
The remaining door installation processes do not have any negative impact on the floor, except for contamination. By working carefully, you can leave the floor clean. Try to keep the gap between the door frame and the laminate small; it is more aesthetically pleasing and not noticeable.
Final conclusions
Whatever you decide to do first, the floor or the doors, you will still have to do a size calculation to guess with the parameters. You can avoid damage to finishing materials by carefully covering them during work.
Doors with a threshold are easier to install before laying the floor; it is possible to rest the frame on the subfloor. Doors without a threshold are easier to install after laying the floor, and it is easier to calculate the gap between the finished floor and the frame for the hanging system.
Articles similar to What is done first - the floor or the doors?:
- Entrance doors are the face of your home, so you need to choose them with special care...
- To install entrance doors, two installation methods are used. Choose the installation method depending...
Quite often, disputes arise about the order of procedures - what comes first: doors or laminate? For beginners in the construction business, this issue is especially important, especially if they plan to carry out the work with their own hands.
There are many opinions on this matter, but there is no clear answer to this question; you can get an excellent result with any sequence of procedures, it all depends on the nuances.
Some options may be easier, while others may be more difficult, so you need to study the characteristics of each of them in detail.
FAQ
Some of the most frequently asked questions regarding interior finishing work.
What comes first, doors or wallpaper?
You can install interior doors both before and after wallpapering. The main thing is not to combine these two works and not to carry them out at the same time. When wallpaper is glued, moisture collects in the room and remains at a high level for up to three days.
The canvases, door frames, and decorative strips swell and increase by about five centimeters. Simultaneous installation of the door will lead to the fact that subsequently, after drying, there will be a large gap between the leaf and the frame. The door lock is also likely to break.
Installation of an interior door
- Good:
the dust generated during door installation will not settle on top of the wallpaper. - Bad:
you will have to spend time and carefully trim, and then tuck the edges of the canvas behind the decorative strip (platband).
- Good:
during the installation of the door, you can hide all the errors in the plastering work. - Bad:
if the dimensions of the doorway are not maintained, and at the time of pasting the wallpaper was cut along the opening, then the platband may not close the resulting gaps.
When to glue ceiling plinth?
Ceiling plinth is a decorative element that serves to delimit and hide the seams between the ceiling and walls.
Ceiling plinths include:
- baguettes;
- cornices;
- curbs;
- fillets.
Their task is not only to hide seams and transitions between the wall and the ceiling, but also to prevent the formation of cracks.
You can glue the baseboards before and after wallpapering. However, it would be more appropriate to attach them directly to the wallpaper.
All surfaces must be leveled using putty. When it is planned to paint the fillet, this is done immediately after painting the ceiling, before it dries. Otherwise there will be marks between them.
Without painting the baseboards, after waiting until the ceiling is completely dry, you should cover the joints with tape, which will protect the ceiling from glue, and fasten the baseboards. Only then are the walls painted or pasted over, adjusting the edges of the canvas. If you later need to change the wallpaper without touching the baseboard, you can easily remove it. Therefore, it is correct to glue the ceiling plinth first.
If the plinth is glued on top of the wallpaper, then in this case you will have to painstakingly cut everything off or replace it completely, along with the plinth.
When is it better to stretch the ceiling?
Stretch ceilings are a specific product, which makes it possible to install them at the final stage of finishing work. During stretching there is practically no dirt and the likelihood of damaging the finished wall and floor covering is very small. However, experts advise hiring specialists to get quick and high-quality results.
In this case, the top-down principle does not work. It is intended for primarily standard and routine repair work.
Ceiling tiles or wallpaper first?
It is best to glue the ceiling tiles first. In order not to stain or damage the wallpaper in the future, since paint, whitewash, glue and similar substances leave practically impossible to clean marks on them.
Floor or wallpaper: which comes first?
Preparation. The walls need to be prepared only after the floor. The debris is removed and is ready for installation of the final flooring. It is laid at the end of the repair work. Before this, the base is covered with film, so that later traces of plaster can be easily removed.
Laying. All wallpaper is pasted before the linoleum is laid; the wooden floor should also be sanded at the end. However, some craftsmen believe that wallpapering is done after laying the floor and attaching the baseboards. This is due to the fact that the wall decoration can be replaced at any time without touching the baseboards.
What's next, decorative stone or wallpaper?
It also doesn’t matter what you glue first. Basically everything depends on the professionalism of the performer.
If you stick a decorative stone at the beginning, then the wallpaper is simply adjusted and cut off in the areas where it overlaps the stone. Even if there is excess damp fabric left, it will dry and the joint will be invisible. The wallpaper is cut with a painting knife with a thin blade. They are pressed tightly against the stone with a spatula and cut along its edge with a knife. The spatula holds the wet wallpaper and prevents it from tearing.
You can also stick a decorative stone on top of the wallpaper. However, you need to work carefully so as not to stain them with glue. To prevent this, you can outline the boundaries of the future fastening in advance, and stick masking tape on the wallpaper. When finished, the tape is removed and the canvas remains clean.
When is the air conditioner installed?
It is more correct to begin installing the air conditioner before pasting the walls or covering them with plasterboard. Communications connecting two blocks (internal and external) are hidden in the walls. At the same time, the outdoor unit is installed, thereby completing the dirtiest part of the work.
Once the interior finishing is completed, the indoor unit is installed. Its installation takes about an hour, and after that a test run is carried out and the operation of the air conditioner is checked.
Photo wallpaper or wallpaper first?
Initially, it is better to stick the wallpaper, then, joining it, stick the photo wallpaper and again the wallpaper strips. However, in order for the drawing to lay flat and not beveled anywhere, it is necessary to mark the vertical. The vertical is the standard by which the wall is aligned. It is useful for uneven and bumpy walls. This is not necessary, but will help keep the pattern even.
First laminate, then doors
Many people believe that it is better to lay laminate flooring first. To avoid damage to the coating during installation of the box, you can pre-fill it with cardboard or other material. You will also need to pre-treat the door slopes with plaster.
Installing the box is not that difficult and there won’t be a lot of contamination, so you shouldn’t worry too much about it. But laminate flooring is much easier to install when there is nothing obstructing the work.
It is recommended to install the door in advance only if the package includes a threshold. For other cases, you can determine the location of the threshold and simply cut the laminate in the required place.
The main advantage of pre-installing the laminate is that the box will not put pressure on the coating and this will prevent possible damage to it.
Correctly measure the opening for the box
After completing the floor work, it will be possible to accurately measure the opening for the box and determine the required size.
It will be extremely difficult to shorten the finished product if the dimensions have been specified incorrectly.
In addition, the cost of installing a door after laying laminate flooring will be much less. Also keep in mind that to reduce the size of the box you will need a special tool.
When joining two different coatings or types of laminate in a doorway, it is necessary to take into account the gaps between the coating and the wall, which can be created using a special profile.
Arrangement of a doorway
The advantages of this order of procedures are:
- the ability to accurately measure the required dimensions of the box;
- ease of work;
- the price for the work will be reduced.
The disadvantages include the possibility of damage to the laminate.
Thus, it is quite difficult to unequivocally answer the question of what comes first: the laminate or the door. You will need to determine the procedure yourself, based on factors and preferences.
However, the easiest and also cheapest option is to install the floor first. This procedure will allow you to complete all procedures quickly and accurately, especially if a construction worker is working.
When carrying out construction or repair work, it is very important to observe the correct order of their implementation. Otherwise, you can damage or stain what has already been done. The wrong sequence of work can make it difficult to complete the next step. If you need to lay laminate flooring, hang interior doors and wallpaper the walls, in what order are these steps correct?
What comes first: doors or laminate?
What comes first: doors or laminate? There is no consensus on this issue. Both options are possible. But the following conditions must be met:
- all preparatory work for laying laminate flooring, namely: leveling the floor, purchasing underlay and laminate, must be done in advance.
- The door slopes must be prepared: leveling and plastering.
After the dirty work is done, the sequence of installing the doors and laying the laminate can be any. It is necessary to proceed from the specific conditions at the repair site.
Option 1:
If the renovation is being done from scratch and the doors have not yet been hung, then it is more convenient to lay laminate flooring first. You will get a beautiful continuous coating.
The advantages of this option:
- The work of laying laminate flooring is easy and convenient. There is no need to file down the door frame pillars and slip the substrate and laminate under them.
- After laying the laminate, you can accurately measure the doorway to order the door.
- you can correctly install the door frame so that it does not put pressure on the laminate and it does not lose its “floating” properties.
- the cost of installation work on installing the door and work on laying the laminate will be lower, since in this option they are easier to perform.
Disadvantages of this option:
- if the door has a threshold, then you need to accurately determine its location in advance and cut the laminate in the right place.
- Before installing the door, it is necessary to cover the floor surface with cardboard or a special film so as not to damage the laminate.
If, when performing renovations from scratch, the doors are installed first, and then the laminate is laid. This option is optimal if the door has a threshold. In this case, first measure the thickness of the substrate purchased in advance for the laminate and the laminate itself. Add 2-3 mm to the resulting number so that the door does not put pressure on the laminate. The door is purchased taking into account these calculations. The lower ends of the door frame are shortened to the required length, after which the frame is installed in the opening. When laying the underlay and laminate, they are placed under the door frame pillar.
The advantages of this option:
- It is convenient to install a door with a threshold; the laminate is placed at the threshold without forming gaps.
- There is no need to cover the floor when installing the door.
Disadvantages of this option:
- It is quite difficult to determine exactly the amount by which the door frame is shortened and to saw off the racks evenly.
- Considering that the laminate is joined into the lock at an angle, it is inconvenient to bring it under the uprights of the box.
- Some types of door frames do not allow the pillars to be filed.
Option 3:
When renovating, the doors are already in place, you just need to replace the laminate. In this case, if the floor is fairly level, you can lay the laminate directly on it. You need to make sure that the door leaf allows this, because the floor level, taking into account the thickness of the substrate and laminate, will increase by almost 1 cm. Otherwise, you will have to either remove the old floor covering or shorten the door leaf, or perhaps increase the height of the opening. In any case, with the door frame already installed, it is necessary to cut the bottom of its post to the required size and install the laminate there.
This is a rather labor-intensive option, but there are situations when it is the only possible one.
Regardless of which option is used, you need to make sure that all the dirty work is done in advance, so that your doors and laminate flooring will remain nice and clean.
What comes first, wallpaper or laminate?
Wallpapering the walls and laying laminate flooring are carried out at the final stage of renovation work, when all other work, such as installing windows, electrical wiring, heating and ventilation systems, has already been done. This is necessary in order not to scratch or stain the wallpaper or floor. Actually, it is the possibility of spoiling the result of work already done that is the criterion for determining the sequence of their implementation. Before wallpapering the walls and laying the laminate on the floor, you need to do all the rough work. The walls need to be puttied, primed and plastered, if required. Prepare them so that all that remains is to paste the wallpaper. The floor also needs to be leveled, if it is necessary to putty and lay a backing under the laminate. In a room prepared in this way, laying laminate flooring and gluing wallpaper can be done in any order.
Based on the service life of wallpaper and laminate, it would be more logical to lay the laminate first, because it will last 10–12 years, and the wallpaper will have to be changed after 3–5 years. In this case, during subsequent cosmetic repairs, the laminate will not interfere with the renovation of the walls.
On the other hand, building rules require that after completing rough work, finishing is carried out from top to bottom, i.e. ceiling, walls, floor. There is an opinion that although gluing wallpaper on a wall is not a dirty operation, and the floor can be pre-covered, the increased humidity and glue fumes generated during this process can negatively affect the laminate. Moreover, it is impossible to ventilate the room at this time, but, on the contrary, while the wallpaper is drying, all windows and doors must be closed.
In fact, it does not matter in what sequence these works will be carried out. The main thing is that they are performed correctly, using proven technology and following the instructions of the material manufacturers. And don’t forget to do all the dirty prep work in advance.
At any construction forum, the question: what comes first - laminate or doors, comes up more often than others. Moreover, the answers to it are given diametrically opposite. Some people think that laminate is laid on the floor first, and only then the interior doors are installed. And some are sure that it is necessary to do the opposite.
In fact, these works can be done in any order - as is more convenient for you. But all rough work must be completed before laying the laminate and installing the doors (see)
Examples in the interior
To accurately understand the progress of the work, let’s look at it using the example of finishing a kitchen.
It is necessary to decide on the layout of the room and the interior. You can come up with the interior yourself or select from ready-made works available on the Internet.
Next, the so-called “zones” are designed, for which the necessary materials are already selected. The kitchen should have two “zones” - a working one, where food is prepared, and a dining area. They are usually separated by different facing materials. The working area is decorated with tiles, and the dining area with wallpaper, thus creating a cozy atmosphere. Of course, this is an approximate standardized solution.
For novice builders and home owners who deal with renovations every five years, the question of the sequence of finishing work arises at all stages, because not only the quality, but also the durability of the finishing coating depends on compliance with the subtleties of technology. What comes first: installing doors or hanging wallpaper. The answer to this question is given by experienced builders who have tested both options in practice.
Door installation
They are one of the main decorative elements of any living space, regardless of its purpose. That is why the question of what comes first - the doors are installed or the wallpaper is glued is very important. As noted above, installation can be done at any time, but it is best to adhere to the following sequence:
- Ceiling finishing.
- Wallpaper sticker.
- Laying flooring.
- Installation of interior doors.
This algorithm of actions is good for its simplicity and speed of work. However, you must be extremely careful, since carelessness or an absurd accident can damage the floor covering. When installing door structures, before laying the laminate, you need to very accurately calculate the amount of space for the threshold. It will be quite difficult to do this without special skills, so it is better to stick to the scheme described above.
What comes first: wallpapering or installing a door
If you mount the door completely before gluing the wallpaper, difficulties will inevitably arise in matching the wallpaper to the door frames
To decide in what sequence to carry out the finishing work, you should understand how the door frame is structured and what difficulties and risks arise when installing doors:
- doors are installed using polyurethane foam, the excess of which, after expansion and hardening, is cut off and the gaps are puttied;
- if the wall is thick, then slopes appear at the door, which need to be plastered and puttied and only then covered with wallpaper;
- The technology for gluing wallpaper implies the absence of drafts and closed windows and doors, otherwise a tight fixation will not work.
Installing doors is rough work, gluing wallpaper is finishing work.
These factors determine the optimal course of action:
- Preparing and leveling the wall surface. The use of plaster and putty, primer and impregnation makes this process dirty, the floor will be stained, there will be smears and stains on the ceiling. The best solution is to prepare the walls, ceiling and floor together.
- Door installation. The platbands are not yet attached. The gaps and slopes around the box are puttied for finishing.
- Wallpapering all the way to the edge of the door frame. The doors are covered with film and closed until the wallpaper glue dries.
- Installation of platbands. They cover all the unsightly places and the edges of the wallpaper.
A forced change in the sequence is acceptable: then around the doorway you should leave allowances for the slopes along the width of the wallpaper, or leave the area unfinished, and after installing the door, carefully glue the pieces.
It is necessary to wallpaper walls correctly and competently. In most cases, wallpaper is chosen for wall decoration as the most compromise finishing material. Today, when in two minutes you can find a lot of offers with help in gluing, many refuse the idea of a completely independent repair. But often the fear of doing something with your own hands “from start to finish” is simply far-fetched. Have you ever hung wallpaper yourself? Maybe it's time to start? Just arm yourself with information, prepare from the theoretical side, and then in practice everything will go like clockwork.
What to do first - wallpaper or install doors?
When carrying out repairs on your own, you must follow a certain sequence of actions. Thus, the basic rule of organizing work prescribes “going from top to bottom.” First finish the ceiling, then the walls and then the floor. And this is understandable. After all, if you put down expensive flooring and wallpaper, and then start painting the ceiling, you will probably have problems removing the splattered paint, or you may even have to redo the job all over again.
However, from this recommendation it is not at all clear which is better - installing doors before or after wallpapering. On this issue, we can immediately say that entrance doors and windows should be installed before the start of repairs in order to eliminate drafts and prevent changes in humidity and temperature in the room during finishing work. By the way, we previously considered the question of what came first, wallpaper or suspended ceiling, in this article.
Experts have different opinions about interior doors. Here are the most common sequence of actions:
- Install the frame and door leaf, glue the wallpaper and then secure the trim. This method allows you to hide the cut edge of the wallpaper, while completing the finishing faster and more accurately.
- Install the door frame. Glue up the trellises. Install platbands. But hang the door leaf only after laying the floor coverings. Especially if the floors were screeded or poured.
- When painting walls, install the canvas and platbands only after finishing the final finishing. Otherwise, there is a high probability of accidental paint getting on the elements of a rather expensive block.
- Wallpapering leads to a significant level of humidity in the room. And if the tree does not have a moisture-resistant protective coating or impregnation, then installation is best done after the trellises have completely dried.
- If the frame and door leaf have expensive decorative finishing, then it is better to install the door block after finishing wallpapering and finishing the floors.
The task can become more complicated when carrying out renovations in a room with an already installed door. In this case, you will have to remove the canvas and trim, and cover the box with protective masking tape.
Advantages and disadvantages
In the question of what comes first, wallpaper or doors, each option has its own advantages and probable risks of poor quality work. It is very important to take into account the structure and type of wallpaper, the quality of the finish and the presence of protective coatings on the doors. Let's try to evaluate these indicators and figure out what is better and more correct - finishing the walls first or installing interior doors right away.
Doors first
Craftsmen who claim that you need to install the doors first and then glue the wallpaper base their opinion on the following factors:
- if you don’t install the trim right away, then nothing will interfere with the gluing, the wall won’t be covered with glue;
- most of the doors sold have a high-quality coating against moisture - the material will not swell;
- dust that appears when installing the box, especially in brick walls, will not settle on the wallpaper;
- closed doors will eliminate the creation of drafts, wallpapering will be of better quality;
- gluing the trellises under the platband will be neat and beautiful;
- simple adjustment of the existing opening to the door block.
Among the disadvantages are:
- the remaining likelihood of wood swelling from moisture;
- installation of platbands only after finishing the walls.
Looking at the pros and cons outlined above, we can say that installing doors before wallpapering is more preferable and is unlikely to create trouble . But possible dust settling and drafts can create problems. With the door already installed, all cracks are sealed with foam and closed. This option eliminates the possibility of damage to the wallpaper near the door, as, for example, when installing a box. The installation of slopes will not lead to the plaster mortar getting onto the covered wall.
Wallpaper first
Wallpapering before installing interior doors has three important positive factors, which supporters of this method refer to:
- Pasting a doorway is easier to do;
- eliminates the possibility of the door frame swelling as a result of high humidity;
- To avoid drafts, you just need to close all windows, vents and entrance doors.
Typically, pasted wallpaper dries completely in 2-4 days. At this time, the humidity level in the room rises and can create some discomfort for residents. The absence of a door will ensure more active drying without drafts, only through natural exhaust channels.
As you can see, the evidence of benefits in this case is based on preserving the door frame, without mentioning that wallpaper and other materials are also expensive. Therefore, let's talk about the disadvantages, of which there are noticeably more:
- when drilling (for installation of the box), stone may crumble in a thin wall with the formation of shells, the sealing of which will require removing the wallpaper near the door;
- high accuracy of measurements is required to select a door for an existing opening;
- poor-quality sealing of gaps between the box and the wall;
- installing slopes will certainly lead to the wall being sprayed with solution;
- dust settling on the wallpaper during installation work.
As a result, we can conclude that wallpapering and then installing doors will give worse results. Although it is quite acceptable.
Wall painting option
What is the best thing to do if the walls are painted rather than papered?
Here, too, it is better to first install the door frame, without the door leaf and trim. Then proceed to decorative finishing.
Just first seal the cracks and arrange the platbands. In addition, the surface of the door frame should be covered with protective masking tape. After the paint has dried, hang the canvas and install the trim. This technology reduces the risk of possible wood swelling, and damage to the door block is reduced to zero. In addition, the process of painting the wall near the platbands is greatly simplified.
The first and main tip: how to start gluing wallpaper correctly
Let’s say you know perfectly well how to carry out the preparatory work, and you don’t need to waste time explaining this stage. Do you know right away where you will be gluing from - from the door, from the window, or maybe from the corner? Meanwhile, this moment is very important. With this choice, the type of lighting in the room is important.
When, back in Soviet times, almost all wallpaper was glued overlapping, there was such a strip on the wallpaper itself, onto which the new canvas was glued. And so that the transition would not be visible, it was necessary to glue it away from the window.
Today this problem is not so acute. If you are using thick wallpaper, then it is not at all possible, or rather, it is not recommended, to glue it overlapping.
There are several options for where you can start gluing wallpaper indoors.
Where to glue from, options:
- From the door. The main thing is to maintain strict verticality, so you can start work from any vertical landmark convenient for you. This could also be a door frame. Glue the very first canvas strictly vertically, so it would be a good idea to use an additional device such as a plumb line. Then gluing continues in the chosen direction.
- From the corner. The method will only be good if the room has perfectly even corners. But this doesn’t always work out that way, so it’s more common to glue from the door or window.
- From a major landmark. If there is more than one passage and more than one window in the room, the pasting process begins from the largest landmark.
- From several equal lines at once. This method is good for a room with a large window, then pasting is carried out in different directions from this same window. And to make the joints less noticeable, they are made above the window or above the door.
Please note: if the corners in the room are uneven, no matter how exactly you glue them, verticality is lost. Therefore, in this case, when pasting each wall, you need to use a new vertical line. It's troublesome, but there's no other way.
Advantages and disadvantages of the described method
If you can't decide which comes first (doors or laminate), you should choose this method if you are very concerned about the integrity of the flooring after installing the door. However, you will have to spend a lot of effort cutting holes in the panel.
If you install the laminate under the box itself, then there will be no unsightly gaps between the opening and the flooring, where dust and small debris usually accumulate. But there is a possibility that after installing the laminate, the door may begin to close worse.
Using this method, you should correctly calculate the width of the gap between the canvas and the floor. This indicator should include the height of the substrate, the thickness of the panel, decorative threshold and compensation margin.
Which is better: to glue wallpaper from the window or to the window
It doesn’t matter whether you start gluing wallpaper from the window or from the door. Maybe you even wallpaper a room with perfectly straight corners (which is extremely rare). The main thing is to glue the wallpaper from a perfectly level vertical. If the first canvas is placed evenly along a vertical line, then all subsequent canvases will go smoothly.
You should start gluing wallpaper from a perfectly flat vertical line.
Therefore, most often paper, vinyl and non-woven wallpaper are glued away from the window. It’s more common this way, and they also hope for the evenness of the window opening. Therefore, the window is used as an ideal vertical from which the walls are finished in order to achieve even lines. But the door can also be such a starting point; this is by no means a mistake.
What to put first and where to start gluing wallpaper in the room
If the renovation is in full swing, and you still don’t know what to do first – lay the floor or glue the wallpaper? Professionals advise doing the things that leave the most waste first. Laying linoleum is unlikely, but laying laminate might be better first.
In the room where renovations are being carried out, all work is completed first, after which more garbage remains
If you first glue wallpaper and then lay laminate:
- Some types of laminate are very sensitive to wallpaper glue, so the coating can deteriorate, which means everything is correct, stick it first;
- Construction debris can also theoretically damage the laminate;
- If the laminate is already laid, protect it with a special film from the work being carried out.
In the case of linoleum, wallpaper is usually glued, and then the linoleum is directly laid. But still, do everything with an eye on the individual characteristics of the repair. And what is more pleasant and habitual for you to do. Adapt to yourself, there are no strict rules.
Doors first
In a debate between laminate and doors, the latter option often wins. If you decide to install interior structures first, and then proceed to laying the flooring, then you need:
- level the floor;
- remove slopes;
- choose the material and substrate for it;
- buy a canvas, taking into account how much the floor level will rise after laying the covering.
Place the box in the opening so that it does not rest on the floor. Shorten the lower ends of the box by the thickness of the laminate, backing and another couple of millimeters so that they do not put pressure on the coating.
When hanging the canvas, take into account the height to which the floor in the room will rise, and leave a couple of millimeters of free space between the canvas and the floor.
Before actual installation, you will need to very carefully saw down the box and place a laminated panel under it. Please note that it should fit into the gap freely, and the racks of the box should not put pressure on its surface.
How long does it take for wallpaper to dry?
Non-woven vinyl wallpaper, so popular today, takes a day or two to dry. The drying speed depends on the microclimate in the room, on the type of walls and wall coverings, on the density and thickness of the wallpaper. And also, of course, on the quantity, quality and thickness of the glue.
Wallpaper dries depending on the type, as well as on the amount and thickness of glue
The higher the temperature in the room, the faster the wallpaper will dry. If the room is below plus ten or seven, it is not recommended to glue wallpaper at all. Likewise, temperatures above +25 are also not recommended for repairs.
When can you open windows after wallpapering?
The time you need to wait before opening the window after the gluing process is no less than 12 hours. Sometimes you shouldn’t open the windows for a whole 48 hours. Wallpaper dries at a constant temperature, it should not be lower than +15. And the so-called wandering drafts can ruin all the work.
After the wallpapering process, windows can be opened no earlier than 12 hours later
Also, for the first days after gluing, try not to drill, install or turn on the air conditioner. Stretch ceilings are also not installed the first five days after gluing. However, the installation of ceilings involves strong heating, which is unacceptable at the moment.
How to start gluing wallpaper correctly (video)
Wallpapering is a more difficult process psychologically than physically. If you don't rush, if you follow all the rules, if you choose good material, then even beginners can do this job perfectly. That's what we wish for you!
Happy sticking!
The question of where to carry out repair work first - on the walls or ceiling - has been asked since the advent of tension films.
You really don’t want to dust off the fresh gloss that reflects the entire room. It’s also a pity for expensive wallpaper if it suddenly gets damaged while working with the stretch fabric. To understand this issue, we will try to follow the process of repairing ceilings and walls step by step.
Process Features
Whatever work has to be done first, each will be to the detriment of the other. When installing a baguette under a stretch fabric, holes are drilled in the wall, which produces a lot of dust, and fresh wallpaper can be damaged. In addition, the installation of the canvas itself involves high temperatures. No one knows whether the wallpaper will like it.
There is a way out. Carefully prepare the walls for pasting and invite specialists to install the baguette (do the most dusty work), then paste the wallpaper
and again invite workers to install the ceiling. The method is good, but there is one problem - the craftsmen will not agree to such a lengthy method of work.
To understand the features of the process, and at least get closer to figuring out what to do first, you need to try to figure out what a suspended ceiling and wallpaper are.
The canvas itself is a fabric base or a PVC product, which can be matte or glossy. Installed on a specially prepared metal or plastic frame.
If the ceiling was planned to be multi-level, all work with plasterboard should have been carried out in advance
. First, the old finish is removed, the ceiling is cleaned well, otherwise in the future finishing debris will fall onto the tension fabric. Then it’s time to treat fungal stains (if any). Before installing the ceiling, all electrical work must be completed.
Wallpaper is a roll of various types: paper, non-woven, vinyl. Many people had to glue them. To begin with, the walls are leveled, and a layer of glue is applied to the dried surface (if the wallpaper is paper, the glue is also applied to the canvas). Then the coatings are placed on the base, glued well, and air bubbles and excess glue are squeezed out with a roller.
There is nothing complicated about this, but there are two types of developments: either the wallpaper is pasted in front of the ceiling installation and pressed down with a baguette (in this case they look neat), or after that the top of the canvases will have to be carefully trimmed, trying not to damage the ceiling structure.
What do you do first - suspended ceiling or wallpaper?
If each stage of renovation work in an apartment is carried out by different specialists, then those involved in the main finishing work recommend doing the ceiling last. In fact, employees have personal motives for this:
- it is more convenient to carry out your type of work;
- reluctance to be in the same territory with other specialists;
- basic ignorance of the sequence of repairs.
Experts recommend starting the installation of tension fabrics immediately after completing the rough finishing. The installation procedure is dusty and requires making a large number of holes in the wall and ceiling. For installation, you need a hammer drill and everything that comes out from under its nozzle will immediately end up on the wallpaper. No one wants to waste their efforts and money down the drain, so it is better not to postpone the installation of ceilings until the last minute.
Important! Before finishing the walls, only the frame is mounted, and after the renovation of the room is completed, the canvas is stretched. If the installation of the ceiling is carried out by third-party specialists, you should first arrange a return visit with them.
If the walls are already covered, but the structure is not yet equipped, then during installation it is necessary to use a construction vacuum cleaner, which will immediately collect dust and debris. This will help protect the wallpaper from contamination. More details are shown in the video:
But there are exceptions to the rules: sometimes it is better to install tension structures at the last stage of work.
Why is the ceiling leveled?
Before starting finishing work at the top, prepare the base so that unevenness does not spoil the impression of the repair. This will protect the canvas:
- from sagging due to temperature fluctuations;
- condensation formation;
- absorption of odors.
In a new apartment, the joints of the floor panels - rusts - are glued with a construction bandage. The cracks are filled with sealant or polyurethane foam, which eliminates the accumulation of air and the shaking of the film during a draft.
It doesn’t matter what comes first: wallpaper or suspended ceiling, the main thing is to thoroughly clean the surface of peeling plaster in a residential building. Even a small fragment that falls after installation can spoil the aesthetic impression and force local dismantling. The areas affected by the fungus are treated with an antiseptic solution and a primer is applied. It eliminates the risk of mold spores and protects against dust shedding.
At the next stage, the lighting is determined, choosing lamps with a power of up to 60 W for this purpose, and a cable is connected to the light sources. It is difficult to change the location of the points after decorating the dome. When installing under each lamp, craftsmen cut out pinholes in the film that cannot be masked. Next they solve the issue of communications.
We offer you to choose economical LED lamps for suspended ceilings at low prices.
In this sequence, the installation of recessed ceiling lamps takes place
What is the sequence?
Let's try to understand what is better: to stretch the suspended ceiling before or after wallpapering. To do this, consider both options.
First the wallpaper, then the ceiling
If you decide to act in this way, it is worth considering the need for a break of 4-5 days between pasting the walls and installing the ceiling. The wallpaper must dry well before the heat gun works.
.
Some experts believe that you should first work with the walls and align them perfectly, otherwise the ceiling panel may be skewed.
The main danger of pre-gluing is contamination of the walls when working with a hammer drill.
If traces of brick remain on the wallpaper, it will be quite difficult to remove them.
A rotary hammer equipped with a vacuum cleaner would help solve this problem to some extent. Gluing the canvases before installing the ceiling frame will result in them getting under the baguette. It will press down the top edge of the canvases, which will make it difficult to dismantle the wallpaper during the next repair.
. The positive thing is that the top contour of the wall is perfect.
You can opt for liquid coatings
. They are beautiful and modern, but the risk of staining the finished ceiling when working with a spatula increases.
If you have to glue wallpaper for painting, the risk of staining the ceiling becomes even greater. On the other hand, high temperatures during installation can affect the quality of the paint at the base of the ceiling. The same problem can happen with liquid wallpaper.
First the ceiling, then the wallpaper
If the wallpaper is light and delicate, it may be irreparably damaged during the installation of a stretch ceiling, so it is better to paste it over at the last stage of repair. In addition, a lack of professionalism among those working with the ceiling can lead to mechanical damage to the wallpaper.
When gluing walls, you should work carefully with the upper edge of the canvases so as not to disturb the ceiling plugs
. Everything will work out if you show diligence, but during the next repair the wallpaper can be easily dismantled.
Both options have their pros and cons, but responsibility for the choice always lies with the owner.
Installation of doors after laying the floor covering
Installing doors after laying the flooring may seem like a more rational solution, however, in this case, some nuances arise. Naturally, laying laminate or linoleum is not difficult, but future dirty work of various kinds will most likely damage the floor to some extent.
In this case, you will need to be as careful as possible when carrying out work. Where the door is installed, it is best to cover the laminate with industrial cardboard in several layers. It will do an excellent job of protecting the floor covering, and you will not be afraid for its safety.
If you have already made the floor, then next you need to secure the door frame in a hinged manner. It is important not to allow it to forcefully touch the surface of the laminate. If it suddenly turns out that the purchased door slightly does not coincide with the required dimensions, and you need to file it, then it is better to do this before installation, laying the frame horizontally.
No other moments during the installation of doors should affect the floor covering. It’s better if the gap between the door leaf and the laminate is small, it’s more beautiful.
Finally
Whatever decision you make about installing laminate or doors, in any case you will be faced with a number of nuances that will need to be addressed during the renovation process. The main thing is to calculate everything correctly and take into account all the parameters.
It is better to install doors with a threshold before laying the flooring, and without a threshold - after.
During a major renovation, the question often arises: what is done first - doors or laminate? There is no clear answer to this. Both options have their advantages and disadvantages. The choice in favor of one or the other can only be made taking into account the characteristics of each specific room. Therefore, before laying laminate flooring in a doorway, it is necessary to study all the intricacies of installing this material.
During a major renovation or finishing of a new room, when installing doors and laying floors, four problems arise that need to be solved:
- The need to adjust the height of the door leaves to the height of the floor.
- Possibility of damage to new doors or laminate in the doorway during installation.
- The need to carefully arrange the junction of the flooring and jambs.
- A method for creating joints between different flooring materials.
Important nuances
The issue of order has not yet been clarified. What to do first, install suspended ceilings or work on the walls? Wallpapering, as well as installing a ceiling, have their own nuances. When working with walls, there is a chance of damaging or staining the stretch fabric, but it is virtually eternal, while wallpaper can be re-pasted every year.
When a profile is placed under a suspended ceiling, there is a possibility of contamination of the wallpaper, and there is also a fear that it will not withstand high temperatures. In this case, you can abandon the polyvinyl chloride surface in favor of a fabric canvas
, which is mounted using a cold method.
And one more nuance - the profile for a woven ceiling requires shallower drilling, which means there will be less dust. However, well-dried wallpaper can easily withstand temperatures of 60-70 degrees.
The PVC film needs to be heated to soften it. The prepared canvas is immediately tucked under the profile using special tools. The gap between the material and the wall is masked with plugs. They are the first to suffer from poor quality wallpaper work.
An important nuance: any suspended ceiling can be installed in the presence of wallpaper, even in a room furnished with furniture. Sliding wardrobes and curtains are also not a hindrance to this process. You'll just have to use a vacuum cleaner afterwards. But, if the renovation has just begun, you need to ask yourself many times what to do first.
But what if the renovation was done a long time ago and you need to re-stick the wallpaper without damaging the ceiling? Dismantling should be carried out very carefully, especially if the wallpaper was pasted at the initial stage
and fell under the ceiling profile. They will have to be released without damaging the canvas.
To complete the work you will need a spatula and a construction knife. Carefully insert the spatula between the ceiling and the knife. Moving them along the walls, slowly cut off the old wallpaper. In this way, you can protect the material from being cut, even if the knife comes off.
It is much easier to remove the finish if you wet the walls with water and wait a while.
After studying the workflow, we expected to immediately get an answer to our dilemma. There is no answer, you will have to turn to specialists.
Advantages and disadvantages of the “wallpaper first” option
Apartment owners who have installed wallpaper themselves know very well how difficult it is to get through an interior door. The complexity of the work is not inferior to pasting corners. Therefore, the absence of a door frame is a definite plus - there is no need to trim wet wallpaper directly on the wall.
The second, main advantage: the door frame and leaf will not swell as the wallpaper glue dries. Let us explain: according to wallpapering technology, there should be no drafts in the room. Therefore, experts recommend tightly closing windows and doors.
Drying lasts about three days. During this time, the humidity in the room rises several times, as a result of which the door frame swells and increases in size up to 5 cm. The consequences can be different:
- Drying slowly, the door will take its previous shape, i.e. everything will work out;
- the door frame will warp;
- The door leaf will be damaged and cracks will appear.
If the frame or panel is damaged, the door will have to be replaced, which is what proponents of the “first the wallpaper, then the door” cycle put at the forefront.
The attentive reader will immediately notice: everyone talks about the need to avoid drafts, but how to do this if the interior door is not installed? The answer is simple: tightly close the windows in the entire apartment while the wallpaper is drying.
The disadvantages include the following:
- installation of doors is accompanied by dust that settles on the wallpaper. There are two points here: it takes time and effort to vacuum the walls, however, dust cannot be removed from all types of wallpaper;
- during the installation of the door frame, there is a very high probability of damage to the wall (potholes appear) and the wallpaper itself, which will require re-gluing it in the area of the door;
- in most cases, after installing the doors, an additional, unpasted area of the wall appears near them - a large gap between the door frame and the wall is closed with a slope made of a cement-sand mixture. It needs to be glued, since the standard platband is not able to hide the emerging wall. The results of such work will be noticeable for a long time;
- When constructing slopes from a cement-sand mixture, it is very difficult (in practice, impossible) to protect the wallpaper from splashes of the solution. In addition, the wallpaper will have to be torn off the wall along the perimeter of the doorway so as not to damage or get wet.
Experts' opinion
The renovation is coming to an end and it is hoped that experts will shed light on the sequence of construction work.
Craftsmen believe that it is better to cover the walls and then install the ceiling
. The arguments are the same: there is a risk of damaging or staining the walls; in addition, high temperatures are unfavorable for fresh wallpaper. Perhaps these craftsmen are afraid of responsibility for the dusty walls.
Other experts, on the contrary, advise installing the ceiling after gluing, fearing for the canvas
, which can be damaged with a construction knife when cutting wallpaper. And glue and paint getting on the canvas will ruin it forever.
There is no clear opinion even among professionals, because the material for work, the premises, various nuances - everything can be extraordinary, requiring an individual approach.
Act according to circumstances
Of course, it is more convenient and logical to finish the walls first, and then lay the laminate. But the question of whether to install wallpaper or laminate flooring first should be decided based on the specific situation.
The sequence is designed for ease rather than strict adherence. Sometimes you can decide on the type and color of wallpaper only after the finishing floor covering has been installed. Watch the video for a specialist’s opinion on this issue:
If it is more convenient to work in reverse order, then your decision is correct. The main thing is to achieve the intended result, a harmonious combination of floor and wall finishing.
The popularity of laminate flooring is growing every day.
Floors from this coating are made both in a finished room (for example, the floor was updated) and in a room under renovation (where the floor is an integral part of the interior and is selected together with other components).
It’s easier to choose a laminate for a finished, renovated room: the general concept of the interior, the color scheme are already clear, the lighting has been installed, and the basic requirements for the flooring have been determined (color, texture, performance characteristics). When choosing a coating for a room to be renovated, especially if you are faced with this for the first time, the wide range, different textures, colors are confusing and it is difficult to choose the right option without serious preparation.
Below are general tips on choosing a laminate and its combination with the color of the walls and their texture.
Now let’s imagine that the wallpaper and laminate have already been selected. All dirty work in the room has already been completed (the ceiling has been tidied up, the walls and ceiling have been leveled). Now it's time to finish the walls and floor.
Here the question clearly arises: “What comes first: laminate or wallpaper?”
Opinions vary. It all depends on the specifics of the room being renovated. Basically, the floors are laid first. For example, parquet or linoleum always comes before wallpapering. When laying parquet, glue is used and then it is scraped, which in any case is very dusty and stains the walls. A roll of linoleum can also damage brand new wallpaper, so it is advised to lay it down first, and applying glue to wallpaper on linoleum is much more convenient and cleaner.
With laminate the situation is different. Its installation requires more time (and for the first time), but is not a dusty process.
On the laid laminate, it is enough to lay a film and...
However, there are several “buts”:
- firstly, after covering the walls with wallpaper, they are dried with the windows and doors closed, which creates a “steam room” in the room (the room is hot and humid), and this is not very good for laminate;
- secondly, the laminate can be damaged or stained (the film has come loose or glue has dripped, it can be scratched by a ladder or sawhorse, etc.).
Advice. To avoid scratching the floor, wrap the legs of the stairs with a cloth.
If the laminate is laid first, then there is no point in screwing on the baseboard right away. It is easier to glue wallpaper on walls without a plinth and you can check whether a sufficient expansion joint has been left (under normal conditions it should be from 1 to 1.5 cm).
Carrying out any renovation in an apartment is not such an easy task and it requires careful planning. In addition to all other questions, one of the most significant is determining what to do first - glue wallpaper or lay laminate.
Photo of a room with wallpaper and laminate flooring
Of course, different repair teams may solve this problem in different ways, since each has its own reasons and experience. However, in our article today we will take a closer look at both the advantages and disadvantages of each of these approaches. Based on them, we will try to reasonably and balancedly answer the question of what is better to do first: laminate or wallpaper.
Successful examples and options
In conclusion, I would like to dwell on the aesthetic component of the work done. If you see how beautiful the ceilings and wallpaper have become, the answer to the question of what to do sooner may emerge by itself. Or it may not work out.
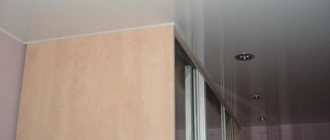
Stretch ceilings have always been an interior decoration. It can be amazing and mysterious, like a country through the looking glass. With it, the room is filled with colors, it seems larger and brighter. Ceilings come in different types and have their own design and style.
Matte
Absolutely flat surface without a hint of reflection. The texture resembles a classically painted canvas. Used for large rooms
.
The matte finish is so neutral that it suits any style. Soffits will be good equipment for the ceiling
, or other sources of bright light, because the matte canvas does not reflect light.
Glossy
A good option for small rooms. They get the opportunity to visually double in size. Moreover, the dark gray fabric has a stronger reflectivity
.
Spotlights (even with a weak glow) on such a ceiling look like stars. By building multi-level compositions using plasterboard and placing a canvas in them, they achieve the effect of an almost natural image of water or sky.
Fabric
Despite its textile origin, the fabric is still processed with polymers and acquires special strength.