Choosing a design for the head of the bed
Many people wonder how to make a modern upholstered headboard with their own hands? But there is no standard advice in this matter.
The headboard of the bed can be made with your own hands.
Draw a sketch of your product based on your taste preferences. You can consult with a craftsman who understands furniture making. Various interior solutions will make the design of the room stylish and practical.
You can design the headboard according to your personal preference.
As for functionality, it is important to take into account several nuances when choosing.
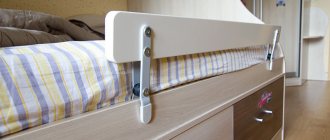
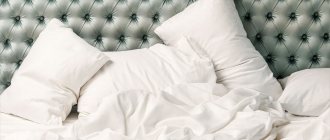
The headboard, upholstered in soft material, looks quite stylish. This headboard is suitable for lovers of increased comfort, because you can lean on the “back” of the bed while relaxing, reading magazines or watching a TV series.
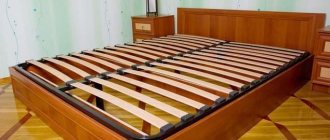
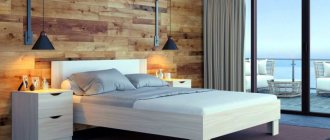
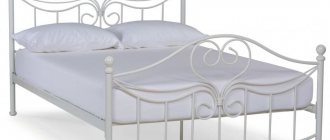
Beds with a carriage frame look stylish and expensive.
Soft decor can be very different. It all depends on your imagination and wallet.
The decor of the bed depends on your imagination and funds.
Advice. This headboard will decorate any room, and it looks unusual and expensive. To update your bed frame, you can do the trim yourself or add accessories. Modern examples can be found in magazines or on the Internet.
You can lean your elbows on the soft headboard while reading, which creates additional comfort.
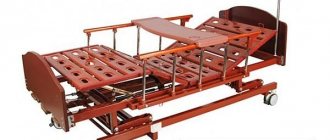
How is the headboard of the bed restored?
For restoration work, velor, furniture suede, jacquard, chenille, tapestry, leather and eco-leather are most often used. Our assortment includes a huge number of materials of different colors and textures, so we can choose the right option for the interior of any bedroom.
The restoration process itself consists of several stages:
- removing upholstery and foam rubber from the frame;
- restoration or replacement of the frame;
- attaching new foam rubber to the frame;
- upholstery of the structure with fabric;
- design decor.
It doesn’t matter what kind of headboard the bed originally had: our specialists will provide any sleeping place with a beautiful and comfortable backrest. It can be attached directly to the frame or to the wall.
Upholstery of the headboard: choosing a design
Not only the material used is important, but also the design. The owner can think it over on his own or contact our specialists and choose an option from the presented catalog. If it doesn't have the design you need, we will create a custom design. The shape of the back – rectangular, square, round or curly – leaves a lot of room for imagination. There are a huge number of options for decorating with fabric or leather. For example, covering the head of a bed using a drawstring is very popular. It can be vertical, horizontal, square, carriage, with or without buttons. For any type of screed, all of the above materials can be used. This type of headboard repair looks very attractive and expensive.
What materials and tools will be needed for the job?
It is recommended to prepare all necessary tools and materials in advance. To save time, try to plan the upcoming amount of work.
It is necessary to think through the entire plan for future work.
You will need the following items:
- furniture panel made of plywood base;
- any high-quality fabric for the front side;
- fabric cut for the wrong side of the back;
- foam rubber about 5 cm thick to create a soft base;
- loops with bolts to help secure the finished headboard;
- decorative elements;
- furniture stapler with thick staples;
- electric jigsaw;
- drill;
- sharp knife and scissors;
- Crochet hook;
- universal glue;
- twine lace;
- wall fastenings and screws.
To make a carriage screed you will need a lot of materials and tools.
As you can see, the list is not small. Therefore, in order not to be distracted by searching for the necessary items, prepare everything before you start work.
Substrate treatment
To make a bed headboard with your own hands, you need to process the base. If the base is an old bed, first of all you need to rid the frame of the previous covering. Then, on the inside, along the length, boards or plywood cut along the contour are bolted. If desired, you can increase the length of the headboard using special bars, placing them on brackets for soft covering. Don't add a lot of details. If you need to make a wooden headboard of the bed with your own hands, then wooden boards are used as the material for the backrest, which can be arranged in any order.
Then you need to make holes at the headboard using a drill. To do this, you can use a perforated panel on which the marks are visible. But these devices have a high price, quickly become unusable, and it is irrational to use them to mark the necessary places.
A master class on making a bed with your own hands clearly demonstrates all stages of work. The production stages are as follows:
- determine the main point of the head of the bed;
- connect the found point with the middle hole on the perforated mesh;
- from this place, retreat down four rows - this is where application should begin;
- Use a marker to place marks through the holes in the required places;
- you need to mark the first point. It is considered fourth down from the center. Then you need to find the eighth point - it is located at the eighth horizontal mark. So we mark the points to the end of the row in both directions, then we make such marks vertically;
- the entire headboard should be marked in this way in a checkerboard pattern, with four points retreated horizontally and vertically from the marked ones;
- marks must be placed on the entire top of the headboard;
- 10 centimeters should be left along the entire perimeter of the headboard;
- Using a drill, we begin to drill holes. You shouldn’t make them too big, a diameter the size of a needle will suffice. If there is a frame at the back of the product, it must be drilled.
Preparing the base of the headboard
Take a plywood sheet of the required size. It can be rectangular or other non-standard shape.
For the base of the headboard you will need a sheet of plywood.
We cut the foam rubber to the size of the plywood base. We apply markings on the foam rubber for fastening the buttons. The fastening can be any: in several rows, diagonally or in a checkerboard pattern.
A piece of foam rubber needs to be cut to the size of a plywood sheet.
Next, take a knife and make holes for the buttons. They can also be made using a heated metal pipe. Remember that you need to put a board under the foam rubber, otherwise there is a chance of ruining the floor covering. Next, we lay the foam rubber on the plywood base and draw holes with a pencil. We drill the necessary holes.
Holes for buttons are cut in the foam rubber.
How to upholster with fabric: master class
Below we discuss upholstery methods for different headboard options, as well as different upholstery methods.
Large rectangular
A rectangular headboard is the easiest to restore and decorate. It is enough to choose the fabric for the upholstery, as well as stock up on foam rubber and padding polyester. Instructions:
- place the backrest on the foam rubber, cut around the perimeter;
- Apply construction adhesive to the headboard and press down the foam;
- At the top end, sew the foam rubber with a stapler;
- lay the padding polyester with an allowance of 7–8 cm at the edges;
- lay the upholstery, tuck the edges with padding polyester from the top, and staple to the base;
- Sew the bottom end in the same way, fix the fabric on the sides;
- cut triangles of fabric at the corners and secure with a stapler.
This finishing option is the simplest. It is enough to monitor the tension of the fabric so that there are no ties or distortions. If possible, ask a friend for help.
Figured
Upholstering a shaped headboard is a little more difficult, but only because it will take more time. The procedure is no different from standard upholstery, but has a number of features:
- the foam rubber must be cut to the shape of the headboard (curly), so it is more convenient to use tailor’s scissors instead of a stationery knife;
- padding polyester or batting is also laid on top of the foam rubber, which is fixed along the contour of the part with a stapler until the required shape is achieved;
- the lower end of the back is usually straight, so start from there: lay the fabric on the lining, stitch with a stapler from the back side;
- do the same with the sides, cutting off the fabric in the lower corners - only the upper curly end will remain to be covered with fabric;
- act progressively: place staples through every centimeter of fabric, make cuts in places of bends so that the upholstery is more pliable;
- after covering, the back side of the back will look unaesthetic: this can be corrected by sewing mesh lining fabric or any other fabric.
Advice
Stock up on anti-stapler in advance. When working with a shaped headboard, you will often need to remove the brackets to adjust the upholstery.
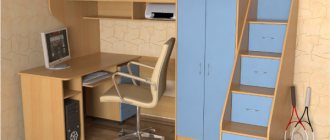
Angular
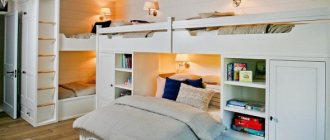
There are different ways to use the free space in a room. Often the bed is placed in a corner to free up space. These can be either regular rectangular beds or corner models. Here it is reasonable to stylize the corner as a sleeping place, designing a corner headboard for better positioning of the sleeping area.
Peculiarities:
- you will need to measure the width and length of the bed to determine the angle parameters for decoration;
- Based on the parameters of the bed, prepare two plywood, chipboard, fiberboard or a pair of wooden panels (longitudinal and transverse);
- in the case of standard upholstery, it is enough to reupholster the sheets by covering the sheets with foam rubber, padding polyester and fabric;
- for the carriage screed, diamond-shaped markings are made on plywood;
- at the intersections of the diamonds, holes are drilled to adjust the fittings and fabric;
- You can secure the plywood to the wall with screws, bolts, nails or a profile;
- To increase the strength of the structure, glue is used in corner joints (preferably epoxy).
Attention
A corner headboard will likely require drilling into the wall. It is irrational to attach such a headboard to the bed because of its heaviness.
With decorative trim
Products covered with leather or fabric are usually decorated with decorative nails or rivets. This headboard takes on a finished look and looks aesthetically pleasing. The main constriction is carried out according to the general principle. Markings for future decor should be done on the finished back, which is covered with fabric.
- Make the necessary indentation along the edges. To do this, it is convenient to use a triangular ruler.
- Use a pencil to mark the places where the outermost nails will be driven in.
- Install the nails and stretch a thick thread between them.
- Measure the width of the marking: this way you will understand at what step it is better to install the fittings.
- Mark with a pencil all places for installing parts.
- Then you just need to install the nails according to the markings and hammer them in with a hammer.
Reference
Upholstery with decorative trim looks good on both rectangular and shaped headboards.
Sheathing with carriage tie
The carriage tie is most popular when covered with leather. However, the quilted effect can be achieved even with the help of other upholstery fabric. Additional accessories and tools will be required: decorative buttons, round drill. Instructions:
- cut the foam around the perimeter of the back, glue it with mounting glue;
- wait until the glue sets (5–7 minutes), turn the part with the foam over;
- Use a pencil to mark under the screed, keeping 5–7 cm margins along the edges;
- Drill holes at the intersections of the diamonds: this is where the fittings will be installed;
- to draw holes on the foam rubber, remove the needle and thread and make a mark;
- drill holes in the foam using a round drill;
- fix the padding polyester with a stapler, make indentations in the holes (press your fingers on the padding polyester at the drilling sites);
- Apply identical markings to the reverse side of the leather, thread the threads where they align with the holes;
- lay the skin on the foam rubber, pull the threads through the holes and pull it tight, fix it on the back side with a stapler;
- stitch the leather along the edges of the headboard, starting from the top end and ending with the sides;
- Thread the threads into the legs of the buttons, pull them out into the holes on the headboard, and sew them on the back side with a stapler.
Attention
The thickness of the foam rubber for the carriage screed must be at least 50 mm. It is not necessary to lay synthetic padding under natural leather, but it is recommended.
The video shows how to cover the headboard with a carriage screed:
How to make upholstery on the back side?
- A mesh lining fabric (perforated) of the desired shade is attached to the back side of the headboard. It hides the aesthetic imperfections of the covering, protects the wood and joints from damage. It is necessary to cut the fabric with 2-3 cm indentations along the edges of the headboard so that there is enough of it to cover the stitching.
- Fold the edges and secure with pins for convenience.
- Secure the material with a stapler around the perimeter of the back.
- Alternatively, the fabric is secured with small nails. Then the seam seems neater.
Upholstering a headboard is easy to do and the results will bring joy to any bedroom owner. You can revive old furniture, create a unique thing that has no analogues. To do this, you will need a minimum of tools and the help of a close friend, because any work moves faster in a team.
Decorating the headboard
There are a large number of material options for headboard decoration: leather, eco-leather, velor, suede, velvet, etc.
The thickness and class of fabric for the upholstery can also be any. Try to use high-quality and rich material, and not primitive fabric with small flowers. This way your furniture will look not only stylish, but also expensive.
The fabric for the upholstery can be any, but it is better to use a beautiful material.
A rather interesting design solution would be a headboard made of carriage screed. The decorative method of decorating carriages was actively used in the 18th century. Today, such finishing is actively used in the manufacture of furniture and interior items.
The carriage screed began to be used back in the 18th century.
We take foam rubber with a pre-prepared plywood base, and the holes on both parts must match. We apply a layer of padding polyester on top with a small margin on all sides. We lay the material with a margin of 10 cm or more. We turn the plywood over and attach the fabric. To do this you will need a furniture stapler.
We thread the lace through the fabric-covered buttons and tie them in a knot. Using a crochet hook, insert it into the holes in the plywood. Securely attach all the buttons with staples and the carriage headrest is ready!
All buttons must be securely fastened with staples.
To upholster a headboard on a bed, you do not need to have any special sewing or construction skills. All you have to do is come up with an interesting design and complete the screed yourself. The price of a furniture tie will depend on the fabric, but it will still be significantly less than when ordering a custom-made bed.
The nuances of making a headboard, how you can do it yourself
The bed is the main piece of the bedroom set. Today there are many different models of beds, one of the first places is occupied by options with soft headboards. The cost of such products is quite high, but making a headboard with your own hands is not difficult. This will not only save on work, but will also give you the opportunity to experiment with finishing.
Photo ideas for the design of a bed headboard with a carriage screed
Works taking into account the type of upholstered headboard
To make the bedroom look new, it is enough to update a certain element of the bed, in particular, it will be enough to update the head of the bed, making this element with your own hands. Today, the most popular is the soft front part of the bed, which makes the sleeping area look comfortable and cozy. There are several options on how to make a wooden bed and elements for it with your own hands.
Carriage screed technique
The name of this method goes back to the distant past, when carriages were decorated using such decoration. Today it is successfully used for finishing various pieces of furniture. The effect of such finishing is manifested if the material is thick fabric, which looks great in the form of folds. The carriage screed involves making a pattern in the manner of rhombuses or squares. Large buttons covered with the same fabric and large beads are used as rivets.
To make a carriage headboard with your own hands, you will need:
- sheet of plywood - the basis of the product;
- fabric for decoration;
- thick foam rubber, synthetic winterizer;
- buttons on the leg for rivets,
- drill for drilling holes;
- pointed knife;
- furniture stapler with staples;
- fastenings and screws;
- nylon threads, twine;
- scissors, glue, crochet hook.
These devices will help craftsmen in creating not only individual parts of a sleeping place, but also in making a bed.
First you need to take a sheet of plywood, from which, if necessary, the shape of the product itself is created. Next, we cut out the foam rubber along the blank. Markings are made on it in a checkerboard pattern of the places where the buttons will be located. Using the tip of a knife, holes are cut in these places. Experts recommend making such holes using a metal pipe. The pipe is heated, applied to the right places, and two holes are obtained at once.