Even the smallest errors on the walls will be visible when painting them, so the preparatory process is very important before painting.
If there are flaws on the wall, then even the most expensive paint or the most expensive materials will not save it. Today in stores you can buy different types of materials, thanks to which you can level the walls for painting.
In order not to get lost in a large number of materials, you need to know the leveling procedure itself and the features of certain mixtures.
Creating a flat surface
In new houses that have just been built, as well as in some old apartments, the quality of wall coverings is not the best.
There are different differences on the walls, in some cases reaching 2-5 cm.
In addition, cracks and holes always accompany buildings, so you can level the base for painting using several methods:
- If there is significant curvature on the surface, the corners of the walls do not match, and there are displacements, then it is recommended to use frame technology. To do this, a sheathing is created, which is attached to the curved walls, after which sheets of plywood, plasterboard, chipboard and other flat materials are installed. Then the entire plane is leveled and only then paint is applied. In the modern world, people use drywall for this technique because it is inexpensive and easy to work with.
- The second leveling method is the use of plasters or mortars based on sand and cement. This method is also called raw or wet. The method is used for minor defects and differences that do not exceed 5 cm. If the curvature is more than 5 cm, then it is better not to use the method. The use of cement mortar is the best option for brick.
Painting smooth walls will be a pleasure if you do them using the frame method. The wall turns out to be smooth, and insulation can be laid between the sheets of drywall and the wall itself.
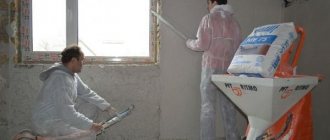
Building mixtures for leveling
To level the walls, you will need to prepare auxiliary materials, the description of which is given in the table:
| № | Materials | Description |
| 1 | Ready putty | The diluted putty must be used within a short period of time, otherwise the residue will thicken and the remaining amount can be discarded. It is recommended to purchase materials strictly according to the estimate. |
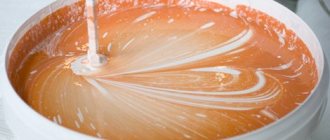
| 2 | Dry putty | It is more economical to buy dry mixtures, which can be diluted with water if necessary. Often mixtures are sold in bags of 25-30 kg, consumption is approximately 1-1.2 kg per 1 sq.m. The powder is poured into water according to the proportions indicated on the package, and then thoroughly mixed with a mixer. |
| 3 | Primer | Additional material that allows the putty to better adhere to the wall. The soil prevents the appearance of mold and dampness on the walls. On average per 1 sq.m. About 100 grams of primer are consumed. Often sold in metal cans or canisters. |
You need to prepare the putty in such a quantity that it is enough for the work and does not remain for a long time.
You need to work at average temperature, the room should not be more than 25 degrees.
Dry air is also not allowed in the room; humidity must be maintained so that the plaster dries evenly.
Before using the primer, it must be thoroughly mixed, and if necessary, diluted with water or solvent.
Leveling a brick wall
If the leveling is carried out without using a frame technique, then the wall is immediately puttied. For brick you will need to complete the following steps:
- The old coating must be dismantled.
- All remnants of glue or finishing materials are washed off and then impregnated with antifungal agents. This will prevent mold and black spots from appearing on the surface.
- If the differences are small, up to 2 cm, then no additional work will be required. If the difference between the walls is large and the solution will be applied in a layer of more than 2 cm, then a special reinforcing mesh is applied to the surface of the wall.
- Next, vertical beacons are installed. They are leveled and attached to the walls using cement or plaster at a distance of 50 to 150 cm.
- Now the cement mortar is mixed and thrown onto the wall between the beacons. Using the rule, the solution is stretched along the wall from bottom to top; the movements of the rule should be in the form of a zigzag.
- When the entire space is filled, it is necessary to evaluate the evenness of the surface and, if necessary, add solution to the depressions and repeat the work.
- After the solution has dried, primer is applied to the wall and left for several hours to absorb. Then the finishing putty is spread and the surface is brought to perfect evenness.
After the work has been done, the surface is considered ready for painting. If necessary, you can additionally walk along the wall with sandpaper to smooth the surface. For more information about leveling brickwork, watch this useful video:
Before throwing the solution between the beacons, you should take care of laying out new wiring, as well as installing boxes for sockets and switches.
Applying a new coating
It doesn't matter at all what the paint is supposed to be applied to. Whether it’s decorative plaster or wallpaper for painting, you still need to first level the wall and putty.
So what do we have? A terrible peeled dusty wall. First you need to clean it from dust. Otherwise, the putty simply won’t stick. This can be done with a stiff brush or an old vacuum cleaner.
Do not rush to apply the putty solution! Carefully inspect the wall for mold or signs of mildew. If there are any signs, treat the damaged area with a solution of copper sulfate. It is advisable to cover about 35-39 cm of clean surface around in order to avoid spreading the dirty trick further. If you neglect this stage, then in the near future you can safely expect the appearance of black spots of fungus. And already on top of the final painting. Do you need it?
Advice. To play it safe, we recommend treating the entire surface of the wall with an antifungal agent. Better to be on the safe side.
After drying, we don’t run for a bag of putty again. And we take any deep penetration soil and smear the wall again. As a rule, such a mixture is always liquid, like water. And applying it with a brush or roller is an unaffordable luxury and a big waste. Try using a spray bottle. Priming will be more uniform and virtually waste-free.
Advice. If you have a garden sprayer, be sure to use it. The size of the nozzle is adjustable so that it does not become clogged with primer particles, and the pressure will help complete this stage of work quickly, economically and efficiently.
But now, a day after applying the primer, you can drag out a bag of putty. And again, do not rush to dilute it with water. Have you installed beacons? Have you prepared the rule and spatulas? Will you apply the putty by eye? Well, if you are confident in your abilities... In fact, even professionals with many years of experience use the lighthouse wall leveling system. Although, any amateur always flatters himself. Try it too. After all, there is probably time and money to re-prepare the walls for painting...
Don't show off. Install the beacons according to the level. And for rough putty, choose a coarse mixture. Dilute it according to the instructions and do not hesitate. Apply more to the rule and move it from the bottom up. Just don’t slap the mortar onto the wall! It will fall back on you. Not all masters use this application technique, let alone non-professionals.
And there is no need to try to smooth out all the unevenness at the same time. Then you still need to apply a fine-grain finishing putty on a gypsum base. So you can correct minor flaws with her. By the way, you can try to carefully smooth out large ones after 40-45 minutes of drying. To do this, you need to take a special wooden construction “grater” with a large mesh or sandpaper. And remove large crumbs of putty using smooth circular movements.
Advice. To avoid pulling beacons out of the walls, use aluminum ones. They do not rust over time and can be safely left in the wall.
After the rough layer has dried well, you can apply the finishing putty. The method of final preparation of the walls depends on the desired result (matte or gloss).
Matte.
Apply the finishing putty in a thin layer and let it dry thoroughly. Then the surface was sanded with dry fine sandpaper to a slight roughness.
Glossy.
Do not wait for the finishing layer to dry completely. 30 minutes after application, possible irregularities are smoothed out with wet sandpaper.
Advice. For the best result, the sandpaper is secured to a construction float or a flat block. Use screws or nails. Glue won't work.
how to remove paint from a concrete wall
Leveling a concrete wall
Leveling a concrete wall for painting is a little different than a brick base. Those who do not know how to level concrete walls for painting can use the step-by-step guide:
- The walls are cleaned of old coating.
- A primer is applied to the surface, which is intended only for concrete.
- After 6 hours, this is exactly the time needed for the primer to dry, you should dilute the starting putty and begin applying it to the walls.
- After the first layer of plaster has been laid, you will immediately need to apply a nylon mesh directly onto it, the cells of which are 2 x 2 cm. Such a mesh will not allow the plaster to crumble over the years and will keep it in a heap.
- A second layer of solution is applied on top of the mesh. In this case, there is no need to wait until the previous layer hardens.
- The movements of the spatula should only be cross-shaped, gradually stretching and leveling the putty. It is better to use wide types of spatulas.
- When the second layer is laid, the wall should be allowed to dry for 24 hours.
- To ensure the most even surface possible, apply finishing plaster in a very thin layer. She will be able to level out and remove even minor holes.
- After another day, the walls are sanded with sandpaper to give them perfect smoothness and evenness. Watch all the intricacies of concrete leveling in this video:
Finishing
Putty
No matter how hard we try at the previous stage, in any case, the surfaces we get will not be as smooth as necessary. That is why the preparation of plastered walls for painting, as well as masking defects in plasterboard sheathing, must also be performed at a high level.
Applying putty
The most common processing technique is putty.
With plaster everything is quite simple here:
- Using a spatula or trowel, scoop up the finishing putty mixture. As a rule, a gypsum binder is used for this purpose.
- We distribute the mixture evenly over the wall, masking plaster defects.
- Using a wide spatula, smooth the surfaces, achieving as smooth a surface as possible.
It will be somewhat more difficult to process plasterboard walls:
- We open the joints between the panels using a knife or plane, cutting off the edges of the sheets at 450. This will ensure reliable adhesion of the putty and gypsum board.
- We glue the seams with a polymer serpyanka mesh.
Sealing an embroidered seam (pictured) with serpyanka
- We use putty to mask all cracks, plane defects, as well as places where screws are attached.
In both cases, we install special pads on the corners that will protect the joint of the walls from chipping. We mask the overlays using the same putty, after which we finally level the planes.
Installing and masking the corner
Grout
Next, the procedure for preparing walls for painting involves mechanical alignment of the putty surfaces:
- We attach sandpaper No. 60 or an abrasive mesh with a similar grain size to a special grater or grinding machine.
- We process all putty areas, sanding uneven areas and smoothing out protrusions on the surface.
Advice! During work, a lot of dust is generated, so it would be a good idea to use a respirator.
Machine sanding
- Next, we remove dust from the surface and perform final grouting. To do this, we use sandpaper No. 100 or No. 120 with a finer grain. During the work, make sure that the grinding surface does not become clogged with dust.
- For finishing with water-based paint, exactly this surface quality is required. For other compositions, especially textured ones, rough grouting is quite enough - as long as there are no major defects.
Primer
The last step before starting the actual painting is applying the primer.
This procedure ensures increased adhesion of the base material with the finish, so it should not be neglected:
- For most decorative compositions, walls are treated with penetrating primers with a fine structure. It is advisable to use materials from the same manufacturer as the paint itself.
- Zinga conductive paint, which is usually applied to metal, requires prior priming with an insulating anti-corrosion compound.
- Fire-retardant paints for metal Polistil, used mainly in industry, are laid on load-bearing steel structures without a primer as such. To ensure adhesion, it is enough to clean and degrease the steel.
Apply primer for painting
The primer is usually applied in two passes. After the second layer of material has dried, the walls can begin to be painted.
Preparing drywall
After the frame of the profiles has been made and installed, sheets of drywall should be secured to it using self-tapping screws. Then the plane is leveled, but for the final completion of the work, the sheets of drywall must be puttied.
The work process looks like this:
- When attaching sheets of drywall, it is necessary to remove chamfers from the material along the edges, this allows you to get rid of unevenness and obtain smooth joints with small gaps.
- All screws should be slightly recessed.
- Next, you need to dilute the putty according to the instructions indicated on the package and apply it to the joints, and then use a large spatula to apply the mixture over all sheets.
- All seams on the sheets must be sealed with reinforcing tape. To do this, after the first applied layer, a tape approximately 5 cm wide is glued to the mixture and covered with a second layer, which helps prevent the appearance of cracks.
- The depressions made from self-tapping screws are puttied, and the surface is brought into a common plane.
- When a couple of layers have dried, the walls need to be sanded for perfect evenness.
Now the walls are ready for painting. It is not necessary to prime drywall surfaces after applying putty. Simply apply a couple of layers of paint and let it dry. For more information about preparation, watch this video:
For drywall, acrylic water-based or water-dispersion paint is used.
Before starting work, it is necessary to assess the condition of the walls under the finishing materials and only then begin to putty or make a frame using plasterboard sheets.
In this article you will learn why to level the surface of the wall before painting. Study the information on what tools are used to smooth the walls. Step-by-step instructions will be described: when to apply plaster, why putty is needed. You will understand the process of wall correction yourself.
How to line the walls
The dry method uses schemes made from a frame structure and durable material - drywall. To attach drywall, you should purchase:
- GPL sheets;
- special galvanized profile;
- screws for screwing the material to the frame or to the wall;
- screwdriver;
- dowels;
- special knife for cutting drywall.
Putty will also be needed in the process of leveling the surface at the final stage.
With the raw method, where the wall will be leveled with putty and plaster, the following materials will be needed: primer, reinforcing mesh, beacon profiles, screws, plaster, trowel for creating internal corners, putty.
Instructions step by step
There are several stages in preparing the surface for decoration.
- Preparatory stage. Removing old wallpaper or paint, scraping out old plaster, putty is a must. When applying paint to a wall in the presence of remnants of old wallpaper and plaster, the putty will fall off over time.
- Draft stage. It performs three main types of work: reinforcement, leveling, and putty. Reinforcement is carried out if there are cracks on the wall; putty is needed for uniformity. Leveling allows you to eliminate crooked corners and gaps between the wall and the floor or ceiling. Leveling can be dry when using plasterboard material and wet when using putty and plaster.
- Finishing stage. The final part is when the surface is directly painted.
Sanding, plastering, puttying
Concrete walls are characterized by increased strength, but another feature of such a surface is its evenness. If defects in the form of small depressions or protrusions are found on such walls, it is necessary to get rid of them by grinding and puttying. The smallest bumps can be knocked off with a hammer (pick), but sanding is one of the mandatory procedures included in preparing walls for painting.
Whatever the surface of the walls in the apartment (concrete, brick, plasterboard), preparing the walls for painting with water-based paint requires mandatory puttying. During the work, it is necessary to correctly select the most suitable mixture (ready-made or dry) and a tool that will make it easier to level the surface. We are talking about spatulas with a length of at least 45 cm and a trowel. In addition you will need:
- level 2 m with spirit level;
- rule;
- spatula 10 cm for scooping the mixture.
In cases where concrete walls have to be prepared for painting, they are leveled using ready-made gypsum plaster mixtures of the “Rotband” type.
Working with such compositions is simple and convenient. Applying them to the surface and distributing them over it does not require much physical effort. All manipulations can be performed with a 45-60 cm trowel or spatula. The quality of the created surface is checked by applying a rule and a two-meter level to the wall.
The putty is applied in three layers: the first base, starting, second leveling and third finishing. Each has a certain thickness and is made with a specially created composition. This is a mandatory stage of work related to preparing walls for painting with water-based paint. It is this that ensures the uniform distribution of the paint composition over the wall surface.
Using putty you can eliminate minor defects even on a plastered surface. These may be small gaps and cracks, depressions no more than 3 mm deep, but even if plasterboard was used to level the walls, it will not be possible to prepare the walls for painting without putty.
It is the putty that fills the seams and seals the joints between the fixed sheets.
When to apply plaster on a wall
If you choose the raw method, you will need plaster. Before application, prepare the surface:
- Clear the area under the plaster of old material, paint, wallpaper. It is also worth removing dust and dirt.
- Next, beacons are distributed along the wall. They are set for even application of the material to the surface. Beacons are aluminum profile landmarks that are used to determine when the next layer of plaster is applied to the wall.
- After fixing the beacons, spray is applied - the first layer of plaster is applied, more liquid than the main layer of finishing material. The thickness of this layer is approximately 5 mm. Thus, roughness and unevenness on the surface are corrected.
- Then the plaster is diluted more thickly and the base layer is applied, priming the surface with a thickness of 10-20 mm. This layer is used only when the spray has hardened and turned white.
- After the primer has set, but has not yet dried, cover it. The putty is diluted to the consistency of sour cream, then applied to a layer of soil about 2 mm thick.
- After the covering has hardened, but not completely, grouting is done: the formed tubercles and irregularities are rubbed with a special wooden grater in a circular motion.
Putty when leveling walls: how to do it
- Carefully inspect the walls; if they are uneven or rough, you must first treat them with plaster.
- If there is old coating, such as paint, plaster, they must be removed.
- If they are leveling with drywall, check that all the screws are screwed in and do not protrude on the surface.
- When leveling with putty, you must use the rule to determine the evenness of the walls: apply a strip or level to the surface of the wall, monitor the size of the existing gaps between the wall and the tool, and determine the scale of subsequent alignments.
- Next, putty is applied. Putty is putty in two stages - starting and finishing.
- The next step is to apply the primer. It is necessary to save paint or glue in subsequent stages.
How to level a wall with your own hands
So, if you decide to level the wall yourself, you should take the following steps.
- Decide on the leveling method - dry (using GPL) or wet (using plaster and putty).
- When choosing the plasterboard method, decide how to attach the canvas: to the frame or attach it to the wall with glue.
- When choosing to smooth the surface using the wet method, go through all the stages: cleaning areas of old materials, installing beacons, applying two layers of plaster, rubbing seams and uneven areas, and then treating the walls directly with putty.
- After all the stages, when the walls have a fairly smooth surface, you can apply paint.
Even without experience in construction and repair work, it is possible to carry out all stages of wall alignment as correctly as possible. The main thing is to choose a method that even beginners can do. By taking responsibility for completing the work, you can save money and also gain the necessary experience.
Plastering
If it is impossible to achieve a perfectly flat surface or the old coating has become unusable, it should be completely removed. After removing all the old plaster, clean the walls with a broom or vacuum cleaner. After this, make a solution and seal all large cracks, aligning them as much as possible with the level of the main surface. The differences after such processing should not be more than 1 cm; a laser level can be used to check.
After this, you need to prime the walls. The primer is able to protect the surface from excess moisture and the formation of fungal colonies. If you are unable to achieve a level difference of less than 1 cm, you should definitely use reinforced mesh. It is attached to the walls using ordinary dowels.
After preparation, it is worth installing beacons that will help level the walls. Beacons are sold in any specialized store. The first beacon is installed from any corner at a distance of 30 cm, the subsequent ones from it should be 1.3-1.5 m wide. After installing them, apply the plaster solution along the profile of the beacon and in its center. This will allow you to see the required level of material application. After completely treating the wall, remove the beacons and treat the empty spaces from them with plaster.
Preparation process
Before applying the putty, it is necessary to clarify that various substrates are suitable for applying paint. Among them:
- treated with putty;
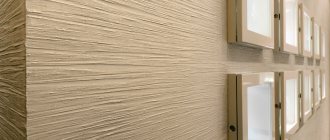
- relief materials for finishing;
- decorative plaster;
- other flat surfaces, including wallpaper.
Each type of work has certain features and disadvantages. But the most popular method is to apply putty; this is the simplest and most proven option that you can implement with your own hands.
There are times when perfectly smooth walls are not needed: in a garage, barn, basement or other utility or storage room. In this case, you can do without puttying, but first you need to prepare the plaster for painting.
Finishing for painting wooden walls
When preparing to paint wooden surfaces, the characteristics of this material should be taken into account.
After complete drying, the surface is ready for painting.
When preparing walls with textured surfaces for painting, you only need to apply a layer of special primer (deep penetration), since the relief material does not need sanding and leveling.
Wallpaper that is suitable for painting does not require special treatment; it is enough to cover it with a thin layer of glue or adhesive primer.
Tools
When doing the work yourself, you will need the following tools:
- it is better to purchase several spatulas of different sizes for work, they will help in applying the composition;
- a marker is required for initial preparation and marking;
- a portable lamp, it will provide complete lighting;
- small axe, hammer and chisel;
- abrasives: mesh, sandpaper, bars.
For do-it-yourself puttying you may need: spatulas, a lamp, sandpaper and other tools
When performing processing, all tools should be within direct access so that it is convenient for you to use them.
Stages
The finishing procedure includes several stages, including:
- carrying out initial grinding before starting work;
- applying starting putty;
- treatment;
- performing the finishing layer;
- further leveling.
When doing the finishing yourself, you should inspect the base. If it is strong and there is no damage to the surface, then you can remove the old layer and do a little leveling.
Standard technology involves using regular sandpaper and a sanding block. If you have specialized equipment, then it is quite possible to use it.
After removing old layers and leveling, it is necessary to conduct an additional inspection of the base. If there is serious damage or fungus on it, they should be completely removed. The resulting holes are sealed with a solution and allowed to dry.
The walls will need to be treated with antiseptic compounds to kill mold and fungi, then apply a primer. Such preparation does not take much time and is easy to perform.
Before priming, the walls must be treated with an antiseptic composition.
In case of serious differences in heights and damage to the plaster, it is necessary to choose another option for primary preparation. You will need to completely remove the old coating from the wall and replace it with a new solution. As an option, you can install plasterboard panels. The decision is up to you, take into account the possible difficulties in performing the work and the cost of various materials.
Primary putty
After the initial preparation of the walls, you can proceed to the actual finishing and leveling. The plaster itself is not suitable for painting; it has a porous structure and absorbs large amounts of moisture. This can lead to a change in shade and roughness. Therefore, the entire surface of the wall must be covered with putty.
The technology for carrying out the work involves the selection and application of starting putty. Its main difference is a large amount of fine sand, it allows you to lay the material in a fairly thick layer, the composition does not crack when it dries further.
To work, you will need a large spatula; a small one is used as an auxiliary tool for more accurate distribution. Usually materials are supplied in the form of dry mixtures; carefully read the instructions on the packaging, then dilute them for further use.
When applying it yourself, it is recommended to use additional reinforcement for the wall. It increases the strength of the material and increases its service life.
Initially, the putty is applied to the wall in one layer, then a nylon mesh is applied and pressed in using a spatula. It is covered with a compound on top and remains inside the structure of the material.
When finishing, many people try to immediately even out the composition on the wall as much as possible. But this can be called a serious mistake. When applying putty, you should only slightly level the surface and distribute the mixture to other areas. You should not persistently achieve an ideal result at this stage.
The mixture must be allowed to dry for 8 hours, after which you can begin sanding. For this purpose, coarse abrasives are used; they will help to level and get rid of small defects.
Final alignment
Finishing putty is used for the top layer. Its main difference is the absence of foreign impurities in the material and large grains, which ensures ideal surface leveling.
If the starting composition is applied according to the technology in a thick layer of up to 4 mm, then for the finishing composition it should be half as much. Otherwise, cracking of the material and damage may occur.
Finishing is done using a large spatula, a small one is used to distribute the composition and smooth it out. This material fits much better on the wall, but you should not try to eliminate all the existing tubercles.
Let the material dry well for 6 hours. Afterwards, you need to take an abrasive mesh marked “60” and carefully treat the surface. It is important not to overdo it, otherwise you can remove all the applied composition from the surface.
If the result does not suit you, then you should perform 1-2 additional layers. You can evaluate the quality of the finish using a lamp at an acute angle. Small shadows indicate bumps and must be removed with an abrasive.
Preparation for painting
How to prepare a wall?
And while much is clear about the painting process itself, not everything is clear about preparing the walls for painting. What are we talking about? The whole point is that you cannot simply apply paint to a surface that is not prepared. Firstly, this will lead to the fact that the paint will begin to peel off after some time under the influence of external factors. Secondly, the quality of the applied layer will be strikingly different from that applied to the prepared surface.
Hence the frequently asked question, how to properly prepare walls for the painting process? And here it is necessary to immediately make a reservation that the walls must be divided into categories. Category one is brick without plaster applied to it. The second category is concrete without preliminary preparation. And the third category is walls in old houses that require repairs.
Preparing brick walls
Preparing a brick wall
There are always more problems with brick walls than with others, because it is always associated with their plastering. This process is complex, dirty and time-consuming. In addition, it takes a fairly long period of time. And the question of how to plaster is very relevant today. Where does it all begin? First of all, a metal mesh is laid on the walls, which serves as a reinforcing frame.
There are several technologies that depend on the number of layers applied. The simplest and most common is two-layer plaster, where the first is a spray that is applied in liquid form. And the second is soil created from a thick solution.
Attention! The primer cannot be applied in one layer. it is quite thick, its standard thickness is 5-6 centimeters. The plaster will simply fall off under its own weight. Therefore, experts recommend applying the primer in two or three layers, each of which is well dried.
After which the plastered surface is treated with a primer. To level the walls, it is best to use a deep penetration primer. This ends the first stage, and the second stage begins, which is associated with laying the putty. Hence the next question - how to putty the walls correctly?
It is necessary to immediately make a reservation that puttying must be carried out with full responsibility and in accordance with all the rules. Firstly, to carry out this process you will need a dry putty mixture, which is usually diluted with water. Secondly, to level the putty, use two spatulas at once. Wide for applying finishing material to the wall, small for applying putty on a wide spatula.
When leveling walls for painting, the material must be applied in several layers. The first one, which is also the thickest, is applied to the wall at an angle of 20-30 degrees. Please note that the finishing material must be laid with an overlap, that is, the freshly applied putty is laid on top of the already laid one, capturing part of it.
After the first layer completely covers the wall, you need to give it time to dry. After which the surface must be treated with fine sandpaper and primed. And now the finishing layer is applied, which will make the wall even and smooth. It is usually the thinnest, but as practice shows, it is not immediately possible to paint a wall with this layer. This requires both experience and skill.
But there’s nothing wrong with that if something doesn’t work out. You can apply layers of paint ad infinitum until the surface reaches the required smoothness.
Very important! Each applied layer of putty must be treated with a primer.
Preparation of concrete walls
Preparing a concrete wall
How to level concrete walls? We can say that concrete is much easier to level than brick. This is primarily due to the fact that there is no plastering step in this process. That is, not only less financial and time costs, but also less dirt, labor and nerves. But in all other respects, the process of leveling concrete walls is identical to the process of leveling brick walls. That is, preparation clearly wins.
Preparing old walls
With old walls, it is necessary to understand the surface study plan. It is very important to remove all defects on it that will interfere with the work. Cracks, chips and gouges can be dealt with using plaster mortar. But there are often walls, especially in the bathroom, where they begin to collapse under the influence of high humidity.
Preparing the old surface
What can be done in this situation? Here there is only one option - to completely clear the area to its base, that is, to completely remove not only the finishing materials, but also the materials that were used for leveling. After which it is better to process it again. If you need plaster, then you need to apply it; if putty, then this material is used.
All other stages are carried out using the same technology described above.