One of the important advantages of tension dams is that they can be installed in almost any room, including large ones. The ceilings are suitable for bathrooms, small hallways, impressive living rooms and even classrooms. Even a swimming pool can be equipped with a tension cloth of the appropriate size. Still, mostly films for indoors are produced in sizes no more than 5 meters wide. The maximum size of the fabric is the same. So what kind of stretch ceilings can be for large rooms? Our article talks about this.
Features and problems of installing a stretch ceiling in a large room
What do you say is the problem? Why can’t we produce tension fabrics of even greater width? After all, there is not much difference. Roll out the film 5 meters or add another meter just in case. However, here the elementary laws of physics come into play. Earth's gravity - there's no escape from it. Therefore, with a large size, sagging will certainly occur. And the larger the surface of the tension fabric, the more noticeable and noticeable the sagging of the fabric will be. It is considered acceptable if the sagging of the canvas is 1 cm per meter of width. This is normal, since such a change in lines is not noticeable to the eye, especially when looking at the bottom. However, with a larger width - for example, if you need to stretch the tension fabric for a width of more than 5 meters, there is a danger of damaging the fabric and causing sagging. That is why manufacturers do not produce panels of greater width.
What to do in such a situation? Typically, in a room where the width of the room is, say, 6 meters, a dividing profile is installed. It divides the room into two parts. The parts fit together comfortably and beautifully.
How to use fabrics in a large room
If you have a large room, then you will have to choose the widest roll of canvas.
Let's start with fabric - most manufacturers produce not very wide materials, but there are those who produce fabrics of more than three, four and even five meters. For example, European manufacturers make wide-sized fabric sheets in rolls, and if the ceilings are even wider, they make connections between two fabrics. Moreover, the connection depends on the type of fabric. If it is a film coating, then it is welded in a special way. But if you have a polyester fabric in front of you, then you cannot weld it in a similar way to vinyl. In this case, as described above, separation profiles are used. If desired, such profiles can also be installed for film materials.
This profile connection looks very decent. The joint can be decorated with a decorative strip or without it at all.
How is the installation going?
The work process will not take much time, and after that you will not have to clean up piles of construction waste. Once the contract is concluded, specialists will arrive at your site within a strictly specified time frame.
Stages of work:
- Preparing the base. The ceiling is cleared of dust and old coating.
- Marking for each tier.
- Creating a frame - for this, aluminum profiles will be used. When creating multi-level systems, gypsum board sheets may also be needed.
- Working with lighting devices. Specialists lay the wires and attach light bulb stands. If you plan to use backlighting, do it at this stage.
- After the frame is ready, the canvas is stretched. If you have to work in a spacious room, the canvas is assembled from several parts, glued together by welding. Don’t worry, at the end you will get a visually solid canvas (no seams will be visible). They begin to work with the canvas from the lower level, gradually moving upward.
- Installation of lamps.
- Masking joints between walls and levels. A special tape is used for this.
About Chinese materials for large rooms
If the size of the room is slightly wider than 5 meters, then you can try stretching Chinese-made fabric.
Chinese manufacturers offer film with a maximum width of five meters. However, if the fabric does not stretch at all, then the stretch film coating stretches easily. It’s not for nothing that when cutting material, it is laid in dimensions 10 percent smaller than required - the rest will stretch. So if your room is, for example, 5.5 meters wide, then consult the experts. Maybe you can use Chinese PVC film. But if the width is even greater, then you will have to weld the seams. It is impossible to do this yourself; specialized companies for installing suspended ceilings have the necessary equipment and weld the seams carefully, almost unnoticeably to the eye. Welding is carried out at the molecular level, so the sheets retain high strength despite the thinnest thickness of the weld. Therefore, there is no need to fear that welded ceilings will tear or sag over time or come apart right along the seam.
How does the seam behave on different types of film? Let's tell you in more detail:
- matte canvas - if the canvas is of high quality, then the seam is practically invisible to the eye, it merges with the canvas;
- satin - on this material the connection point also does not differ;
- gloss is the most capricious material in this regard. Butt welding can be seen. And the point is not how well the seam is made, but simply that the light and shadows are refracted and reveal the slightest defects and unevenness of the canvas.
Advice! If the room is large and you need to install a welded ceiling, then it is recommended to choose a matte finish. And leave the gloss for other smaller rooms, where mirroring is exactly what is needed to expand the space.
Two-level suspended ceilings with lighting
Illuminated two-level ceilings look much more impressive and are more functional than unlit ones. They allow you to take full advantage of the limitless possibilities of lighting design and make the room much cozier and more comfortable. And for some types of ceilings (for example, satin), built-in additional lighting is simply necessary, since only with such lighting they reveal all the features of their texture and richness of shades.
The most popular solutions are spotlights, chandeliers, LED lamps and strips. There are two types of spotlights: with external and internal lamps. The first ones are more practical, since in this case the lamp itself protrudes beyond the ceiling, and only its base is placed between the tension and main ceilings.
LED strips of various colors create a soft, subdued light, ideal for additional lighting. As a rule, such tapes are placed at level transition areas to make the two-tier structure more “weightless.”
Output: multi-level ceilings
What if you need to decorate the ceiling in a very large room?
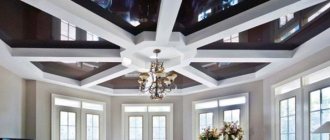
For example, in a restaurant, cafe, club, etc.? To decorate the ceiling of such an establishment, you can make a cod of several colors and make a multi-colored ceiling in one plane. The color will create the illusion of a multi-tiered structure, and the costs will be low. Or you can actually install a more complex multi-tiered structure, and it will certainly be more expensive, but also a more luxurious ceiling. The ceiling can be made in two or even three tiers, and here you can combine either a single-color film coating or materials of different textures.
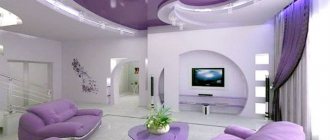
Very often, suspended ceilings at different levels help to beautifully zone a room. For example, highlight a bar counter or central part using a beautiful design in a circle or semicircle.
What multi-level systems do we work with?
Let's look at the most popular multi-level ceilings today. If the first priority is to hide pipes and wires from view, then the “step” option will be the optimal solution. If you want to highlight any zone in the room, resort to “wave”. If you have high ceilings, then with the help of multi-level “river” ceilings you will be able to enhance the room and create a cozy atmosphere in it. If you are planning to highlight the bed or TV area in the living room, take a closer look at the “semi-circle projection” system. But those who have a bulky, conspicuous chandelier are advised to take a closer look at the “podium” option. “Snail” is one of the expensive options that can create a unique atmosphere in the room. Non-standard shapes are often used in children's rooms.
Methods for tensioning fabric in large rooms
How to secure a large tension fabric? Typically, a PVC or metal baguette is used for such purposes. But to tension large sections of fabric, an aluminum frame is required. Only metal can withstand the increased load that large blades place on it. And if for a regular PVC baguette the load should not exceed 20 kilograms per square meter, then the metal will withstand its fivefold increase.
Another point to consider is the possibility of breakaway. It is almost impossible to tear the profile off the wall even with strong tension on the canvas if you use the harpoon connection method. With this method, if the screws are of sufficient size, you will ensure the strength and safety of the fastenings of tension fabrics over a large area. Using a harpoon fastening of a stretch ceiling to the wall, you will get a ceiling size from 6 m wide and up to 12 m long.
Multi-level stretch ceilings: installation sequence
To make multi-level stretch ceilings with your own hands, you will need the following tools and materials:
- pliers for profile systems;
- roughing plane for processing the edges of gypsum boards;
- needle roller;
- profile cutter;
- edge plane;
- heat gun;
- screwdriver;
- drill;
- CD and UD profiles for drywall;
- fasteners;
- drywall;
- stretch fabric cut to the size of your room;
- baguettes for canvas;
- edge strip;
- clamps;
- putty knife;
- perforator with drills with pobedite tips;
- hydraulic level;
- building level;
- strong thread;
- dowels
Multi-level stretch ceilings
Since multi-level suspended ceilings have a lot of different designs and constructive solutions, we will not be able to list them all here. Let's look at the sequence of manufacturing a multi-level ceiling using the example of the simplest design, when we install a plasterboard box around the perimeter of the room, and in the center we make a suspended ceiling one level higher.
Sequence of work:
- First you should make markings on the walls of the room. To do this, find the lowest corner in the room and put a mark there. To this we add the height of the profile and insulation, if one is assumed. We apply the resulting frame installation mark to all walls using a hydraulic level. Next, using a nylon thread, we beat off the fastening lines around the perimeter of the room. We apply the level of the second tier.
- Then, along the lower and upper broken levels, attach the U-profile guides to the walls. The dowel pitch is 30 cm.
- After installing the guides, we cut and fasten the vertical posts of the plasterboard box. The pitch of the posts is 20 cm. To fasten them we use metal screws.
Frame for multi-level stretch ceilings
- We do the wiring. We mark the locations of the lamps and distribution box. We lay the wires. We install the lamps and check the wiring.
- Let's start installing drywall. Remember that when performing multi-level stretch ceilings, you should make sure that the gypsum board joints fall on the profiles used. The fasteners are made using metal self-tapping screws.
- We make holes for the lamps and putty the drywall.
- Lastly, we attach the tension fabric. When performing multi-level stretch ceilings, you must strictly follow the instructions for attaching the film. We fix the baguette for the canvas on the vertical surface of the gypsum board box. We fasten the baguette with a minimum step.
- Multi-level stretch ceilings are most often made using PVC film, so we cannot do without a heating unit. Warm up the heat gun. We hang the canvas at the corners from the baguette using special clamps. The heating temperature of the canvas should be 70 degrees. After this, you can insert a harpoon with a spatula around the perimeter of the canvas into the baguette. Advice: if you are making multi-level stretch ceilings with lamps in film, then you need to make a neat hole in it. This hole is protected by a special plastic ring.
- After the film cools, the ceiling becomes perfectly smooth and even. This is achieved by pulling it.
Sheathing with plasterboard and laying communications
More information about installing a multi-level stretch ceiling can be found in the video:
Requirements for installing ceilings
In order for tension structures to stand for a long time and firmly, it is worth considering several nuances:
- check the strength of the walls to withstand not only the strength of the fastening, but also the tensile force of the baguette;
- anodized aluminum is the best profile for a stretch ceiling in a large room;
- You need to choose the film carefully and meticulously. It must be of high quality;
- It is not recommended to install such ceilings yourself. It is better to hire professional installers and entrust the installation to them.
Installation
There are two main ways to install ceiling panels:
- Harpoon.
- Klinova.
The installation method is selected based on the design of the ceiling, since there are a number of differences between them.
Harpoon method
Chic bedroom
With the harpoon method, the basis for fastening the canvas is a rigid polyurethane edging with a cross-section in the form of a harpoon hook. In order for the fabric to stretch well, its area should be 5-7% less than the area of the ceilings.
During installation, the canvas is attached to the profile in the corner of the room. Then it heats up and gradually stretches to the remaining corners. After the canvas is completely stretched over the corner fasteners, its final installation is carried out. The cooled canvas shrinks in size and takes on the required shape.
Wedge method
This method is labor intensive, but it is faster than the harpoon method. Unlike the previous method, the canvas, on the contrary, is cut out with an allowance of approximately 10-15 cm more. Before installation, the canvas is also heated, straightened and secured with spacer profiles. If the installation technology is followed, the ceiling will be perfectly flat, without creases, folds, etc.
Nuances of installing multi-level systems
Installation of a multi-level ceiling system is carried out in several stages (it is better not to do this with your own hands). First, an aluminum or plastic profile is installed around the perimeter of the room, to which fasteners are fixed. Then a baguette is installed to the profile.
Note! Each level of the system is mounted sequentially, and the baguette is the basis of the multi-level design.
A simple option
Unlike a guide profile, a baguette can have absolutely any shape. Thanks to this, it became possible to create not only multi-level, but also curved ceilings, arched elements, steps, waves, domes, etc. The relative ease of installation of such a system on baguettes made it possible to install multi-level systems even in the most ordinary standard apartment.
A feature of the installation can be considered the appearance of gaps, which are masked using special PVC overlays. When decorating a large room or installing a very complex system, for example, a dome-shaped one, seams inevitably appear that need to be made minimally noticeable. Additionally, you can disguise the seams by using a variety of lighting systems, for example, directional light, “starry sky”, etc. You can see the options in the photo.
Note! Despite the enormous design possibilities, PVC canvas does not allow creating, for example, pointed structures.
If it is necessary to make such forms, a combination of ceiling canvas with plasterboard and other materials is used.
Types of multi-level systems
Visual division into zones
- Two-level.
- Three-level.
- Four-level.
- Closed geometric, etc.
Stretch ceilings combine very well with different lighting sources (see photo), but when choosing lamps, you need to take into account the susceptibility of polyvinyl chloride to high temperatures.

