Classic board swing
What do you need
- Thick rope;
- board 30–50 mm thick;
- drill;
- drill;
- hacksaw;
- dye;
- brush.
How to do
1. Cut a piece of board about 50 cm long with a hacksaw or other saw that you have on hand.
2. To protect against precipitation and give a more aesthetic appearance, paint the resulting seat.
3. Using a drill a couple of millimeters larger than the thickness of the rope used, make two holes - at both ends of the board. Step back 2-3 cm from the edge so that the seat does not break, and drill exactly in the vertical center for an even suspension.
4. Divide the rope into two equal parts, make loops at the ends and secure to a suitable branch. Place the ropes at a distance approximately equal to the width of the seat.
5. Thread the ends of the ropes into the holes of the board and tie a couple of knots, choosing the desired height.
6. Try swinging.
What can be changed
- If you don't have a board, a shovel handle, a log or a piece of plywood will work as a seat.
Options for mounting a swing in a doorway
You can secure a swing or jumping jacks in a doorway provided that:
- The door frame is made of solid wood;
- The box is installed in a permanent partition.
If it is a light MDF door in a plasterboard partition without a reinforcing frame around the perimeter of the opening, the fastening will be unreliable and unsafe.
If you are sure that the materials that make up the opening are strong and reliable, you have three options for hanging a swing in it: to the top crossbar, to the side posts or to the horizontal bar.
Option with horizontal bar
A horizontal bar without a swing is a very useful device. And quite often it is installed just in the doorway. You can easily hang any swing on it, equipping it with rings or carabiners if necessary.
Note! Do not hang the swing on a telescopic sliding horizontal bar installed at random. When swinging, it can change its linear dimensions downward and fall.
For this purpose, choose horizontal bars with a stationary fastening or make them yourself using a durable crossbar and side fastenings.
For the crossbar, choose a metal pipe with a diameter of about 3 cm with thick walls (at least 3 mm).
Advice. Chrome-plated furniture pipes are not suitable for this purpose. They are thin-walled and may not withstand the load.
The crossbar can be installed in special rod holders screwed to the door frame. They can be closed or open, attached to a vertical or horizontal plane.
You can do without brackets and holders. Below are instructions on how to make a swing bar from steel water pipe. Its initial length should be 4-6 cm greater than the width of the opening.
| Image | Description |
| At the ends of the pipe, use a grinder or a hacksaw to make four slots 2-3 cm deep at equal distances from each other. The length of the pipe between the slots should be equal to the width of the doorway at the installation site. | |
| Trim the two opposite petals, leaving only the other two. | |
| In the remaining petals, drill holes according to the diameter of the mounting bolts. | |
| Bend the petals with mounting holes perpendicular to the pipe. Through them it will be fixed on the side posts of the box. |
Swing made from a disc and one rope
What do you need
- 4–5 boards 30–50 mm thick and 400–500 mm long;
- thick rope;
- hammer;
- nails;
- brush;
- paint or varnish;
- clamps;
- glue;
- drill;
- wood drill;
- roulette;
- thread;
- pencil;
- jigsaw;
- sanding machine or sandpaper;
- file.
How to do
1. Build a platform from boards. To do this, coat the side ends with glue, connect them together and tighten them with clamps. A simpler option: nail two bars across the boards, stepping back 10 cm from the edge.
2. Sand the top of the pad by hand with sandpaper or with a machine.
3. Using a tape measure, find and mark the center of the site with a pencil. Also put a line at a distance of 10 mm from the edge of one of the sides.
4. Drive a nail into the center, tie a pencil to it with a thread and draw a circle with a radius length along the mark at the edge of the area. Pull out the nail: you won't need it anymore.
6. Using a drill, make a hole in the center with a diameter 2–3 mm larger than the thickness of the rope of the future swing.
7. Using a file, grind off the resulting sharp edges in the center so that the rope does not fray when swinging.
8. Paint or varnish the resulting seat and wait until everything dries.
9. Thread the rope through the hole and tie a couple of knots to keep it from falling through.
10. Secure the free end of the rope to the tree.
What can be changed
- The round seat can be easily replaced with a fairly strong rectangular board. This will not make your riding any worse.
- In order not to bother with splicing boards, you can take a piece of plywood that is suitable in size.
Swing made from an old tire
What do you need
- Tire;
- bicycle camera;
- rope;
- insulating tape;
- steel washers according to the diameter of the rope;
- staples? clamps;
- drill;
- drill;
- knife;
- thin cord or fishing line.
How to do
1. Estimate the approximate length of the rope so that it is enough from the branch to the ground, and add 1 m as a reserve.
Wrap the tape in the right place so that the edges do not fray, and separate the piece with a sharp knife.
2. Cut the bike tube and attach it to one end of the rope.
3. Tie this part so that you get a loop wrapped around the camera. This will protect the rope from chafing and prevent it from cutting into a branch.
4. Throw the rope over the branch and tighten the loop. For convenience, you can use a thin cord with a weight attached to it.
5. Form a knot at a height of approximately 1.5–1.7 m from the ground.
6. Cut two more pieces of rope, each about 2m long. Thread them into a knot on the hanger, and then tie one knot at each end to secure it.
7. Tighten a knot on the main rope from the branch. You should now have three ends that will hold the tire.
8. Divide the tire into three approximately equal parts and drill holes with a diameter equal to the thickness of the rope, moving away from the edge of the tire. On the back side, make a few more holes to drain rainwater.
9. Insert the ropes into the holes, put on the washers, and secure the ends with clamps.
10. Release the tire and try to swing.
What can be changed
- Instead of clamps, you can simply tie knots that will prevent the rope from falling into the washers and will securely hold the entire structure.
- If desired, the tire can be easily painted so that it looks more aesthetically pleasing and does not stain clothes.
Price
If you don’t want to do everything manually or you don’t have time for this, then ready-made designs can be bought or made to order on the Internet. Their cost depends on many factors. First of all, this is the price of the material. The cheapest are plastic swings. And if you just buy a double seat made of plastic, it will cost you 500 rubles. You can secure it with simple ropes.
Metal models will cost more . But such a design will be both more reliable and durable. For a metal swing you will have to pay several thousand. It all depends on the assembly features and the size of the swing.
The manufacturing company also plays an important role . The more famous it is, the more expensive the swing usually costs. But at the same time, the brand is a guarantee of quality and reliability. Nobody wants to risk their established reputation and lose customers. So, when you give money for a branded item, you don’t have to worry about it breaking.
Double swings are a must for those who like to relax in the company of children . Choose durable structures, install them on your site, and your kids will enjoy their vacation and not distract you from your dacha activities.
Plank swing
What do you need
- A piece of furniture board;
- square;
- pencil;
- rope;
- drill;
- drill;
- file;
- sanding paper or plane;
- hacksaw;
- matches or lighter.
How to do
1. Step back 250–300 mm from the edge of the furniture board, attach a square and draw a line with a pencil.
2. Use a hacksaw to saw off the future swing seat along the line.
3. Mark with a pencil the places for attaching the rope in each corner, departing 20 mm from the edges.
4. Make holes with a drill. Select a diameter such that the rope passes with difficulty and does not dangle.
5. Saw off the sharp corners of the board with a hacksaw and then file it down. If you want it to be neat, first mark the shape with a template, coin or other round object.
6. Round the top edge of the board with sandpaper or a plane so that the child does not get hurt.
7. Cut two identical pieces of rope and burn the ends.
8. Thread the ropes through the holes in the board on each side so that the loose ends are on top.
9. Secure the ends of the ropes to any strong support, such as a wall beam.
What can be changed
- If the furniture board is replaced with a cutting board, then all that remains is to drill holes and secure the ropes.
- The swing can be hung in a doorway, on a tree, on the beam of a terrace or gazebo.
Swing made of polypropylene pipes and plywood
What do you need
- Polypropylene pipe;
- rope;
- plywood;
- carbines;
- hacksaw;
- pipe cutter;
- drill;
- drill;
- dye;
- brush.
How to do
1. Cut a seat from plywood measuring 30? 30 cm or 30? 40 cm. Drill holes in the corners for attaching the rope. If desired, coat the plywood with paint.
- Cut the polypropylene pipe into pieces: 15 cm - four pieces, 25 cm - two pieces, 35 cm - two pieces. Drill through holes in each section along both edges.
- Divide the rope into two equal pieces. Then fold each one in half, thread it through and secure it in the carabiners. These will be the left and right hangers.
2. Take the longest piece of pipe and thread one rope from the right and left hangers into the holes on each side.
3. Next, string one middle section of pipe at a time, also inserting a rope through the holes at the ends of the parts.
4. Next - one short piece at a time. Here the rope is inserted into the pipe itself along its entire length.
5. Now thread the free ends of the left and right hangers through the holes of the second long piece.
6. Insert the rope into the remaining open holes in the mid-length tubes. And then add one short piece at a time, again passing the rope through the pipe along its entire length.
- Pass the free ends of the hangers into the holes in the seat and tie a knot in each of them.
7. Attach the carabiners to any sturdy support. The swing is ready!
What can be changed
- The seat can also be easily made from a cutting board or piece of wood of a suitable size.
- Instead of pipes, wooden blocks or cuttings from garden tools will do. True, you will have to tinker with drilling holes for the rope.
Skateboard swing
What do you need
- Old skateboard;
- rope;
- shovel handle;
- roulette;
- pencil;
- drill;
- drill;
- dye;
- screwdriver.
How to do
1. Remove the wheels and anything unnecessary from the board.
2. Step back 5 cm from the edges and place marks for four holes for the ropes: two on each side.
3. Drill through these places. Select the diameter so that the rope holds as tightly as possible.
4. Cut two pieces of 30–40 cm long from the cutting and drill one hole in them on each side. Step back 3-5 cm from the edge to prevent the wood from cracking. These will be the hand rests.
5. Paint the bars the same color as the skateboard.
6. Divide the rope into two equal pieces and fold in half. Tie a knot at each end, but don't pull it too tight yet.
7. Thread the rope through the bars, make another knot, and then pass the rope through the holes in the skateboard. Tie knots at the free ends at the bottom of the board.
8. Hang the structure on a suitable tree branch and use the knots to adjust the handles to a comfortable position.
What can be changed
- If you make thicker single hangers with a split on the skateboard, you can easily do without handles.
Swing with supports and a purchased seat
What do you need
- Board 50 * 200 mm;
- board 25 * 100 mm;
- 2 anchor bolts with rings;
- 2 carbines;
- timber 50 * 100 mm;
- nails;
- swing seat;
- hammer;
- roulette;
- drill;
- drill;
- hacksaw or jigsaw.
How to do
1. Cut the parts needed to assemble the two supports: four 2.5 m pieces from a 50? 200 mm, four - 1.35 m each from a 25? 100 mm and four - 35 cm each from timber 50? 100 mm.
- Assemble the structure in the shape of the letter “A”. Fold the long boards at an angle and nail the lintels from the middle sections to them. Reinforce the top of the support with short pieces of timber.
- Build the second swing support in the same way.
2. Trim any exposed edges with a hacksaw or jigsaw to avoid injury.
3. Place a piece of 50 ? board on the crossbars at the top of the letter “A”. 200 2 m long and nail it. Raise the entire structure.
4. In the middle of the beam, drill holes for fasteners at a distance of 50–70 cm from each other. Wrap the anchor bolts with rings into them.
5. Hang the seat on ropes and secure it with carabiners on the rings.
6. Check the strength of the structure.
What can be changed
- Instead of boards for supports, you can use round beams or logs.
- A purchased seat can be easily replaced with a homemade one.
Installation location of the sofa swing
As we have already said, a sofa swing can be either part of the interior or its completely independent element, as, for example, in the case of a structure under a canopy. Most often, sofa swings are installed outdoors on trails and on patios.
But, modern trends are increasingly including a sofa swing as an interior item in closed rooms, such as a nursery or living room. Agree that it looks very impressive, but, unfortunately, not every room can have a sofa hanging from the ceiling.
A sofa floating in the air can often be found on the lawn in front of the house, however, in case of bad weather, you will have to take time to protect the sofa from moisture.
Chair swing
What do you need
- Chair;
- rope;
- dye;
- brush;
- hacksaw;
- drill;
- drill;
- sanding paper.
How to do
1. Saw off the chair legs with a hacksaw near the seat.
2. Use a drill to drill one hole in each corner of the seat.
3. Sand the surface of the chair with sandpaper.
4. Cover the resulting swing seat with fresh paint and let it dry.
5. Divide the rope into four equal parts. Thread each piece through the hole and tie a couple of knots.
6. Hang the structure from a thick tree branch using the free ends.
What can be changed
- The swing can be hung on the terrace or in the gazebo. It will be especially cool to build several of these structures and relax with friends.
Pallet swing
What do you need
- Pallet;
- rope;
- sanding paper or machine;
- scotch;
- carbines;
- drill;
- drill;
- scissors;
- lighter.
How to do
1. Sand the surface of the pallet with sandpaper or a machine to remove all burrs.
2. Drill six holes in the outer boards of the pallet with a diameter equal to the thickness of the rope.
3. Turn the pallet over and do the same on the other side. Try to keep the holes in the top and bottom boards underneath each other.
4. Go over all the holes with sandpaper or a machine to remove burrs and avoid damaging the rope.
5. Prepare two pieces of rope. Wrap the rope with tape and cut it at this point. Then cauterize so that the edges do not fray.
6. Thread the rope with a snake through the holes on one edge of the pallet and tie knots at the ends.
7. Do the same on the other side of the pallet.
- Straighten the ropes to resemble the cables of a suspension bridge, and connect them with carabiners - one on each side.
8. Take two more pieces of rope and tie a loop on them at both ends.
9. Throw these ropes over a thick tree branch.
10. Attach the pallet to the hangers using carabiners.
11. Lay out a blanket and bring pillows.
What can be changed
- Instead of a rope, the upper suspensions can easily be made from chains. Supporting cables can also be replaced with chains, but this will look too brutal.
Let's start making a swing
Step 1. Assembling the seat
If we are dealing with simple plywood, the task becomes much easier.
If the seat is a prefabricated structure made of slats, you need to assemble the following from them:
The main thing is that the blocks do not crack. Therefore, before tightening the screws, it is advisable to drill thin holes for them. This way you will solve two problems at once - the blocks will not crack and it will be easier to screw in the screws. Please note: the corner screws must be screwed in offset, since there will be large holes for the rope in the corners of the structure. You can go even further and glue the outermost of the five cross bars.
Step 2. Drill holes for the rope
This will seem strange, but all the other parts of our future swing will not be rigidly attached to each other. The design will be very flexible. When removed, such a swing can be easily folded so that it does not take up much space and put away until next season.
First, we will make longitudinal holes in the blocks - the uprights of the crossbars:
The work requires accuracy. It is advisable to make the holes exactly in the center. If you have a vice, then it is worth securing the parts in them while drilling. After all 10 blocks have been drilled, you need to sand them down with sandpaper. While swinging, the child can grasp them with his hands; it is important that no splinters or flakes remain on the surface.
Next, carefully drill holes in the corners of the seat and in the top slats:
As a result, we should have the following construction:
All pictures for this review were prepared in a 3D modeling program and were originally intended for the website www.mark.kashkanov.com
Now that the seat is assembled and all the technological holes are drilled, you can glue foam rubber onto it and cover it with fabric.
It is necessary to sand the edges, glue foam rubber and tighten it all with a piece of cloth, which we have already talked about. The material must be secured properly so that during the swing, or when the child slides from the seat to get off the swing, he does not tear off the fabric.
It is best to use the leg of old jeans, which you have long worn out in a certain place and put in a long drawer “until better times.” With a slight movement of the hand, jeans can be turned into elegant shorts, as they said in the famous film, and the freed lower parts of the legs can be used for swings. If the size of your trousers allows, you can even pull the trouser leg over the seat like a sleeve, and then secure the edges on the bottom side with small nails or staples.
It is probably not worth mentioning that the length of the nails should be such that they do not come out on the other side with their points up. Foam rubber, of course, is a good thing, but over time it becomes thinner and at one point. Well, then you understand. So be careful with carnations. If something happens, take thicker plywood for greater guarantee.
At this point I would like to explain why two short bars were used between the post and the crossbars instead of one long one. There are two reasons for this.
- in short blocks it is much easier to make longitudinal holes and not deviate from the central axis,
- if we have two short blocks, the swing folds more compactly, which is much more convenient for storing it.
Step 3. Secure the rope
This is the final part of the work, but it should be treated with great attention. Mistakes here can be very costly.
We measure out two pieces of rope. Its length depends on where you will hang the finished swing. You need to try them on in place and cut off two identical pieces. Keep in mind that part of the length of the rope will go to knots, so feel free to add another twenty centimeters to the expected length.
Next, we insert the ends into the holes of the swing and tie reliable strong knots under the lower plane of the seat. Keep in mind that if over time one of the knots comes undone while swinging, the child, at best, will simply be very scared. I don’t even want to write about worst-case scenarios. In the future, you need to inspect the knots from time to time in order to tighten them if they become loose.
In principle, after this you can hang the swing and carry out tests.
Because the limit bars are not secured to each other and are held only by a rope, the front bar is easy to lift to get your child in and out of the swing. Over time, when the baby grows and the center of gravity of the entire system is higher and higher, you can raise the limiting bars by adding additional vertical bars to the structure. Otherwise, the child may lean forward over the front bar while swinging and hit his head on the floor.
Garden swing with supports
What do you need
- Beam 100 * 100 mm;
- timber 50 * 50 mm;
- galvanized chain;
- board 25 * 100 mm;
- bolts;
- mounting plates;
- screws;
- sanding paper;
- hacksaw;
- jigsaw;
- roulette;
- pencil.
- How to do
1. From timber 100 * 100 mm, cut four racks with a height of 195 cm.
2. Assemble two supports in the shape of the letter “A” with upper and lower jibs from 50 ? 50 mm. Drill through the parts and connect with bolts.
3. Cut a 1.8 m long cross member from a 100 * 100 mm beam and secure it to the upper supports of the racks, tightening them with bolts.
4. Cut six boards 120 cm long: three for the back and three more for the seat.
5. If desired, cut out a pattern on the top board of the backrest with a jigsaw. Sand everything well with sandpaper.
6. For pieces of timber 50? Attach three boards with 50 mm screws - this will be the seat.
- Do the same for the back and join the two pieces together at the desired angle.
7. Cut out armrests from two boards and attach them with screws through the beam to the seat and back.
8. Drill holes in the beam for the bolts and install them through the chain link. Secure it on top with a nut, and to prevent it from falling into the wood, place a metal plate or washer of large diameter.
9. Make holes in the seat beams, insert bolts into them and secure the ends of the chains.
10. Adjust the length of the hangers to the desired position.
What can be changed
- For greater strength, you can add another cross beam along the bottom of the rear of the supports.
- If desired, build a canopy made of polycarbonate or tarpaulin to protect from the sun and precipitation.
Types of garden swings
Most often they are made to order, but, of course, a hanging bench with a crossbar can be bought ready-made. For example:
• children's swings – small (sometimes miniature), they are offered by furniture stores and toy stores.
As a rule, this is a durable metal device with reliable fastenings, safety features and, so to speak, special amenities.
Children's swings are distinguished by bright colors and interesting designs that attract the child's attention. But be prepared that very soon they will have to be replaced: children's models are designed for a certain weight and age, which is not so much a necessity as a marketing ploy to force parents to buy swings more often.
• Standard garden swing
If you need to quickly landscape your dacha plot and give it a lived-in and well-groomed look, then this is the most reasonable solution.
Ready-made (all you have to do is assemble) garden furniture can withstand the weight of two or three people, has soft seats and is often complemented by a canopy that protects from the sun or rain.
It’s easy to install a ready-made swing. It is much more difficult to choose a truly reliable design: for this purpose, you will have to thoroughly study the warranty documents and product characteristics.
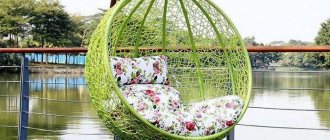
• Swing sofas
This is a luxurious and at the same time very comfortable country accessory. It has a wide seat with soft upholstery, a high comfortable backrest, and a roof that creates a pleasant shadow. The sofa swing is complemented by pillows and blankets that match the basic design.
But the most characteristic difference of a “hanging sofa” is that it has a small swing amplitude. It's more of a hammock than a children's entertainment item. Elderly people prefer such swings with a smooth ride.
In addition, there are swings for the dacha:
• wooden . For the most part, these are luxury products that cost much more than models made of metal and plastic. But they are characterized by decorativeness and originality, as a result of which they are able to decorate, ennoble, and make any site and landscape “richer.”
A garden swing made of natural wood is a stylish addition to both a simple country house and a real villa. Their only drawback is the relatively high price. However, the cost is justified, because in addition to the main, expensive raw materials, the production of such swings involves the use of fasteners and fittings made from expensive materials. It also includes decor - wood processing, notches, ornaments.
In addition, wooden swings are almost always made to order, that is, they are an original and even exclusive product.
• The market offers metal swings Such a product made from metal pipes and chains costs several orders of magnitude cheaper than its wooden counterpart.
However, in this range there are premium products - those that include handmade decorative forging. Naturally, such a swing, made taking into account the individual requests of the customer, will cost a tidy sum.
Unlike wooden ones, forged swings look delicate, light, almost weightless. This gives them access to any landscape style - you just need to make sure that nearby objects, a table with a bench or a gazebo, are also decorated with forging.
Kinds
All swings can be classified according to the number of axes of rotation:
- With one axis of rotation. These swings are easy to make and are the simplest option. The movement of the seat occurs exclusively back and forth perpendicular to the beam on which the structure is placed. The minimum height from the ground to the seat in this case is 35 cm.
- With several axes of rotation. In this case, the movement of the seat from side to side is added. This design is quite labor intensive. Suitable for older children. The distance from the seat to the ground is the same - 35 cm.
- With one suspension point. The elements with the help of which the swing sets in motion - a chain or rope - converge at one point under the crossbar. In this case, the distance from the ground to the seat and from the seat to the structure supports will be 40 cm.
They are also divided according to purpose:
- Mobile. This version of the play building has a simple, lightweight design, making it easy to move from one place to another. For example, in any place convenient for playing: even in the house, even outside in the shade.
- Family. They have a huge heavy structure. At first glance, it looks like a bench without supporting elements with a large backrest. This swing can accommodate the whole family. A U-shaped structure is used to fasten it, and chains or cables with excellent strength are used as fixation.
This type of play structure can be covered with an awning or a roof can be built over it - and you can ride even in the rain.
- Children's. This category of swings is made in the form of boats or hanging chairs. Children will be able to ride them only when adults are nearby with seat belts fastened.
Distinction by type of structure:
- Hammocks . Fastening occurs using a metal crossbar. This can, of course, be replaced with a strong lower tree branch, provided it is straight enough. The weight that the hammock structure can withstand is about two hundred kilograms. When using this design, you can feel the flight above the ground. This option is very popular among those who like to read books.
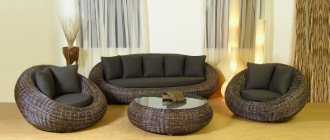
- Singles . They have a variety of designs. No need to install an additional crossbar. The peculiarity is that it is easy to install, so this type of swing can be installed anywhere. Various materials are used for construction.
- Sun loungers . This system accommodates three people: one child and two adults. The configuration of the swing is such that its fixation is necessary only at one point, so it can be installed in an apartment. The strength of such a product, despite its apparent lightness, is quite high due to the metal alloy.
- Hanging . The design of this version of the swing is usually made of a seat and several cables or strong chains. The cable elements are fastened on each side. The dimensions of such a product are varied: they depend on the materials used. The distinctive qualities of the design are strength, lightness and comfort.
Swing for children from 3-7 years old
The following types of children's swings are the version that can be attached both to the floor base and to other supporting structures. The materials that will be needed to make them are:
- durable plywood 18 mm;
- cardboard;
- threaded rods and nuts;
- circular and miter saw;
- jigsaw;
- milling cutter;
- set of hex keys;
- Bulgarian.
Before you start making such children's swings by assembling them yourself, you need to draw drawings of the blanks on cardboard. Afterwards, the cardboard is placed on sheets of plywood, markings are made with a pencil and the necessary shapes are cut out with a jigsaw. Then the edges of all parts are sanded with sandpaper.
This swing can be designed for one or more children. Depending on this, its design will change. Parts can also be attached to each other using glue, self-tapping screws, or specially cut grooves.
The groove mounting system is more preferable for a children's room, as it makes it easy to disassemble the product if necessary, freeing up space.
Ready-made options
Rocking chair with connection using grooves
Sidewalls are made, on which markings are applied for the grooves. The sides are placed on top of each other and guide holes are made in the corners of the markings with a drill. Then grooves with a depth of about 6 mm are cut out with a milling cutter. After this, a seat is cut out, the width of which depends on your preferences and the dimensions of the room. The seat is connected to the sides, having previously narrowed its edges for a tighter fit into the grooves.
Corners in kindergarten can be made very beautiful. Tires can be used to make excellent swings for children. In our article you will find a complete guide.
You will learn how to properly make a sandbox yourself by reading our material at https://karuselkin.ru/detskaya-ploshhadka/pesochnica-s-kryshkoj-glavnaya-sostavlyayushhaya-detstva/ link.
The dimensions of the backrest, in turn, depend on the width of the rear of the seat. It is attached to grooves that were previously cut on it using a milling machine. A wooden spacer and threaded rods are installed at the bottom of the rocker. After this, the rocking chair is painted with non-toxic paint.
Now you know how to make a children's swing in an apartment yourself. Your children will be able to have fun, develop their muscles and vestibular apparatus, and you will be pleased to look at them, knowing that you contributed to their happiness.