The technical, or utilitarian-household role of upholstered furniture covers is obvious: to extend the service life of rather expensive and significant pieces of furniture in interior design. Sewing a chair cover with your own hands is not a difficult job. Removing it and washing it is easier and simpler than cleaning the original upholstery, and replacing it is much simpler and cheaper than reupholstering.
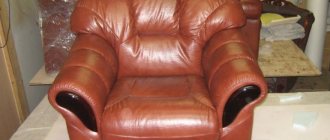
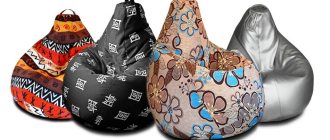
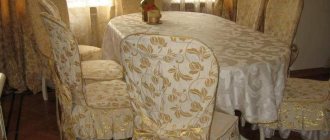
Special mention should be made of the aesthetic significance of the chair cover. Only the ever-memorable Dasha Bukina would think of placing a sofa in the middle of the room. A chair, by its very nature, is certainly a significant element in an interior. And in a cool loft, and in a mini pressed to the limit, and in an infinitely sophisticated shabby chic, you want to relax in a chair comfortably, otherwise what is it all for? A skillfully designed and executed cover allows you to fit any, without exaggeration, chair into the interior of any style. English “eared” in a loft, French Voltairean in a mini, futuristic office in an empire style? No problem, see photo:
Armchairs with covers in the interior
Sew or wear?
Before examining your favorite seat and thinking about how to cut it all out and sew it into one, it wouldn’t hurt to ask yourself: why do my chairs need covers? If only from dust and dirty alien trousers, then perhaps it would be better to just buy a universal chair cover made of stretch fabric with an elastic band - such covers simply stretch over it. Unfortunately, there are fewer stretch covers for an armchair on sale than for a sofa or chair: the enhanced individuality of the former affects it. Whether a potential buyer knows at least something about the principles and rules of creating an interior design or not, he definitely does not want to give his favorite or prestigious chair in the living room the appearance of “like everyone else.” Demand dictates not only supply, but also price: Jacquard NEW will cost about 8,000 rubles; Turkish Bulsan approx. 6000 rub. The design of both is quite monotonous - it is dictated by the properties of the fabric. The colors are modest. In addition, the Turk's elastic band soon stretches, but for a dust cover this is not very significant. If standard design solutions fit into your interior, then New Life covers made from thicker, more refined fabric and more varied colors may be suitable, see video
Video: example of purchased chair covers
Stretch covers for upholstered furniture have one common property: it is either completely impossible or very difficult to sew them with ordinary thread on a regular sewing machine, and the quality of the finished product will be noticeably worse than the factory one. This is especially true for functional chair covers - computer and office, see below. And, finally, if you need a decorative cover to give an individual look to a prestigious chair in the interior and/or fit it into the interior, then sewing it yourself is almost the only option. Let’s say the price of custom tailoring is from 10,000 to 60,000 rubles. and doesn't scare you anymore. But where is the guarantee that the master will understand your vision of the situation and your plan?
Step-by-step instruction
The fabric chosen for sewing a cover for a computer chair with your own hands is laid out inside out on a flat surface and the pattern details are fixed on it with pins. The elements are outlined with chalk and then cut out. The edges of the parts are processed with an overlocker or sewn with a zigzag so that the fabric does not fray.
Next, the elements are swept away and tried on a computer chair. The strip of fabric running along the perimeter must be cut to leave holes for the armrests and permanent contact. At this stage, you can adjust the darts so that the cover lies more evenly. There is no need to sew the parts of the lower part of the seat together; zippers will be sewn in there. Having achieved a perfect fit, the seams are sewn on a machine. Part of the side seam on the back is left free for the zipper.
To make the cover look neater, the seams are folded over the strip running around the perimeter of the chair and an additional stitch is laid. Now they will not bend and puff up.
Now you need to sew a zipper: a long one into the cape for the back (from the permanent contact to the middle of the side part) and three short ones, connecting the parts of the bottom of the seat.
Your hand-sewn computer chair cover is ready. It will look great in the interior and will protect the furniture from dirt and damage.
Using the technology described above, you can sew a cover for a computer chair from old jeans. To make parts for the back and seat, you first need to undo the trousers and connect the parts so that you get a fabric that matches the length and width of the elements of the office chair. This is a simple option.
Which one to sew?
First of all, let's decide what type of cutting the cover will be - the choice of fabric and the method of cutting the patterns for the pattern depend on this. This is directly related to the design of the case, because... Not all fabrics suitable for it are available in all colors and patterns.
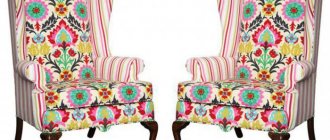
Chair covers of different types of cutting
You can sew a cover for a chair at home. types of cutting (see also fig.):
- Fitted and flared – allows you to fit the chair into any interior. The fabric required is sufficiently elastic, the same as for a computer chair cover, see below. It is not suitable for a chair with a high turn-down back and/or a large camber of armrests - it will not be put on or taken off, but it is suitable for Voltaire chairs and others with a straight back and armrests. The only aesthetically suitable cover for a chair in the interior of minimalism and high-tech styles. Suitable fabrics for this type of cover are available in both modest and bright colors, but not very variegated colors. A significant part of ready-made covers are cut in a tight-fitting, flared fashion. Making patterns and creating a pattern with your own hands requires sufficient attention, accuracy and skills in cutting and sewing;
- Tight-fitting with a frill “skirt” - fits any chair into interiors usually called bourgeois - empire, art deco, shabby chic, haberdashery. If the fabric is soft and its colors are chosen tastefully, any chair will also fit well into the interiors of the Greco-Roman clone (French, English traditional), Baroque, Rococo and other classics. Any fabric is suitable, because... At the junction of the skirt with the top, an elastic band can be inserted without any problems, and skillfully straightened folds in the vertical corners and on the back of the back do not spoil the overall appearance. The most common and universal type of cover. Ready-made covers are most often cut to fit with a skirt. Creating a pattern, cutting and sewing with your own hands does not require high professionalism;
- Semi-loose cut - tightened to fit with ties. Again, any chair fits into interior styles according to the previous one. point, and also in country, colonial and oriental. If the ribbons for the bows are replaced with straps with fasteners or Velcro or cords tied to the strings, the chair will fit into the interior of a modern clone (except for mini and high-tech) and into the loft. Fabric – any. Minimal cutting and sewing skills are required, so semi-loose-cut covers are most often sewn by amateurs. In professional tailoring it is used less often, because requires 10-30% more fabric than tight-fitting ones, and does not provide obvious arguments to explain the difference in price;
- Loose fit - the whole thing is pulled to fit with cords or elastic bands. The fabric needs to be thin and non-caking. Suitable for country and colonial interiors. Sometimes shabby chic or loft. The complexity of cutting and sewing requires complete professionalism. Care is difficult. Short-lived. The chair does not protect well, because... collects dust.
Note: using the example of a tight-fitting cover without widening at the bottom, it is convenient to explain the rules and techniques for removing pattern pieces, see below. But it doesn’t look good on the chair, because... You definitely need a zipper, fasteners or ties in the backrest, which is always visible on the chair.
About capes
Simple protective capes without a pattern (item 1 in the figure) are rarely thrown over a chair and are most often removed later. The reason is that the traction area of the seat tires and the cover on the chair is several times smaller than on the sofa, and sitting in the chair is usually not so calm. As a result, the cape gets wrinkled every now and then.
Chair covers without a cover and with a cover
A simple cover is sometimes placed on a chair, firstly, to protect the most vulnerable parts of an expensive decorative cover. In this case, it is sewn either from the same fabric as the cover, pos. 2, either matching it or contrasting. Secondly, capes made of dense, perhaps not very beautiful, but durable and resistant fabric are used to cover chairs placed, for example, on a veranda, terrace, in a gazebo, under a canopy. In general, somewhere outside.
The basis of the cape for a decorative cover is a straight piece of material, on the left in the figure:
Covers for a chair in the room and on the veranda (in the gazebo, under a canopy)
Next, sew as a cover-cover without a pattern for the sofa (in the center): wings are attached to the front-seat-back-back section. It is better to make a protective cape for a chair that may be exposed to external influences from 3 separate parts: a common panel and armrests. Along the free edges, turn ups of 3-4 cm are given, which are stitched, and eyelets are placed, as in curtains, on the right in Fig. A cover of this design can be covered with cords so that the original upholstery of the chair will not be visible at all.
How to sew a chair cover yourself: trimming and finishing with cord
Step 2: Trimming the Fabric
- To sew your own chair cover, trim the fabric 5 cm below the twill tape.
- Trim the fabric along the sides of the seat platform, leaving 6 inches of extra fabric to tuck in where the seat meets the inside of the side armrests.
- Trim all other seam allowances to 2.5 cm. Where you need to straighten and stretch the fabric, cut it.
Note. When you sew, the seam allowances will need to be trimmed to 12mm.
Step 3: Cord Finishing
- Pin the cord in place, around the inside of the back, along any seam line that needs to be trimmed. Cut the cord where you need to fit it into different notches or corners. If you prefer, you can hand baste the cord into place to make it easier to work with.
- If the cover has a trim strip, make a faint line into the fabric along the fold, then pin the cord into place along the seam line of one of the sections.
What to sew from
First of all, what you shouldn’t use to sew a cover for upholstered furniture:
- Any cotton fabric is cheap, but fragile and short-lived. A cover made of cotton, even industrially decatified, for example. jeans, doesn’t hold its shape, easily creeps and wrinkles. And most importantly, cotton fabrics freely allow moisture to pass through, and dirt, grease and grease are transferred to the original upholstery, as they were specially invented for this purpose. This is not bad in clothes, but it brings dirt and skin secretions outside, but not into the chair.
- Wool fabrics are allergenic. Their close contact with the body is unacceptable; At present, woolen underwear is not produced. Wool readily absorbs moisture and grease, which is why it seems difficult to get dirty. But, as you know, wet or simply worn woolen clothes need to be dried. Dry particles of dirt are pushed out of the wool - it has the property of self-cleaning. However, if a woolen cover covers the chair, then at least half of the accumulated dirt will be given to it.
- Velvet and velor accumulate dust, dirt, and grease and transfer it to the chair. Poorly cleaned and washed. They wear out quickly from regular cleaning and washing.
- Silk, satin, scallop are slippery, the cover tends to slide off. Squeezed folds quickly cake and are difficult to straighten. They get wet and leave grease on the chair, which is only slightly worse than cotton. They accumulate static.
The chair cover needs to be sewn from:
- Protective technical – the best material is linen canvas. Even better is a painted canvas. If it is impregnated with a water-polymer emulsion, the cover will become waterproof. In second place are synthetic dress fabrics for outerwear. The advantage is the variety of colors, but they adhere less well to the original upholstery. On the third, for the chairs outside, there is hemp (made from hemp fibers) or propylene matting. On the last one there is a homespun (hemp cloth).
- Bright colorful decorative - from any furniture upholstery fabric.
- Decorative prestigious - jacquard, chinille and other traditional dense upholstery fabrics. But the best option is modern semi-synthetic upholstery, like for a computer or office chair, see below.
Constructing a pattern
A cover for a chair is cut and sewn in generally the same way as for a sofa. But the different geometric proportions of the chair and the procedure for using it place increased demands on the accuracy of taking patterns from life and cutting fabric. If, for example, you take a pattern for a sofa cover from the same set, throw out the middle of it and sew a chair cover from the rest, then it will almost certainly wrinkle in plain sight, see fig. on right.
Wrinkles on seat covers due to improper cutting
What parts does the pattern of a tight-fitting chair cover consist of, is shown in the figure:
Scheme for constructing a pattern for a chair cover
By widening the back, armrests and front from below, we get a pattern for a cover with flares or a skirt. If you need a semi-loose cut cover, the overhangs of the armrest parts are made straight. For an example, see a selection of videos on how to cut and sew a cover with frills for an armchair:
An example is a good thing, but if you need your own original cover for your own chair, not the same as in the example, and you like a different fabric, then you need to keep something else in mind. In Fig. Above, you can already see the differences between the pattern of a cover for a chair and that for a sofa: the cuts for the front, seat, back and back of the back are elongated in length/height, while for the sofa, on the contrary, in width. The cut for the back of the sofa is also elongated in width, but here it needs to be almost square. If the fabric stretched exactly the same in all directions, it would mean nothing. But it stretches differently along and across. And in a chair cover, the armrests pull the seat more strongly, and its area of contact with the base is smaller.
How to thread a piece of thread and take measurements to create patterns for a chair cover
The first thing that follows from this is that the threads of the cover fabric must be threaded as shown on the left in the figure:
- Facade, seat, back - along the top, deep, up, down.
- Armrests - up and down across.
- Front inserts of straight armrests are vertical.
- Inserts for armrests with camber – give the lobar ones a camber of approx. 1/3 along the top from the greatest extension of the armrest.
That is, cutting the fabric for a chair cover at random, just to save money, will not work - there will be irremovable wrinkles on the finished cover. It is necessary to remove the patterns from the chair, mark the orientation of the lobes on each one, lay them out on the floor in a strip equal to the width of the cut of the chosen fabric and minimize waste, observing the necessary orientation of the lobes. Then the required cut length is measured locally and purchased.
How to remove patterns
For patterns you need to prepare or purchase suitable material, see below. Then the chair is measured, as shown in the center in the figure, and according to the measurements, blank pieces of approximately the same shape are cut out from the pattern material with an allowance of 10-15 cm. The blanks are placed in place, pulled up, crimped at the joints and the contours are drawn with a marker; the orientation of the lobar is immediately noted. After this, the blanks are cut along the contour with an indentation of 7-10 cm and laid out to determine the length of the cut, see above.
Insertion is a delicate matter
If the chair has a large camber of armrests, and the fabric of the cover is chosen to be dense and not very stretchy (jacquard or flock, for example), then the patterns for the inserts in the armrests should not be removed by drawing them in place, but built according to size. Building on a regular grid is tedious and inaccurate - you will almost certainly get lost. Building on an arbitrary grid of basic verticals and horizontals will also take time, but the probability of error is much less and the accuracy is higher. You just need to make a device in addition to the tailor's meter - a simple caliper from a pair of wooden rulers with holes; the length of the rulers is from 30 cm. The ends of the rulers opposite to the holes are cut at an angle of 30-45 degrees towards each other, i.e. mirrored, and the rulers are fastened through the hole with a bolt and nut. The measurement procedure is as follows (see also on the right in the figure):
- Prepare a simple plumb line from some kind of weight and thread or fishing line;
- In nature, along a plumb line, using chalk or soap, mark the base vertical A from the middle of the base of the insert;
- In the same way, mark the base vertical B from the pole of the armrest P - its highest point;
- The main horizontal line is drawn on the template sheet;
- Measure hA - height A from the line of the curb of the chair;
- Construct a basic vertical A on the workpiece;
- On location, measure the distance between the basic verticals C;
- On location, measure the full height of the base vertical B from P to the curb line, and the height of the dip B - hB;
- Based on the data obtained, a basic vertical B is built on the workpiece;
- On location, the arms of the horizontal lines A0 – a(n) are removed using calipers and transferred to the workpiece. The horizontals are placed more often, the steeper the bend of the sides of the insert contour in a given section and the closer they (horizontals) are to the pole. The heights of the horizontal lines are measured with a meter;
- Similarly, the arms of the horizontal lines B0 – b(n) are removed and transferred to the workpiece, but the measurements are taken downwards from the pole;
- Using a regular drawing pattern or by hand, draw the outline of the insert on the workpiece.
The highlight of this method is that in the most critical places, where wrinkles can appear on the product, the shoulders a(n) and b(n) duplicate each other to some extent. Suddenly, when drawing, it turns out that their end marks have diverged greatly; measurements at this level can be repeated, because an error in beating any pair of horizontal arms is not transmitted to the others.
What to make patterns from
The material for the patterns for the chair cover should stretch approx. just like upholstery fabric, and apply it in place, wrinkled in the same way. Then you will immediately see where the cuts for darts are needed or, if there are more than 2-3 of them, where this part needs to be divided into two.
In professional tailoring, pattern pieces are cut out of percale - fabric that has been decatified 3-4 times and impregnated with a special composition. Decorate the canvas by soaking it overnight in initially hot water, drying it and ironing it until dry while still wet. Percale is sold in specialized sewing stores, but in small towns this is most likely not available. You can, of course, order it on the Internet, but if you only need a cover for one chair, you can also wash and starch an old, washed sheet - it has already been dried naturally. However, such a pattern will be disposable: the starch will soon be knocked out, and there is no point in starching again - the dimensions will float away. In most cases, if the chair is not particularly pretentious in shape, percale can be replaced with building insulating material - glassine. You can find it in any hardware store, or they can bring you a custom-made cut from the warehouse. Using glassine patterns, you can cut out covers for 5-6 chairs, which is more than enough for yourself.
Basting a blank pattern for a chair cover made of sheet insulating material
If the cover is insulated, then instead of a pattern you can use the insulation itself - thick sheet polyester, artificial felt, etc. Insulation blanks are applied in place. Working seams are basted with a thick thread, and basting seams for cuts are sewn with a thinner thread of a contrasting color, see fig. on right; The stitching and cutting lines are marked with a marker. In this case, when cutting, you need to add the thickness of the insulation to the sewing allowance.
Sewing
Sewing a cover for a chair has no significant features. It’s even simpler than many other cases - you don’t have to leave the armhole under the turnout and then sew it up. You need to sew with a thread that matches the density of the fabric: thick approx. No. 20; thin No. 30-No. 40. All seams along the contour of the seat are reinforced, see figure:
Reinforced seam for sewing chair covers
If the cover has edgings, they are sewn into the parts before sewing them into the product; the exception is the edging on the curb line. The allowance for parts with edgings is increased by 3.5 times the thickness of the insert cord. The edging on the front parts of the armrests is made on their inserts; the piping on the back is on its details, not on the back! Then the edging will straighten the part it frames evenly, and possible folds will disappear into parts that are less visible and visually significant.
Covers for special chairs
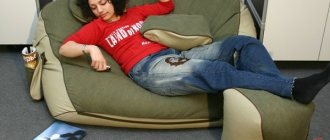
Special means computer, office and home work chairs for schoolchildren and adults. One cannot sit relaxed in such chairs. Riders constantly move in them. We are not talking about gamers, nervous regulars of social networks and hyperactive choleric managers. An ordinary calm and balanced person, engaged in systematic productive work, while sitting in a chair, without noticing it, fidgets all the time. A work chair should reduce fatigue, but if the cover on it keeps getting knocked down and slips, then, on the contrary, it will increase it. Everyone places certain specific requirements on the work chair cover.
Textile
Limitations begin with the choice of fabric. Thin upholstery usually doesn’t hold up on a work chair, but on thick traditional upholstery, sorry, it doesn’t take long to rub the buttocks. In any case, there is nothing to say about reducing fatigue.
Types of fabrics for covers of computer, office and work chairs
The best fabric for a work chair cover is the relax type, on the left in Fig. Relax fabrics are usually used to make car seat covers (we’ll talk about them later). The relaxation cover fits in place like a glove, does not accumulate static, does not rub anything even on a bare body, is easy to clean dry and can withstand repeated washing without losing its appearance. Relax fabrics are quite expensive, but at home, an almost complete replacement for them is woven nubuck, in the center. The flock upholstery on the right is somewhat worse - it gets dirty faster and you have to wash the cover made from it more often.
Note: microfiber can be considered a conditionally suitable fabric for upholstered furniture covers. The case made from it fits well and fits well into place. Microfiber collects and retains dirt and does not allow moisture into the chair. But it cannot be washed or wet cleaned, because... from them it immediately loses its properties. Regular dry cleaning will greatly shorten the lifespan of microfiber.
Which one to sew for work?
The work chair has a significant difference from the living room: its backrest is adjustable in height and its back is quite strongly convex - a rod, a slider and a regulator stopper are placed there. Therefore, it will not be possible to sew a work chair cover using a regular pattern: not only will it not look good, but it will also quickly fray on the fold.
Types of covers for work chairs
Ready-made covers for office chairs and computer chairs with increased ergonomics are produced in the form of cover-linings on ribbons with ties, fasteners or Velcro, pos. 1 and 2 in Fig. They cannot be called ideal: the ribbons are visible, weaken, come undone, the cover slips, and dust and dirt collect in its folds. For ordinary computer and work chairs, the so-called. bunny cover made of 2 separate parts, named after the very popular model with the image of a malevolent hare on the back, pos. 3a and 3b. The bunny cover is quite accessible to repeat with your own hands; how to sew a bunny cover for a computer chair, see video:
Video: original bunny cover for an office chair
The bunny cover, however, is also not ideal - it still creeps little by little and has to be adjusted from time to time. But a cover for a work chair of the type used for a living room (item 4) is not suitable at all: in addition to the dust collector fold, the fabric of the cover that crawls along the smooth armrests noticeably increases fatigue, and the cover itself keeps getting knocked down. In this case, a knitted cover is optimal, pos. 1 and 2 in Fig.:
Knitted covers for computer and office chairs
In the fold it hardly collects dust and does not get lost under a not overly active rider. It is securely fixed on the back with a knitted lapel, pos. 3. However, to knit a chair cover, you need to know how to knit, see video tutorial:
Video: knitted cover for a computer chair
Let's try to sew a universal one
Meanwhile, there are chairs in everyday use whose ergonomics are subject to much more stringent requirements. In cars. The driver, manipulating the controls, willy-nilly has to move a lot, and his mistake from fatigue is not seven troubles for you - one problem. And no mirrors, raid arrays or just backups for you. And covers for car seats have been developed for a long time. And any of them can be adapted for a computer and an office chair, because... Structurally the basics are similar.
So, take a pattern for a car seat cover (see figure) and start playing tricks with it. First, the lower part (seat) and upper part (back) do not have to be made of 5 parts, because The sides of both work chairs are low. Therefore, you can discard the parts highlighted in brown, and cut out the bases (grayish-green) as for a bunny cover. But you need to sew overlays (gray-dark purple) on them; their role is not only decorative.
How to remake a car seat cover pattern for a computer or office seat
Second, we sew the backdrop (bottom right in the figure) in one piece, but in 2 layers. The lining is made of durable technical fabric, and the decorative top is made of upholstery. We remove the ties E and F, and instead of them we sew a tight elastic band with hooks L to the back lining; on the wrong side of the back, the corresponding loops K are sewn. We cut the backdrop to be wider at the bottom, for which we remove the dimensions H1 and H2 from the base chair (top left in the figure). The height of the durable back lining is H1, counting from the top (the elastic is sewn to its bottom edge), and the height of the decorative overlay is H2. It is better to take elastic bands tighter, for example. from a car or motorcycle trunk.
When everything is sewn, we put on the seat and secure it with elastic bands - they are not visible. We put on the back cover, hook the hooks of its elastic bands to the loops. The durable lining stretches and securely fixes the backrest, and the decorative trim covers its locking screw, but does not interfere with its use. So we have a universal cover for a computer, office or work chair based on a car one.
Note: in order for such a cover to last longer and fit better in place, it is advisable to sew the front part of the back and seat in 2 layers with a lining made of durable technical fabric. In this case, elastic bands with hooks are sewn to the lining.
How to make a chair cover: finishing and processing
Step 9: Pinning Cord or Other Trim to the Bottom Edge
Step 10: Finishing the Bottom Edge
- Measure and record the distance around the chair along the cord sewing line. You will need this distance to determine the length of the skirt.
- Measure 10cm from each corner along the cord line; mark. Measure and record the distance between each set of marks on the sides, front and back of the cover.
You can see how to sew a chair cover in these photos: