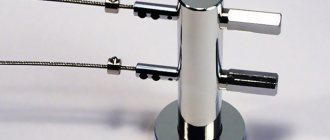
Making curtain rods with your own hands
You can make a string cornice with your own hands. Initially, you need to make a special decorative strip. To make it, take a piece of chipboard sheet. Its width should be from 10 to 17 centimeters, and its thickness should not exceed 1.5 centimeters. After you have made the bar of the required dimensions, it can be decorated with carvings and painted with varnish.
If you are not good at woodworking, you can purchase a special film. In this case, there is no need to paint the plank.
After making the strip, you need to attach a string base to the cornice and screw several metal corners of a rectangular configuration.
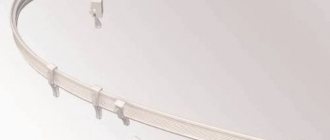
You can make a homemade cornice for the kitchen using plastic pipes. To do this, you will need plastic pipes of the required thickness, screws or holders.
Manufacturing process of plastic curtain rod:
- First, use a hacksaw to cut the plastic pipes.
- Attach the resulting product to a window or wall using screws or adhesive.
- Paint the cornice if necessary.
- Hang curtains on the resulting product.
How to hang a curtain rod: step-by-step instructions
Before installing the cornice, you need to take a number of measurements. First you need to decide how high from the ceiling you will hang the cornice.
Installation of the cornice is carried out in the following sequence:
- On the ceiling you need to mark the place where the structure is attached.
- Then you need to assemble the cornice and decide on its length. If necessary, you need to remove the excess part of the product using a hacksaw.
- Use a drill to drill holes.
- Drive dowels into the hole. Their size should be slightly smaller.
- Secure the cornice with screws.
Installation process
There is nothing difficult in installing such products. It is necessary to prepare some tools in the form of a hammer drill, a tape measure and a hacksaw if there is a need to shorten the purchased guides. Next, the installation of the plastic cornice on the ceiling begins:
- Having determined the required length of the guide using a tape measure, it is sawed off to the required size with a hacksaw.
- Having attached the prepared strip to the ceiling, the attachment points are marked with a pencil through the factory holes on it.
- The plank is put aside, and a hammer drill is taken in hand, with which holes are drilled at the designated points.
- The guide is again applied to the ceiling and dowels are inserted through the existing holes and screws are screwed in.
.
- After you have finished attaching the plastic cornice to the ceiling, all that remains is to close the technological holes and ends of the guide with special plastic plugs.
In order to hang curtains, you need to insert runners with hooks into the slots on the installed curtain. This is done through a hole in the channel for the runners. Once they are in place, a special plug is inserted into this groove to prevent the sliders from falling out.
Tip: purchased curtains do not always have ready-made grooves for fastening. They are easy to make yourself - a hole of a larger diameter is drilled in the outer part of the part so that the screw head can pass through. And in the inner part it is made of a smaller diameter so that the screw can press the curtain against the ceiling with its head.
The finale of all work can be the installation of a decorative strip on the front side of the curtain. This part can be simply painted in one of many colors or have additional decor in the form of a pattern, three-dimensional details or any other - the choice of such products is quite extensive.
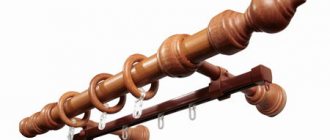
We make curtains with our own hands
You can make comfortable ones yourself from an old sheet. Before you start sewing drapery, you need to measure the dimensions of the window and the diameter of the cornice. Add a few centimeters to the resulting values for allowances.
Algorithm for sewing curtains:
- Use a sharp object to rip open the seams.
- Fold the top of the sheet over. Sew this fold.
- Iron the resulting seam.
- Insert the resulting hailstone into the rod.
- If desired, decorate the resulting product with eyelets, beads or lace.
If you want to do it, you can make curtains from linen fabric. This material is durable, practical and looks beautiful. You can use cotton instead of linen.
When manufacturing, adhere to the following algorithm:
- First you need to sew the loops for the curtain. When making hinges, take into account the diameter of the cornice. To make loops, you need to take two strips 25 centimeters wide, fold them in half and sew them together.
- Iron the seam.
- Cut out linen or cotton fabric. Before doing this, measure the dimensions of the window. To the obtained values, add 2 centimeters for allowances.
- Tuck the fabric on the side and stitch the product.
- Sew loops to the top edge of the curtain.
- Sew the bottom of the resulting curtains. After this, you can hang the curtains on the brackets.
How to hang curtains on a ceiling cornice
The ceiling cornice has hooks or runners for hanging curtains. Each type of profile has its own, but they come in different heights.
It is necessary to select hooks/runners according to the type of profile
Now about the difference between hooks and runners. The runners have small wheels. They are more expensive, but the curtains move much easier. To save money, you can take hooks for tulle (we move it very rarely) and runners for drapes (curtains).
Types of hooks for ceiling cornices
To hang curtains on a ceiling cornice, a special ribbon is sewn to the top of the curtain. It helps to form folds of the required size. This ribbon has a strip that can be used as loops. This is where the hooks are attached.
Curtain tape and hooks on it
There is another option - to make the loops by hand, but then the folds will have to be laid and sewn up by hand. This option will have to be used if you need to lay not standard folds, but with some special pattern.
There are two ways to hang curtains on a ceiling cornice:
- Secure the hooks to the tape, and then tuck them one by one into the desired groove on the profile. Then install the stopper, then the plug.
- The second method is to first insert the required number of hooks/runners into the groove, install a stopper and a plug. Then put loops on the hooks.
Installing the locking screw. Then you need to put a plug
The first option is physically simpler, but the second option is more often done. When you remove the hooks for washing, they may get lost, or you may make a mistake in the order in which they are installed. In general, it is not so important how exactly you hang the curtains on the ceiling cornice. The choice is yours. And finally, a small life hack on how to make it easier to put loops on hooks. This is a tedious and difficult task that irritates many.
How to properly attach a ceiling cornice
How to attach a cornice to a suspended ceiling? To do this, you will need to fix a special beam on the ceiling. A tension fabric must be attached to this product. As a result, you should end up with a small niche. You must install a ceiling cornice in it.
If you have a simple painted ceiling, then installation should be done in the following sequence:
- First, cut off the excess part from the cornice. This can be done using a special hacksaw for metal.
- Then attach hook caps to the ends of the curtain rod.
- Make a small hole in the middle of the structure. Drill holes of the same diameter along the entire length of the cornice.
- Attach the structure to the ceiling. In this case, the symmetry axes of the assembled cornice and the window must exactly coincide in the vertical plane.
- Using a hammer drill, drill holes in the ceiling. Insert a dowel into them and secure the cornice with a self-tapping screw.
- Secure the resulting structure using dowel nails. After this, you can hang curtains or tulle.
If you want to attach a cornice to a plasterboard ceiling, the installation process will be the same. However, before starting work, you need to install special wooden embeds at the site where the structure is attached. The length and width of the mortgage must be greater than the length and width of the cornice. Otherwise the structure will collapse.
Attaching the ceiling cornice to the drywall
If it was decided to install a ceiling cornice at the renovation stage, most likely there is a special niche in which it is installed. In this case, it is attached to the ceiling, and how to attach the ceiling cornice to concrete and wooden floors is described above. It will be a little more difficult, since freedom of action is limited, but not critical.
Attaching the cornice in a niche is a little more inconvenient
There may be a second option - without a niche. A wooden beam is fixed at the place where the cornice is installed. It is located between the drywall and the main floor. In this case, the ceiling cornice is attached to the beam through plasterboard. You need to use wood screws of sufficient length so that the body of the beam contains at least 2/3 of the length (preferably more).
But if you decide to replace the cornice with a ceiling one after the repair, you will have to look for special fasteners. These are the so-called butterfly and snail dowels. Both are characterized by an increased contact area with the material, due to which the load is distributed over a larger surface. But it’s still better not to use heavy fabrics.
Using special fasteners for drywall
Both types of drywall fasteners - butterfly dowel and snail dowel - come in plastic and metal. Stronger, obviously metal. But the trick is that most likely it is not the dowel that will withstand the high load, but the drywall. To prevent this from happening, reduce the fastener installation step. For example, you can make it 40-45 cm. This will increase labor intensity, but will give at least some hope that the structure will not collapse.
Installing curtain rods (video)
As you can see, there is nothing complicated in installing a cornice. To carry out installation you will need a minimum set of building elements. When choosing a ceiling cornice, you need to take into account a number of nuances. For example, if you are going to hang a cornice on a plasterboard ceiling, give preference to lightweight structures. Also note that when installing a plastic cornice, the screws must be screwed in using specialized pliers. In addition, do not forget to cover the fastening points of the structure with plugs.
Attention, TODAY only!
Attaching the cornice to the ceiling
An apartment has been purchased, renovations have been done, now it is necessary to fill the acquisition with everything necessary to give the home individuality and comfort. For some reason, the first thing that owners try to do in a new home is hang curtains or lambrequins across the windows. Of course, there is nothing left to do but hang the cornice. But not everyone knows how to do it correctly.
This is not due to a lack of installation and installation skills, but due to several objective reasons why these skills were not needed.
- First, the repairs were done by a qualified team from a construction company who could install the cornice in ten minutes with their eyes closed.
- Secondly, the cornice or curtain was installed by the previous residents.
You always have to start somewhere and do something for the first time. The repairs have been made and curtains or a lambrequin for the windows are needed, the cornice has been selected, the final touch remains to install it correctly.
From practice, it has been noticed that the selection of a cornice, unlike the selection of curtains or a lambrequin, is not a long process; the most interesting thing begins after the installation of this product has begun.
Everyone knows that there are two types of cornices:
wall-mounted with fastening to the wall and ceiling-mounted with fastening to the ceiling, respectively, so when choosing it, you need to worry about the fastening system.
Ceiling cornices look very elegant. Due to this method of fastening, curtains or lambrequins hung on it completely cover the window openings from ceiling to floor; it very neatly hides the curtain fastening system. With modern technologies, it has become possible to attach these types to suspended and suspended ceilings.
This type has a number of pronounced advantages, these are:
- high hanging of curtains visually increases the length of the wall and the height of the ceiling;
- a tight fit of curtains and lambrequins to the wall and ceiling solves the problem of drafts and allows you to adjust the light intensity;
- curtains mask wall defects and uneven surfaces.
Installation methods
There are two solutions to your problem, and the choice depends on the weight of plastic ceiling curtain rods. Moreover, we are not talking about the maximum load that they can withstand, but about the actual weight of the curtains.
Another question is whether you can handle this work with your own hands, and whether you have the necessary tools.
Ceiling mount
Plastic ceiling curtain rods can be mounted in this way, provided that the curtains are light. For example, tulle and thin night curtains. It is not suitable for heavy curtains.
First, brief installation instructions:
- See if your curtain rod has through-hole mounting holes. They should be located in increments of about 50-60 cm. If they are not there or the distance is greater, then holes in the profile need to be drilled.
- If the ceiling plastic curtain rod is too long, saw off the excess with a hacksaw.
The easiest way to cut off excess is with a fine-tooth hacksaw.
- Attach it to the ceiling exactly along the fastening line, and through the mounting holes place it on the base of the mark with a pencil or marker.
Note. If the cornice is supplied with rotating elements, then when marking the fastening line, take into account their dimensions.
- Drill holes in the ceiling for the plastic dowels exactly according to the marks.
- Insert the dowels into them until they stop.
- Place the cornice against the ceiling again, aligning the holes, and screw a screw into each.
Now the most important thing. For installation you will need not ordinary dowels, but so-called “butterflies”.
This is what they look like:
Photo of a special dowel for drywall
You shouldn't take too big ones; size 10x50 is enough. 10 mm is the diameter, 50 mm is the length. The price is low - about one ruble per piece. Accordingly, for holes in the ceiling you will need a screwdriver with a 10 mm drill bit.
Note. Self-tapping screws are purchased separately; their optimal size is 3.5x55 mm.
To insert a butterfly into a hole in drywall, its “wings” need to be squeezed with your fingers and pushed into it until the thrust washer touches the surface. When you screw a self-tapping screw into such a dowel, it will pull its shank to the inner plane, due to which the “wings” will straighten and press against the drywall, providing reliable fastening.
Inside view: ceiling plastic curtain rods are securely fastened
For reference. The permissible load on each such element is 16-24 kg. But you shouldn’t take risks by hanging curtains that are too heavy on plastic ceiling curtain rods.
Wall mount
If you plan to place a large load on the plastic ceiling cornice, installation on a plasterboard structure without specially made mortgages is not recommended. In this case, wall mounting is performed.
To do this you need to buy these metal brackets:
Wall Mount Bracket
Note. They come in different lengths. Choose taking into account the width of the profile and its distance from the wall.
This installation method is also better to choose when there are active children or large pets in the house, which, through carelessness, can get tangled in the curtains or pull them.
- The brackets are attached to the walls with regular dowels; you can use the ones included in the kit. To drill holes in concrete or brick, you will need a hammer drill.
- The number of brackets depends on the length of your plastic ceiling curtain rod, as well as on the weight of the curtains. If they are not very heavy, you can take a step of 1-1.5 meters. If massive and multi-layered - 50 cm.
- The brackets are attached to the plastic profile using special plates and the screws included in the kit.
How to attach
The procedure is the same, but with markings on the walls.
We recommend watching the video: “How to attach and assemble a cornice with your own hands”
Choosing a cornice
Currently, there are a huge number of types of ceiling cornices. When choosing them, you should be guided by the following parameters:
- “endurance” of the structure – what kind of curtains will hang on it;
- number of rows - how many curtains or lambrequins it is designed for;
- material of manufacture - wood, plastic or metal.
If you managed to decide on all the questions posed above, all that remains is to decide who will hang the cornice. We decided to do it ourselves, let’s start selecting the tools necessary to carry out all the work.
Regardless of who is going to hang the cornice, the basic set of tools will not change.
So, the main tools:
Stepladder, tape measure, square, impact drill or hammer drill, screwdriver, set of dowels and screws, pencil, hacksaw or jigsaw, spirit level.
Before hanging the cornice, you need to choose its length. When choosing the length, it is necessary to take into account that for ease of use and for full opening of window openings, the ends of the device should protrude 30 - 40 centimeters beyond the window slopes.
Having found out the length, use a tape measure and a square to mark the cutting line and cut the workpiece to the required length. We seal the ends of the cornice with special plugs for hooks in the case of a straight version, or install bent parts of the structure in a figured version. Having marked the middle, we make a hole using drills of different diameters. Using a drill of a larger diameter, we drill out the hole made by a drill of a smaller diameter in order to achieve the possibility of recessing the head of the self-tapping screw in it. We make identical holes along the entire length, taking into account that the greater the weight of the curtains, the more often holes for fastening are made. When installing a double or triple cornice, the holes for fastening are made in two rows, opposite each other.
Note
Before installing the curtain rod and lambrequin, we place it against the ceiling, achieving symmetry with the window. But it’s still better to choose a position based on general aesthetics, and not on the correctness of measurements.
We drill a hole in the ceiling through the central one, fasten the structure with one screw for now, align it, mark the location of the remaining mounting holes and fix the dowel with nails.
If it is necessary to hang curtain rods on a suspended or suspended ceiling, we consider two options for attaching them.
- The first option is installation using brackets.
The process is identical to that described above, with the exception of some nuances, namely, after the entire structure has been carefully assembled, we attach the brackets to the wall, mark the fastening points through the mounting holes, drill holes in the wall, insert dowels into them and fasten the cornice using self-tapping screws. - The second option is the installation of embedded beams before the manufacture of suspended or suspended ceilings.
To implement this option, before installing the ceilings, the craftsmen who manufacture the ceilings need to indicate exactly the places where the cornices will be located and in how many rows the curtains and lambrequins will be hung, so that they install the embedded beams in the indicated places. Subsequently, they will be attached to these structures.
The methods discussed above are more suitable for ceiling installation. Wall mounting also has its own characteristics. First, mark the middle of the window, and measure the same distance from this point in both directions. These will be the mounting points for the brackets to the wall.
Before hanging the curtain rod on the wall, we mount it on the floor, measure the length, and be sure to measure the distance between the consoles. From the ceiling, mark with a horizontal line the distance at which the curtain will be attached. Having marked the center of the window, we mark the measured distance to the curtain consoles on the right and left sides. At the same distance from the ceiling, in exactly the same way, we find points and put two marks, their intersection is the place where it is necessary to make holes for fasteners.
For fastening to the wall, it is enough to make a large hole; from practice it is known that a 12 mm drill is sufficient. Due to the fact that large diameter screws are screwed into such dowels, a smaller dowel is inserted into the large dowel and driven in with light blows of a mallet. This installation has a large error tolerance, which is its advantage.
Installation and installation of a ceiling cornice by a professional takes from 15 to 30 minutes. If you do it yourself, you can do it in literally an hour, an hour and a half. But, on the other hand, it helps to save some money, gain invaluable experience in using tools, and generally do something useful. Therefore, success in your endeavor and patience.
Most people always want to bring more warmth and comfort to their home. This can be done in various ways: add innovations in design or decorate the room with ordinary little things. A cornice that is correctly selected for the overall interior of the room will be this very addition. True, not everyone knows how to hang a curtain rod in a room without outside help. To do this, you need to follow clear, proven instructions that will help make the room more comfortable.
A curtain rod is not just a device with which you can move curtains and fix them in a certain position, but also an excellent method of decorating a room. A beautiful and stylish cornice always catches the eye and creates a positive impression of the entire room design. Therefore, if it is not possible to call a professional craftsman, you need to know what you need to do to hang the curtain rod yourself.
How to attach to the ceiling?
In order to install the cornice correctly, you must first carefully study the instructions for the model you have chosen. As a rule, it immediately gives recommendations for installing the product.
When choosing a ceiling cornice that will be attached to a suspended ceiling, you must take care in advance to strengthen the ceiling covering with a wooden beam in place of the cornice. If the ceiling canvas is already stretched, the opportunity to hang the cornice on the ceiling is lost.
This section will discuss the installation of a plastic tire curtain rod, since it is the most popular one today. Even a beginner can fix this design.
The most important thing is to take your time and do the work carefully:
- Mark the position of the cornice on the wall, making a preliminary calculation. The length of the cornice depends on individual preferences: you can make the curtains cover only the window opening, or you can prefer to have the curtains cover the entire wall.
- If you choose the width of the window opening, cut off part of the tire with the length of the window opening plus 60-90 cm, depending on the splendor of the curtains. When choosing the full-wall option, you will need a tire the length of the wall minus 20 cm (10 cm on each side).
- You need to drill holes in the plastic tire for fastening: large on the outside and very small on the inside. The standard fastening spacing is 60 cm, but if the curtains are heavy, it should be reduced. When installing under a suspended ceiling, please note that on the side that will be located near the ceiling, holes do not need to be drilled at all (later they will be cut through with self-tapping screws), and on the outer part they should be such a width that the screw head can easily pass through them.
- Wide models with 3 or 4 rows can be equipped with 2 rows of fastenings, so feel free to make two rows of holes.
- Attach the cornice to the markings on the ceiling. Using a simple pencil, mark drilling marks through the holes. It is much more convenient if two people work: one holds, the other notes. So the probability that the cornice will “move away” tends to zero.
- Use a drill to drill holes in the ceiling and seal them with dowels.
- Now attach the tire and screw through the holes.
For installation on a suspended ceiling, installation is carried out in a similar way, with the exception of a few important differences.
- Markings on the ceiling should be done before fixing the ceiling sheet and strengthen the place of the future cornice with a wooden block.
- The canvas itself needs to be reinforced with protective rings where there will be holes for fastening. After installing the rings, you need to carefully burn holes for the screws. This is done to ensure that the stretch ceiling does not break.
- Using self-tapping screws, the tire is carefully screwed to the ceiling, strictly falling into the burnt holes. It is recommended to start installation from the middle.
To learn how to install a ceiling cornice correctly and quickly, watch the following video.
Types of ceiling cornices
If suddenly the choice causes some difficulty, then it will be useful to know which types of cornices are the most popular. Due to the emergence of high technologies in manufacturing plants, the sales market is overcrowded with various models and types. You can literally get lost among their wide variety, so in order to navigate your choice, you need to know the main differences in the models.
The choice of one type should depend not only on taste preferences, but also on the design of the room and the type of ceiling cladding materials. It should be taken into account that some ceilings may simply not support the weight of the cornice with curtains hung on it.
Combination with curtains
An important factor that determines the beauty of the chosen option is the curtains that are correctly selected for it. It is recommended to choose it at the same time as curtains in order to establish their compatibility. You need to decide on the model and color in advance, so that when you come to the store, you already know which type is more suitable for your interior. It is not recommended to hang a curtain rod with heavy curtains using only fastenings to the ceiling. You should not choose heavy metal pieces for a plastered ceiling, since the plaster may fall off along with the entire attached structure.
As for the selection of curtains, the following types are the most popular:
- It is best to hang a metal cornice in combination with classic curtains. Tulle is also perfect for this example.
- Japanese curtains will look beautiful together with a forged metal cornice.
- Baguette is ideal in combination with Italian curtains. This option is known for the fact that it hides all the fasteners underneath and creates the appearance that the curtains are coming straight from the ceiling.
- The profile cornice elegantly combines with roller blinds. Together they will create a simply amazing impression.
Nevertheless, everyone can choose their own style, which will become somewhat unique. Experimenting is great, the main thing is not to overdo it.
Preliminary preparation
Before you go shopping, you must complete all the appropriate measurements.
Whatever the dimensions, you must first take into account that the design should not interfere with the opening of the window. To do this, you need to hang it at least 5 cm above the window opening.
For a more elegant appearance, it is necessary that the edges of the cornice protrude no more than 20 cm above the window opening. Most often, a cornice with one rod is used for this. And last but not least, you need to consider for which room the cornice is being hung, because the future design will depend on this.
How to hang a cornice yourself: step-by-step instructions
The installation process is carried out as follows:
- As for spare parts, the cornice kit includes all the necessary fasteners: screws, dowels, self-tapping screws, etc. However, there are times when you need to purchase certain parts. For this case, below is a list of necessary parts.
- The scheme for attaching the cornice to the ceiling is extremely simple: it is usually done using brackets and ceiling fasteners along the edges. If the length exceeds 2 meters, then it is necessary to make fastenings in the center. In addition, it is important to consider that the number of fasteners can be completely different, as this does not affect the movement sliders. Therefore, for reinsurance, you can make 5 - 7 fasteners.
- Make markings for the brackets in advance, which will make it easier to navigate when drilling holes. To avoid creating interference with the movement of curtains, it is recommended to mark the fasteners with the condition that the cornice will recede from the wall by 5 - 8 cm.
- Drill holes according to the markings using a hammer drill 2 - 4 cm.
- Drive dowels into the drilled holes.
- Mount the brackets into dowels or simply screw the cornice (plastic) to the dowels using screws.
Required materials and tools:
- electric drill;
- roulette;
- screwdrivers/screwdriver (preferably);
- hammer;
- Hammer/impact drill;
- ruler;
- dowels;
- screws;
- brackets;
- self-tapping screws
How to attach a ceiling cornice to a suspended ceiling?
Let's look at two options for attaching a cornice to such a ceiling.
- The first option is when, when installing a suspended ceiling, places for attaching cornices are provided.
- The second option is when the suspended ceiling was installed earlier and it is unknown how the cornice is attached or it is missing altogether.
First option
We thought in advance about the design of the room in which you are renovating and planning to install a suspended ceiling. Before installing the suspended ceiling, we recommend that you provide a fastening that will be evenly adjacent from the inside to the surface of the ceiling material.
Figure 1. Wooden blocks for attaching the cornice
To fasten the cornices, you can fix the fastening bar before installing the ceiling. As shown in the picture. It is more advisable to fasten plywood dies to the rough ceiling using metal fasteners rather than a block. Shown in the picture below.
Figure 2. Wooden dies on metal fasteners
Try to agree in advance about the installation of such fastenings with the specialists installing the suspended ceiling. It is important to maintain the dimensions, otherwise the dies will either be thicker and stick out, or smaller and when attaching the cornice, the ceiling will bend inward.
Figure 3. Attaching the cornice with self-tapping screws to the suspended ceiling
The figure above shows how to attach cornices to the ceiling with self-tapping screws. First, apply tape to the puncture sites. Carry out drilling work carefully so as not to damage the ceiling fabric. Drill holes slightly smaller than the diameter of the self-tapping screw, first in the ceiling film, and then in plywood or plank.
Second option
There are no fastenings for curtains on the rough ceiling. Installation of fasteners was not done in advance. However, I really want to install ceiling cornices this way. To do this, mark the puncture sites. Apply tape to the intended puncture site. This is done to secure the puncture sites. Make a hole in the finished ceiling, drill a hole in the rough ceiling with a hammer drill to the required depth. Use a vacuum cleaner to carefully remove drilling dust that has settled on the suspended ceiling from the inside. Secure the cornice with an anchor bolt. This mounting option requires high professionalism of the cornice installer. This method is not recommended for an unprepared person.
Return to content
Installing a cornice in the bedroom
Tools for installing ceiling cornice: liquid nails, hacksaw, glue, cutter, fastening.
A bedroom is a room in which there should be absolute harmony and comfort. An important role in this is played by natural lighting, which must be regulated at any time. That is why it is so important to correctly select the right cornice for this room.
A round option in combination with Roman blinds is best suited. They are perfect for creating that coziness.
The first thing to do is to place the curtain rod about 15 cm above the top end of the window opening and mark the holes. Then you need to drill holes, drive dowels into them and begin fastening with self-tapping screws.
After installation, it is necessary to fix the hose guide into the holders and put the tips on both ends.
Installation of ceiling cornice
Ceiling cornice is suitable for more interiors than wall cornice. This is due to the low ceiling heights in old houses, as well as the predominant choice of suspended ceilings. Cornices attached to the ceiling vary in type and are often complemented with decorative elements.
Attaching curtains to the cornice
The final step in installing the curtain rod is the installation of curtain mounts. There are several ways this can be done.
- Rings/hooks - most often they are included in the kit, but you can always buy them in addition.
- “Crocodiles” are reminiscent of clothespins, only they have special teeth that increase the fastening ability.
- Eyelets are metal rings that are threaded directly into the curtains, after which they are easy to hang on almost any hooks.
- Clips - the principle is the same as that of “crocodiles”, with the exception of the absence of teeth. Clips are used for tulle or light curtains.
This completes the installation of the cornice; all that remains is to hang the curtains on it. Remember that the overall appearance of the entire room depends on the correctly chosen option.
Detailed instructions are given by Master Nikolai Kotov, partner of the “Public Services Center 124” .
If you want to make minor repairs yourself, determine the extent of the breakdown, or fix a minor problem in your home, send your question to
,
and you will definitely receive a detailed answer or instructions. And if solving the problem turns out to be difficult for you, the technician will promptly come to the site and fix any problem!
In this issue I would like to offer detailed instructions on how to properly and securely hang a cornice.
We take the most common, cheapest two-row cornice, which is sold in all hardware stores. The instructions I scanned assume that you can install the product yourself.
I would like to offer you a more detailed version of the instructions that I use in practice:
Attaching a cornice to a suspended ceiling
How to connect a ceiling cornice and a suspended ceiling? Let's consider two ways of fixing a tire curtain rod - open and closed. The first option is simpler and therefore more often used. The second is more difficult, but gives a visually more attractive result.
Open installation of a cornice on a suspended ceiling.
The process begins with creating a base for attaching the cornice rail (after installing the ceiling frame before stretching the film). For it, a wooden beam with a length and width corresponding to the eaves rail is used.
The height of the beam should be a couple of millimeters less than the distance between the stretch ceiling frame and the ceiling. To accurately determine these dimensions, markings are made on the ceiling for attaching the cornice base, and then the walls are marked around the perimeter. Then the suspended ceiling frame is fixed.
Next, a wooden beam is screwed to the ceiling with dowels. This embedded part must first be properly processed. It must be carefully sanded so that it does not damage the vinyl film upon contact.
The timber also needs to be coated with a protective compound (antiseptic and/or hydrophobic). Remember: the ceiling is installed for half a century, and wood is a natural material that is prone to destruction, especially in the event of flooding.
The height of the mortgage is adjusted using mounting wedges. When the beam is secured, the vinyl film is stretched. A mortgage that does not reach it by a couple of millimeters is not visible. In those places where the cornice will be screwed through the film to the beam, reinforcing rings are glued to the fabric.
This is done to prevent the PVC material from tearing. Then holes for self-tapping screws are burned into the vinyl. Then the cornice rail is screwed to the beam. As you can see, the work is not easy, so entrust it to the professionals from our company.
Hidden fastening of the cornice to the suspended ceiling.
This option allows you to attach a cornice without holes in the ceiling. The essence of the hidden method is the direct installation of the cornice on the rough floor.
After installing the cornice, a beam is screwed to the ceiling, onto which the frame of the tension structure is attached. As a result, the place where the curtains are attached is completely invisible; it seems that the fabric is falling from the ceiling. The photo clearly demonstrates the advantages of hidden fastening of the cornice to the suspended ceiling - the room visually becomes higher.
It is important to purchase a cornice before measuring the room for making a tension structure, since the dimensions of the cornice determine the shape and size of the niche, thus affecting the size of the stretch ceiling.
The cornice is attached to the ceiling with dowels with sleeves made of plastic or metal. When fixing the embedded beam, they retreat a couple of millimeters from the cornice. And in this case, the wood element must be treated so that it does not rot or mold in the future.
Frame baguettes are attached from the eaves side. Thanks to this, the stretched ceiling sheet completely covers the block, making it invisible. This method is most effective when combined with varnish films.
Unpacking the cornice
This thing is packaged in several layers of dense polypropylene using a vacuum-thermal method, so we arm ourselves with a sharp knife and separate from the total mass individual packages with fasteners, rings, hooks, clips, decorative consoles, etc. Then, on the freed pipe (1), we scratch the polypropylene with a knife along the entire length along the seam line and carefully “undress” the pipe. An attempt to cut through rigid polypropylene, under which there is a soft polyvinyl chloride decorative coating of the pipe, can lead to its exposure to metal.
How to attach a curtain to the ceiling
Preparatory work
A huge assortment of various products (plastic, metal, wood) is divided into three large groups:
- with mounting on hangers;
- with brackets provided for fastening;
- with mounting holes.
The last option is justifiably considered the most difficult for self-repair; we will study its stages in detail. In other cases, work follows the same scenario.
Only cut with a hacksaw with sharp teeth: a dull tool will damage the surface.
Let's prepare the tools. You will need a few of them:
- hacksaw for metal;
- perforator;
- screws, dowels;
- drill.
Now let's adjust the sizes. First decide on the location and size of the structure. The curtains will flow smoothly if the curtain is 15-20 centimeters from the wall. It’s easy to calculate the length of the strip: if there is a single window, add 40 centimeters to the width of the frame; with two windows located next to each other, a 30-centimeter allowance is enough. Saw off the excess ends with a sharp hacksaw.
Main part
You have three main tasks: make neat holes, correctly mark the location of the cornice and mount it securely. Let's look at how to attach a ceiling cornice to a concrete ceiling, a hard-to-work surface.
- Drilling holes
Mark the middle of the crossbar and form the first hole. Don’t be lazy and take note of the trick of repair specialists: arm yourself with a double drill or use two drills. With the first, wide tool, we form a circle on the front side of the structure. Match the diameter of the screw - the hole should be equal to it or slightly larger in size. Work slowly: as soon as the depth is sufficient for the dowel head to “sink,” change the drill to a thin one and complete the job.
Curtains made of heavy materials will not sag if the holes on the cornice are frequent and uniform
In the same way, inspiredly create holes along the entire length of the curtain. Their number depends not on your desire to work, but on the width of the cornice and the type of curtains. Dense heavy fabric requires frequent holes - every 15-20 centimeters, light tulle flutters beautifully on the crossbar with sparse fasteners - about half a meter. If the curtain strip is massive or very wide, it is advisable to make two rows of circles.
Attention! The cornice will not move away from the ceiling and will not sag under the weight of the curtains if the holes are drilled evenly, strictly at equal intervals.
- Marking and fastening
Before attaching the cornice to the ceiling, you need to mark the location for the dowels. To do this, we first temporarily adjust our structure. Find the center point for the future support and align it with the center of the crossbar. Using a drill with a diameter of 5-6 mm and a hammer drill, make a hole. Its depth is equal to the length of the dowel on which you will briefly attach the cornice.
Now your eyes should be sharper than ever, and your movements should be confident and correct. Draw marks on the ceiling through the holes you made on the plank. Remove the cornice and use a puncher to deepen your artwork so that the dowel-nails are completely included in them - fixing the structure will be the last stage of the work.
In order for the cornice to lie flat on the surface, ensure that the holes are completely aligned with the markings on the ceiling
Fitting
We lay the pipe in front of the window parallel to the wall, put on brackets (4), decorative ends (5) and “try on” the structure.
- close to the heating pipe (heating of the polymer holder from the pipe can lead to deformation);
- at the junction of beveled corners (there are many voids there);
- at the beginning of the radius of rounding walls in block houses (do not forget that the cups of the mounting bases have a fairly large diameter and installation even at the very beginning of the radius will lead to inevitable distortion);
- We stay away from the intended passage of heating pipes in houses with heating built into the walls.
If necessary, cut the pipe to the required length. We make a mark with a marker along the entire circumference. We saw through the pipe at the seam to a depth of 0.5 cm, then file along the marker line and break off the sawn end. You don’t have to go through the hassle of trying to cut the pipe to its full depth by hand!
Shorten the tire (9) to the same length. Here you will have to be very careful, because the profile of the tire has an open cross-section and constantly “plays” when sawing. Without fail, use the tips of the pliers to level the cut area, bend it slightly inward and remove the burrs with a file.
Pre-assembly of the cornice
The brackets are fixed to the pipe using small self-tapping screws, which must be invisible during installation, i.e., facing the ceiling.
We set aside 2 rings (2) (they are subsequently installed between the decorative tips and the outer holders), then put on the tip, the bracket, then the ring, then half of the remaining rings, the middle bracket, the remaining rings, the third bracket, another ring and the tip. Leave a gap of 3-10 cm between the tips and the outer brackets.
When fixing the holders, pay attention to ensure that the pipe seam faces the window during installation: being located at the bottom or on the front side, it will be noticeable, and located at the top (i.e. in the place where it comes into contact with the rings), it will quickly lose its decorative coating that will be rubbed by sliding rings.
When the assembled but loose cornice lies on the floor and the brackets are located approximately parallel, we begin to fix the brackets. Upon closer inspection, the apparently thick-walled rings of the brackets turn out to be very thin-walled and, moreover, consisting of three parts, i.e., sealing rings are inserted into the hole. When fixing such brackets on a pipe, you need to remember the possibility of their breakage by carelessly screwing in the screws! If, as often happens, fixing the brackets on the pipe is not provided by the manufacturer, then you will have to prepare and perform this necessary operation yourself.
We check by eye the parallelism of the fixed brackets and, if necessary, trim them.
Marking the place where the cornice is attached
I do not undertake to give design advice, but usually wall cornices are attached approximately in the middle of the distance between the window slope and the ceiling, and horizontally - symmetrically relative to the window or wall. I usually attach the assembled cornice to the intended fastening site to visually represent the future structure. We mark the place of fastening of one of the outer bases, drill a hole, insert a dowel, secure the base and insert the bracket into the base. Holding the cornice, we roughly outline (outline) the attachment points for the remaining bases and proceed to precise marking. If the apartment has suspended ceilings or slopes of double-glazed windows, then it is enough to simply mark the places where the bases are attached, measuring equal distances from the slope or ceiling. If everything is “a little crooked,” then it is best to slightly unscrew the installed base, fasten the thread to the screw and pull it to the place where the second outermost base is supposed to be installed. We fix the thread on the wall with masking tape or electrical tape and use a level to find its required position. We mark with crosses the exact places where the bases are attached.
Cornices and suspended ceilings
Ceiling cornice on a suspended ceiling
If your suspended ceiling is already installed, you will not be able to attach ceiling cornices.
Here the only option is to mount the cornice on the wall using special brackets.
If you are just planning to install a suspended ceiling, then to install cornices you need to choose one of the possible options:
In the open version, the suspended ceiling is installed in the usual way, but first markings are made on the real ceiling and embedded wooden beams are attached. The beam is selected to such a thickness that the stretch ceiling fabric, after tension, fits tightly to it from below, without a gap. The timber must be treated with special solutions to prevent the wood from rotting.
Read about how to choose the right underlay for laminate flooring here.
You might be interested in an article on how to make concrete yourself.
The closed version differs in that the cornice is attached in the usual way, and the fastening elements of the stretch ceiling are no longer attached to the wall, but to the real ceiling.
With this option, the suspended ceiling covers the cornice. What the curtains hang on is not visible. It looks quite impressive.
That's all. You can hang curtains and admire the results of your work.
We bring to your attention an interesting video on how to properly install a ceiling cornice:
See inaccuracies, incomplete or incorrect information? Do you know how to make an article better?
Would you like to suggest photos on the topic for publication?
Please help us make the site better! Leave a message and your contacts in the comments - we will contact you and together we will make the publication better!
Attaching the bases to the wall
First of all, we prepare the workplace (of course, it must be prepared at earlier stages of work, when we begin the first fittings at the fastening site). We install 3 strong stools or chairs along the window (chairs are placed with their backs to the window). We clear the window sill and move the furniture away. If it is impossible to move the furniture, you should at least cover it from dust. Prepare the vacuum cleaner: remove the nozzle, push the pipe to the maximum. We insert an 8 mm drill bit into the hammer drill. We ask someone to hold the pipe of the turned on vacuum cleaner as close as possible to the place where the holes are drilled. In this case, most of the dust will be immediately sucked into the vacuum cleaner.
When drilling holes for fasteners, we have the opportunity to run into some unpleasant surprises:
- hitting the fittings.
In this case, we put the hammer drill aside and drill out the reinforcement with metal drills. If you find the reinforcement in a timely manner, you will have the opportunity not to break the hammer drill, but will get away with a few dull drills. - getting into a “weak” wall or into the void.
This occurs even in concrete walls, not to mention brick ones, when drilling which, “by the law of meanness,” you will definitely run into masonry mortar. If the wall is gas silicate, then you must have special metal dowels in your arsenal. And post-war houses, covered with shingles and dry plaster, are a whole different story!
So, we take the fasteners supplied with the cornice and... put it aside. Sometimes you really want to force the person who supplied the cornice with fasteners to work with what he hands off to a gullible buyer. These smooth dowels that turn in the holes, these soft screws, the slots of which are instantly cut off with a screwdriver - all this is not for our case if we want to make a reliable fastening!
I use 5x60 mm self-tapping screws and various dowels, which I select depending on the quality of the wall. In the simplest case, I simply drive a “rough” dowel (8 mm) into the hole and, based on how easily it fits into the hole, I feel whether I will have to “be smart” further or everything will work out. If the dowel fits in easily but does not fall through, the simplest thing is to “spread” it with a wooden plug. But sometimes you have to take a 10-12 mm dowel and expand it with a plug or dowel of a smaller cross-section. If manipulations with dowels do not produce results, then expand the hole to solid edges and hammer a wooden plug made to size into it.
When dowels (plugs) are driven into all holes, you can attach the bases. To do this, we put a self-tapping slot on the PZ2 bit, pass the self-tapping screw into the hole in the base, until it stops, and use a screwdriver to fix the base on the wall. I can’t say what value to set the screwdriver’s force limiter to: each “screwdriver” has its own scale, but I don’t recommend choosing the maximum, because Excessive force may break the fragile plastic base.
I don’t envy those who try to arm themselves with a screwdriver and, holding it in their raised hand, try to do without a screwdriver!
For better fastening, anchors should be used
Wedge anchor
If there are no fastening elements in the kit of the cornice, or it needs to be moved to another place, and the old fasteners have become unusable, then you should think about using anchors with internal threads.
Moreover, if you plan to hang heavy curtains, and even in several rows, then it is better to replace the standard screws with something more serious.
Anchors provide strong and reliable fastening. They are used as follows. The anchor is placed in a pre-drilled hole of the appropriate diameter. When hitting the center punch, the anchor wedges right in the hole.
As you can see, fixing the ceiling cornices is not that difficult. The only problem is the inconvenience of operation. But even with this disadvantage, installing a cornice is quite within the capabilities of even a not very qualified home craftsman.
For some reason, there is an opinion, which is certainly wrong, that cornices cannot be attached to a suspended ceiling. It is possible to install ceiling cornices on PVC film, and without any particular difficulties. The only thing is that you need to figure out exactly where you need to hang them. And the whole point is this: a suspended ceiling is a thin polyvinyl chloride fabric that is not able to withstand the load exerted on it by a suspended ceiling cornice and heavy curtains. What to do in such a situation? We'll talk about this next.
The essence of cornices for suspended ceilings
As it turned out, when decorating an interior, cornices can carry not only an aesthetic load, but also a functional one. So, for example, without going into details, we can immediately say that curtain rods for a suspended ceiling help to optically increase the height of your room, serve for attaching curtains and arranging lighting.
Cornices for suspended ceilings are almost no different from ordinary cornices; they are a flat rail that is fixed directly to the ceiling - suspended, regular or tension. The ceiling cornice is an element that limits the ceiling on one side and gives it completeness. In addition, the cornice, in addition to its design purpose, must also act as a reliable fastening for curtains.
Ceiling cornices require a thoughtful approach, because after installing the canvas it is impossible to place any objects on its surface.
Cornices for suspended ceilings are usually understood as two completely different designs:
- Curtain rod. The purpose of using such products is quite clear. The peculiarity lies in the fact that attaching a cornice to a suspended ceiling is problematic. Wall-mounted curtain rods under a suspended ceiling must also create conditions in which an aluminum clip or curtain hook will not tear the thin PVC film. It is worth taking into account that fabric ceilings are much less afraid of accidental damage due to their own strength. Wall cornices for suspended ceilings can be mounted without any discounts on the proximity of the ceiling.
- Cornice for hidden lighting. Such products are a polystyrene profile that is attached to the wall with regular glue. An LED strip is glued directly to the wall or the inner surface of the cornice behind it. The cornice under the suspended ceiling is designed to make the lighting hidden, hiding the light sources from the viewer's eyes.
Types of cornices for suspended ceilings
Depending on the material from which ceiling cornices are made, they are divided into:
- Wooden - expensive, heavy and massive products, which at the same time look the most presentable.
- Aluminum curtain rods are quite strong and lightweight.
- Steel - cornices that are used to fasten heavy curtains. Steel and aluminum cornices are often decorated with overlays made of plastic or wood.
- Plastic are the most common curtain rods for suspended ceilings. They are highly durable, provide easy movement of curtains, and are quite inexpensive.
Ceiling cornices for suspended panels on the modern market are presented in different price categories and a wide range of colors, so you can easily find a suspended ceiling and a ceiling cornice that completely match in color.
Installation of wall curtain rods
The option of installing wall cornices is considered preferable if the PVC film is already stretched, but the ceiling cornice has not been installed. However, some owners initially choose this solution and, with suspended ceilings, hang curtains exclusively on the wall cornice. There are several reasons for this:
- Although the most ordinary ceiling cornice is inexpensive, its installation when stretching the ceiling adds close to 2,000 rubles to the cost of the work. Installing a wall-mounted curtain rod allows you to reduce the cost of arranging a tension panel.
- Some consumers do not want to violate the integrity of the film in order to be completely confident in the waterproofness of their stretch ceiling, or to be able to change the interior of the house over time by installing other products, for example, blinds, on the windows instead of curtains.
There are many different configurations and types of wall-mounted cornices on sale; their cost is low. Ordinary stick cornices, designed for a traditional ceiling, are no different from their analogues for tensioned fabric. The cornice is attached to the wall, the curtain is hung on rings that are put on a stick. The only thing that is recommended to pay attention to during installation is the distance to the tension fabric. Even rings with the clips or hooks facing up should not come into contact with its surface.
Profile cornices for stretch ceilings are also no different from traditional products. Moreover, the very design of the profile cornices does not allow hooks to damage the PVC film. All dangers lie in wait for the panel only during the installation of the cornice. Fabric ceilings feel absolutely safe.
Installation of cornice for LED lighting
To install an LED strip on a ceiling cornice, you will need the following tools and materials: universal glue (liquid nails, titanium or acrylic putty), a sharp knife, a box of matches, a miter box for cutting materials at an angle, putty for sealing gaps between the wall and the cornice.
First, you need to glue foil tape to the inner base of the cornice; if you have special tape from the manufacturer of the ceiling cornice for a stretch ceiling, then glue only the corners and joints. Next, you should prepare the LED strip, protecting it from short circuits.
LED strip can be assembled from pieces and connected to each other by soldering, which increases the risk of short circuits through foil tape. Therefore, you need to find the soldering points and remove the protective paper from the tape. Carefully pry it off, being careful not to damage the adhesive base.
Tear off a piece of paper and glue a patch to the contacts; this solution can protect the tape from short circuits and the owners from unnecessary actions. A similar procedure should be done along the entire length of the LED strip; it is better to do this before installing it on the cornice than to suffer while hanging with your arms raised.
It is recommended to fasten the ceiling cornice itself in this way. It is optimal to stick the cornice directly onto the plaster before gluing the wallpaper, having first primed the wall with a primer. To cut the ceiling cornice at an angle, you need to use a miter box. An alternative, and a much better one, is to purchase special decorative corners.
Each cornice strip must be glued not only to the wall, but also to the embedded strip that was previously secured. To ensure the rigidity of the connection, it is recommended to use matches as dowels. The distance to the tension fabric should be approximately 7 - 10 centimeters. At the same time, cornices on suspended ceilings should not show hidden lighting to the person who is on the opposite corner of the room.
The actual installation of the LED strip to create illumination for the stretch ceiling is carried out in the following sequence. Remove the protective layer of paper and carefully apply the tape to the cornice. Pay special attention to the joints of two sections of the LED strip. Many masters often make mistakes at this stage of work, as a result of which light gaps are noticeable.
The joints of two sections of the LED strip at the junction of the wires must have a minimum length, which is equal to the distance between the two LEDs of this strip. After installing the LED strip on the cornice, you can begin connecting the power wires.
In order to create reliable cable contact, it is easier to crimp the connection with special pliers to make it very reliable, especially in small and hard-to-reach places. After this, the installation of curtain rods for a suspended ceiling and LED strip is completed with the installation of LED amplifiers, controllers and power supplies; at any time, the connection circuit itself can be replaced or reconnected.
Features of fastening ceiling cornices
Methods for installing cornices that are used for traditional ceiling finishing, be it concrete or plasterboard, cannot be used in a situation with PVC film. A master who decides to combine a curtain rod and a suspended ceiling is faced with a more difficult task, which would seem to be insoluble in principle - the stretched fabric is clearly not intended for attaching a heavy and large object from which the curtains will also be hung, since it is possible to stretch the ceiling .
The solution in this case will be simple. Ceiling cornices for suspended ceilings are attached not to the surface of the ceiling itself, but to mortgages mounted in advance. Usually this role is played by an ordinary beam made of fairly durable wood. Of course, the mortgages are secured before the stretch ceiling fabric is stretched.
In practice, the following methods of installing a cornice for a suspended ceiling are known:
- Visible ceiling cornices are fixed to hidden support bars under the ceiling;
- Hidden ceiling cornices are mounted on the main ceiling, and the tension fabric is fixed in front of the cornice to a special stand.
The first method is simpler and is used quite often, while the second is more difficult to implement, but from a design point of view it is more attractive. Let's find out how to act in this or that case in order to successfully combine a ceiling cornice and a suspended ceiling into a single system.
Open installation of ceiling cornice
The most common method of installing a ceiling cornice to a suspended ceiling, as we said above, is open installation with the installation of an embedded bar. Work is carried out in this order. Before installing the suspended ceiling in place, determine the place where you will subsequently secure the ceiling cornice. Apply markings on the ceiling in the appropriate place, then mark the perimeter of the room and attach the fixing profile of the tension fabric to the walls.
Now it’s time for the most important operation: attach a wooden block to the ceiling along the marking line. It is important not to forget to treat the wood with antiseptic solutions and dry it or apply a hydrophobic primer to it, since the space behind the tension fabric is not ventilated, and the timber may otherwise rot. It is recommended to fasten it using dowels, which should be driven into pre-drilled holes in the ceiling.
When carrying out work on attaching a cornice to a suspended ceiling, it is necessary to correctly select the thickness of the embedded bar so that its lower surface is adjacent almost flush to the stretch ceiling fabric. To regulate this parameter, in some cases mounting wedges are hammered between the ceiling and the backfill.
After you secure such a block, you can stretch the ceiling fabric. Ceiling cornices are secured through the film with self-tapping screws, trying to cause minimal damage to the surface. As a rule, the places where the screws pass through the panel are reinforced with polymer rings, and the holes themselves are not cut, but burned. If you do everything correctly, then the embedded block, which acts as the main link that unites the cornice and the suspended ceiling, will be practically invisible.
Final assembly and installation of the cornice
All that remains is to put the tire brackets (6) on the tire. I would like to warn experimenters against trying to snap the brackets onto the bus. It was not in vain that we bent it inward and filed the area where the tire was cut. It is through this end that we string the brackets onto the rail and snap the rail brackets onto the cornice brackets.
The correct sequence for putting on curtains: it is much more logical to first attach the hooks and runners to the curtains, then put them on the curtain rod. Don't laugh, many housewives suffer by doing this in reverse order.
All that remains is to insert the brackets into the bases fixed to the wall and secure them with small self-tapping screws.